[\\w-]{32})"
}
]
}
}
```
## Add Cart Item
Add an item to the cart. Returns the new cart item that was added, or an error response.
```http
POST /cart/items/
```
| Attribute | Type | Required | Description |
| :---------- | :------ | :------: | :--------------------------------------------------------------------------------------------------- |
| `id` | integer | Yes | The cart item product or variation ID. |
| `quantity` | integer | Yes | Quantity of this item in the cart. |
| `variation` | array | Yes | Chosen attributes (for variations) containing an array of objects with keys `attribute` and `value`. |
```sh
curl --request POST https://example-store.com/wp-json/wc/store/v1/cart/items?id=100&quantity=1
```
For an example response, see [Single Cart Item](#single-cart-item).
If you're looking to add multiple items to the cart at once, please take a look at [batching](/docs/apis/store-api/resources-endpoints/cart#add-item).
## Edit Single Cart Item
Edit an item in the cart.
```http
PUT /cart/items/:key
```
| Attribute | Type | Required | Description |
| :--------- | :------ | :------: | :--------------------------------- |
| `key` | string | Yes | The key of the cart item to edit. |
| `quantity` | integer | Yes | Quantity of this item in the cart. |
```sh
curl --request PUT https://example-store.com/wp-json/wc/store/v1/cart/items/e369853df766fa44e1ed0ff613f563bd?quantity=10
```
For an example response, see [Single Cart Item](#single-cart-item).
## Delete Single Cart Item
Removes an item from the cart by its key.
```http
DELETE /cart/items/:key
```
| Attribute | Type | Required | Description |
| :-------- | :----- | :------: | :-------------------------------- |
| `key` | string | Yes | The key of the cart item to edit. |
```sh
curl --request DELETE https://example-store.com/wp-json/wc/store/v1/cart/items/e369853df766fa44e1ed0ff613f563bd
```
## Delete All Cart Items
Removes all items from the cart at once.
```http
DELETE /cart/items/
```
There are no extra parameters needed to use this endpoint.
```sh
curl --request DELETE https://example-store.com/wp-json/wc/store/v1/cart/items
```
**Example response:**
```json
[]
```
---
## Cart API
*Source: apis/store-api/resources-endpoints/cart.md*
# Cart API
The cart API returns the current state of the cart for the current session or logged in user.
All POST endpoints require a [Nonce Token](/docs/apis/store-api/nonce-tokens) or a [Cart Token](/docs/apis/store-api/cart-tokens) and return the updated state of the full cart once complete.
## Get Cart
```http
GET /cart
```
There are no parameters required for this endpoint.
```sh
curl "https://example-store.com/wp-json/wc/store/v1/cart"
```
Returns the full cart object response (see [Cart Response](#cart-response)).
## Responses
All endpoints under `/cart` (listed in this doc) return responses in the same format; a cart object which includes cart items, applied coupons, shipping addresses and rates, and non-sensitive customer data.
### Cart Response
```json
{
"items": [
{
"key": "a5771bce93e200c36f7cd9dfd0e5deaa",
"id": 38,
"quantity": 1,
"quantity_limits": {
"minimum": 1,
"maximum": 9999,
"multiple_of": 1,
"editable": true
},
"name": "Beanie with Logo",
"short_description": "This is a simple product.
",
"description": "Pellentesque habitant morbi tristique senectus et netus et malesuada fames ac turpis egestas. Vestibulum tortor quam, feugiat vitae, ultricies eget, tempor sit amet, ante. Donec eu libero sit amet quam egestas semper. Aenean ultricies mi vitae est. Mauris placerat eleifend leo.
",
"sku": "Woo-beanie-logo",
"low_stock_remaining": null,
"backorders_allowed": false,
"show_backorder_badge": false,
"sold_individually": false,
"permalink": "https://local.wordpress.test/product/beanie-with-logo/",
"images": [
{
"id": 61,
"src": "https://local.wordpress.test/wp-content/uploads/2023/03/beanie-with-logo-1.jpg",
"thumbnail": "https://local.wordpress.test/wp-content/uploads/2023/03/beanie-with-logo-1-450x450.jpg",
"srcset": "https://local.wordpress.test/wp-content/uploads/2023/03/beanie-with-logo-1.jpg 800w, https://local.wordpress.test/wp-content/uploads/2023/03/beanie-with-logo-1-450x450.jpg 450w, https://local.wordpress.test/wp-content/uploads/2023/03/beanie-with-logo-1-100x100.jpg 100w, https://local.wordpress.test/wp-content/uploads/2023/03/beanie-with-logo-1-600x600.jpg 600w, https://local.wordpress.test/wp-content/uploads/2023/03/beanie-with-logo-1-300x300.jpg 300w, https://local.wordpress.test/wp-content/uploads/2023/03/beanie-with-logo-1-150x150.jpg 150w, https://local.wordpress.test/wp-content/uploads/2023/03/beanie-with-logo-1-768x768.jpg 768w",
"sizes": "(max-width: 800px) 100vw, 800px",
"name": "beanie-with-logo-1.jpg",
"alt": ""
}
],
"variation": [],
"item_data": [],
"prices": {
"price": "1800",
"regular_price": "2000",
"sale_price": "1800",
"price_range": null,
"currency_code": "USD",
"currency_symbol": "$",
"currency_minor_unit": 2,
"currency_decimal_separator": ".",
"currency_thousand_separator": ",",
"currency_prefix": "$",
"currency_suffix": "",
"raw_prices": {
"precision": 6,
"price": "18000000",
"regular_price": "20000000",
"sale_price": "18000000"
}
},
"totals": {
"line_subtotal": "1800",
"line_subtotal_tax": "180",
"line_total": "1530",
"line_total_tax": "153",
"currency_code": "USD",
"currency_symbol": "$",
"currency_minor_unit": 2,
"currency_decimal_separator": ".",
"currency_thousand_separator": ",",
"currency_prefix": "$",
"currency_suffix": ""
},
"catalog_visibility": "visible",
"extensions": {}
},
{
"key": "b6d767d2f8ed5d21a44b0e5886680cb9",
"id": 22,
"quantity": 1,
"quantity_limits": {
"minimum": 1,
"maximum": 9999,
"multiple_of": 1,
"editable": true
},
"name": "Belt",
"short_description": "This is a simple product.
",
"description": "Pellentesque habitant morbi tristique senectus et netus et malesuada fames ac turpis egestas. Vestibulum tortor quam, feugiat vitae, ultricies eget, tempor sit amet, ante. Donec eu libero sit amet quam egestas semper. Aenean ultricies mi vitae est. Mauris placerat eleifend leo.
",
"sku": "woo-belt",
"low_stock_remaining": null,
"backorders_allowed": false,
"show_backorder_badge": false,
"sold_individually": false,
"permalink": "https://local.wordpress.test/product/belt/",
"images": [
{
"id": 51,
"src": "https://local.wordpress.test/wp-content/uploads/2023/03/belt-2.jpg",
"thumbnail": "https://local.wordpress.test/wp-content/uploads/2023/03/belt-2-450x450.jpg",
"srcset": "https://local.wordpress.test/wp-content/uploads/2023/03/belt-2.jpg 801w, https://local.wordpress.test/wp-content/uploads/2023/03/belt-2-450x450.jpg 450w, https://local.wordpress.test/wp-content/uploads/2023/03/belt-2-100x100.jpg 100w, https://local.wordpress.test/wp-content/uploads/2023/03/belt-2-600x600.jpg 600w, https://local.wordpress.test/wp-content/uploads/2023/03/belt-2-300x300.jpg 300w, https://local.wordpress.test/wp-content/uploads/2023/03/belt-2-150x150.jpg 150w, https://local.wordpress.test/wp-content/uploads/2023/03/belt-2-768x768.jpg 768w",
"sizes": "(max-width: 801px) 100vw, 801px",
"name": "belt-2.jpg",
"alt": ""
}
],
"variation": [],
"item_data": [],
"prices": {
"price": "5500",
"regular_price": "6500",
"sale_price": "5500",
"price_range": null,
"currency_code": "USD",
"currency_symbol": "$",
"currency_minor_unit": 2,
"currency_decimal_separator": ".",
"currency_thousand_separator": ",",
"currency_prefix": "$",
"currency_suffix": "",
"raw_prices": {
"precision": 6,
"price": "55000000",
"regular_price": "65000000",
"sale_price": "55000000"
}
},
"totals": {
"line_subtotal": "5500",
"line_subtotal_tax": "550",
"line_total": "4675",
"line_total_tax": "468",
"currency_code": "USD",
"currency_symbol": "$",
"currency_minor_unit": 2,
"currency_decimal_separator": ".",
"currency_thousand_separator": ",",
"currency_prefix": "$",
"currency_suffix": ""
},
"catalog_visibility": "visible",
"extensions": {}
}
],
"coupons": [
{
"code": "test",
"discount_type": "percent",
"totals": {
"total_discount": "1095",
"total_discount_tax": "109",
"currency_code": "USD",
"currency_symbol": "$",
"currency_minor_unit": 2,
"currency_decimal_separator": ".",
"currency_thousand_separator": ",",
"currency_prefix": "$",
"currency_suffix": ""
}
}
],
"fees": [],
"totals": {
"total_items": "7300",
"total_items_tax": "730",
"total_fees": "0",
"total_fees_tax": "0",
"total_discount": "1095",
"total_discount_tax": "110",
"total_shipping": "1300",
"total_shipping_tax": "130",
"total_price": "8256",
"total_tax": "751",
"tax_lines": [
{
"name": "Tax",
"price": "751",
"rate": "10%"
}
],
"currency_code": "USD",
"currency_symbol": "$",
"currency_minor_unit": 2,
"currency_decimal_separator": ".",
"currency_thousand_separator": ",",
"currency_prefix": "$",
"currency_suffix": ""
},
"shipping_address": {
"first_name": "John",
"last_name": "Doe",
"company": "",
"address_1": "Hello street",
"address_2": "",
"city": "beverly hills",
"state": "CA",
"postcode": "90211",
"country": "US",
"phone": "123456778"
},
"billing_address": {
"first_name": "John",
"last_name": "Doe",
"company": "",
"address_1": "Hello street",
"address_2": "",
"city": "beverly hills",
"state": "CA",
"postcode": "90211",
"country": "US",
"email": "checkout@templates.com",
"phone": "123456778"
},
"needs_payment": true,
"needs_shipping": true,
"payment_requirements": [ "products" ],
"has_calculated_shipping": true,
"shipping_rates": [
{
"package_id": 0,
"name": "Shipment 1",
"destination": {
"address_1": "Hello street",
"address_2": "",
"city": "beverly hills",
"state": "CA",
"postcode": "90211",
"country": "US"
},
"items": [
{
"key": "a5771bce93e200c36f7cd9dfd0e5deaa",
"name": "Beanie with Logo",
"quantity": 1
},
{
"key": "b6d767d2f8ed5d21a44b0e5886680cb9",
"name": "Belt",
"quantity": 1
}
],
"shipping_rates": [
{
"rate_id": "flat_rate:10",
"name": "Flat rate",
"description": "",
"delivery_time": "",
"price": "1300",
"taxes": "130",
"instance_id": 10,
"method_id": "flat_rate",
"meta_data": [
{
"key": "Items",
"value": "Beanie with Logo × 1, Belt × 1"
}
],
"selected": true,
"currency_code": "USD",
"currency_symbol": "$",
"currency_minor_unit": 2,
"currency_decimal_separator": ".",
"currency_thousand_separator": ",",
"currency_prefix": "$",
"currency_suffix": ""
},
{
"rate_id": "free_shipping:12",
"name": "Free shipping",
"description": "",
"delivery_time": "",
"price": "0",
"taxes": "0",
"instance_id": 12,
"method_id": "free_shipping",
"meta_data": [
{
"key": "Items",
"value": "Beanie with Logo × 1, Belt × 1"
}
],
"selected": false,
"currency_code": "USD",
"currency_symbol": "$",
"currency_minor_unit": 2,
"currency_decimal_separator": ".",
"currency_thousand_separator": ",",
"currency_prefix": "$",
"currency_suffix": ""
},
{
"rate_id": "local_pickup:13",
"name": "Local pickup",
"description": "",
"delivery_time": "",
"price": "0",
"taxes": "0",
"instance_id": 13,
"method_id": "local_pickup",
"meta_data": [
{
"key": "Items",
"value": "Beanie with Logo × 1, Belt × 1"
}
],
"selected": false,
"currency_code": "USD",
"currency_symbol": "$",
"currency_minor_unit": 2,
"currency_decimal_separator": ".",
"currency_thousand_separator": ",",
"currency_prefix": "$",
"currency_suffix": ""
}
]
}
],
"items_count": 2,
"items_weight": 0,
"cross_sells": [],
"errors": [],
"payment_methods": [ "bacs", "cod" ],
"extensions": {}
}
```
### Error Response
If a cart action cannot be performed, an error response will be returned. This will include a reason code and an error message:
```json
{
"code": "woocommerce_rest_cart_invalid_product",
"message": "This product cannot be added to the cart.",
"data": {
"status": 400
}
}
```
Some error responses indicate conflicts (error 409), for example, when an item cannot be found or a coupon is no longer applied. When this type of response is returned, the current state of the cart from the server is also returned as part of the error data:
```json
{
"code": "woocommerce_rest_cart_invalid_key",
"message": "Cart item no longer exists or is invalid.",
"data": {
"status": 409,
"cart": { ... }
}
}
```
This allows the client to remain in sync with the cart data without additional requests, should the cart change or become outdated.
## Add Item
Add an item to the cart and return the full cart response, or an error.
This endpoint will return an error unless a valid [Nonce Token](/docs/apis/store-api/nonce-tokens) or [Cart Token](/docs/apis/store-api/cart-tokens) is provided.
```http
POST /cart/add-item
```
| Attribute | Type | Required | Description |
| :---------- | :------ | :------: | :---------------------------------------------------------------------------------------------------------------------------------------- |
| `id` | integer | Yes | The cart item product or variation ID. |
| `quantity` | integer | Yes | Quantity of this item in the cart. |
| `variation` | array | Yes | Chosen attributes (for variations) containing an array of objects with keys `attribute` and `value`. See notes on attribute naming below. |
```sh
curl --header "Nonce: 12345" --request POST https://example-store.com/wp-json/wc/store/v1/cart/add-item?id=100&quantity=1
```
Returns the full [Cart Response](#cart-response) on success, or an [Error Response](#error-response) on failure.
If you want to add supplemental cart item data before it is passed into `CartController::add_to_cart` use the [`woocommerce_store_api_add_to_cart_data`](https://github.com/woocommerce/woocommerce-blocks/blob/4d1c295a2bace9a4f6397cfd5469db31083d477a/docs/third-party-developers/extensibility/hooks/filters.md#woocommerce_store_api_add_to_cart_data) filter. For example:
```php
add_filter( 'woocommerce_store_api_add_to_cart_data', function( $add_to_cart_data, \WP_REST_Request $request ) {
if ( ! empty( $request['custom-request-param'] ) ) {
$add_to_cart_data['cart_item_data']['custom-request-data'] = sanitize_text_field( $request['custom-request-param'] );
}
return $add_to_cart_data;
}, 10, 2 );
```
**Variation attribute naming:**
When adding variations to the cart, the naming of the attribute is important.
For global attributes, the attribute posted to the API should be the slug of the attribute. This should have a `pa_` prefix. For example, if you have an attribute named `Color`, the slug will be `pa_color`.
For product specific attributes, the attribute posted to the API can be one of the following:
- the name of the attribute. For example, if you have an attribute named `Size`, the name will be `Size`. This is case-sensitive.
- the slug of the attribute. For example, if you have an attribute named `Autograph ✏️`, the name will be `attribute_autograph-%e2%9c%8f%ef%b8%8f`. This is case-sensitive. You can get this slug from the related `select` on the product page.
**Example POST body:**
```json
{
"id": 13,
"quantity": 1,
"variation": [
{
"attribute": "pa_color",
"value": "blue"
},
{
"attribute": "attribute_autograph-%e2%9c%8f%ef%b8%8f",
"value": "Yes"
},
{
"attribute": "Logo",
"value": "Yes"
}
]
}
```
The above example adds a product variation to the cart with attributes size and color.
**Batching:**
If you want to add multiple items at once, you need to use the batch endpoint:
```http
POST /wc/store/v1/batch
```
The JSON payload for adding multiple items to the cart would look like this:
```json
{
"requests": [
{
"path": "/wc/store/v1/cart/add-item",
"method": "POST",
"cache": "no-store",
"body": {
"id": 26,
"quantity": 1
},
"headers": {
"Nonce": "1db1d13784"
}
},
{
"path": "/wc/store/v1/cart/add-item",
"method": "POST",
"cache": "no-store",
"body": {
"id": 27,
"quantity": 1
},
"headers": {
"Nonce": "1db1d13784"
}
}
]
}
```
## Remove Item
Remove an item from the cart and return the full cart response, or an error.
This endpoint will return an error unless a valid [Nonce Token](/docs/apis/store-api/nonce-tokens) or [Cart Token](/docs/apis/store-api/cart-tokens) is provided.
```http
POST /cart/remove-item
```
| Attribute | Type | Required | Description |
| :-------- | :----- | :------: | :-------------------------------- |
| `key` | string | Yes | The key of the cart item to edit. |
```sh
curl --header "Nonce: 12345" --request POST https://example-store.com/wp-json/wc/store/v1/cart/remove-item?key=e369853df766fa44e1ed0ff613f563bd
```
Returns the full [Cart Response](#cart-response) on success, or an [Error Response](#error-response) on failure.
## Update Item
Update an item in the cart and return the full cart response, or an error.
This endpoint will return an error unless a valid [Nonce Token](/docs/apis/store-api/nonce-tokens) or [Cart Token](/docs/apis/store-api/cart-tokens) is provided.
```http
POST /cart/update-item
```
| Attribute | Type | Required | Description |
| :--------- | :------ | :------: | :--------------------------------- |
| `key` | string | Yes | The key of the cart item to edit. |
| `quantity` | integer | Yes | Quantity of this item in the cart. |
```sh
curl --header "Nonce: 12345" --request POST https://example-store.com/wp-json/wc/store/v1/cart/update-item?key=e369853df766fa44e1ed0ff613f563bd&quantity=10
```
Returns the full [Cart Response](#cart-response) on success, or an [Error Response](#error-response) on failure.
## Apply Coupon
Apply a coupon to the cart and return the full cart response, or an error.
This endpoint will return an error unless a valid [Nonce Token](/docs/apis/store-api/nonce-tokens) or [Cart Token](/docs/apis/store-api/cart-tokens) is provided.
```http
POST /cart/apply-coupon/
```
| Attribute | Type | Required | Description |
| :-------- | :----- | :------: | :--------------------------------------------- |
| `code` | string | Yes | The coupon code you wish to apply to the cart. |
```sh
curl --header "Nonce: 12345" --request POST https://example-store.com/wp-json/wc/store/v1/cart/apply-coupon?code=20off
```
Returns the full [Cart Response](#cart-response) on success, or an [Error Response](#error-response) on failure.
## Remove Coupon
Remove a coupon from the cart and return the full cart response, or an error.
This endpoint will return an error unless a valid [Nonce Token](/docs/apis/store-api/nonce-tokens) or [Cart Token](/docs/apis/store-api/cart-tokens) is provided.
```http
POST /cart/remove-coupon/
```
| Attribute | Type | Required | Description |
| :-------- | :----- | :------: | :------------------------------------------------ |
| `code` | string | Yes | The coupon code you wish to remove from the cart. |
```sh
curl --header "Nonce: 12345" --request POST https://example-store.com/wp-json/wc/store/v1/cart/remove-coupon?code=20off
```
Returns the full [Cart Response](#cart-response) on success, or an [Error Response](#error-response) on failure.
## Update Customer
Update customer data and return the full cart response, or an error.
This endpoint will return an error unless a valid [Nonce Token](/docs/apis/store-api/nonce-tokens) or [Cart Token](/docs/apis/store-api/cart-tokens) is provided.
```http
POST /cart/update-customer
```
| Attribute | Type | Required | Description |
| :---------------------------- | :----- | :------: | :--------------------------------------------------------------------------------------- |
| `billing_address` | object | no | Customer billing address. |
| `billing_address.first_name` | string | no | Customer first name. |
| `billing_address.last_name` | string | no | Customer last name. |
| `billing_address.address_1` | string | no | First line of the address being shipped to. |
| `billing_address.address_2` | string | no | Second line of the address being shipped to. |
| `billing_address.city` | string | no | City of the address being shipped to. |
| `billing_address.state` | string | no | ISO code, or name, for the state, province, or district of the address being shipped to. |
| `billing_address.postcode` | string | no | Zip or Postcode of the address being shipped to. |
| `billing_address.country` | string | no | ISO code for the country of the address being shipped to. |
| `billing_address.email` | string | no | Email for the customer. |
| `billing_address.phone` | string | no | Phone number of the customer. |
| `shipping_address` | object | no | Customer shipping address. |
| `shipping_address.first_name` | string | no | Customer first name. |
| `shipping_address.last_name` | string | no | Customer last name. |
| `shipping_address.address_1` | string | no | First line of the address being shipped to. |
| `shipping_address.address_2` | string | no | Second line of the address being shipped to. |
| `shipping_address.city` | string | no | City of the address being shipped to. |
| `shipping_address.state` | string | no | ISO code, or name, for the state, province, or district of the address being shipped to. |
| `shipping_address.postcode` | string | no | Zip or Postcode of the address being shipped to. |
| `shipping_address.country` | string | no | ISO code for the country of the address being shipped to. |
Returns the full [Cart Response](#cart-response) on success, or an [Error Response](#error-response) on failure.
## Select Shipping Rate
Selects an available shipping rate for a package, then returns the full cart response, or an error.
This endpoint will return an error unless a valid [Nonce Token](/docs/apis/store-api/nonce-tokens) or [Cart Token](/docs/apis/store-api/cart-tokens) is provided.
```http
POST /cart/select-shipping-rate
```
| Attribute | Type | Required | Description |
| :----------- | :------ | :------: | :---------------------------------------------- |
| `package_id` | integer | yes | The ID of the shipping package within the cart. |
| `rate_id` | string | yes | The chosen rate ID for the package. |
```sh
curl --header "Nonce: 12345" --request POST /cart/select-shipping-rate?package_id=1&rate_id=flat_rate:1
```
Returns the full [Cart Response](#cart-response) on success, or an [Error Response](#error-response) on failure.
---
## Checkout order API
*Source: apis/store-api/resources-endpoints/checkout-order.md*
# Checkout order API
The checkout order API facilitates the processing of existing orders and handling payments.
All checkout order endpoints require a [Nonce Token](/docs/apis/store-api/nonce-tokens) or a [Cart Token](/docs/apis/store-api/cart-tokens) otherwise these endpoints will return an error.
## Process Order and Payment
Accepts the final chosen payment method, and any additional payment data, then attempts payment and
returns the result.
```http
POST /wc/store/v1/checkout/{ORDER_ID}
```
| Attribute | Type | Required | Description |
| :----------------- | :----- | :------: | :------------------------------------------------------------------ |
| `key` | string | Yes | The key for the order verification. |
| `billing_email` | string | No | The email address used to verify guest orders. |
| `billing_address` | object | Yes | Object of updated billing address data for the customer. |
| `shipping_address` | object | Yes | Object of updated shipping address data for the customer. |
| `payment_method` | string | Yes | The ID of the payment method being used to process the payment. |
| `payment_data` | array | No | Data to pass through to the payment method when processing payment. |
```sh
curl --header "Nonce: 12345" --request POST https://example-store.com/wp-json/wc/store/v1/checkout/{ORDER_ID} -d '{"key":"wc_order_oFmQYREzh9Tfv","billing_email":"admin@example.com","payment_method":"cheque","billing_address":{...},"shipping_address":{...}'
```
**Example request:**
```json
{
"key": "wc_order_oFmQYREzh9Tfv",
"billing_email": "admin@example.com",
"billing_address": {
"first_name": "Peter",
"last_name": "Venkman",
"company": "",
"address_1": "550 Central Park West",
"address_2": "Corner Penthouse Spook Central",
"city": "New York",
"state": "NY",
"postcode": "10023",
"country": "US",
"email": "admin@example.com",
"phone": "555-2368"
},
"shipping_address": {
"first_name": "Peter",
"last_name": "Venkman",
"company": "",
"address_1": "550 Central Park West",
"address_2": "Corner Penthouse Spook Central",
"city": "New York",
"state": "NY",
"postcode": "10023",
"country": "US",
"phone": "555-2368"
},
"payment_method": "cheque",
"payment_data": []
}
```
**Example response:**
```json
{
"order_id": 146,
"status": "on-hold",
"order_key": "wc_order_oFmQYREzh9Tfv",
"customer_note": "",
"customer_id": 1,
"billing_address": {
"first_name": "Peter",
"last_name": "Venkman",
"company": "",
"address_1": "550 Central Park West",
"address_2": "Corner Penthouse Spook Central",
"city": "New York",
"state": "NY",
"postcode": "10023",
"country": "US",
"email": "admin@example.com",
"phone": "555-2368"
},
"shipping_address": {
"first_name": "Peter",
"last_name": "Venkman",
"company": "",
"address_1": "550 Central Park West",
"address_2": "Corner Penthouse Spook Central",
"city": "New York",
"state": "NY",
"postcode": "10023",
"country": "US",
"phone": "555-2368"
},
"payment_method": "cheque",
"payment_result": {
"payment_status": "success",
"payment_details": [],
"redirect_url": "https://local.wordpress.test/block-checkout/order-received/146/?key=wc_order_VPffqyvgWVqWL"
}
}
```
## Payment Data
There are many payment gateways available for merchants to use, and each one will be expecting different `payment_data`. We cannot comprehensively list all expected requests for all payment gateways, and we would recommend reaching out to the authors of the payment gateway plugins you're working with for further information.
An example of the payment data sent to the Checkout Order endpoint when using the [WooCommerce Stripe Payment Gateway](https://wordpress.org/plugins/woocommerce-gateway-stripe/) is shown below.
For further information on generating a `stripe_source` please check [the Stripe documentation](https://stripe.com/docs).
```json
{
"payment_data": [
{
"key": "stripe_source",
"value": "src_xxxxxxxxxxxxx"
},
{
"key": "billing_email",
"value": "myemail@email.com"
},
{
"key": "billing_first_name",
"value": "Jane"
},
{
"key": "billing_last_name",
"value": "Doe"
},
{
"key": "paymentMethod",
"value": "stripe"
},
{
"key": "paymentRequestType",
"value": "cc"
},
{
"key": "wc-stripe-new-payment-method",
"value": true
}
]
}
```
---
## Checkout API
*Source: apis/store-api/resources-endpoints/checkout.md*
# Checkout API
The checkout API facilitates the creation of orders (from the current cart) and handling payments for payment methods.
All checkout endpoints require either a [Nonce Token](/docs/apis/store-api/nonce-tokens) or a [Cart Token](/docs/apis/store-api/cart-tokens) otherwise these endpoints will return an error.
## Get Checkout Data
Returns data required for the checkout. This includes a draft order (created from the current cart) and customer billing and shipping addresses. The payment information will be empty, as it's only persisted when the order gets updated via POST requests (right before payment processing).
```http
GET /wc/store/v1/checkout
```
There are no parameters required for this endpoint.
```sh
curl --header "Nonce: 12345" --request GET https://example-store.com/wp-json/wc/store/v1/checkout
```
### Example Response
```json
{
"order_id": 146,
"status": "checkout-draft",
"order_key": "wc_order_VPffqyvgWVqWL",
"customer_note": "",
"customer_id": 1,
"billing_address": {
"first_name": "Peter",
"last_name": "Venkman",
"company": "",
"address_1": "550 Central Park West",
"address_2": "Corner Penthouse Spook Central",
"city": "New York",
"state": "NY",
"postcode": "10023",
"country": "US",
"email": "admin@example.com",
"phone": "555-2368"
},
"shipping_address": {
"first_name": "Peter",
"last_name": "Venkman",
"company": "",
"address_1": "550 Central Park West",
"address_2": "Corner Penthouse Spook Central",
"city": "New York",
"state": "NY",
"postcode": "10023",
"country": "US"
},
"payment_method": "",
"payment_result": {
"payment_status": "",
"payment_details": [],
"redirect_url": ""
}
}
```
## Update checkout data
This endpoint allows you to update the checkout data for the current order. This can be called from the frontend to persist checkout fields, for example.
```http
PUT /wc/store/v1/checkout?__experimental_calc_totals=true
```
Note the `__experimental_calc_totals` parameter. This is used to determine if the cart totals should be recalculated. This should be set to true if the cart totals are being updated in response to a PUT request, false otherwise.
| Attribute | Type | Required | Description |
| :------------------ | :----- | :------: | :-------------------------------------------------- |
| `additional_fields` | object | No | Name => value pairs of additional fields to update. |
| `payment_method` | string | No | The ID of the payment method selected. |
| `order_notes` | string | No | Order notes. |
```sh
curl --header "Nonce: 12345" --request PUT https://example-store.com/wp-json/wc/store/v1/checkout?additional_fields[plugin-namespace/leave-on-porch]=true&additional_fields[plugin-namespace/location-on-porch]=dsdd&payment_method=bacs&order_notes=Please%20leave%20package%20on%20back%20porch
```
### Example Request
```json
{
"additional_fields": {
"plugin-namespace/leave-on-porch": true,
"plugin-namespace/location-on-porch": "dsdd"
},
"payment_method": "bacs",
"order_notes": "Please leave package on back porch"
}
```
### Example Response
```json
{
"order_id": 1486,
"status": "checkout-draft",
"order_key": "wc_order_KLpMaJ054PVlb",
"order_number": "1486",
"customer_note": "",
"customer_id": 1,
"billing_address": {
"first_name": "Peter",
"last_name": "Venkman",
"company": "",
"address_1": "550 Central Park West",
"address_2": "Corner Penthouse Spook Central",
"city": "New York",
"state": "NY",
"postcode": "10023",
"country": "US",
"email": "admin@example.com",
"phone": "555-2368"
},
"shipping_address": {
"first_name": "Peter",
"last_name": "Venkman",
"company": "",
"address_1": "550 Central Park West",
"address_2": "Corner Penthouse Spook Central",
"city": "New York",
"state": "NY",
"postcode": "10023",
"country": "US"
},
"payment_method": "bacs",
"payment_result": null,
"additional_fields": {
"plugin-namespace/leave-on-porch": true,
"plugin-namespace/location-on-porch": "dsdd"
},
"__experimentalCart": { ... },
"extensions": {}
}
```
Note the `__experimentalCart` field that is returned as part of the response. Totals will be updated on the front-end following a PUT request. This makes it possible to manipulate cart totals in response to fields persisted via the PUT request.
## Process Order and Payment
Accepts the final customer addresses and chosen payment method, and any additional payment data, then attempts payment and
returns the result.
```http
POST /wc/store/v1/checkout
```
| Attribute | Type | Required | Description |
| :------------------ | :----- | :------: | :------------------------------------------------------------------ |
| `billing_address` | object | Yes | Object of updated billing address data for the customer. |
| `shipping_address` | object | Yes | Object of updated shipping address data for the customer. |
| `customer_note` | string | No | Note added to the order by the customer during checkout. |
| `payment_method` | string | Yes | The ID of the payment method being used to process the payment. |
| `payment_data` | array | No | Data to pass through to the payment method when processing payment. |
| `customer_password` | string | No | Optionally define a password for new accounts. |
```sh
curl --header "Nonce: 12345" --request POST https://example-store.com/wp-json/wc/store/v1/checkout?payment_method=paypal&payment_data[0][key]=test-key&payment_data[0][value]=test-value
```
### Example Request
```json
{
"billing_address": {
"first_name": "Peter",
"last_name": "Venkman",
"company": "",
"address_1": "550 Central Park West",
"address_2": "Corner Penthouse Spook Central",
"city": "New York",
"state": "NY",
"postcode": "10023",
"country": "US",
"email": "admin@example.com",
"phone": "555-2368"
},
"shipping_address": {
"first_name": "Peter",
"last_name": "Venkman",
"company": "",
"address_1": "550 Central Park West",
"address_2": "Corner Penthouse Spook Central",
"city": "New York",
"state": "NY",
"postcode": "10023",
"country": "US"
},
"customer_note": "Test notes on order.",
"create_account": false,
"payment_method": "cheque",
"payment_data": [],
"extensions": {
"some-extension-name": {
"some-data-key": "some data value"
}
}
}
```
### Example Response
```json
{
"order_id": 146,
"status": "on-hold",
"order_key": "wc_order_VPffqyvgWVqWL",
"customer_note": "",
"customer_id": 1,
"billing_address": {
"first_name": "Peter",
"last_name": "Venkman",
"company": "",
"address_1": "550 Central Park West",
"address_2": "Corner Penthouse Spook Central",
"city": "New York",
"state": "NY",
"postcode": "10023",
"country": "US",
"email": "admin@example.com",
"phone": "555-2368"
},
"shipping_address": {
"first_name": "Peter",
"last_name": "Venkman",
"company": "",
"address_1": "550 Central Park West",
"address_2": "Corner Penthouse Spook Central",
"city": "New York",
"state": "NY",
"postcode": "10023",
"country": "US"
},
"payment_method": "cheque",
"payment_result": {
"payment_status": "success",
"payment_details": [],
"redirect_url": "https://local.wordpress.test/block-checkout/order-received/146/?key=wc_order_VPffqyvgWVqWL"
}
}
```
## Payment Data
There are many payment gateways available for merchants to use, and each one will be expecting different `payment_data`. We cannot comprehensively list all expected requests for all payment gateways, and we would recommend reaching out to the authors of the payment gateway plugins you're working with for further information.
An example of the payment data sent to the Checkout endpoint when using the [WooCommerce Stripe Payment Gateway](https://wordpress.org/plugins/woocommerce-gateway-stripe/) is shown below.
For further information on generating a `stripe_source` please check [the Stripe documentation](https://stripe.com/docs).
```json
{
"payment_data": [
{
"key": "stripe_source",
"value": "src_xxxxxxxxxxxxx"
},
{
"key": "billing_email",
"value": "myemail@email.com"
},
{
"key": "billing_first_name",
"value": "Jane"
},
{
"key": "billing_last_name",
"value": "Doe"
},
{
"key": "paymentMethod",
"value": "stripe"
},
{
"key": "paymentRequestType",
"value": "cc"
},
{
"key": "wc-stripe-new-payment-method",
"value": true
}
]
}
```
---
## Order API
*Source: apis/store-api/resources-endpoints/order.md*
# Order API
The order API returns the pay-for-order order.
## Get Order
```http
GET /order/{ORDER_ID}?key={KEY}&billing_email={BILLING_EMAIL}
```
There is one required parameter for this endpoint which is `key`. `billing_email` must be added for guest orders.
```sh
curl "https://example-store.com/wp-json/wc/store/v1/order/{ORDER_ID}?key={KEY}&billing_email={BILLING_EMAIL}"
```
Returns the full order object response (see [Order Response](#order-response)).
## Responses
Order endpoints return responses in the same format as `/cart`; an order object which includes order items, applied coupons, shipping addresses and rates, and non-sensitive customer data.
### Order Response
```json
{
"id": 147,
"status": "pending",
"coupons": [
{
"code": "discount20",
"totals": {
"currency_code": "GBP",
"currency_symbol": "£",
"currency_minor_unit": 2,
"currency_decimal_separator": ".",
"currency_thousand_separator": ",",
"currency_prefix": "£",
"currency_suffix": "",
"total_discount": "421",
"total_discount_tax": "0"
}
}
],
"shipping_address": {
"first_name": "Peter",
"last_name": "Venkman",
"company": "",
"address_1": "550 Central Park West",
"address_2": "Corner Penthouse Spook Central",
"city": "New York",
"state": "NY",
"postcode": "10023",
"country": "US",
"phone": "555-2368"
},
"billing_address": {
"first_name": "Peter",
"last_name": "Venkman",
"company": "",
"address_1": "550 Central Park West",
"address_2": "Corner Penthouse Spook Central",
"city": "New York",
"state": "NY",
"postcode": "10023",
"country": "US",
"email": "admin@example.com",
"phone": "555-2368"
},
"items": [
{
"key": "9bf31c7ff062936a96d3c8bd1f8f2ff3",
"id": 15,
"quantity": 1,
"quantity_limits": {
"minimum": 1,
"maximum": 99,
"multiple_of": 1,
"editable": true
},
"name": "Beanie",
"short_description": "This is a simple product.
",
"description": "Pellentesque habitant morbi tristique senectus et netus et malesuada fames ac turpis egestas. Vestibulum tortor quam, feugiat vitae, ultricies eget, tempor sit amet, ante. Donec eu libero sit amet quam egestas semper. Aenean ultricies mi vitae est. Mauris placerat eleifend leo.
",
"sku": "woo-beanie",
"low_stock_remaining": null,
"backorders_allowed": false,
"show_backorder_badge": false,
"sold_individually": false,
"permalink": "https://local.wordpress.test/product/beanie/",
"images": [
{
"id": 44,
"src": "https://local.wordpress.test/wp-content/uploads/2020/03/beanie-2.jpg",
"thumbnail": "https://local.wordpress.test/wp-content/uploads/2020/03/beanie-2-324x324.jpg",
"srcset": "https://local.wordpress.test/wp-content/uploads/2020/03/beanie-2.jpg 801w, https://local.wordpress.test/wp-content/uploads/2020/03/beanie-2-324x324.jpg 324w, https://local.wordpress.test/wp-content/uploads/2020/03/beanie-2-100x100.jpg 100w, https://local.wordpress.test/wp-content/uploads/2020/03/beanie-2-416x416.jpg 416w, https://local.wordpress.test/wp-content/uploads/2020/03/beanie-2-300x300.jpg 300w, https://local.wordpress.test/wp-content/uploads/2020/03/beanie-2-150x150.jpg 150w, https://local.wordpress.test/wp-content/uploads/2020/03/beanie-2-768x768.jpg 768w",
"sizes": "(max-width: 801px) 100vw, 801px",
"name": "beanie-2.jpg",
"alt": ""
}
],
"variation": [],
"prices": {
"currency_code": "GBP",
"currency_symbol": "£",
"currency_minor_unit": 2,
"currency_decimal_separator": ".",
"currency_thousand_separator": ",",
"currency_prefix": "£",
"currency_suffix": "",
"price": "1000",
"regular_price": "2000",
"sale_price": "1000",
"price_range": null,
"raw_prices": {
"precision": 6,
"price": "10000000",
"regular_price": "20000000",
"sale_price": "10000000"
}
},
"item_data": [],
"totals": {
"currency_code": "GBP",
"currency_symbol": "£",
"currency_minor_unit": 2,
"currency_decimal_separator": ".",
"currency_thousand_separator": ",",
"currency_prefix": "£",
"currency_suffix": "",
"line_subtotal": "1000",
"line_subtotal_tax": "0",
"line_total": "800",
"line_total_tax": "0"
},
"catalog_visibility": "view"
},
{
"key": "e369853df766fa44e1ed0ff613f563bd",
"id": 34,
"quantity": 1,
"quantity_limits": {
"minimum": 1,
"maximum": 99,
"multiple_of": 1,
"editable": true
},
"name": "WordPress Pennant",
"short_description": "This is an external product.
",
"description": "Pellentesque habitant morbi tristique senectus et netus et malesuada fames ac turpis egestas. Vestibulum tortor quam, feugiat vitae, ultricies eget, tempor sit amet, ante. Donec eu libero sit amet quam egestas semper. Aenean ultricies mi vitae est. Mauris placerat eleifend leo.
",
"sku": "wp-pennant",
"low_stock_remaining": null,
"backorders_allowed": false,
"show_backorder_badge": false,
"sold_individually": false,
"permalink": "https://local.wordpress.test/product/wordpress-pennant/",
"images": [
{
"id": 57,
"src": "https://local.wordpress.test/wp-content/uploads/2020/03/pennant-1.jpg",
"thumbnail": "https://local.wordpress.test/wp-content/uploads/2020/03/pennant-1-324x324.jpg",
"srcset": "https://local.wordpress.test/wp-content/uploads/2020/03/pennant-1.jpg 800w, https://local.wordpress.test/wp-content/uploads/2020/03/pennant-1-324x324.jpg 324w, https://local.wordpress.test/wp-content/uploads/2020/03/pennant-1-100x100.jpg 100w, https://local.wordpress.test/wp-content/uploads/2020/03/pennant-1-416x416.jpg 416w, https://local.wordpress.test/wp-content/uploads/2020/03/pennant-1-300x300.jpg 300w, https://local.wordpress.test/wp-content/uploads/2020/03/pennant-1-150x150.jpg 150w, https://local.wordpress.test/wp-content/uploads/2020/03/pennant-1-768x768.jpg 768w",
"sizes": "(max-width: 800px) 100vw, 800px",
"name": "pennant-1.jpg",
"alt": ""
}
],
"variation": [],
"prices": {
"currency_code": "GBP",
"currency_symbol": "£",
"currency_minor_unit": 2,
"currency_decimal_separator": ".",
"currency_thousand_separator": ",",
"currency_prefix": "£",
"currency_suffix": "",
"price": "1105",
"regular_price": "1105",
"sale_price": "1105",
"price_range": null,
"raw_prices": {
"precision": 6,
"price": "11050000",
"regular_price": "11050000",
"sale_price": "11050000"
}
},
"item_data": [],
"totals": {
"currency_code": "GBP",
"currency_symbol": "£",
"currency_minor_unit": 2,
"currency_decimal_separator": ".",
"currency_thousand_separator": ",",
"currency_prefix": "£",
"currency_suffix": "",
"line_subtotal": "1105",
"line_subtotal_tax": "0",
"line_total": "884",
"line_total_tax": "0"
},
"catalog_visibility": "view"
}
],
"needs_payment": true,
"needs_shipping": true,
"totals": {
"subtotal":"2105",
"total_discount": "421",
"total_shipping": "500",
"total_fees": "0",
"total_tax": "0",
"total_refund": "0",
"total_price": "2184",
"total_items": "2105",
"total_items_tax": "0",
"total_fees_tax": "0",
"total_discount_tax": "0",
"total_shipping_tax": "0",
"tax_lines": []
},
"errors": [],
"payment_requirements": [ "products" ],
}
```
### Error Response
If an order action cannot be performed, an error response will be returned. This will include a reason code and an error message:
```json
{
"code": "woocommerce_rest_invalid_order",
"message": "Invalid order ID or key provided.",
"data": {
"status": 401
}
}
```
---
## Product Attribute Terms API
*Source: apis/store-api/resources-endpoints/product-attribute-terms.md*
# Product Attribute Terms API
```http
GET /products/attributes/:id/terms
GET /products/attributes/:id/terms?orderby=slug
```
| Attribute | Type | Required | Description |
| :-------- | :------ | :------: |:--------------------------------------------------------------------------------------------------------------|
| `id` | integer | Yes | The ID of the attribute to retrieve terms for. |
| `order` | string | no | Order ascending or descending. Allowed values: `asc`, `desc` |
| `orderby` | string | no | Sort collection by object attribute. Allowed values: `id`, `name`, `name_num`, `slug`, `count`, `menu_order`. |
```sh
curl "https://example-store.com/wp-json/wc/store/v1/products/attributes/1/terms"
```
**Example response:**
```json
[
{
"id": 22,
"name": "Blue",
"slug": "blue",
"count": 5
},
{
"id": 48,
"name": "Burgundy",
"slug": "burgundy",
"count": 1
}
]
```
---
## Product Attributes API
*Source: apis/store-api/resources-endpoints/product-attributes.md*
# Product Attributes API
## List Product Attributes
```http
GET /products/attributes
```
There are no parameters required for this endpoint.
```sh
curl "https://example-store.com/wp-json/wc/store/v1/products/attributes"
```
Example response:
```json
[
{
"id": 1,
"name": "Color",
"taxonomy": "pa_color",
"type": "select",
"order": "menu_order",
"has_archives": false
},
{
"id": 2,
"name": "Size",
"taxonomy": "pa_size",
"type": "select",
"order": "menu_order",
"has_archives": false
}
]
```
## Single Product Attribute
Get a single attribute taxonomy.
```http
GET /products/attributes/:id
```
| Attribute | Type | Required | Description |
| :-------- | :------ | :------: | :----------------------------------- |
| `id` | integer | Yes | The ID of the attribute to retrieve. |
```sh
curl "https://example-store.com/wp-json/wc/store/v1/products/attributes/1"
```
**Example response:**
```json
{
"id": 1,
"name": "Color",
"taxonomy": "pa_color",
"type": "select",
"order": "menu_order",
"has_archives": false
}
```
---
## Product Brands API
*Source: apis/store-api/resources-endpoints/product-brands.md*
# Product Brands API
## List Product Brands
```http
GET /products/brands
```
There are no parameters required for this endpoint.
```sh
curl "https://example-store.com/wp-json/wc/store/v1/products/brands"
```
Example response:
```json
[
{
"id": 16,
"name": "Nike",
"slug": "nike",
"description": "This is the Nike brand.",
"parent": 0,
"count": 11,
"image": {
"id": 55,
"src": "https://store.local/wp-content/uploads/2021/11/nike-logo.jpg",
"thumbnail": "https://store.local/wp-content/uploads/2021/11/nike-logo-324x324.jpg",
"srcset": "https://store.local/wp-content/uploads/2021/11/nike-logo.jpg 800w, https://store.local/wp-content/uploads/2021/11/nike-logo-324x324.jpg 324w, https://store.local/wp-content/uploads/2021/11/nike-logo-100x100.jpg 100w, https://store.local/wp-content/uploads/2021/11/nike-logo-416x416.jpg 416w, https://store.local/wp-content/uploads/2021/11/nike-logo-300x300.jpg 300w, https://store.local/wp-content/uploads/2021/11/nike-logo-150x150.jpg 150w, https://store.local/wp-content/uploads/2021/11/nike-logo-768x768.jpg 768w",
"sizes": "(max-width: 800px) 100vw, 800px",
"name": "nike-logo.jpg",
"alt": ""
},
"review_count": 2,
"permalink": "https://store.local/product-brand/nike/"
},
{
"id": 21,
"name": "Adidas",
"slug": "adidas",
"description": "",
"parent": 0,
"count": 1,
"image": null,
"review_count": 1,
"permalink": "https://store.local/product-brand/adidas/"
}
]
```
## Single Product Brand
Get a single brand.
```http
GET /products/brands/:id
```
or
```http
GET /products/brands/:slug
```
| Parameter | Type | Required | Description |
| :-------- | :------ | :------: |:---------------------------------------------------------------------|
| `identifier` | string | Yes | The identifier of the brand to retrieve. Can be an brand ID or slug. |
```sh
curl "https://example-store.com/wp-json/wc/store/v1/products/brands/1"
```
or
```sh
curl "https://example-store.com/wp-json/wc/store/v1/products/brands/adidas"
```
**Example response:**
```json
{
"id": 1,
"name": "Adidas",
"slug": "adidas",
"description": "",
"parent": 0,
"count": 1,
"image": null,
"review_count": 1,
"permalink": "https://store.local/product-brand/adidas/"
}
```
---
## Product Categories API
*Source: apis/store-api/resources-endpoints/product-categories.md*
# Product Categories API
## List Product Categories
```http
GET /products/categories
```
There are no parameters required for this endpoint.
```sh
curl "https://example-store.com/wp-json/wc/store/v1/products/categories"
```
Example response:
```json
[
{
"id": 16,
"name": "Clothing",
"slug": "clothing",
"description": "This is the clothing category.",
"parent": 0,
"count": 11,
"image": {
"id": 55,
"src": "https://store.local/wp-content/uploads/2021/11/t-shirt-with-logo-1.jpg",
"thumbnail": "https://store.local/wp-content/uploads/2021/11/t-shirt-with-logo-1-324x324.jpg",
"srcset": "https://store.local/wp-content/uploads/2021/11/t-shirt-with-logo-1.jpg 800w, https://store.local/wp-content/uploads/2021/11/t-shirt-with-logo-1-324x324.jpg 324w, https://store.local/wp-content/uploads/2021/11/t-shirt-with-logo-1-100x100.jpg 100w, https://store.local/wp-content/uploads/2021/11/t-shirt-with-logo-1-416x416.jpg 416w, https://store.local/wp-content/uploads/2021/11/t-shirt-with-logo-1-300x300.jpg 300w, https://store.local/wp-content/uploads/2021/11/t-shirt-with-logo-1-150x150.jpg 150w, https://store.local/wp-content/uploads/2021/11/t-shirt-with-logo-1-768x768.jpg 768w",
"sizes": "(max-width: 800px) 100vw, 800px",
"name": "t-shirt-with-logo-1.jpg",
"alt": ""
},
"review_count": 2,
"permalink": "https://store.local/product-category/clothing/"
},
{
"id": 21,
"name": "Decor",
"slug": "decor",
"description": "",
"parent": 0,
"count": 1,
"image": null,
"review_count": 1,
"permalink": "https://store.local/product-category/decor/"
}
]
```
## Single Product Category
Get a single category.
```http
GET /products/categories/:id
```
| Category | Type | Required | Description |
| :------- | :------ | :------: | :---------------------------------- |
| `id` | integer | Yes | The ID of the category to retrieve. |
```sh
curl "https://example-store.com/wp-json/wc/store/v1/products/categories/1"
```
**Example response:**
```json
{
"id": 1,
"name": "Decor",
"slug": "decor",
"description": "",
"parent": 0,
"count": 1,
"image": null,
"review_count": 1,
"permalink": "https://store.local/product-category/decor/"
}
```
---
## Product Collection Data API
*Source: apis/store-api/resources-endpoints/product-collection-data.md*
# Product Collection Data API
This endpoint allows you to get aggregate data from a collection of products, for example, the min and max price in a collection of products (ignoring pagination). This is used by blocks for product filtering widgets, since counts are based on the product catalog being viewed.
```http
GET /products/collection-data
GET /products/collection-data?calculate_price_range=true
GET /products/collection-data?calculate_attribute_counts[0][query_type]=or&calculate_attribute_counts[0][taxonomy]=pa_color
GET /products/collection-data?calculate_rating_counts=true
```
| Attribute | Type | Required | Description |
| :--------------------------- | :----- | :------: | :--------------------------------------------------------------------------------------------------------------------------------------------------------------------------------------------------------- |
| `calculate_price_range` | bool | No | Returns the min and max price for the product collection. If false, only `null` will be returned. |
| `calculate_attribute_counts` | object | No | Returns attribute counts for a list of attribute taxonomies you pass in via this parameter. Each should be provided as an object with keys "taxonomy" and "query_type". If empty, `null` will be returned. |
| `calculate_rating_counts` | bool | No | Returns the counts of products with a certain average rating, 1-5. If false, only `null` will be returned. |
| `calculate_stock_status_counts` | bool | No | Returns counts of products with each stock status (in stock, out of stock, on backorder). If false, only `null` will be returned. |
**In addition to the above attributes**, all product list attributes are supported. This allows you to get data for a certain subset of products. See [the products API list products section](/docs/apis/store-api/resources-endpoints/products#list-products) for the full list.
```sh
curl "https://example-store.com/wp-json/wc/store/v1/products/collection-data?calculate_price_range=true&calculate_attribute_counts=pa_size,pa_color&calculate_rating_counts=true"
```
**Example response:**
```json
{
"price_range": [
"currency_minor_unit": 2,
"min_price": "0",
"max_price": "9000",
"currency_code": "USD",
"currency_decimal_separator": ".",
"currency_minor_unit": 2,
"currency_prefix": "$",
"currency_suffix": "",
"currency_symbol": "$",
"currency_thousand_separator": ",",
],
"attribute_counts": [
{
"term": 22,
"count": 4
},
{
"term": 23,
"count": 3
},
{
"term": 24,
"count": 4
}
],
"rating_counts": [
{
"rating": 3,
"count": 1
},
{
"rating": 4,
"count": 1
}
]
}
```
---
## Product Reviews API
*Source: apis/store-api/resources-endpoints/product-reviews.md*
# Product Reviews API
## List Product Reviews
This endpoint returns product reviews (comments) and can also show results from either specific products or specific categories.
```http
GET /products/reviews
GET /products/reviews?category_id=1,2,3
GET /products/reviews?product_id=1,2,3
GET /products/reviews?orderby=rating&order=desc
```
| Attribute | Type | Required | Description |
| :------------ | :------ | :------: | :-------------------------------------------------------------------------------------------------- |
| `page` | integer | no | Current page of the collection. |
| `per_page` | integer | no | Maximum number of items to be returned in result set. Defaults to no limit if left blank. |
| `offset` | integer | no | Offset the result set by a specific number of items. |
| `order` | string | no | Order sort attribute ascending or descending. Allowed values: `asc`, `desc` |
| `orderby` | string | no | Sort collection by object attribute. Allowed values : `date`, `date_gmt`, `id`, `rating`, `product` |
| `category_id` | string | no | Limit result set to reviews from specific category IDs. |
| `product_id` | string | no | Limit result set to reviews from specific product IDs. |
```sh
curl "https://example-store.com/wp-json/wc/store/v1/products/collection-data?calculate_price_range=true&calculate_attribute_counts=pa_size,pa_color&calculate_rating_counts=true"
```
**Example response:**
```json
[
{
"id": 83,
"date_created": "2022-01-12T15:42:14",
"formatted_date_created": "January 12, 2022",
"date_created_gmt": "2022-01-12T15:42:14",
"product_id": 33,
"product_name": "Beanie with Logo",
"product_permalink": "https://store.local/product/beanie-with-logo/",
"product_image": {
"id": 56,
"src": "https://store.local/wp-content/uploads/2021/11/beanie-with-logo-1.jpg",
"thumbnail": "https://store.local/wp-content/uploads/2021/11/beanie-with-logo-1-324x324.jpg",
"srcset": "https://store.local/wp-content/uploads/2021/11/beanie-with-logo-1.jpg 800w, https://store.local/wp-content/uploads/2021/11/beanie-with-logo-1-324x324.jpg 324w, https://store.local/wp-content/uploads/2021/11/beanie-with-logo-1-100x100.jpg 100w, https://store.local/wp-content/uploads/2021/11/beanie-with-logo-1-416x416.jpg 416w, https://store.local/wp-content/uploads/2021/11/beanie-with-logo-1-300x300.jpg 300w, https://store.local/wp-content/uploads/2021/11/beanie-with-logo-1-150x150.jpg 150w, https://store.local/wp-content/uploads/2021/11/beanie-with-logo-1-768x768.jpg 768w",
"sizes": "(max-width: 800px) 100vw, 800px",
"name": "beanie-with-logo-1.jpg",
"alt": ""
},
"reviewer": "reviewer-name",
"review": "This is a fantastic product.
\n",
"rating": 5,
"verified": true,
"reviewer_avatar_urls": {
"24": "https://secure.gravatar.com/avatar/12345?s=24&d=mm&r=g",
"48": "https://secure.gravatar.com/avatar/12345?s=48&d=mm&r=g",
"96": "https://secure.gravatar.com/avatar/12345?s=96&d=mm&r=g"
}
}
]
```
---
## Product Tags API
*Source: apis/store-api/resources-endpoints/product-tags.md*
# Product Tags API
## List Product Tags
```http
GET /products/tags
```
There are no parameters required for this endpoint.
```sh
curl "https://example-store.com/wp-json/wc/store/v1/products/tags"
```
Example response:
```json
[
{
"id": 1,
"name": "Test Tag",
"slug": "test-tag",
"description": "",
"parent": 0,
"count": 1
},
{
"id": 2,
"name": "Another Tag",
"slug": "another-tag",
"description": "",
"parent": 0,
"count": 1
}
]
```
---
## Products API
*Source: apis/store-api/resources-endpoints/products.md*
# Products API
The store products API provides public product data so it can be rendered on the client side.
## List Products
```http
GET /products
GET /products?search=product%20name
GET /products?slug=slug-1,slug-2
GET /products?after=2017-03-22&date_column=date
GET /products?before=2017-03-22&date_column=date
GET /products?exclude=10,44,33
GET /products?include=10,44,33
GET /products?offset=10
GET /products?order=asc&orderby=price
GET /products?parent=10
GET /products?parent_exclude=10
GET /products?type=simple
GET /products?sku=sku-1,sku-2
GET /products?featured=true
GET /products?category=22
GET /products?brand=adidas
GET /products?_unstable_tax_my-taxonomy=my-taxonomy-term-id
GET /products?tag=special-items
GET /products?attributes[0][attribute]=pa_color&attributes[0][slug]=red
GET /products?on_sale=true
GET /products?min_price=5000
GET /products?max_price=10000
GET /products?stock_status=['outofstock']
GET /products?catalog_visibility=search
GET /products?rating=4,5
GET /products?return_price_range=true
GET /products?return_attribute_counts=pa_size,pa_color
GET /products?return_rating_counts=true
```
| Attribute | Type | Required | Description |
| :------------------------------------------ | :------ | :------: | :------------------------------------------------------------------------------------------------------------------------------------------------------------------------------------------------------------------------------------ |
| `search` | integer | no | Limit results to those matching a string. |
| `slug` | string | no | Limit result set to products with specific slug(s). Use commas to separate. |
| `after` | string | no | Limit response to resources created after a given ISO8601 compliant date. |
| `before` | string | no | Limit response to resources created before a given ISO8601 compliant date. |
| `date_column` | string | no | When limiting response using after/before, which date column to compare against. Allowed values: `date`, `date_gmt`, `modified`, `modified_gmt` |
| `exclude` | array | no | Ensure result set excludes specific IDs. |
| `include` | array | no | Limit result set to specific ids. |
| `offset` | integer | no | Offset the result set by a specific number of items. |
| `order` | string | no | Order sort attribute ascending or descending. Allowed values: `asc`, `desc` |
| `orderby` | string | no | Sort collection by object attribute. Allowed values : `date`, `modified`, `id`, `include`, `title`, `slug`, `price`, `popularity`, `rating`, `menu_order`, `comment_count` |
| `parent` | array | no | Limit result set to those of particular parent IDs. |
| `parent_exclude` | array | no | Limit result set to all items except those of a particular parent ID. |
| `type` | string | no | Limit result set to products assigned a specific type. |
| `sku` | string | no | Limit result set to products with specific SKU(s). Use commas to separate. |
| `featured` | boolean | no | Limit result set to featured products. |
| `category` | string | no | Limit result set to products assigned to categories IDs or slugs, separated by commas. |
| `category_operator` | string | no | Operator to compare product category terms. Allowed values: `in`, `not_in`, `and` |
| `brand` | string | no | Limit result set to products assigned to brands IDs or slugs, separated by commas. |
| `brand_operator` | string | no | Operator to compare product brand terms. Allowed values: `in`, `not_in`, `and` |
| `_unstable_tax_[product-taxonomy]` | string | no | Limit result set to products assigned to the term ID of that custom product taxonomy. `[product-taxonomy]` should be the key of the custom product taxonomy registered. |
| `_unstable_tax_[product-taxonomy]_operator` | string | no | Operator to compare custom product taxonomy terms. Allowed values: `in`, `not_in`, `and` |
| `tag` | string | no | Limit result set to products assigned a specific tag ID. |
| `tag_operator` | string | no | Operator to compare product tags. Allowed values: `in`, `not_in`, `and` |
| `on_sale` | boolean | no | Limit result set to products on sale. |
| `min_price` | string | no | Limit result set to products based on a minimum price, provided using the smallest unit of the currency. E.g. provide 10025 for 100.25 USD, which is a two-decimal currency, and 1025 for 1025 JPY, which is a zero-decimal currency. |
| `max_price` | string | no | Limit result set to products based on a maximum price, provided using the smallest unit of the currency. E.g. provide 10025 for 100.25 USD, which is a two-decimal currency, and 1025 for 1025 JPY, which is a zero-decimal currency. |
| `stock_status` | array | no | Limit result set to products with specified stock statuses. Expects an array of strings containing 'instock', 'outofstock' or 'onbackorder'. |
| `attributes` | array | no | Limit result set to specific attribute terms. Expects an array of objects containing `attribute` (taxonomy), `term_id` or `slug`, and optional `operator` for comparison. |
| `attribute_relation` | string | no | The logical relationship between attributes when filtering across multiple at once. |
| `catalog_visibility` | string | no | Determines if hidden or visible catalog products are shown. Allowed values: `any`, `visible`, `catalog`, `search`, `hidden` |
| `rating` | boolean | no | Limit result set to products with a certain average rating. |
```sh
curl "https://example-store.com/wp-json/wc/store/v1/products"
```
**Example response:**
```json
[
{
"id": 34,
"name": "WordPress Pennant",
"slug": "wordpress-pennant",
"variation": "",
"permalink": "https://local.wordpress.test/product/wordpress-pennant/",
"sku": "wp-pennant",
"summary": "This is an external product.
",
"short_description": "This is an external product.
",
"description": "Pellentesque habitant morbi tristique senectus et netus et malesuada fames ac turpis egestas. Vestibulum tortor quam, feugiat vitae, ultricies eget, tempor sit amet, ante. Donec eu libero sit amet quam egestas semper. Aenean ultricies mi vitae est. Mauris placerat eleifend leo.
",
"on_sale": false,
"prices": {
"currency_code": "GBP",
"currency_symbol": "£",
"currency_minor_unit": 2,
"currency_decimal_separator": ".",
"currency_thousand_separator": ",",
"currency_prefix": "£",
"currency_suffix": "",
"price": "1105",
"regular_price": "1105",
"sale_price": "1105",
"price_range": null
},
"average_rating": "0",
"review_count": 0,
"images": [
{
"id": 57,
"src": "https://local.wordpress.test/wp-content/uploads/2020/03/pennant-1.jpg",
"thumbnail": "https://local.wordpress.test/wp-content/uploads/2020/03/pennant-1-324x324.jpg",
"srcset": "https://local.wordpress.test/wp-content/uploads/2020/03/pennant-1.jpg 800w, https://local.wordpress.test/wp-content/uploads/2020/03/pennant-1-324x324.jpg 324w, https://local.wordpress.test/wp-content/uploads/2020/03/pennant-1-100x100.jpg 100w, https://local.wordpress.test/wp-content/uploads/2020/03/pennant-1-416x416.jpg 416w, https://local.wordpress.test/wp-content/uploads/2020/03/pennant-1-300x300.jpg 300w, https://local.wordpress.test/wp-content/uploads/2020/03/pennant-1-150x150.jpg 150w, https://local.wordpress.test/wp-content/uploads/2020/03/pennant-1-768x768.jpg 768w",
"sizes": "(max-width: 800px) 100vw, 800px",
"name": "pennant-1.jpg",
"alt": ""
}
],
"has_options": false,
"is_purchasable": true,
"is_in_stock": true,
"low_stock_remaining": null,
"add_to_cart": {
"text": "Add to cart",
"description": "Add “WordPress Pennant” to your cart"
}
}
]
```
## Single Product by ID
Get a single product by id.
```http
GET /products/:id
```
| Attribute | Type | Required | Description |
| :-------- | :------ | :------: | :--------------------------------- |
| `id` | integer | Yes | The ID of the product to retrieve. |
```sh
curl "https://example-store.com/wp-json/wc/store/v1/products/34"
```
**Example response:**
```json
{
"id": 34,
"name": "WordPress Pennant",
"slug": "wordpress-pennant",
"variation": "",
"permalink": "https://local.wordpress.test/product/wordpress-pennant/",
"sku": "wp-pennant",
"summary": "This is an external product.
",
"short_description": "This is an external product.
",
"description": "Pellentesque habitant morbi tristique senectus et netus et malesuada fames ac turpis egestas. Vestibulum tortor quam, feugiat vitae, ultricies eget, tempor sit amet, ante. Donec eu libero sit amet quam egestas semper. Aenean ultricies mi vitae est. Mauris placerat eleifend leo.
",
"on_sale": false,
"prices": {
"currency_code": "GBP",
"currency_symbol": "£",
"currency_minor_unit": 2,
"currency_decimal_separator": ".",
"currency_thousand_separator": ",",
"currency_prefix": "£",
"currency_suffix": "",
"price": "1105",
"regular_price": "1105",
"sale_price": "1105",
"price_range": null
},
"average_rating": "0",
"review_count": 0,
"images": [
{
"id": 57,
"src": "https://local.wordpress.test/wp-content/uploads/2020/03/pennant-1.jpg",
"thumbnail": "https://local.wordpress.test/wp-content/uploads/2020/03/pennant-1-324x324.jpg",
"srcset": "https://local.wordpress.test/wp-content/uploads/2020/03/pennant-1.jpg 800w, https://local.wordpress.test/wp-content/uploads/2020/03/pennant-1-324x324.jpg 324w, https://local.wordpress.test/wp-content/uploads/2020/03/pennant-1-100x100.jpg 100w, https://local.wordpress.test/wp-content/uploads/2020/03/pennant-1-416x416.jpg 416w, https://local.wordpress.test/wp-content/uploads/2020/03/pennant-1-300x300.jpg 300w, https://local.wordpress.test/wp-content/uploads/2020/03/pennant-1-150x150.jpg 150w, https://local.wordpress.test/wp-content/uploads/2020/03/pennant-1-768x768.jpg 768w",
"sizes": "(max-width: 800px) 100vw, 800px",
"name": "pennant-1.jpg",
"alt": ""
}
],
"has_options": false,
"is_purchasable": true,
"is_in_stock": true,
"low_stock_remaining": null,
"add_to_cart": {
"text": "Add to cart",
"description": "Add “WordPress Pennant” to your cart"
}
}
```
## Single Product by slug
Get a single product by slug.
```http
GET /products/:slug
```
| Attribute | Type | Required | Description |
| :-------- | :----- | :------: | :----------------------------------- |
| `slug` | string | Yes | The slug of the product to retrieve. |
```sh
curl "https://example-store.com/wp-json/wc/store/v1/products/wordpress-pennant"
```
**Example response:**
```json
{
"id": 34,
"name": "WordPress Pennant",
"slug": "wordpress-pennant",
"variation": "",
"permalink": "https://local.wordpress.test/product/wordpress-pennant/",
"sku": "wp-pennant",
"summary": "This is an external product.
",
"short_description": "This is an external product.
",
"description": "Pellentesque habitant morbi tristique senectus et netus et malesuada fames ac turpis egestas. Vestibulum tortor quam, feugiat vitae, ultricies eget, tempor sit amet, ante. Donec eu libero sit amet quam egestas semper. Aenean ultricies mi vitae est. Mauris placerat eleifend leo.
",
"on_sale": false,
"prices": {
"currency_code": "GBP",
"currency_symbol": "£",
"currency_minor_unit": 2,
"currency_decimal_separator": ".",
"currency_thousand_separator": ",",
"currency_prefix": "£",
"currency_suffix": "",
"price": "1105",
"regular_price": "1105",
"sale_price": "1105",
"price_range": null
},
"average_rating": "0",
"review_count": 0,
"images": [
{
"id": 57,
"src": "https://local.wordpress.test/wp-content/uploads/2020/03/pennant-1.jpg",
"thumbnail": "https://local.wordpress.test/wp-content/uploads/2020/03/pennant-1-324x324.jpg",
"srcset": "https://local.wordpress.test/wp-content/uploads/2020/03/pennant-1.jpg 800w, https://local.wordpress.test/wp-content/uploads/2020/03/pennant-1-324x324.jpg 324w, https://local.wordpress.test/wp-content/uploads/2020/03/pennant-1-100x100.jpg 100w, https://local.wordpress.test/wp-content/uploads/2020/03/pennant-1-416x416.jpg 416w, https://local.wordpress.test/wp-content/uploads/2020/03/pennant-1-300x300.jpg 300w, https://local.wordpress.test/wp-content/uploads/2020/03/pennant-1-150x150.jpg 150w, https://local.wordpress.test/wp-content/uploads/2020/03/pennant-1-768x768.jpg 768w",
"sizes": "(max-width: 800px) 100vw, 800px",
"name": "pennant-1.jpg",
"alt": ""
}
],
"has_options": false,
"is_purchasable": true,
"is_in_stock": true,
"low_stock_remaining": null,
"add_to_cart": {
"text": "Add to cart",
"description": "Add “WordPress Pennant” to your cart"
}
}
```
## Product Variations
By default, Store API excludes product variations. You can retrieve the variations for a product by using the `type=variation`.
```sh
curl "https://example-store.com/wp-json/wc/store/v1/products?type=variation"
```
---
## WooCommerce coding standards
*Source: best-practices/coding-standards/coding-standards.md*
# WooCommerce coding standards
Adhering to WooCommerce coding standards is essential for maintaining high code quality, ensuring compatibility, and facilitating easier maintenance and updates. This document outlines the recommended coding practices for developers working within the WooCommerce ecosystem, including the use of hooks, function prefixing, translatable texts, and code structure.
## Position of hooks
Position hooks below the function call to align with the common pattern in the WordPress and WooCommerce ecosystem.
Example:
```php
/**
* Add custom message.
*/
function YOUR_PREFIX_custom_message() {
echo 'This is a custom message';
}
add_action( 'wp_footer', 'YOUR_PREFIX_custom_message' );
```
## Prefixing function calls
Use a consistent prefix for all function calls to avoid conflicts. For the code snippets in this repo, use `YOUR_PREFIX`.
Example:
```php
/**
* Add custom discount.
*/
function YOUR_PREFIX_custom_discount( $price, $product ) {
return $price * 0.9; // 10% discount
}
add_filter( 'woocommerce_product_get_price', 'YOUR_PREFIX_custom_discount', 10, 2 );
```
## Translatable texts and text domains
Ensure all plain texts are translatable and use a consistent text domain, adhering to internationalization best practices. For the code snippets in this repo, use the textdomain `YOUR-TEXTDOMAIN`.
Example:
```php
/**
* Add welcome message.
*/
function YOUR_PREFIX_welcome_message() {
echo __( 'Welcome to our website', 'YOUR-TEXTDOMAIN' );
}
add_action( 'wp_footer', 'YOUR_PREFIX_welcome_message' );
```
## Use of function_exists()
To prevent errors from potential function redeclaration, wrap all function calls with `function_exists()`.
Example:
```php
/**
* Add thumbnail support.
*/
if ( ! function_exists( 'YOUR_PREFIX_theme_setup' ) ) {
function YOUR_PREFIX_theme_setup() {
add_theme_support( 'post-thumbnails' );
}
}
add_action( 'after_setup_theme', 'YOUR_PREFIX_theme_setup' );
```
## Code quality standards
To ensure the highest standards of code quality, developers are encouraged to adhere to the following practices:
### WooCommerce sniffs and WordPress code standards
- **Ensure no code style issues** when code is passed through WooCommerce Sniffs and WordPress Code Standards for PHP_CodeSniffer.
### Automated testing
- **Unit tests**: Implement automated unit tests to validate code functionality in isolation.
- **E2E tests**: Utilize automated end-to-end tests to verify the integrated operation of components within the application.
### Tracking and managing bugs
- **Monitor and aim to minimize** the number of open bugs, ensuring a stable and reliable product.
### Code organization
- **Organize code in self-contained classes** to avoid creating "god/super classes" that contain all plugin code. This practice promotes modularity and simplifies maintenance.
By following these coding standards and practices, developers can create high-quality, maintainable, and secure WooCommerce extensions that contribute positively to the WordPress ecosystem.
---
## CSS/Sass naming conventions
*Source: best-practices/coding-standards/css-sass-naming-conventions.md*
# CSS/Sass naming conventions
## Introduction
Our guidelines are based on those used in [Calypso](https://github.com/Automattic/wp-calypso), which itself follows the [BEM methodology](https://getbem.com/).
Refer to the [Calypso CSS/Sass Coding Guidelines](https://wpcalypso.wordpress.com/devdocs/docs/coding-guidelines/css.md) for full details.
Read more about [BEM key concepts](https://en.bem.info/methodology/key-concepts/).
There are a few differences in WooCommerce which are outlined below.
## Prefixing
As a WordPress plugin WooCommerce has to play nicely with WordPress core and other plugins/themes. To minimize conflict potential, all classes should be prefixed with `.woocommerce-`.
## Class names
When naming classes, remember:
- **Block** - Standalone entity that is meaningful on its own. Such as the name of a component.
- **Element** - Parts of a block and have no standalone meaning. They are semantically tied to its block.
- **Modifier** - Flags on blocks or elements. Use them to change appearance or behavior.
### Example
```css
/* Block */
.woocommerce-loop {}
/* Nested block */
.woocommerce-loop-product {}
/* Modifier */
.woocommerce-loop-product--sale {}
/* Element */
.woocommerce-loop-product__link {}
/* Element */
.woocommerce-loop-product__button-add-to-cart {}
/* Modifier */
.woocommerce-loop-product__button-add-to-cart--added {}
```
**Note:** `.woocommerce-loop-product` is not named as such because the block is nested within `.woocommerce-loop`. It's to be specific so that we can have separate classes for single products, cart products, etc. **Nested blocks do not need to inherit their parents full name.**
## TL;DR
- Follow the [WordPress Coding standards for CSS](https://make.wordpress.org/core/handbook/best-practices/coding-standards/css/) unless it contradicts anything here.
- Follow [Calypso guidelines for CSS](https://wpcalypso.wordpress.com/devdocs/docs/coding-guidelines/css.md).
- Use BEM for [class names](https://en.bem.info/methodology/naming-convention/).
- Prefix all class names.
---
## WooCommerce grammar, punctuation and capitalization guide
*Source: best-practices/coding-standards/grammar-punctuation-capitalization.md*
# WooCommerce grammar, punctuation and capitalization guide
Following grammar, punctuation and style guidelines helps keep our presentation consistent. Users have a better experience if they know what to expect and where to find the information they need.
## Basics
**Be democratic**. Some people read every word. Some scan and search or prefer video. Help everyone.
**Be focused**. Lead with the most important information in sentences, paragraphs, and sections.
**Be concise**. Use plain language and brief sentences.
**Be consistent**. Follow our guidelines and style tips.
**Be specific**. Communicate crystal clear. Trim the fat.
## Guidelines
### Abbreviations and acronyms
Spell out the full version on first mention with abbreviation or acronym in parentheses. Use the short version on second and consecutive mentions.
- First use: Payment Card Industry Data Security Standard (PCI-DSS)
- Second use: PCI-DSS
If the abbreviation or acronym is widely known, use it as is. For example: API, FAQ, HTML, PHP, SQL, SSL.
### Active voice
With active voice, the subject in the sentence performs the action. With passive voice, the subject in the sentence has the action done unto it.
- Active: Jon downloaded his extension files.
- Passive: The extension files were downloaded by Jon.
### Capitalization
Cases when we capitalize:
- Blog post and documentation article titles: First word.
- Documentation headings (h2): Use sentence case (not title case) for docs titles and subheadings.
- Product names: Every word except prepositions and conjunctions.
- Sentences: First word.
- Unordered/Bulleted lists - First word of each entry.
Cases when we use lower case:
- "ecommerce" (not "eCommerce")
- email address - `info@woocommerce.com`
- website URL - `developer.woocommerce.com`
### Contractions
Use with discretion. Contractions, such as I'm and there's, give writing an informal and conversational feel, but may be inappropriate if content is being translated. For example, sometimes the not in don't is ignored by online translators.
### Emoji
Emoji can add subtle emotion and humor or bring visual attention to your content. Use rarely and intentionally.
### Numbers
Spell out a number at the start of a sentence, and spell out numbers one through nine in all cases. Use numerals in all other cases.
- Ten products will launch in June. Not: 10 products will launch in June.
- Lance ran a marathon and won third place in his age group.
- I bought five hammers and 21 types of nails for the building project.
- There were 18 kinds of beer on tap at the pub.
Use a comma for numbers with more than three digits: 41,500, 170,000, 1,000,000 or 1 million.
#### Currency
Use currency codes and not only the symbol/sign when specifying dollars. Whole amounts need not have a decimal and two places.
- USD $20
- CAD $19.99
- AUD $39.50
When writing about other currencies, use the symbol/sign.
- €995
- ¥5,000
- £18.99
#### Dates
Spell out the day of the week and month, using the format:
- Monday, December 12, 2016
#### Decimals
Use decimal points when a number is difficult to convert to a fraction, such as 3.141 or 98.5 or 0.29.
#### Fractions
Spell out fractions: one-fourth
#### Percent
Spell out the word 'percent.' Don't use % symbol unless space is limited, e.g., for use on social media.
#### Phone numbers
Use hyphens without spaces between numbers, not parentheses or periods. Use a [country code](https://countrycode.org/) for all countries.
- +1-555-867-5309
- +34-902-1899-00
#### Range and span
Use a hyphen to indicate a range or span of numbers: 20-30 days.
#### Temperature
Use the degree symbol and the capital C abbreviation for Celsius and capital F abbreviation for Fahrenheit.
- 27°C
- 98°F
#### Times
Use numbers and am or pm with a space and without periods.
- 7:00 am
- 7:30 pm
Use a hyphen between times to indicate a time period in am or pm. Use 'to' if the time period spans am and pm.
- 7:00-9:00 am and 7:00 am to 10:30 pm
Specify a time zone when writing about an event with potential attendees worldwide. Automattic uses Coordinated Universal Time (UTC).
Abbreviate U.S. time zones:
- Eastern time: EDT or EST
- Central time: CDT or CST
- Mountain time: MDT or MST
- Pacific time: PDT or PST
#### Years
Abbreviate decades
- 80s and 90s
- 1900s and 1890s
### Punctuation
#### Ampersands
Ampersands need only be used when part of an official company/brand name. Should not be substituted for 'and.'
- Ben & Jerry's
- Andre, Timo, and Donny went to a football game at Camp Nou.
#### Apostrophes
An apostrophe makes a word possessive. If a word already ends in s and is singular, add an 's. If a word ends in s and is plural, add an apostrophe.
- A teammate borrowed Sam's bike.
- A teammate borrowed Chris's bike.
- Employees hid the office managers' pens.
These are possessives: FAQ's questions, HE's weekly rotation. These are plural: FAQs and HEs.
#### Colons
Use a colon to create a list.
- Aaron ordered three kinds of donuts: glazed, chocolate, and pumpkin.
#### Commas
Use a serial comma, also known as an Oxford comma, when compiling a list.
- Jinny likes sunflowers, daisies, and peonies.
Use common sense for other cases. Read the sentence out loud, and use a comma where clarity or pause may be needed.
#### Dashes and hyphens
Use a hyphen - without spaces on either side to link words, or indicate a span or range.
- first-time user
- Monday-Friday
Use an em dash - without spaces on either side to indicate an aside.
Use a true em dash, not hyphens.
- Multivariate testing-just one of our new Pro features-can help you grow your business.
- Austin thought Brad was the donut thief, but he was wrong-it was Lain.
#### Ellipses
Ellipses ... can be used to indicate an indefinite ending to a sentence or to show words are omitted when used in brackets [...] Use rarely.
#### Exclamation points
Use an exclamation point rarely and use only one.
Exclamation points follow the same placement convention explained in Periods.
#### Periods
Periods should be:
- Inside quotation marks
- Outside parentheses when the portion in parentheses is part of a larger sentence
- Inside parentheses when the part in parentheses can stand on its own
Examples
- Jake said, "I had the best day ever."
- She went to the supermarket (and to the nail salon).
- My mom loves pizza and beer. (Beer needs to be cold and dark.)
#### Question marks
Question marks follow the same placement convention explained in Periods.
#### Quotation marks
Periods and commas go within quotation marks. Question marks within quotes follow logic - if the question mark is part of the quotation, it goes within. If you're asking a question that ends with a quote, it goes outside the quote.
Use single quotation marks for quotes within quotes.
- Who sings, "All These Things That I've Done"?
- Brandon Flowers of The Killers said, "I was inspired and on a roll when I wrote, 'I got soul, but I'm not a soldier.'"
#### Semicolons
Semicolons can be used to join two related phrases.
- Their debut solo album hit the Top 10 in 20 countries; it was #1 in the UK.
### People, places, and things
#### Company names and products
Use brand identity names and products as written on official websites.
- Pull&Bear
- UE Boom
Refer to a company or product as 'it' (not 'they').
- WooCommerce is, and not WooCommerce are.
#### File extensions
A file extension type should be all uppercase without periods. Add a lowercase s to make plural.
- HTML
- JPEG
- PDF
A specific file should have a lowercase extension type:
- dancingcat.gif
- SalesReport2016.pdf
- firethatcannon.mp3
#### Names and titles
First mention of a person should include their first and last name. Second and consecutive mentions can use first name only.
Capitalize job titles, the names of teams, and departments.
- Happiness Engineers or HEs
- Team Apollo
- Legal
#### Pronouns
Use he/him/his and she/her/her as appropriate. Don't use "one" as a pronoun. Use they/them/their if gender is unknown or when referring to a group.
#### Quotations
Use present tense when quoting someone.
- "I love that WooCommerce is free and flexible," says Brent Jamison.
#### Schools
The first time you mention a school, college, or university in a piece of writing, refer to it by its full official name. On all other mentions, use its more common abbreviation.
- Georgia Institute of Technology, Georgia Tech
- Georgia State University, GSU
#### States, cities, and countries
Spell out all city and state names. Don't abbreviate city names.
On first mention, write out United States. For further mentions, use U.S. The same applies to other countries or federations with a common abbreviation, such as European Union (EU) and United Kingdom (UK).
#### URLs and websites
Capitalize the names of websites and web publications. Don't italicize.
Avoid writing out URLs; omit `http://www` when it's necessary.
### Slang and jargon
Write in plain English. Text should be universally understood, with potential for translation. Briefly define technical terms when needed.
### Text formatting
Use italics to indicate the title of a book, movie, or album.
- The Oren Klaff book Pitch Anything is on sale for USD $5.99.
Avoid:
- Underline formatting
- A mix of italic, bold, caps, and underline
Left-align text, never center or right-aligned.
Leave one space between sentences, never two.
---
## Naming conventions
*Source: best-practices/coding-standards/naming-conventions.md*
# Naming conventions
## PHP
WooCommerce core generally follows [WordPress PHP naming conventions](https://make.wordpress.org/core/handbook/best-practices/coding-standards/php/#naming-conventions).
There are some additional conventions that apply, depending on the location of the code.
### `/src`
Classes defined inside `/src` follow the [PSR-4](https://www.php-fig.org/psr/psr-4/) standard. See the [README for `/src`](https://github.com/woocommerce/woocommerce/blob/trunk/plugins/woocommerce/src/README.md) for more information.
The following conventions apply to this directory:
- No class name prefix is needed, as all classes in this location live within the `Automattic\WooCommerce` namespace.
- Classes are named using `CamelCase` convention.
- Functions are named using `snake_case` convention.
- Class file names should match the class name. They do not need a `class-` prefix.
- The namespace should match the directory structure.
- Hooks are prefixed with `woocommerce_`.
- Hooks are named using `snake_case` convention.
For example, the class defined in `src/Util/StringUtil.php` should be named `StringUtil` and should be in the `Automattic\WooCommerce\Util` namespace.
### `/includes`
The `/includes` directory contains legacy code that does not follow the PSR-4 standard. See the [README for `/includes`](https://github.com/woocommerce/woocommerce/blob/trunk/plugins/woocommerce/includes/README.md) for more information.
The following conventions apply to this directory:
- Class names are prefixed with `WC_`.
- Classes are named using `Upper_Snake_Case` convention.
- Functions are prefixed with `wc_`.
- Functions are named using `snake_case` convention.
- Hooks are prefixed with `woocommerce_`.
- Hooks are named using `snake_case` convention.
Class name examples:
- `WC_Cache_Helper`
- `WC_Cart`
Function name examples:
- `wc_get_product()`
- `wc_is_active_theme()`
Hook name examples (actions or filters):
- `woocommerce_after_checkout_validation`
- `woocommerce_get_formatted_order_total`
## JS
WooCommerce core follows [WordPress JS naming conventions](https://developer.wordpress.org/coding-standards/wordpress-coding-standards/javascript/#naming-conventions).
As with PHP, function, class, and hook names should be prefixed, but the convention for JS is slightly different.
- Global class names are prefixed with `WC`. Class names exported from modules are not prefixed.
- Classes are named using `UpperCamelCase` convention.
- Global function names are prefixed with `wc`. Function names exported from modules are not prefixed.
- Functions are named using `camelCase` convention.
- Hooks names are prefixed with `woocommerce`.
- Hooks are named using `camelCase` convention.
Global class name example:
- `WCOrdersTable`
Global function name example:
- `wcSettings()`
Hook name example (actions or filters):
- `woocommerceTracksEventProperties`
## CSS and SASS
See [CSS/Sass Naming Conventions](./css-sass-naming-conventions.md).
---
## How to add a custom field to simple and variable products
*Source: best-practices/data-management/adding-a-custom-field-to-variable-products.md*
# How to add a custom field to simple and variable products
In this tutorial you will learn how to create a custom field for a product and show it in your store. Together we will set up the skeleton plugin, and learn about WP naming conventions and WooCommerce hooks. In the end, you will have a functioning plugin for adding a custom field.
The [full plugin code](https://github.com/EdithAllison/woo-product-custom-fields) was written based on WordPress 6.2 and WooCommerce 7.6.0
## Prerequisites
To do this tutorial you will need to have a WordPress install with the WooCommerce plugin activated, and you will need at least one [simple product set up](https://woocommerce.com/document/managing-products/), or you can [import the WooCommerce sample product range](https://woocommerce.com/document/importing-woocommerce-sample-data/).
## Setting up the plugin
To get started, let's do the steps to [create a skeleton plugin](https://github.com/woocommerce/woocommerce/tree/trunk/packages/js/create-woo-extension).
First, navigate to your wp-content/plugins folder, then run:
```sh
npx @wordpress/create-block -t @woocommerce/create-woo-extension woo-product-fields
```
Then we navigate to our new folder and run the install and build:
```sh
cd woo-product-fields
npm install # Install dependencies
npm run build # Build the javascript
```
WordPress has its own class file naming convention which doesn't work with PSR-4 out of the box. To learn more about Naming Conventions see the [WP Handbook](https://developer.wordpress.org/coding-standards/wordpress-coding-standards/php/#naming-conventions). We will use the standard format of "class-my-classname.php" format, so let's go to the composer.json file and change the autoload to:
```json
"autoload": {
"classmap": ["includes/", "includes/admin/"]
},
```
After saving run dump-autoload to generate the class map by running in the Terminal:
```sh
composer dump-autoload -o
```
This generates a new vendor/composer/autoload_classmap.php file containing a list of all our classes in the /includes/ and /includes/admin/ folder. We will need to repeat this command when we add, delete or move class files.
## WooCommerce hooks
Our aim is to create a new custom text field for WooCommerce products to save new stock information for display in the store. To do this, we need to modify the section of the Woo data in the admin area which holds the stock info.
WooCommerce allows us to add our code to these sections through [hooks](https://developer.wordpress.org/plugins/hooks/), which are a standard WordPress method to extend code. In the "Inventory" section we have the following action hooks available to us:
For our Woo extension, we'll be appending our field right at the end with `woocommerce_product_options_inventory_product_data`.
## Creating our class
Let's get started with creating a new class which will hold the code for the field. Add a new file with the name `class-product-fields.php` to the `/includes/admin/` folder. Within the class, we add our namespace, an abort if anyone tries to call the file directly and a `__construct` method which calls the `hooks()` method:
```php
hooks();
}
private function hooks() {}
}
```
Then in Terminal we run `composer dump-autoload -o` to regenerate the class map. Once that's done, we add the class to our `setup.php` `__construct()` function like so:
```php
class Setup {
public function __construct() {
add_action( 'admin_enqueue_scripts', array( $this, 'register_scripts' ) );
new ProductFields();
}
}
```
## Adding the custom field
With the class set up and being called, we can create a function to add the custom field. WooCommerce has its own `woocommerce_wp_text_input( $args )` function which we can use here. `$args` is an array which allows us to set the text input data, and we will be using the global $product_object to access stored metadata.
```php
public function add_field() {
global $product_object;
?>
'_new_stock_information',
'label' => __( 'New Stock', 'woo_product_field' ),
'description' => __( 'Information shown in store', 'woo_product_field' ),
'desc_tip' => true,
'value' => $product_object->get_meta( '_new_stock_information' )
)
); ?>
update_meta_data( '_new_stock_information', sanitize_text_field( $_POST['_new_stock_information'] ) );
$product->save_meta_data();
}
}
```
This function checks if our new field is in the POST array. If yes, we create the product object, update our metadata and save the metadata. The `update_meta_data` function will either update an existing meta field or add a new one. And as we're inserting into the database, we must [sanitize our field value](https://developer.wordpress.org/apis/security/sanitizing/).
And to make it all work, we add the hooks:
```php
private function hooks() {
add_action( 'woocommerce_product_options_inventory_product_data', array( $this, 'add_field' ) );
add_action( 'woocommerce_process_product_meta', array( $this, 'save_field' ), 10, 2 );
}
```
Now if we refresh our product screen, we can see our new field.
If we add data and save the product, then the new meta data is inserted into the database.
At this point you have a working extension that saves a custom field for a product as product meta.
Showing the field in the store
If we want to display the new field in our store, then we can do this with the `get_meta()` method of the Woo product class: `$product->get_meta( '_new_stock_information' )`
Let's get started by creating a new file /includes/class-product.php. You may have noticed that this is outside the `/admin/` folder as this code will run in the front. So when we set up the class, we also adjust the namespace accordingly:
```php
hooks();
}
private function hooks() { }
}
```
Again we run `composer dump-autoload -o` to update our class map.
If you took a look at the extension setup you may have noticed that `/admin/setup.php` is only called if we're within WP Admin. So to call our new class we'll add it directly in `/woo-product-field.php`:
```php
public function __construct() {
if ( is_admin() ) {
new Setup();
}
new WooProductField\Product();
}
```
For adding the field to the front we have several options. We could create a theme template, but if we are working with a WooCommerce-compatible theme and don't need to make any other changes then a quick way is to use hooks. If we look into `/woocommerce/includes/wc-template-hooks.php` we can see all the existing actions for `woocommerce_single_product_summary` which controls the section at the top of the product page:
For our extension, let's add the new stock information after the excerpt by using 21 as the priority:
```php
private function hooks() {
add_action( 'woocommerce_single_product_summary', array( $this, 'add_stock_info' ), 21 );
}
```
In our function we output the stock information with the [appropriate escape function](https://developer.wordpress.org/apis/security/escaping/), in this case, I'm suggesting to use `esc_html()` to force plain text.
```php
public function add_stock_info() {
global $product;
?>
get_meta( '_new_stock_information' ) ); ?>
ID );
woocommerce_wp_text_input(
array(
'id' => '_new_stock_information' . '[' . $loop . ']',
'label' => __( 'New Stock Information', 'woo_product_field' ),
'wrapper_class' => 'form-row form-row-full',
'value' => $variation_product->get_meta( '_new_stock_information' )
)
);
}
```
For saving we use:
```php
public function save_variation_field( $variation_id, $i ) {
if ( isset( $_POST['_new_stock_information'][$i] ) ) {
$variation_product = wc_get_product( $variation_id );
$variation_product->update_meta_data( '_new_stock_information', sanitize_text_field( $_POST['_new_stock_information'][$i] ) );
$variation_product->save_meta_data();
}
}
```
And we now have a new variation field that stores our new stock information. If you cannot see the new field, please make sure to enable "Manage Stock" for the variation by ticking the checkbox in the variation details.
Displaying the variation in the front store works a bit differently for variable products as only some content on the page is updated when the customer makes a selection. This exceeds the scope of this tutorial, but if you are interested have a look at `/woocommerce/assets/js/frontend/add-to-cart-variation.js` to see how WooCommerce does it.
## How to find hooks?
Everyone will have their own preferred way, but for me, the quickest way is to look in the WooCommerce plugin code. The code for each data section can be found in `/woocommerce/includes/admin/meta-boxes/views`. To view how the inventory section is handled check the `html-product-data-inventory.php` file, and for variations take a look at `html-variation-admin.php`.
---
## Developing using WooCommerce CRUD objects
*Source: best-practices/data-management/crud-objects.md*
# Developing using WooCommerce CRUD objects
CRUD is an abbreviation of the four basic operations you can do to a database or resource - Create, Read, Update, Delete.
[WooCommerce 3.0 introduced CRUD objects](https://woocommerce.wordpress.com/2016/10/27/the-new-crud-classes-in-woocommerce-2-7/) for working with WooCommerce data. **Whenever possible these objects should be used in your code instead of directly updating metadata or using WordPress post objects.**
Each of these objects contains a schema for the data it controls (properties), a getter and setter for each property, and a save/delete method which talks to a data store. The data store handles the actual saving/reading from the database. The object itself does not need to be aware of where the data is stored.
## The benefits of CRUD
* Structure - Each object has a pre-defined structure and keeps its own data valid.
* Control - We control the flow of data, and any validation needed, so we know when changes occur.
* Ease of development - As a developer, you don't need to know the internals of the data you're working with, just the names.
* Abstraction - The data can be moved elsewhere, e.g. custom tables, without affecting existing code.
* Unification - We can use the same code for updating things in admin as we do in the REST API and CLIs. Everything is unified.
* Simplified code - Less procedural code to update objects which reduces likelihood of malfunction and adds more unit test coverage.
## CRUD object structure
The [`WC_Data`](https://github.com/woocommerce/woocommerce/blob/trunk/plugins/woocommerce/includes/abstracts/abstract-wc-data.php) class is the basic implementation for CRUD objects, and all CRUD objects extend it. The most important properties to note are `$data`, which is an array of props supported in each object, and `$id`, which is the object's ID.
The [coupon object class](https://github.com/woocommerce/woocommerce/blob/trunk/plugins/woocommerce/includes/class-wc-coupon.php) is a good example of extending `WC_Data` and adding CRUD functions to all properties.
### Data
`$data` stores the property names, and default values:
```php
/**
* Data array, with defaults.
* @since 3.0.0
* @var array
*/
protected $data = array(
'code' => '',
'amount' => 0,
'date_created' => '',
'date_modified' => '',
'discount_type' => 'fixed_cart',
'description' => '',
'date_expires' => '',
'usage_count' => 0,
'individual_use' => false,
'product_ids' => array(),
'excluded_product_ids' => array(),
'usage_limit' => 0,
'usage_limit_per_user' => 0,
'limit_usage_to_x_items' => 0,
'free_shipping' => false,
'product_categories' => array(),
'excluded_product_categories' => array(),
'exclude_sale_items' => false,
'minimum_amount' => '',
'maximum_amount' => '',
'email_restrictions' => array(),
'used_by' => array(),
);
```
### Getters and setters
Each one of the keys in this array (property) has a getter and setter, e.g. `set_used_by()` and `get_used_by()`. `$data` itself is private, so the getters and setters must be used to access the data.
Example getter:
```php
/**
* Get records of all users who have used the current coupon.
* @since 3.0.0
* @param string $context
* @return array
*/
public function get_used_by( $context = 'view' ) {
return $this->get_prop( 'used_by', $context );
}
```
Example setter:
```php
/**
* Set which users have used this coupon.
* @since 3.0.0
* @param array $used_by
* @throws WC_Data_Exception
*/
public function set_used_by( $used_by ) {
$this->set_prop( 'used_by', array_filter( $used_by ) );
}
```
`set_prop` and `get_prop` are part of `WC_Data`. These apply various filters (based on context) and handle changes, so we can efficiently save only the props that have changed rather than all props.
A note on `$context`: when getting data for use on the front end or display, `view` context is used. This applies filters to the data so extensions can change the values dynamically. `edit` context should be used when showing values to edit in the backend, and for saving to the database. Using `edit` context does not apply any filters to the data.
### The constructor
The constructor of the CRUD objects facilitates the read from the database. The actual read is not done by the CRUD class, but by its data store.
Example:
```php
/**
* Coupon constructor. Loads coupon data.
* @param mixed $data Coupon data, object, ID or code.
*/
public function __construct( $data = '' ) {
parent::__construct( $data );
if ( $data instanceof WC_Coupon ) {
$this->set_id( absint( $data->get_id() ) );
} elseif ( is_numeric( $data ) && 'shop_coupon' === get_post_type( $data ) ) {
$this->set_id( $data );
} elseif ( ! empty( $data ) ) {
$this->set_id( wc_get_coupon_id_by_code( $data ) );
$this->set_code( $data );
} else {
$this->set_object_read( true );
}
$this->data_store = WC_Data_Store::load( 'coupon' );
if ( $this->get_id() > 0 ) {
$this->data_store->read( $this );
}
}
```
Note how it sets the ID based on the data passed to the object, then calls the data store to retrieve the data from the database. Once the data is read via the data store, or if no ID is set, `$this->set_object_read( true );` is set so the data store and CRUD object knows it's read. Once this is set, changes are tracked.
### Saving and deleting
Save and delete methods are optional on CRUD child classes because the `WC_Data` parent class can handle it. When `save` is called, the data store is used to store data to the database. Delete removes the object from the database. `save` must be called for changes to persist, otherwise they will be discarded.
The save method in `WC_Data` looks like this:
```php
/**
* Save should create or update based on object existence.
*
* @since 2.6.0
* @return int
*/
public function save() {
if ( $this->data_store ) {
// Trigger action before saving to the DB. Allows you to adjust object props before save.
do_action( 'woocommerce_before_' . $this->object_type . '_object_save', $this, $this->data_store );
if ( $this->get_id() ) {
$this->data_store->update( $this );
} else {
$this->data_store->create( $this );
}
return $this->get_id();
}
}
```
Update/create is used depending on whether the object has an ID yet. The ID will be set after creation.
The delete method is like this:
```php
/**
* Delete an object, set the ID to 0, and return result.
*
* @since 2.6.0
* @param bool $force_delete
* @return bool result
*/
public function delete( $force_delete = false ) {
if ( $this->data_store ) {
$this->data_store->delete( $this, array( 'force_delete' => $force_delete ) );
$this->set_id( 0 );
return true;
}
return false;
}
```
## CRUD usage examples
### Creating a new simple product
```php
$product = new WC_Product_Simple();
$product->set_name( 'My Product' );
$product->set_slug( 'myproduct' );
$product->set_description( 'A new simple product' );
$product->set_regular_price( '9.50' );
$product->save();
$product_id = $product->get_id();
```
### Updating an existing coupon
```php
$coupon = new WC_Coupon( $coupon_id );
$coupon->set_discount_type( 'percent' );
$coupon->set_amount( 25.00 );
$coupon->save();
```
### Retrieving a customer
```php
$customer = new WC_Customer( $user_id );
$email = $customer->get_email();
$address = $customer->get_billing_address();
$name = $customer->get_first_name() . ' ' . $customer->get_last_name();
```
---
## Data storage primer
*Source: best-practices/data-management/data-storage.md*
# Data storage primer
When developing for WordPress and WooCommerce, it's important to consider the nature and permanence of your data. This will help you decide the best way to store it. Here's a quick primer:
## Transients
If the data may not always be present (i.e., it expires), use a [transient](https://developer.wordpress.org/apis/handbook/transients/). Transients are a simple and standardized way of storing cached data in the database temporarily by giving it a custom name and a timeframe after which it will expire and be deleted.
## WP Cache
If the data is persistent but not always present, consider using the [WP Cache](https://developer.wordpress.org/reference/classes/wp_object_cache/). The WP Cache functions allow you to cache data that is computationally expensive to regenerate, such as complex query results.
## wp_options Table
If the data is persistent and always present, consider the [wp_options table](https://developer.wordpress.org/apis/handbook/options/). The Options API is a simple and standardized way of storing data in the wp_options table in the WordPress database.
## Post Types
If the data type is an entity with n units, consider a [post type](https://developer.wordpress.org/post_type/). Post types are "types" of content that are stored in the same way, but are easy to distinguish in the code and UI.
## Taxonomies
If the data is a means of sorting/categorizing an entity, consider a [taxonomy](https://developer.wordpress.org/taxonomy/). Taxonomies are a way of grouping things together.
## Logging
Logs should be written to a file using the [WC_Logger](https://woocommerce.com/wc-apidocs/class-WC_Logger.html) class. This is a simple and standardized way of recording events and errors for debugging purposes.
Remember, the best method of data storage depends on the nature of the data and how it will be used in your application.
---
## How to manage WooCommerce Data Stores
*Source: best-practices/data-management/data-stores.md*
# How to manage WooCommerce Data Stores
## Introduction
Data store classes act as a bridge between WooCommerce's data CRUD classes (`WC_Product`, `WC_Order`, `WC_Customer`, etc) and the database layer. With the database logic separate from data, WooCommerce becomes more flexible. The data stores shipped with WooCommerce core (powered by WordPress' custom posts system and some custom tables) can be swapped out for a different database structure, type, or even be powered by an external API.
This guide will walk through the structure of a data store class, how to create a new data store, how to replace a core data store, and how to call a data store from your own code.
The examples in this guide will look at the [`WC_Coupon`](https://github.com/woocommerce/woocommerce/blob/dcecf0f22890f3cd92fbea13a98c11b2537df2a8/includes/class-wc-coupon.php#L19) CRUD data class and [`WC_Coupon_Data_Store_CPT`](https://github.com/woocommerce/woocommerce/blob/dcecf0f22890f3cd92fbea13a98c11b2537df2a8/includes/data-stores/class-wc-coupon-data-store-cpt.php), an implementation of a coupon data store using WordPress custom post types. This is how coupons are currently stored in WooCommerce.
The important thing to know about `WC_Coupon` or any other CRUD data class when working with data stores is which props (properties) they contain. This is defined in the [`data`](https://github.com/woocommerce/woocommerce/blob/dcecf0f22890f3cd92fbea13a98c11b2537df2a8/includes/class-wc-coupon.php#L26) array of each class.
## Structure
Every data store for a CRUD object should implement the `WC_Object_Data_Store_Interface` interface.
`WC_Object_Data_Store_Interface` includes the following methods:
* `create`
* `read`
* `update`
* `delete`
* `read_meta`
* `delete_meta`
* `add_meta`
* `update_meta`
The `create`, `read`, `update`, and `delete` methods should handle the CRUD logic for your props:
* `create` should create a new entry in the database. Example: Create a coupon.
* `read` should query a single entry from the database and set properties based on the response. Example: Read a coupon.
* `update` should make changes to an existing entry. Example: Update or edit a coupon.
* `delete` should remove an entry from the database. Example: Delete a coupon.
All data stores must implement handling for these methods.
In addition to handling your props, other custom data can be passed. This is considered `meta`. For example, coupons can have custom data provided by plugins.
The `read_meta`, `delete_meta`, `add_meta`, and `update_meta` methods should be defined so meta can be read and managed from the correct source. In the case of our WooCommerce core classes, we define them in `WC_Data_Store_WP` and then use the same code for all of our data stores. They all use the WordPress meta system. You can redefine these if meta should come from a different source.
Your data store can also implement other methods to replace direct queries. For example, the coupons data store has a public `get_usage_by_user_id` method. Data stores should always define and implement an interface for the methods they expect, so other developers know what methods they need to write. Put another way, in addition to the `WC_Object_Data_Store_Interface` interface, `WC_Coupon_Data_Store_CPT` also implements `WC_Coupon_Data_Store_Interface`.
## Replacing a data store
Let's look at how we would replace the `WC_Coupon_Data_Store_CPT` class with a `WC_Coupon_Data_Store_Custom_Table` class. Our examples will just provide stub functions, instead of a full working solution. Imagine that we would like to store coupons in a table named `wc_coupons` with the following columns:
```text
id, code, amount, date_created, date_modified, discount_type, description, date_expires, usage_count,individual_use, product_ids, excluded_product_ids, usage_limit, usage_limit_per_user, limit_usage_to_x_items, free_shipping, product_categories, excluded_product_categories, exclude_sale_items, minimum_amount, maximum_amount, email_restrictions, used_by
```
These column names match 1 to 1 with prop names.
First we would need to create a new data store class to contain our logic:
```php
/**
* WC Coupon Data Store: Custom Table.
*/
class WC_Coupon_Data_Store_Custom_Table extends WC_Data_Store_WP implements WC_Coupon_Data_Store_Interface, WC_Object_Data_Store_Interface {
}
```
Note that we implement the main `WC_Object_Data_Store_Interface` interface as well as the ` WC_Coupon_Data_Store_Interface` interface. Together, these represent all the methods we need to provide logic for.
We would then define the CRUD handling for these properties:
```php
/**
* Method to create a new coupon in the database.
*
* @param WC_Coupon
*/
public function create( &$coupon ) {
$coupon->set_date_created( current_time( 'timestamp' ) );
/**
* This is where code for inserting a new coupon would go.
* A query would be built using getters: $coupon->get_code(), $coupon->get_description(), etc.
* After the INSERT operation, we want to pass the new ID to the coupon object.
*/
$coupon->set_id( $coupon_id );
// After creating or updating an entry, we need to also cause our 'meta' to save.
$coupon->save_meta_data();
// Apply changes let's the object know that the current object reflects the database and no "changes" exist between the two.
$coupon->apply_changes();
// It is helpful to provide the same hooks when an action is completed, so that plugins can interact with your data store.
do_action( 'woocommerce_new_coupon', $coupon_id );
}
/**
* Method to read a coupon.
*
* @param WC_Coupon
*/
public function read( &$coupon ) {
$coupon->set_defaults();
// Read should do a check to see if this is a valid coupon
// and otherwise throw an 'Invalid coupon.' exception.
// For valid coupons, set $data to contain our database result.
// All props should be set using set_props with output from the database. This "hydates" the CRUD data object.
$coupon_id = $coupon->get_id();
$coupon->set_props( array(
'code' => $data->code,
'description' => $data->description,
// ..
) );
// We also need to read our meta data into the object.
$coupon->read_meta_data();
// This flag reports if an object has been hydrated or not. If this ends up false, the database hasn't correctly set the object.
$coupon->set_object_read( true );
do_action( 'woocommerce_coupon_loaded', $coupon );
}
/**
* Updates a coupon in the database.
*
* @param WC_Coupon
*/
public function update( &$coupon ) {
// Update coupon query, using the getters.
$coupon->save_meta_data();
$coupon->apply_changes();
do_action( 'woocommerce_update_coupon', $coupon->get_id() );
}
/**
* Deletes a coupon from the database.
*
* @param WC_Coupon
* @param array $args Array of args to pass to the delete method.
*/
public function delete( &$coupon, $args = array() ) {
// A lot of objects in WordPress and WooCommerce support
// the concept of trashing. This usually is a flag to move the object
// to a "recycling bin". Since coupons support trashing, your layer should too.
// If an actual delete occurs, set the coupon ID to 0.
$args = wp_parse_args( $args, array(
'force_delete' => false,
) );
$id = $coupon->get_id();
if ( $args['force_delete'] ) {
// Delete Query
$coupon->set_id( 0 );
do_action( 'woocommerce_delete_coupon', $id );
} else {
// Trash Query
do_action( 'woocommerce_trash_coupon', $id );
}
}
```
We are extending `WC_Data_Store_WP` so our classes will continue to use WordPress' meta system.
As mentioned in the structure section, we are responsible for implementing the methods defined by `WC_Coupon_Data_Store_Interface`. Each interface describes the methods and parameters it accepts, and what your function should do.
A coupons replacement would look like the following:
```php
/**
* Increase usage count for current coupon.
*
* @param WC_Coupon
* @param string $used_by Either user ID or billing email
*/
public function increase_usage_count( &$coupon, $used_by = '' ) {
}
/**
* Decrease usage count for current coupon.
*
* @param WC_Coupon
* @param string $used_by Either user ID or billing email
*/
public function decrease_usage_count( &$coupon, $used_by = '' ) {
}
/**
* Get the number of uses for a coupon by user ID.
*
* @param WC_Coupon
* @param id $user_id
* @return int
*/
public function get_usage_by_user_id( &$coupon, $user_id ) {
}
/**
* Return a coupon code for a specific ID.
* @param int $id
* @return string Coupon Code
*/
public function get_code_by_id( $id ) {
}
/**
* Return an array of IDs for for a specific coupon code.
* Can return multiple to check for existence.
* @param string $code
* @return array Array of IDs.
*/
public function get_ids_by_code( $code ) {
}
```
Once all the data store methods are defined and logic written, we need to tell WooCommerce to load our new class instead of the built-in class. This is done using the `woocommerce_data_stores` filter. An array of data store slugs is mapped to default WooCommerce classes. Example:
```php
'coupon' => 'WC_Coupon_Data_Store_CPT',
'customer' => 'WC_Customer_Data_Store',
'customer-download' => 'WC_Customer_Download_Data_Store',
'customer-session' => 'WC_Customer_Data_Store_Session',
'order' => 'WC_Order_Data_Store_CPT',
'order-refund' => 'WC_Order_Refund_Data_Store_CPT',
'order-item' => 'WC_Order_Item_Data_Store',
'order-item-coupon' => 'WC_Order_Item_Coupon_Data_Store',
'order-item-fee' => 'WC_Order_Item_Fee_Data_Store',
'order-item-product' => 'WC_Order_Item_Product_Data_Store',
'order-item-shipping' => 'WC_Order_Item_Shipping_Data_Store',
'order-item-tax' => 'WC_Order_Item_Tax_Data_Store',
'payment-token' => 'WC_Payment_Token_Data_Store',
'product' => 'WC_Product_Data_Store_CPT',
'product-grouped' => 'WC_Product_Grouped_Data_Store_CPT',
'product-variable' => 'WC_Product_Variable_Data_Store_CPT',
'product-variation' => 'WC_Product_Variation_Data_Store_CPT',
'shipping-zone' => 'WC_Shipping_Zone_Data_Store',
```
We specifically want to target the coupon data store, so we would do something like this:
```php
function myplugin_set_wc_coupon_data_store( $stores ) {
$stores['coupon'] = 'WC_Coupon_Data_Store_Custom_Table';
return $stores;
}
add_filter( 'woocommerce_data_stores', 'myplugin_set_wc_coupon_data_store' );
```
Our class would then be loaded by WooCommerce core, instead of `WC_Coupon_Data_Store_CPT`.
## Creating a new data store
### Defining a new product type
Does your extension create a new product type? Each product type has a data store in addition to a parent product data store. The parent store handles shared properties like name or description and the child handles more specific data.
For example, the external product data store handles "button text" and "external URL". The variable data store handles the relationship between parent products and their variations.
Check out [this walkthrough](https://developer.woocommerce.com/2017/02/06/wc-2-7-extension-compatibility-examples-3-bookings/) for more information on this process.
### Data store for custom data
If your extension introduces a new database table, new custom post type, or some new form of data not related to products, orders, etc, then you should implement your own data store.
Your data store should still implement `WC_Object_Data_Store_Interface` and provide the normal CRUD functions. Your data store should be the main point of entry for interacting with your data, so any other queries or operations should also have methods.
The [shipping zone data store](https://github.com/woocommerce/woocommerce/blob/trunk/plugins/woocommerce/includes/data-stores/class-wc-shipping-zone-data-store.php) serves as a good example for a "simple" data store using a custom table. The coupons code is a good example for a data store using a custom post type.
All you need to do to register your data store is add it to the `woocommerce_data_stores` filter:
```php
function myplugin_set_my_custom_data_store( $stores ) {
$stores['mycustomdata'] = 'WC_My_Custom_Data_Store';
return $stores;
}
add_filter( 'woocommerce_data_stores', 'myplugin_set_my_custom_data_store' );
```
You can then load your data store like any other WooCommerce data store.
## Calling a data store
Calling a data store is as simple as using the static `WC_Data_Store::load()` method:
```php
// Load the shipping zone data store.
$data_store = WC_Data_Store::load( 'shipping-zone' );
// Get the number of shipping methods for zone ID 4.
$num_of_methods = $data_store->get_method_count( 4 );
```
You can also chain methods:
```php
// Get the number of shipping methods for zone ID 4.
$num_of_methods = WC_Data_Store::load( 'shipping-zone' )->get_method_count( 4 );
```
The `::load()` method works for any data store registered to `woocommerce_data_stores`, so you could load your custom data store:
```php
$data_store = WC_Data_Store::load( 'mycustomdata' );
```
## Data store limitations and WP Admin
Currently, several WooCommerce screens still rely on WordPress to list objects. Examples of this include coupons and products.
If you replace data via a data store, some parts of the existing UI may fail. An example of this may be lists of coupons when using the `type` filter. This filter uses meta data, and is in turn passed to WordPress which runs a query using the `WP_Query` class. This cannot handle data outside of the regular meta tables (Ref #19937). To get around this, usage of `WP_Query` would need to be deprecated and replaced with custom query classes and functions.
---
## Logging in WooCommerce
*Source: best-practices/data-management/logging.md*
# Logging in WooCommerce
WooCommerce has its own robust system for logging, which can be used for debugging during development, catching errors on production, or even sending notifications when specific events occur. By default, WooCommerce uses this logger to record errors, warnings, and other notices that may be useful for troubleshooting problems with a store. Many extensions for WooCommerce also make use of the logger for similar purposes.
## Viewing logs
You can view the entries created by the logger by going to **WooCommerce > Status > Logs**. The log viewing interface depends on which log storage method is configured (see the "Configuring the logger" section below).
### File system
With the default file system storage method, the first thing you will see is the list of existing log files:

The name of a log file is based on the source of the entries it contains (meaning the extension or the part of the WooCommerce codebase), as well as the date the entries were generated. In this file browsing view, you can sort the files in different ways as well as filtering them to show only those from a specific source. Clicking on a file will take you to a single file view, where you can see the actual log entries:

Click on a line number in the file to highlight it. This can also be used to link to a specific line in a file from elsewhere.
From the file browser view, you can sort and filter a list of log files, and then search for a string within the contents of those files:

Clicking on a search result line number will take you to that line in the single file view.
### Database
With the database storage method, you will see a list of log entries, starting with the most recent:

These entries can be sorted by timestamp, level, and source, as well as filtered to only show a particular source or a minimum level. You can also search for a string within the log entry message fields.
## Configuring the logger
From the Logs screen at **WooCommerce > Status > Logs**, click the "Settings" link to make configuration changes:

### Logger
Uncheck the box here to turn off all logging. This is not recommended in most circumstances, as logging can provide valuable information about what is happening on your site!
### Log storage
Out-of-the-box, WooCommerce has two different log storage methods available:
* **File system** - Log entries are recorded to files. Files are differentiated by the `source` value for the log entry (see the "Adding logs" section below), and by the current date. The files are stored in the `wc-logs` subdirectory of the site's `uploads` directory. A custom directory can be defined using the `woocommerce_log_directory` filter hook. Log files can be up to 5 MB in size, after which the log file will rotate.
* **Database** - Log entries are recorded to the database, in the `{$wpdb->prefix}woocommerce_log` table.
If you change this setting, and you already have some log entries, those entries will not be migrated to the other storage method, but neither will they be deleted.
### Retention period
The logger will periodically go through and delete logs that are older than this time period, as a space-saving measure. If log entries are stored in the file system, the entire log file that is beyond the retention period will be deleted, while with database storage, individual log entries will be deleted.
### Level threshold
Each log entry has a severity level (see the "Adding logs" section below). This sets a minimum severity level, and any log entries that are generated that are not at or above the minimum level will not be recorded. Use this setting with caution!
If this setting is set to "None", it means that all log entries will be recorded, regardless of severity level.
## Adding logs
Logs are added via methods in the `WC_Logger` class. The class instance is accessed by using the `wc_get_logger()` function. The basic method for adding a log entry is [`WC_Logger::log( $level, $message, $context )`](https://woocommerce.github.io/code-reference/classes/WC-Logger.html#method_log). There are also shortcut methods for each log severity level, for example `WC_Logger::warning( $message, $context )`. It is preferable to use the shortcut methods rather than the generic `log` method.
### Level
Logs have eight different severity levels:
* `emergency`
* `alert`
* `critical`
* `error`
* `warning`
* `notice`
* `info`
* `debug`
Aside from giving a site owner context as to how important a log entry is, these levels also allow logs to be filtered. If you only want log entries to be recorded for `error` severity and higher, you can set the threshold on the Logs Settings screen (see the "Configuring the logger" above).
Note that this threshold will apply to all logs, regardless of which log handler is in use. The `WC_Log_Handler_Email` class, for example, has its own threshold setting, but it is secondary to the global threshold.
### Message
The message is the main content of a log entry. Make sure it's understandable by anyone who might be viewing the logs!
### Context
The context parameter is intended to be used to store additional structured data related to the log entry. For example, in a log entry about an order, you may want to include contents of the related order object. When the logger is generating an entry, the data in the context parameter is converted to JSON before it is stored. So, if you want to add multiple pieces of context data, each should be added as a separate key within the context array.
There are two specific keys that can be added to the context array that will cause special behavior:
#### `source`
It is recommended that every log entry include a `source` value in the context parameter. `source` is intended to provide context about where in the application or codebase the log was generated, and can be used to filter log entries.
If a source is not specified, the logger will generate a source value based on the plugin or file where the log entry was generated.
#### `backtrace`
Setting the `backtrace` key in your context parameter to `true` will cause the logger to generate a backtrace (i.e. stack trace) in array format, which will be included in the context in place of the `true` value. This is useful particularly for error-related logs, so you can see what code was executed that led to the log entry being generated.

### Full example
```php
wc_get_logger()->info(
'It is time for lunch.',
array(
'source' => 'your_stomach',
'backtrace' => true,
'previous_meal' => $elapsed_time_since_breakfast,
'lunch_options' => array( 'fridge leftovers', 'bahn mi', 'tacos', 'pupusas' ),
)
);
```
## Logging best practices
### When to use logging
* To help troubleshoot an unexpected problem:
* An unexpected value or error is received from an API.
* Data in the system is incorrect or corrupted.
* The application is in an unexpected or broken state.
* To keep an audit log of a process:
* Transaction details not stored elsewhere, like an order note (but maybe they should be?)
* Results of data import or export.
* An important setting is changed.
* An automated process changes or deletes data.
### When _not_ to use logging
* To let a developer know that they're using a method or API incorrectly. This can lead to a large volume of useless log entries, especially if it will get triggered on every page request. Better to give them immediate feedback in the form of an error or exception (e.g. `wc_doing_it_wrong()`).
### Best practices
* Rather than using the `WC_Logger`'s `log()` method directly, it's better to use one of the wrapper methods that's specific to the log level. E.g. `info()` or `error()`.
* Write a message that is a complete, coherent sentence. This will make it more useful for people who aren't familiar with the codebase.
* Log messages should not be translatable. Keeping the message in English makes it easier to search for solutions based on the message contents, and also makes it easier for anyone troubleshooting to understand what's happening, since they may not speak the same language as the site owner.
* Ideally, each log entry message should be a single line (i.e. no line breaks within the message string). Additional lines or extra data should be put in the context array.
* Avoid outputting structured data in the message string. Put it in a key in the context array instead. The logger will handle converting it to JSON and making it legible in the log viewer.
* If you need to include a stack trace, let the logger generate it for you.
* Decide on a source for the component or system you are working on and use it for every log call you make. This will make it easier to find all the log entries that are related to the component, and filter them out from other, unrelated log entries.
* Consider adding one log entry after a looped process with the aggregated results of the loop, rather than adding a separate entry during each item within a loop.
## Customizing the logger
### The logger class
The `WC_Logger` class can be substituted for another class via the `woocommerce_logging_class` filter hook. The alternative class must implement [`WC_Logger_Interface`](https://woocommerce.github.io/code-reference/classes/WC-Logger-Interface.html), or it will not be used. Generally it is better to create a custom log handler (see below) rather than overriding the logger class itself.
### Log handlers
In WooCommerce, a log handler is a PHP class that takes the raw log data and transforms it into a log entry that can be stored or dispatched. WooCommerce ships with four different log handler classes:
* `Automattic\\WooCommerce\\Internal\\Admin\\Logging\\LogHandlerFileV2`: This is the default handler, representing the "file system" log storage method. It records log entries to files.
* `WC_Log_Handler_File`: This is the old default handler that also records log entries to files. It may be deprecated in the future, and it is not recommended to use this class or extend it.
* `WC_Log_Handler_DB`: This handler represents the "database" log storage method. It records log entries to the database.
* `WC_Log_Handler_Email`: This handler does not store log entries, but instead sends them as email messages. Emails are sent to the site admin email address. This handler has [some limitations](https://github.com/woocommerce/woocommerce/blob/fe81a4cf27601473ad5c394a4f0124c785aaa4e6/plugins/woocommerce/includes/log-handlers/class-wc-log-handler-email.php#L15-L27).
#### Changing or adding handlers
To switch from the file handler to the database handler, you can simply update the option on the Logs Settings screen. However, in some cases, you may want to have more than one log handler, and/or you might want to modify the settings of a handler. For example, you may want to have most logs saved to files, but log entries that are classified as emergency or critical errors also sent to an email address. For this, you can use the `woocommerce_register_log_handlers` filter hook to create an array of log handler class instances that you want to use. Some handler class constructors have optional parameters that you can use when instantiating the class to change their default behavior.
Here's an example of adding the email handler:
```php
function my_wc_log_handlers( $handlers ) {
$recipients = array( 'wayne@example.com', 'garth@example.com' ); // Send logs to multiple recipients.
$threshold = 'critical'; // Only send emails for logs of this level and higher.
$handlers[] = new WC_Log_Handler_Email( $recipients, $threshold );
return $handlers;
}
add_filter( 'woocommerce_register_log_handlers', 'my_wc_log_handlers' );
```
#### Creating a custom handler
You may want to create your own log handler class in order to send logs somewhere else, such as a Slack channel or perhaps an InfluxDB instance. Your class must extend the [`WC_Log_Handler`](https://woocommerce.github.io/code-reference/classes/WC-Log-Handler.html) abstract class and implement the [`WC_Log_Handler_Interface`](https://woocommerce.github.io/code-reference/classes/WC-Log-Handler-Interface.html) interface. The [`WC_Log_Handler_Email`](https://github.com/woocommerce/woocommerce/blob/6688c60fe47ad42d49deedab8be971288e4786c1/plugins/woocommerce/includes/log-handlers/class-wc-log-handler-email.php) handler class provides a good example of how to set this up.
### Log file storage location
When using the "file system" log handler, by default the log files are stored in the `wc-logs` subdirectory of the WordPress `uploads` directory, which means they might be publicly accessible. WooCommerce adds an `.htaccess` file to prevent access to `wc-logs`, but not all web servers recognize that file. If you have the option, you may want to consider storing your log files in a directory outside of the web root. Make sure the directory has the same user/group permissions as the `uploads` directory so that WordPress can access it. Then use the `woocommerce_log_directory` filter hook to set the path to your custom directory.
### Turning off noisy logs
If there is a particular log that is recurring frequently and clogging up your log files, you should probably figure out why it keeps getting triggered and resolve the issue. However, if that's not possible, you can add a callback to the `woocommerce_logger_log_message` filter hook to ignore that particular log while still allowing other logs to get through:
```php
function my_ignored_logs( $message, $level, $context, $handler ) {
if ( false !== strpos( $message, 'Look, a squirrel!' ) ) {
return null;
}
return $message;
}
add_filter( 'woocommerce_logger_log_message', 'my_ignored_logs', 10, 4 );
```
### The Logs UI
If you create a custom log handler and you want to build a separate interface for it on the Logs screen, there are a couple of filter hooks that you can work with:
* `woocommerce_logger_handler_options`: This filter hook allows you to add your custom log handler to the list of "Log storage" options on the Settings screen. Your handler must be selected for this setting, making it the "default" log handler, before you can render an alternative interface for it.
* `wc_logs_render_page`: This is the action to hook into for rendering your own Logs interface. It only fires if the default log handler is set to something that is not one of the built-in handlers.
* `wc_logs_load_tab`: This action fires when the Logs tab first starts loading, before any content is output. It's useful for handling form submissions.
---
## Updating countries and subdivisions
*Source: best-practices/localization-translation/countries-and-subdivisions.md*
# Updating countries and subdivisions
WooCommerce comes complete with a comprehensive list of countries and subdivisions (such as provinces or states) that are used in various parts of the user interface.
Of course, even countries and their subdivisions periodically change. In these cases, you can certainly file a [bug report](https://github.com/woocommerce/woocommerce/issues/new?template=1-bug-report.yml) or [submit a pull request](/docs/contribution/contributing). However, it is important to understand that our policy is only to accept changes if they align with the current version of the [CLDR project](https://cldr.unicode.org/). Therefore, it is generally best to review that and, if necessary, propose a change there first before asking that it be adopted by WooCommerce.
This approach may not be suitable in all cases, because it can take time for CLDR to accept updates. In such cases, you can still modify the lists of countries and subdivisions by using custom snippets like the following:
- [Snippet to add a country](/docs/code-snippets/add-a-country)
- [Snippet to add or modify states](/docs/code-snippets/add-or-modify-states)
---
## How to translate WooCommerce
*Source: best-practices/localization-translation/translating-woocommerce.md*
# How to translate WooCommerce
WooCommerce is already translated into several languages and is translation-ready right out of the box. All that's needed is a translation file for your language.
There are several methods to create a translation, most of which are outlined in the WordPress Codex. In most cases you can contribute to the project on [https://translate.wordpress.org/projects/wp-plugins/woocommerce/](https://translate.wordpress.org/projects/wp-plugins/woocommerce/).
To create custom translations you can consider using [Poedit](https://poedit.net/).
## Set up WordPress in your language
To set your WordPress site's language:
1. Go to `WP Admin > Settings > General` and adjust the `Site Language`.
2. Go to `WP Admin > Dashboard > Updates` and click the `Update Translations` button.
Once this has been done, the shop displays in your locale if the language file exists. Otherwise, you need to create the language files (process explained below).
## Contributing your localization to core
We encourage contributions to our translations. If you want to add translated strings or start a new translation, simply register at WordPress.org and submit your translations to [https://translate.wordpress.org/projects/wp-plugins/woocommerce/](https://translate.wordpress.org/projects/wp-plugins/woocommerce/) for approval.
## Translating WooCommerce into your language
Both stable and development versions of WooCommerce are available for translation. When you install or update WooCommerce, WordPress will automatically fetch a 100% complete translation for your language. If such a translation isn't available, you can either download it manually or contribute to complete the translation, benefiting all users.
If you're new to translating, check out the [translators handbook](https://make.wordpress.org/polyglots/handbook/tools/glotpress-translate-wordpress-org/) to get started.
### Downloading translations from translate.wordpress.org manually
1. Go to [translate.wordpress.org](https://translate.wordpress.org/projects/wp-plugins/woocommerce) and look for your language in the list.
2. Click the title to be taken to the section for that language.

3. Click the heading under `Set/Sub Project` to view and download a Stable version.
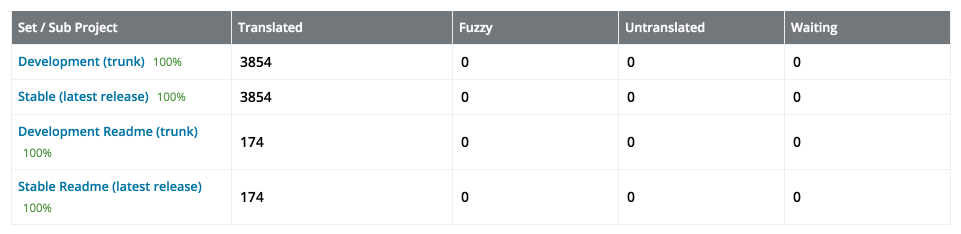
4. Scroll to the bottom for export options. Export a `.mo` file for use on your site.
5. Rename this file to `woocommerce-YOURLANG.mo` (e.g., Great Britain English should be `en_GB`). The corresponding language code can be found by going to [https://translate.wordpress.org/projects/wp-plugins/woocommerce/](https://translate.wordpress.org/projects/wp-plugins/woocommerce/) and opening the desired language. The language code is visible in the upper-right corner.

6. Upload to your site under `wp-content/languages/woocommerce/`. Once uploaded, this translation file may be used.
## Creating custom translations
WooCommerce includes a language file (`.pot` file) that contains all of the English text. You can find this language file inside the plugin folder in `woocommerce/i18n/languages/`.
## Creating custom translations with PoEdit
WooCommerce comes with a `.pot` file that can be imported into PoEdit to translate.
To get started:
1. Open PoEdit and select `Create new translation from POT template`.
2. Choose `woocommerce.pot` and PoEdit will show the catalog properties window.

3. Enter your name and details, so other translators know who you are, and click `OK`.
4. Save your `.po` file. Name it based on what you are translating to, i.e., a GB translation is saved as `woocommerce-en_GB.po`. Now the strings are listed.
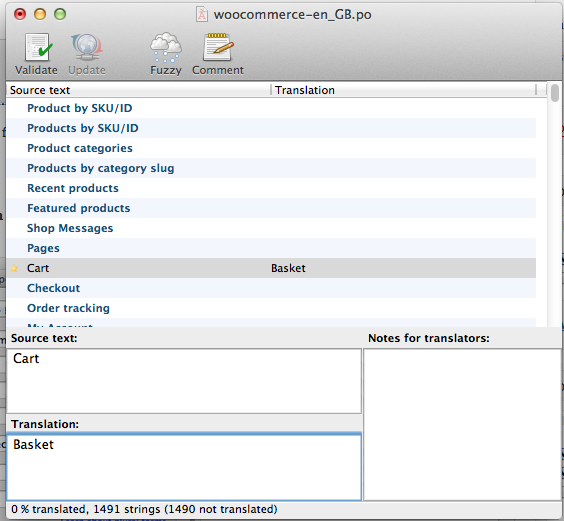
5. Save after translating strings. The `.mo` file is generated automatically.
6. Update your `.po` file by opening it and then go to `Catalog > Update from POT file`.
7. Choose the file and it will be updated accordingly.
## Making your translation upgrade safe
WooCommerce keeps translations in `wp-content/languages/plugins`, like all other plugins. But if you wish to include a custom translation, you can use the directory `wp-content/languages/woocommerce`, or you can use a snippet to load a custom translation stored elsewhere:
```php
// Code to be placed in functions.php of your theme or a custom plugin file.
add_filter( 'load_textdomain_mofile', 'load_custom_plugin_translation_file', 10, 2 );
/**
* Replace 'textdomain' with your plugin's textdomain. e.g. 'woocommerce'.
* File to be named, for example, yourtranslationfile-en_GB.mo
* File to be placed, for example, wp-content/languages/textdomain/yourtranslationfile-en_GB.mo
*/
function load_custom_plugin_translation_file( $mofile, $domain ) {
if ( 'textdomain' === $domain ) {
$mofile = WP_LANG_DIR . '/textdomain/yourtranslationfile-' . get_locale() . '.mo';
}
return $mofile;
}
```
## Other tools
There are some other third-party tools that can help with translations. The following list shows a few of them.
### Loco Translate
[Loco Translate](https://wordpress.org/plugins/loco-translate/) provides in-browser editing of WordPress translation files and integration with automatic translation services.
### Say what?
[Say what?](https://wordpress.org/plugins/say-what/) allows to effortlessly translate or modify specific words without delving into a WordPress theme's `.po` file.
### String locator
[String Locator](https://wordpress.org/plugins/string-locator/) enables quick searches within themes, plugins, or the WordPress core, displaying a list of files with the matching text and its line number.
## FAQ
### Why some strings on the Checkout page are not being translated?
You may see that some of the strings are not being translated on the Checkout page. For example, in the screenshot below, `Local pickup` shipping method, `Cash on delivery` payment method and a message related to Privacy Policy are not being translated to Russian while the rest of the form is indeed translated:
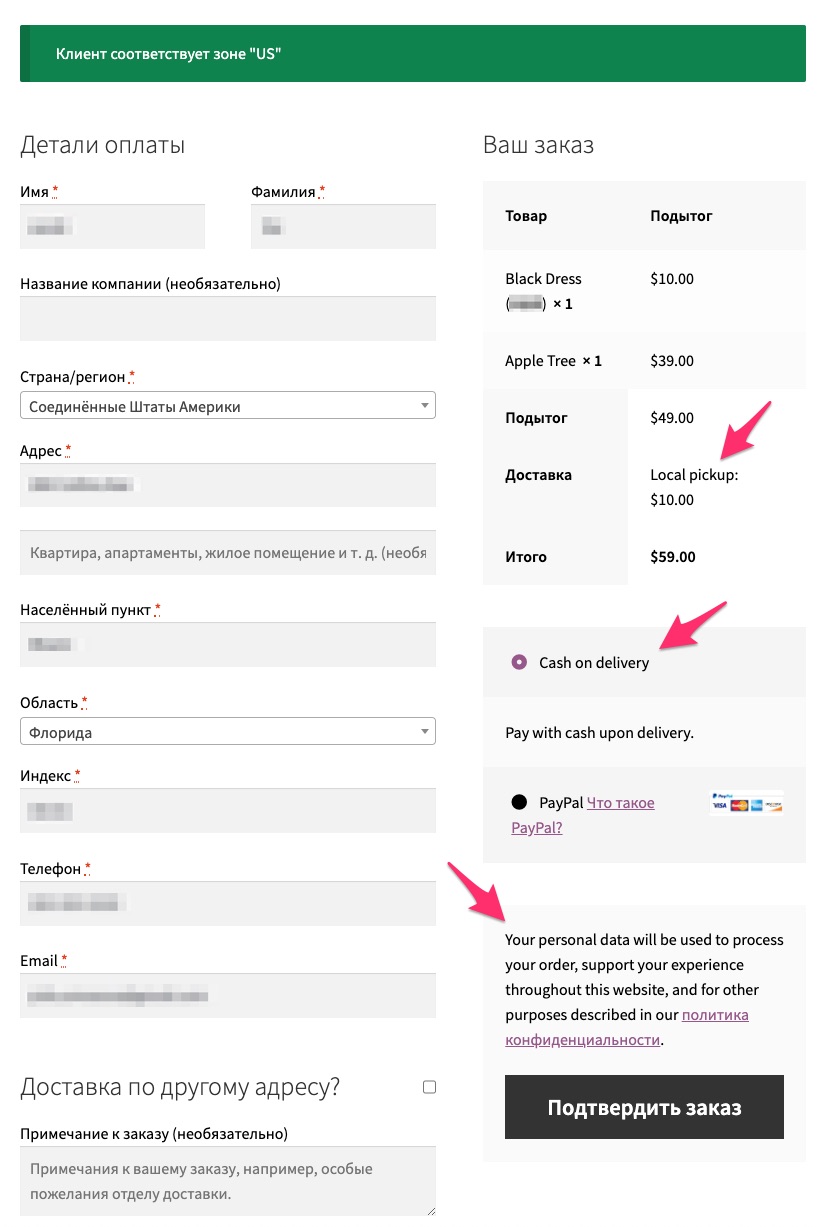
This usually happens when you first install WooCommerce and select default site language (English) and later change the site language to another one. In WooCommerce, the strings that have not been translated in the screenshot, are stored in the database after the initial WooCommerce installation. Therefore, if the site language is changed to another one, there is no way for WooCommerce to detect a translatable string since these are database entries.
In order to fix it, navigate to WooCommerce settings corresponding to the string you need to change and update the translation there directly. For example, to fix the strings in our case above, you would need to do the following:
**Local pickup**:
1. Go to `WooCommerce > Settings > Shipping > Shipping Zones`.
2. Select the shipping zone where "Local pickup" is listed.
3. Open "Local pickup" settings.
4. Rename the method using your translation.
5. Save the setting.
**Cash on delivery**:
1. Go to `WooCommerce > Settings > Payments`.
2. Select the "Cash on delivery" payment method.
3. Open its settings.
4. Rename the method title, description, and instructions using your translation.
5. Save the setting.
**Privacy policy message**:
1. Go to `WooCommerce > Settings > Accounts & Privacy`.
2. Scroll to the "Privacy policy" section.
3. Edit both the `Registration privacy policy` and `Checkout privacy policy` fields with your translation.
4. Save the settings.
Navigate back to the Checkout page - translations should be reflected there.
### I have translated the strings I needed, but some of them don't show up translated on the front end. Why?
If some of your translated strings don't show up as expected on your WooCommerce site, the first thing to check is if these strings have both a Single and Plural form in the Source text section. To do so, open the corresponding translation on [https://translate.wordpress.org/projects/wp-plugins/woocommerce/](https://translate.wordpress.org/projects/wp-plugins/woocommerce/), e.g. [the translation for Product and Products](https://translate.wordpress.org/projects/wp-plugins/woocommerce/stable/de/default/?filters%5Bstatus%5D=either&filters%5Boriginal_id%5D=577764&filters%5Btranslation_id%5D=24210880).
This screenshot shows that the Singular translation is available:
While this screenshot shows that the Plural translation is not available:
---
## How to configure caching plugins for WooCommerce
*Source: best-practices/performance/configuring-caching-plugins.md*
# How to configure caching plugins for WooCommerce
## Excluding pages from the cache
Oftentimes if using caching plugins they'll already exclude these pages. Otherwise make sure you exclude the following pages from the cache through your caching systems respective settings.
- Cart
- My Account
- Checkout
These pages need to stay dynamic since they display information specific to the current customer and their cart.
## Excluding WooCommerce session from the cache
If the caching system you're using offers database caching, it might be helpful to exclude `_wc_session_` from being cached. This will be dependent on the plugin or host caching so refer to the specific instructions or docs for that system.
## Excluding WooCommerce cookies from the cache
Cookies in WooCommerce help track the products in your customers cart, can keep their cart in the database if they leave the site, and powers the recently viewed widget. Below is a list of the cookies WooCommerce uses for this, which you can exclude from caching.
| COOKIE NAME | DURATION | PURPOSE |
| --- | --- | --- |
| woocommerce_cart_hash | session | Helps WooCommerce determine when cart contents/data changes. |
| woocommerce_items_in_cart | session | Helps WooCommerce determine when cart contents/data changes. |
| wp_woocommerce_session_ | 2 days | Contains a unique code for each customer so that it knows where to find the cart data in the database for each customer. |
| woocommerce_recently_viewed | session | Powers the Recent Viewed Products widget. |
| store_notice[notice id] | session | Allows customers to dismiss the Store Notice. |
We're unable to cover all options, but we have added some tips for the popular caching plugins. For more specific support, please reach out to the support team responsible for your caching integration.
### W3 total cache minify settings
Ensure you add 'mfunc' to the 'Ignored comment stems' option in the Minify settings.
### WP-Rocket
WooCommerce is fully compatible with WP-Rocket. Please ensure that the following pages (Cart, Checkout, My Account) are not to be cached in the plugin's settings.
We recommend avoiding JavaScript file minification.
### WP Super Cache
WooCommerce is natively compatible with WP Super Cache. WooCommerce sends information to WP Super Cache so that it doesn't cache the Cart, Checkout, or My Account pages by default.
### Varnish
```varnish
if (req.url ~ "^/(cart|my-account|checkout|addons)") {
return (pass);
}
if ( req.url ~ "\\?add-to-cart=" ) {
return (pass);
}
```
## Troubleshooting
### Why is my Varnish configuration not working in WooCommerce?
Check out the following WordPress.org Support forum post on[ how cookies may be affecting your varnish coding](https://wordpress.org/support/topic/varnish-configuration-not-working-in-woocommerce).
```text
Add this to vcl_recv above "if (req.http.cookie) {":
# Unset Cookies except for WordPress admin and WooCommerce pages
if (!(req.url ~ "(wp-login|wp-admin|cart|my-account/*|wc-api*|checkout|addons|logout|lost-password|product/*)")) {
unset req.http.cookie;
}
# Pass through the WooCommerce dynamic pages
if (req.url ~ "^/(cart|my-account/*|checkout|wc-api/*|addons|logout|lost-password|product/*)") {
return (pass);
}
# Pass through the WooCommerce add to cart
if (req.url ~ "\?add-to-cart=" ) {
return (pass);
}
# Pass through the WooCommerce API
if (req.url ~ "\?wc-api=" ) {
return (pass);
}
# Block access to php admin pages via website
if (req.url ~ "^/phpmyadmin/.*$" || req.url ~ "^/phppgadmin/.*$" || req.url ~ "^/server-status.*$") {
error 403 "For security reasons, this URL is only accessible using localhost (127.0.0.1) as the hostname";
}
Add this to vcl_fetch:
# Unset Cookies except for WordPress admin and WooCommerce pages
if ( (!(req.url ~ "(wp-(login|admin)|login|cart|my-account/*|wc-api*|checkout|addons|logout|lost-password|product/*)")) || (req.request == "GET") ) {
unset beresp.http.set-cookie;
}
```
### Why is my Password Reset stuck in a loop?
This is due to the My Account page being cached, Some hosts with server-side caching don't prevent my-account.php from being cached.
If you're unable to reset your password and keep being returned to the login screen, please speak to your host to make sure this page is being excluded from their caching.
---
## Performance best practices for WooCommerce extensions
*Source: best-practices/performance/performance-best-practices.md*
# Performance best practices for WooCommerce extensions
Optimizing the performance of WooCommerce extensions is vital for ensuring that online stores run smoothly, provide a superior user experience, and rank well in search engine results. This guide is tailored for developers looking to enhance the speed and efficiency of their WooCommerce extensions, with a focus on understanding performance impacts, benchmarking, testing, and implementing strategies for improvement.
## Performance optimization
For WooCommerce extensions, performance optimization means ensuring that your code contributes to a fast, responsive user experience without adding unnecessary load times or resource usage to the store.
### Why performance is critical
- **User Experience**: Fast-performing extensions contribute to a seamless shopping experience, encouraging customers to complete purchases.
- **Store Performance**: Extensions can significantly impact the overall speed of WooCommerce stores; optimized extensions help maintain optimal site performance.
- **SEO and Conversion Rates**: Speed is a critical factor for SEO rankings and conversion rates. Efficient extensions support better store rankings and higher conversions.
## Benchmarking performance
Setting clear performance benchmarks is essential for development and continuous improvement of WooCommerce extensions. A recommended performance standard is achieving a Chrome Core Web Vitals "Performance" score of 90 or above on a simple Woo site, using tools like the [Chrome Lighthouse](https://developer.chrome.com/docs/lighthouse/overview/).
### Using accessible tools for benchmarking
Chrome Lighthouse provides a comprehensive framework for evaluating the performance of web pages, including those impacted by your WooCommerce extension. By integrating Lighthouse testing into your development workflow, you can identify and address performance issues early on.
We recommend leveraging tools like this to assess the impact of your extension on a WooCommerce store's performance and to identify areas for improvement.
## Performance improvement strategies
Optimizing the performance of WooCommerce extensions can involve several key strategies:
- **Optimize asset loading**: Ensure that scripts and styles are loaded conditionally, only on pages where they're needed.
- **Efficient database queries**: Optimize database interactions to minimize query times and resource usage. Use indexes appropriately and avoid unnecessary data retrieval.
- **Lazy Loading**: Implement lazy loading for images and content loaded by your extension to reduce initial page load times.
- **Minification and concatenation**: Minify CSS and JavaScript files and concatenate them where possible to reduce the number of HTTP requests.
- **Testing with and without your extension**: Regularly test WooCommerce stores with your extension activated and deactivated to clearly understand its impact on performance.
- **Caching support**: Ensure your extension is compatible with popular caching solutions, and avoid actions that might bypass or clear cache unnecessarily.
By following these best practices and regularly benchmarking and testing your extension, you can ensure it enhances, rather than detracts from, the performance of WooCommerce stores. Implementing these strategies will lead to more efficient, faster-loading extensions that store owners and their customers will appreciate.
---
## How to optimize performance for WooCommerce stores
*Source: best-practices/performance/performance-optimization.md*
# How to optimize performance for WooCommerce stores
## Introduction
This guide covers best practices and techniques for optimizing the performance of WooCommerce stores, including caching, image optimization, database maintenance, code minification, and the use of Content Delivery Networks (CDNs). By following these recommendations, developers can build high-performing WooCommerce stores that provide a better user experience and contribute to higher conversion rates.
## Audience
This guide is intended for developers who are familiar with WordPress and WooCommerce and want to improve the performance of their online stores.
## Prerequisites
To follow this guide, you should have:
1. A basic understanding of WordPress and WooCommerce.
2. Access to a WordPress website with WooCommerce installed and activated.
## Step 1 - Implement caching
Caching plays a crucial role in speeding up your WooCommerce store by serving static versions of your pages to visitors, reducing the load on your server. There are several ways to implement caching for your WooCommerce store:
### Server-Side caching
Enable server-side caching through your hosting provider or by using server-level caching solutions like Varnish, NGINX FastCGI Cache, or Redis.
### WordPress caching plugins
Install and configure a WordPress caching plugin, such as WP Rocket, W3 Total Cache, or WP Super Cache. These plugins can help you set up page caching, browser caching, and object caching for your WooCommerce store.
### WooCommerce-Specific caching
Ensure that your caching solution is configured correctly for WooCommerce, allowing dynamic content such as cart and checkout pages to remain uncached. Some caching plugins, like WP Rocket, include built-in support for WooCommerce caching.
## Step 2 - Optimize images
Optimizing images can significantly improve your store's performance by reducing the size of image files without compromising quality. To optimize images for your WooCommerce store:
1. Use the right image format: Choose an appropriate format for your images, such as JPEG for photographs and PNG for graphics with transparency.
2. Compress images: Use an image compression tool like TinyPNG or ShortPixel to reduce file sizes before uploading them to your store.
3. Enable lazy loading: Lazy loading delays the loading of images until they're needed, improving initial page load times. Many caching plugins and performance optimization plugins offer built-in lazy loading options.
4. Use responsive images: Ensure that your theme and plugins serve appropriately sized images for different devices and screen resolutions.
## Step 3 - Minify and optimize code
Minifying and optimizing your store's HTML, CSS, and JavaScript files can help reduce file sizes and improve page load times. To minify and optimize code for your WooCommerce store:
1. Use a plugin: Install a performance optimization plugin like Autoptimize, WP Rocket, or W3 Total Cache to minify and optimize your store's HTML, CSS, and JavaScript files.
2. Combine and inline critical CSS: Where possible, combine and inline critical CSS to reduce the number of requests and improve page load times.
3. Defer non-critical JavaScript: Defer loading of non-critical JavaScript files to improve perceived page load times.
## Step 4 - Use a content delivery network (CDN)
A Content Delivery Network (CDN) can help speed up your WooCommerce store by serving static assets like images, CSS, and JavaScript files from a network of servers distributed across the globe. To use a CDN for your WooCommerce store:
1. Choose a CDN provider: Select a CDN provider like Cloudflare, Fastly, or Amazon CloudFront that fits your needs and budget.
2. Set up your CDN: Follow your chosen CDN provider's instructions to set up and configure the CDN for your WooCommerce store.
## Step 5 - Optimize database
Regularly optimizing your WordPress database can help improve your WooCommerce store's performance by removing unnecessary data and optimizing database tables. To optimize your database:
1. Use a plugin: Install a database optimization plugin like WP-Optimize, WP-Sweep, or Advanced Database Cleaner to clean up and optimize your WordPress database.
2. Remove unnecessary data: Regularly delete spam comments, post revisions, and expired transients to reduce database clutter.
3. Optimize database tables: Use the database optimization plugin to optimize your database tables, improving their efficiency and reducing query times.
## Step 6 - Choose a high-performance theme and plugins
The theme and plugins you choose for your WooCommerce store can have a significant impact on performance. To ensure your store runs efficiently:
1. Select a lightweight, performance-optimized theme: Choose a theme specifically designed for WooCommerce that prioritizes performance and follows best coding practices.
2. Evaluate plugin performance: Use tools like Query Monitor or WP Hive to analyze the performance impact of the plugins you install, and remove or replace those that negatively affect your store's performance.
## Step 7 - Enable GZIP compression
GZIP compression can help reduce the size of your store's HTML, CSS, and JavaScript files, leading to faster page load times. To enable GZIP compression:
1. Use a plugin: Install a performance optimization plugin like WP Rocket, W3 Total Cache, or WP Super Cache that includes GZIP compression options.
2. Configure your server: Alternatively, enable GZIP compression directly on your server by modifying your .htaccess file (for Apache servers) or nginx.conf file (for NGINX servers).
## Step 8 - Monitor and analyze performance
Continuously monitor and analyze your WooCommerce store's performance to identify potential bottlenecks and areas for improvement. To monitor and analyze performance:
1. Use performance testing tools: Regularly test your store's performance using tools like Google PageSpeed Insights, GTmetrix, or WebPageTest.
2. Implement performance monitoring: Install a performance monitoring plugin like New Relic or use a monitoring service like Uptime Robot to keep track of your store's performance over time.
## Conclusion
By following these best practices and techniques for performance optimization, you can build a high-performing WooCommerce store that offers a better user experience and contributes to higher conversion rates. Continuously monitor and analyze your store's performance to ensure it remains optimized as your store grows and evolves.
---
## Review guidelines
*Source: best-practices/review-guidelines/README.md*
# Review guidelines
Reviews are an integral part of the online shopping experience, and people installing software pay attention to them. Prospective users of your extensions will likely consider average ratings when making software choices.
Many of today's most popular online review platforms - from Yelp business reviews, to Amazon product reviews - have a range of opinion that can be polarized, with many extremely positive and/or negative reviews, and fewer moderate opinions. This creates a "J-shaped" distribution of reviews that isn't as accurate or as helpful as could be.
WooCommerce.com and WordPress.org both feature reviews heavily, and competing extensions having a higher rating likely have the edge in user choice.
## Primary considerations around reviews
Requesting more reviews for a extension with major issues will not generate good reviews, and analyzing existing reviews will help surface areas to address before soliciting reviews.
It is extremely rare for users of WordPress plugins to leave reviews organically (.2% of users for WordPress.org leave reviews), which means that there's an untapped market of 99.8% of users of the average plugin.
These plugins are competing with other plugins on the same search terms in the WordPress.org plugin directory, and ratings are a large factor in the ranking algorithm. This is not usually a factor to the same extent on the WooCommerce Marketplace. For instance, WooCommerce's PayPal extension directly competes on all possible keywords with other PayPal extensions on the WordPress.org repository, while it does not compete with other PayPal payments extensions on the Marketplace.
---
## How to request WooCommerce extension reviews
*Source: best-practices/review-guidelines/how-to-request-reviews.md*
# How to request WooCommerce extension reviews
## Methods of requesting reviews
### Admin notices
Admin notices are an industry standard method of requesting reviews, but bombarding the admin dashboard with admin notices is not effective. We recommend using restraint in the design of a notice, as well as limiting to a single notice at a time. It's very easy to overwhelm merchants with too many notices, or too intrusive notices.
#### Recommendations
* A good place for an admin notice to review an extension would be to show on the `Plugins` page and extension's settings pages.
* Include a snooze option (or multiple) on your notices with a clear expectation of when the notice will reappear.
* Admin notices should always be always be completely dismissable. They cannot only have a snooze option.
* The options presented in the notice must be phrased carefully to avoid manipulative language.
* Use consistently designed notices so the request for reviews feels like a part of your extension, and looks consistent with WooCommerce's design.
### Direct contact
#### Recommendations
* The most direct route to requesting reviews with the highest chance of being positive is to contact the customer when they are the happiest with the product.
* This can be milestone or time based, following the timing guidelines below.
* The best method for this is either an email or other direct exchange (support chat, call, etc.). This has the highest conversion rate, especially when timed properly so that the customer is happiest.
* This is also extremely effective when you are able to request feedback from specifically qualified merchants, such as merchants that have processed a certain amount with your platform, or who have shipped their first 100 orders using your fulfillment extension, or similar.
* Direct outreach is most likely to be successful if you have ways of targeting users for review requests (merchant account / usage info, etc.), as well as ways to gather the reviews, like sales or marketing teams able to email/call/chat with merchants.
## Messaging for requesting reviews
One method of requesting feedback that we recommend is using the NPS style of review solicitation. This can allow for an increase positive reviews as well as providing the opportunity to assist merchants that are struggling.
NPS-style reviews first ask the user how they rate the product (out of 5 stars), then route them based on their response:
* If they click 4 or 5 stars, ask them to leave a review.
* If they click 1, 2 or 3, tell them we're here to help & ask them to submit a support ticket.
Merchants are significantly more likely to leave a review after a positive support interaction with a support rep who explicitly asked for a review. The language "the best way to thank me is to leave a 5 star review that mentions me in it" or similar tends to work very well - people are more willing to help a person than a produc or company.
---
## Miscellaneous guidelines and advice
*Source: best-practices/review-guidelines/misc-guidelines.md*
# Miscellaneous guidelines and advice
Contributors' names matching search terms directly will rank extremely highly on the WordPress.org plugin repo, which means that having a WordPress.org user named after your business (if that's a search term for your plugin) could tilt the scales over a competing plugin.
Constant nags and overwhelming the admin dashboard with unnecessary alerts detract from your user experience.
You can request to have reviews that are not actually feedback removed. Where this might be applicable is if the request is a simple support request, where it's obviously in the wrong spot. 1 star reviews, even if aggressive or angry, are not usually removed.
Reply to reviews! Thank the giver for offering feedback, acknowledge the issue if needed, ask for more specific feedback, or provide an update when that feedback is addressed! Your reviews are a great window into what your extension's users are actually thinking.
Having folks close to the extension's development (think developers and project managers) looking at reviews on a regular basis is a good way to ensure the customers voice is heard. 1 star reviews are among the most useful, as long as the issue is understood and addressed (if needed).
---
## Notifying users about bug fixes and feature requests
*Source: best-practices/review-guidelines/notifying-users-about-important-events.md*
# Notifying users about bug fixes and feature requests
A bug or a missing feature can be a showstopper for merchants. Bugs that pile up or popular features that are not implemented can lead to negative reviews and/or merchants churning and looking at a competitive solution.
Bugs are usually reported via support or GitHub, or you can discover them yourselves in testing.
When a critical bug is found, resolve it within a couple of days (most critical bugs should be resolved within 24 hours) and release a new plugin version promptly. Part of your release process should be to notify all stakeholders (the support team and the merchant affected) about the upcoming release.
Even though a critical bug is a great source of stress for merchants, a quick resolution makes merchants feel heard and supported - having a reliable business partner, who is keen to help in the most difficult situation, helps build a stronger relationship. Therefore, we usually ask merchants for a 5* review when we deliver a fast solution.
When you implement a new feature request and ship a new plugin version, you can follow a similar approach to bugs:
* Notify all stakeholders.
* Update the relevant request in the Feature Requests board, by sharing a public update and marking it as 'Completed'.
* For breaking releases: communicating with your marketing/relations teams to publish updates/newsletters before the release.
---
## How to respond to negative WooCommerce extension reviews
*Source: best-practices/review-guidelines/responding-to-negative-reviews.md*
# How to respond to negative WooCommerce extension reviews
An unpleasant event in the merchant's journey can lead them to leave a public, negative review. These events usually are:
* a problem with the product,
* a missing product feature,
* an unhelpful reply,
* long wait times to receive a reply, or;
* combinations of the above.
When receiving a negative review, your goal should always be to turn this review around - this sounds tough, but it is really rewarding.
In the majority of cases, merchants who leave a negative review have first tried contacting support for help. This is useful knowledge, as we can read through the conversation history, understand the issue the merchant experienced and share more details with them when we reach out, even from our first reply.
The process we have seen work well is:
* Create a new response (via email, or on a public review) with subject: Regarding your recent review for xxx.
* Start by introducing yourself, for example: "Hey there, This is Andrew from the team that develops xxx".
* Use empathetic language and make it clear that this negative review had an impact on you. For example, "I read your recent review for xxx and I am worried to hear that an issue is preventing you from using this plugin as you had in mind. I'd be happy to help you resolve this!".
Compare the above sentence with: "I am sorry to hear that you experienced an issue with xxx". "I am sorry to" indicates that you are saddened by an event, but don't necessarily plan to do something about it. In comparison, in "I am worried to hear", worry indicates action. Additionally, "That you experienced an issue" can be interpreted as if the problem is mainly the merchant's fault, whereas language like "an issue is preventing you from using this plugin as you had in mind. I'd be happy to help you resolve this!" implies you and the merchant are on the same team.
* Share more details, a solution, an idea, a suggestion or an explanation.
* Urge the merchant to update the review, by highlighting how important reviews are for our team and for other merchants. Example language to do this is "We would appreciate it if you could take a couple of minutes to update your review and describe your experience with our product and support. Honest reviews are extremely helpful for other merchants who try to decide if a plugin is a right fit for them. Thank you for your contribution!".
* Include a direct link to the reviews section, so merchants can easily navigate there and change their review.
* On a follow-up communication, if the merchant has changed the review, consider saying something like: "I shared this with the rest of the team and it made everyone's day".
If the above things are true, sharing some of your procedures with merchants (highlighting how your team emphasizes and thrives on feedback) helps ensure merchants feel like you are part of their team and builds a strong relationship with them.
Even a merchant that doesn't change their review can offer a mutually beneficial discussion by learning more about their setup and offering some suggestions. These conversations help grow merchants' trust.
---
## Utilizing WooCommerce extension feature requests
*Source: best-practices/review-guidelines/utilizing-feature-requests.md*
# Utilizing WooCommerce extension feature requests
It is important to keep track of all feature requests, and have some sort of system of record where anyone can see what kind of feedback the product is receiving over time.
We recommend a daily or bi-daily check-in, where you:
* triage new feature requests,
* celebrate positive reviews and;
* act upon negative reviews.
Carefully maintaining feature request boards (or similar system) is key, as the average board contains a lot of duplicate/spam content, requests about features that have been implemented and requests about features that will likely never be implemented. Poorly maintained boards make merchants feel unheard/neglected.
This results in more negative reviews on the premise that the product teams were not reading/listening to their feedback.
We've seen good results with the following procedures:
Starting with the most affected products, go through all open requests, reply to most/all of them and categorize them as:
* "Open", for requests that we still want more feedback,
* "Planned", for requests that we plan to implement,
* "Completed", for requests that have already been implemented and;
* "Closed", for requests that we do not plan to implement, as they are not a good fit for the product, for duplicate/spam requests and for requests that were actually support questions.
Replying to all "Open" requests is the goal, but if that's not attainable currently, make sure to reply to 100% of the requests that are closed.
For new open requests that arrive as a feature request, discuss/triage them, reply promptly, and assign a status to avoid having the board become unmanaged, and ensure merchants feel (and are) heard.
In addition to the effect a tidy board has on merchants, it also helps product teams better understand which requests are most wanted and most impactful and then plan work accordingly.
---
## Utilizing your support team to respond to feedback
*Source: best-practices/review-guidelines/utilizing-your-support-team.md*
# Utilizing your support team to respond to feedback
Your support team is usually the primary contact point of merchants when they contact you. Tickets and chats are the best tools we have to converse with merchants, understand pain-points about our software, listen to their feedback and analyze their feature requests. Collectively, support teams have a great understanding of the products and how people use them. This information is essential to be transferred over to product and engineering teams.
We recommend that you take the following steps to best utilize your support team:
* Create a strict internal SLA where support team requests are answered by product or engineering teams.
* Ensure you have a way for your support team to effectively report bugs to your product and engineering teams.
* When responding to your support team, avoid super-short answers, and try to explain the answer simply and concisely. This will allow the support agent to copy/paste your answer to the merchant.
* Avoid replying with statements like "no, this is not possible" or "no, this feature will not be implemented" without providing additional context about technical or product limitations.
* Regularly dedicate additional time to implement a short custom code snippets or to provide in-depth technical details about how a custom project would be implemented so that merchants can reach a solution faster if they decide to hire a dedicated WooCommerce developer. A small effort can go a long way to amaze merchants and reveal an opportunity to request a 5 star review.
* Keep support in the loop when they report a bug or request a new feature. When you release a new product version, we always consider the impact it can have on support.
* Work closely with your support team. For example, consider having a feedback hangout call every month where you can discuss product feedback and planned improvements.
With these kinds of practices in place, support teams are more willing to share feedback, issues, concerns, and questions with us. This helps maintain a closer relationship with merchants and identify pain-points early, before they become a reason for them to churn.
---
## When to request WooCommerce extension reviews
*Source: best-practices/review-guidelines/when-to-request-reviews.md*
# When to request WooCommerce extension reviews
The best approach to increasing our top-star reviews is to identify key moments in the merchant's journey, when they are more likely to leave a review and actively request for it.
The most distinct moments for most of our use cases are:
* When merchants feel helpless, lost, frustrated and we are able to help,
* When merchants find a bug in our code and we quickly ship a fix,
* When merchants need a feature and we notify them when it is shipped,
* When merchants feel alone and we make them feel heard and;
* When merchants contact with a question and we go out of our way to provide them with top-notch support, even if this means slightly stepping outside the official boundaries of a support policy.
Think about who is seeing the review request, and what they are doing at that time. Showing a request to a fulfillment worker just trying to ship an order isn't likely going to work well.
Outreach after a milestone works really well. Some language we've used before is "Congratulations on your xxth sale! We're delighted that WooPayments facilitated this milestone. Would you consider sharing your experience and encouraging others by reviewing our extension?".
Another way to optimally time a review request would be to setup a prompt that aligns with use patterns. For instance, if you know that most of your merchants use your extension daily, you would likely send a review request sooner than a extension that most merchants interact very sparingly with.
SaaS/Connector extensions need to be particularly careful about requesting ratings correctly, as they are the most likely to be overlooked unless there is an issue, leading to skewed ratings not representative of the actual extension.
Consider requesting feedback at the end of every single support interaction, especially in the WordPress.org support forums. One of the largest barriers to leaving a review is the requirement of a user being logged into WooCommerce.com (or WordPress.org), and the WordPress.org support forums present a good opportunity to gather these reviews. By being highly responsive in the public support forum and solving issues there, users are already logged in and able to immediately leave a review (after being requested to!).
---
## How to Prevent Data Leaks in WooCommerce
*Source: best-practices/security/prevent-data-leaks.md*
# How to Prevent Data Leaks in WooCommerce
Data leaks can expose sensitive information and compromise the security of a WooCommerce site. One common source of data leaks is direct access to PHP files. This tutorial will show you how to prevent these kinds of data leaks.
In each PHP file of your WooCommerce extension, you should check if a constant called 'ABSPATH' is defined. This constant is defined by WordPress itself, and it's not defined if a file is being accessed directly. Here's how you can do this:
```php
if ( ! defined( 'ABSPATH' ) ) {
exit; // Exit if accessed directly
}
```
With this code, if someone tries to access the PHP file directly, the 'ABSPATH' constant won't be defined, and the script will exit before any sensitive data can be leaked.
Remember, security is a crucial aspect of any WooCommerce site. Always take steps to prevent data leaks and protect your site's information.
---
## WooCommerce security best practices
*Source: best-practices/security/security-best-practices.md*
# WooCommerce security best practices
## Introduction to security practices
Security is extremely important for online stores. A breach can lead to significant financial loss, reputational damage, and erosion of customer trust. Implementing robust security practices is crucial. This guide covers the best practices for securing WooCommerce stores, including hardening WordPress, keeping plugins and themes up to date, implementing secure coding practices, and protecting user data. By following these recommendations, developers can build secure and resilient WooCommerce stores that protect both their business and their customers.
### Audience
This guide is intended for developers who are familiar with WordPress and WooCommerce and want to improve the security of their online stores.
### Prerequisites
To follow this guide, you should have:
1. A basic understanding of WordPress and WooCommerce.
2. Access to a WordPress website with WooCommerce installed and activated.
## Security standards
We recommend that you maintain the following standards:
- **PHPCS**: The PHP Code Sniffer tool helps ensure your code adheres to specific coding standards, which can prevent common security issues. Extensions shouldn't have any failure results against PHPCS.
- **SemGrep**: Focuses on identifying patterns that may indicate security vulnerabilities, allowing developers to write more secure code. Extensions shouldn't have any failure results against SemGrep.
Understanding and implementing these standards can significantly reduce the risk of security vulnerabilities in your extensions and themes.
### Common security pitfalls and how to avoid them
Several common security pitfalls can easily be avoided with vigilance and best practices:
- **SQL injection**: Ensure all database queries are properly sanitized.
- **Cross-site scripting**: Sanitize all user input to prevent malicious code from being executed.
- **File inclusions**: Limit file inclusion to prevent unauthorized access to the file system.
Awareness and prevention of these common issues are crucial steps in securing your WooCommerce store. For more resources, we recommend reading the [WordPress security documentation](https://developer.wordpress.org/apis/security/).
## Manual testing guidelines
Even without access to automated tools like the [Woo Quality Insights Toolkit (QIT)](https://qit.woo.com), manual testing remains a vital component of securing your WooCommerce store. Here are some guidelines on how developers can manually test their extensions for security vulnerabilities:
1. **Code review**: Regularly review your code for security vulnerabilities, focusing on the areas where breaches commonly occur, such as user input fields and database queries. Code reviews should check against the [WordPress security criteria](https://developer.wordpress.org/apis/security/) mentioned above.
2. **Use security plugins**: Plugins like Wordfence, Sucuri, or iThemes Security provide an interface for manual security checks, including file integrity monitoring and malware scanning. Additionally, tooling like [OWASP Zap](https://www.zaproxy.org/) or [GitHub Security Scanning](https://github.com/features/security/) can be used.
3. **Testing environments**: Utilize staging environments to test the security of new features or updates before deploying them live.
## Other security best practices
### Keep WordPress, WooCommerce, and plugins up to date
Regularly updating WordPress, WooCommerce, and all installed plugins is crucial to maintaining a secure online store. Updates often include security patches that address vulnerabilities and help protect your store from attacks. To keep your WordPress and WooCommerce installations up to date:
1. Enable automatic updates for WordPress core.
2. Regularly check for and install updates for WooCommerce and all plugins.
### Choose secure plugins and themes
The plugins and themes you use can have a significant impact on the security of your WooCommerce store. To ensure your store is secure:
1. Install plugins and themes from reputable sources, such as the WordPress Plugin Directory and Theme Directory.
2. Regularly review and update the plugins and themes you use, removing any that are no longer maintained or have known security vulnerabilities.
3. Avoid using nulled or pirated plugins and themes, which may contain malicious code.
### Implement secure coding practices
Secure coding practices are essential for building a secure WooCommerce store. To implement secure coding practices:
1. Follow the WordPress Coding Standards when developing custom themes or plugins.
2. Use prepared statements and parameterized queries to protect against SQL injection attacks.
3. Validate and sanitize user input to prevent cross-site scripting (XSS) attacks and other vulnerabilities.
4. Regularly review and update your custom code to address potential security vulnerabilities.
### Harden WordPress security
Hardening your WordPress installation can help protect your WooCommerce store from attacks. To harden your WordPress security:
1. Use strong, unique passwords for all user accounts.
2. Limit login attempts and enable two-factor authentication (2FA) to protect against brute-force attacks.
3. Change the default `wp_` table prefix in your WordPress database.
4. Disable XML-RPC and REST API access when not needed.
5. Keep file permissions secure and restrict access to sensitive files and directories.
### Secure user data
Protecting your customers' data is a critical aspect of securing your WooCommerce store. To secure user data:
1. Use SSL certificates to encrypt data transmitted between your store and your customers.
2. Store customer data securely and limit access to sensitive information.
3. Comply with data protection regulations, such as the GDPR, to ensure you handle customer data responsibly.
### Implement a security plugin
Using a security plugin can help you monitor and protect your WooCommerce store from potential threats. To implement a security plugin:
1. Choose a reputable security plugin, such as Wordfence, Sucuri, or iThemes Security.
2. Configure the plugin's settings to enable features like malware scanning, firewall protection, and login security.
### Regularly monitor and audit your store's security
Continuously monitor and audit your WooCommerce store's security to identify potential vulnerabilities and address them before they can be exploited. To monitor and audit your store's security:
1. Use a security plugin to perform regular scans for malware and other security threats.
2. Monitor your site's activity logs to identify suspicious activity and potential security issues.
3. Perform regular security audits to evaluate your store's overall security and identify areas for improvement.
### Create regular backups
Backing up your WooCommerce store is essential for quickly recovering from security incidents, such as data loss or site compromise. To create regular backups:
1. Choose a reliable backup plugin, such as UpdraftPlus, BackupBuddy, or Duplicator.
2. Configure the plugin to automatically create regular backups of your entire site, including the database, files, and media.
3. Store your backups securely off-site to ensure they are accessible in case of an emergency.
## Conclusion
By following these security best practices, you can build a secure and resilient WooCommerce store that protects both your business and your customers. Regularly monitoring, auditing, and updating your store's security measures will help ensure it remains protected as new threats and vulnerabilities emerge.
---
## Customizing WooCommerce endpoint URLs
*Source: best-practices/urls-and-routing/customizing-endpoint-urls.md*
# Customizing WooCommerce endpoint URLs
Before you start, check out [WooCommerce Endpoints](./woocommerce-endpoints.md).
## Customizing endpoint URLs
The URL for each endpoint can be customized in **WooCommerce > Settings > Advanced** in the Page setup section.
Ensure that they are unique to avoid conflicts. If you encounter issues with 404s, go to **Settings > Permalinks** and save to flush the rewrite rules.
## Using endpoints in menus
If you want to include an endpoint in your menus, you need to use the Links section:
Enter the full URL to the endpoint and then insert that into your menu.
Remember that some endpoints, such as view-order, require an order ID to work. In general, we don't recommend adding these endpoints to your menus. These pages can instead be accessed via the my-account page.
## Using endpoints in payment gateway plugins
WooCommerce provides helper functions in the order class for getting these URLs. They are:
`$order->get_checkout_payment_url( $on_checkout = false );`
and:
`$order->get_checkout_order_received_url();`
Gateways need to use these methods for full 2.1+ compatibility.
## Troubleshooting
### Endpoints showing 404
- If you see a 404 error, go to **WordPress Admin** > **Settings > Permalinks** and Save. This ensures that rewrite rules for endpoints exist and are ready to be used.
- If using an endpoint such as view-order, ensure that it specifies an order number. /view-order/ is invalid. /view-order/10/ is valid. These types of endpoints should not be in your navigation menus.
### Endpoints are not working
On Windows servers, the **web.config** file may not be set correctly to allow for the endpoints to work correctly. In this case, clicking on endpoint links (e.g. /edit-account/ or /customer-logout/) may appear to do nothing except refresh the page. In order to resolve this, try simplifying the **web.config** file on your Windows server. Here's a sample file configuration:
```xml
<<>?xml version="1.0" encoding="UTF-8"?>
```
### Pages direct to wrong place
Landing on the wrong page when clicking an endpoint URL is typically caused by incorrect settings. For example, clicking 'Edit address' on your account page takes you to the Shop page instead of the edit address form means you selected the wrong page in settings. Confirm that your pages are correctly configured and that a different page is used for each section.
### How to remove "Downloads" from My Account
Sometimes the "Downloads" endpoint on the "My account" page does not need to be displayed. This can be removed by going to **WooCommerce > Settings > Advanced > Account endpoints** and clearing the Downloads endpoint field.
---
## Understanding the risks of removing URL bases in WooCommerce
*Source: best-practices/urls-and-routing/removing-product-product-category-or-shop-from-the-url.md*
# Understanding the risks of removing URL bases in WooCommerce
## In sum
Removing `/product/`, `/product-category/`, or `/shop/` from the URLs is not advisable due to the way WordPress resolves its URLs. It uses the `product-category` (or any other text for that matter) base of a URL to detect that it is a URL leading to a product category. There are SEO plugins that allow you to remove this base, but that can lead to a number of problems with performance and duplicate URLs.
## Better to avoid
You will make it harder for WordPress to detect what page you are trying to reach when you type in a product category URL. Also, understand that the standard "Page" in WordPress always has no base text in the URL. For example:
- `http://yoursite.com/about-page/` (this is the URL of a standard page)
- `http://yoursite.com/product-category/category-x/` (this is the URL leading to a product category)
What would happen if we remove that 'product-category' part?
- `http://yoursite.com/about-page/`
- `http://yoursite.com/category-x/`
WordPress will have to do much more work to detect what page you are looking for when entering one of the above URLs. That is why we do not recommend using any SEO plugin to achieve this.
---
## Working with webhooks in WooCommerce
*Source: best-practices/urls-and-routing/webhooks.md*
# Working with webhooks in WooCommerce
## What are webhooks?
A [Webhook](http://en.wikipedia.org/wiki/Webhook) is an event notification sent to a URL of your choice. Users can configure them to trigger events on one site to invoke behavior on another.
Webhooks are useful for integrating with third-party services and other external API that support them.
## Webhooks in WooCommerce
Webhooks were introduced in WooCommerce 2.2 and can trigger events each time you add, edit or delete orders, products, coupons or customers.
It's also possible to use webhooks with WooCommerce actions, e.g., Create a webhook to be used every time a product is added to the shopping cart, using the action `woocommerce_add_to_cart`.
Webhooks also make it easier for third-party apps to integrate with WooCommerce.
## Creating webhooks
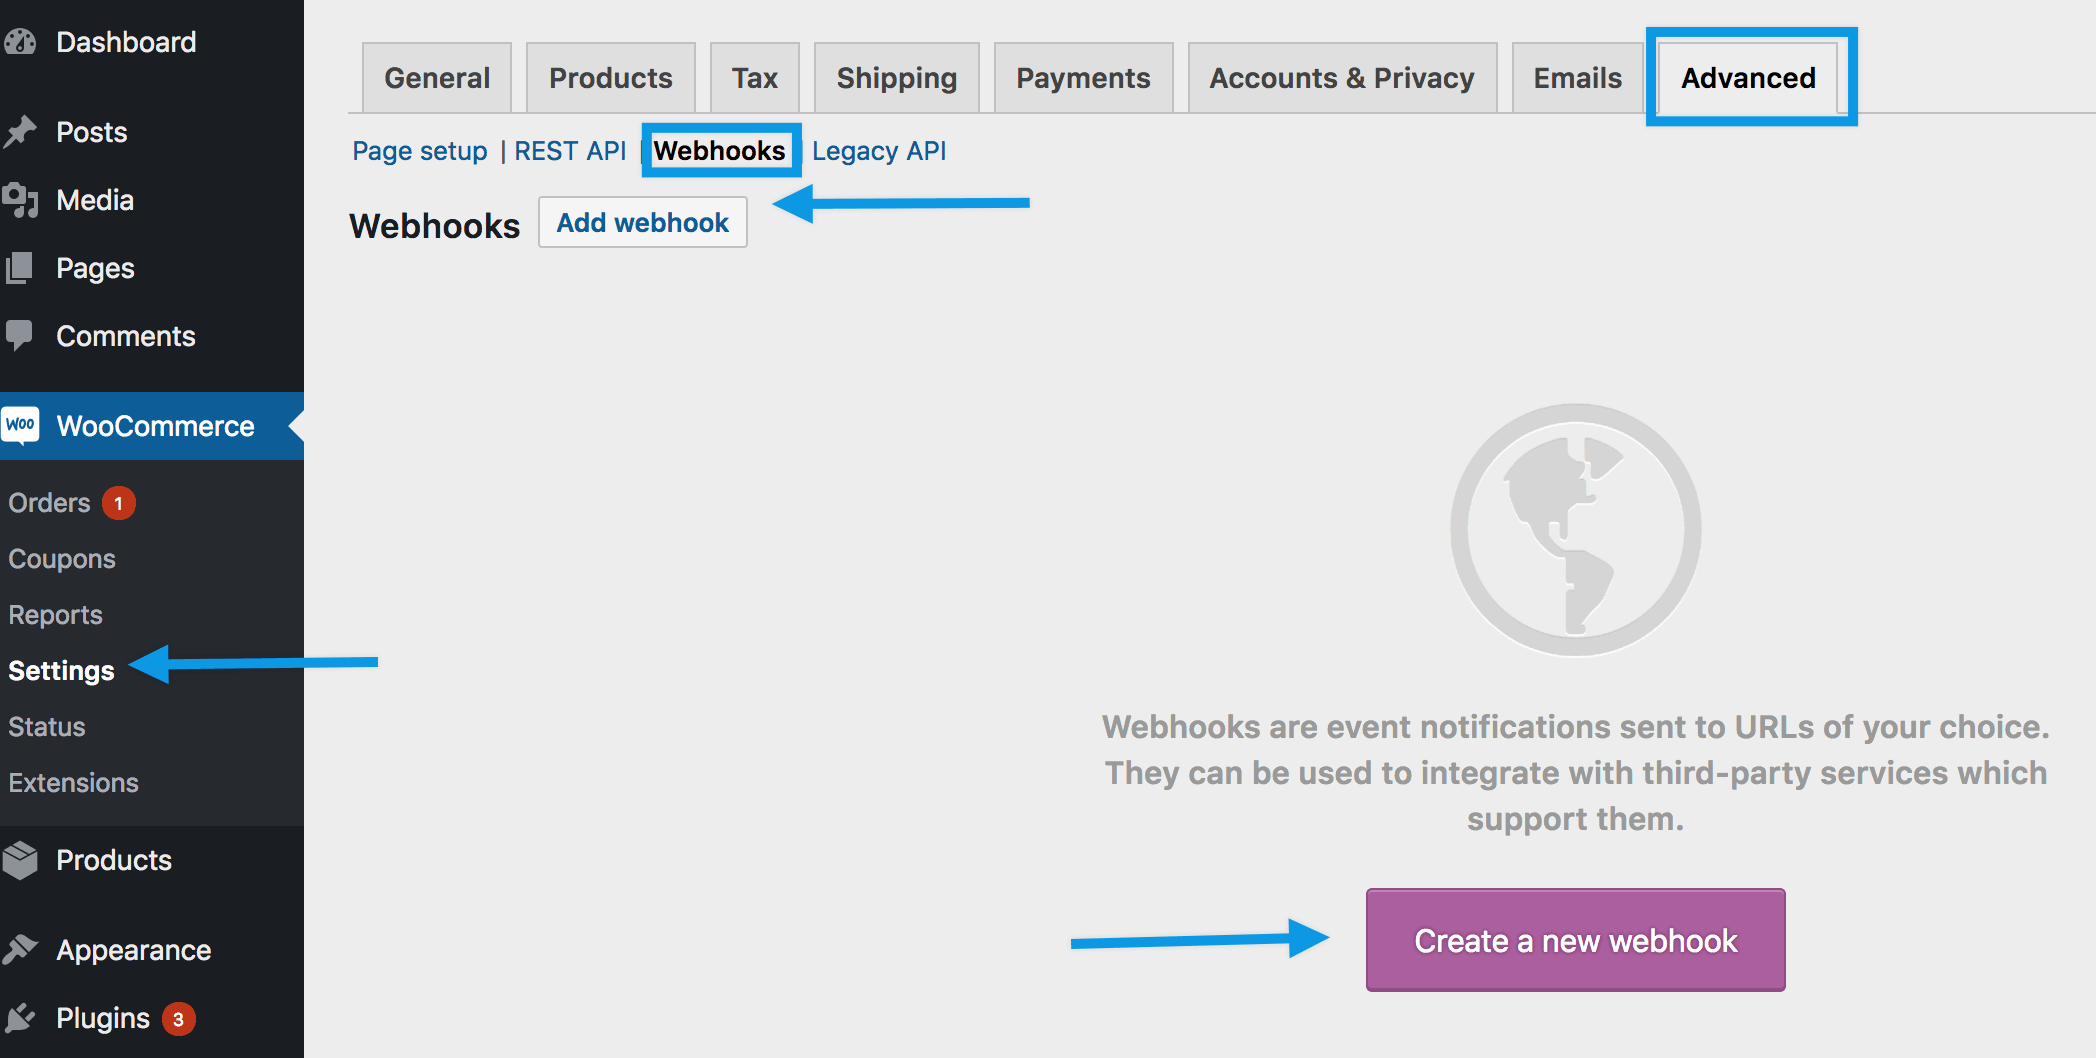
To create a new webhook:
1/ **Go to**: **WooCommerce > Settings > Advanced > Webhooks**.
> **Note:** Webhooks were formerly found under WooCommerce > Settings > API prior to WooCommerce 3.4.
2/ Select **Create a new webhook** (first incident) or **Add webhook**. The **Webhook Data** box appears.

3/ **Enter**.
- **Name**: The **name** is auto-generated as "Webhook created on [date and time of creation]" as a standard to facilitate creation. Change the name to something else.
- **Status**: Set to **Active** (delivers payload), **Paused** (does not deliver), or **Disabled** (does not deliver due delivery failures).
- **Topic**: Indicate when the webhook should be triggered - **Order Created**, **Product Deleted**, or **Customer Updated**. There are also **Action** and **Custom** options.
- **Action Event**: This option is available when the Topic is a WooCommerce **Action**, such as `woocommerce_add_to_cart` for when customers add products to the shopping cart.
- **Custom Topic**: This option is for **advanced users only**. It's possible to introduce new, customized topics with the help of `woocommerce_webhook_topic_hooks` filter.
- **Delivery URL**: URL where the webhook payload is delivered.
- **Secret**: The Secret Key generates a hash of the delivered webhook and is provided in the request headers. This defaults to the current API user's consumer secret, if nothing is entered.
4/ **Save webhook**.
> **Note**: The first time your webhook is saved with the Activated status, it sends a ping to the Delivery URL.
Webhooks are disabled after 5 retries by default if the delivery URL returns an unsuccessful status such as `404` or `5xx`. Successful responses are `2xx`, `301` or `302`.
To increase the number of retries, you can use the `woocommerce_max_webhook_delivery_failures` filter function.
## Editing and deleting webhooks
Webhooks are listed the same way as posts or products.
1. Find the webhook you wish to alter.
2. Hover over the name, and **Edit** and **Delete permanently** options appear.
3. **Delete**, or make **Edits** and **Save changes**. Bulk deletion is also possible with the dropdown.
## Webhook logs
WooCommerce saves logs of all events triggering a webhook. Webhook logs are found at: **WooCommerce > Status > Logs**.
Logs may be reviewed to see delivery and response from the server, making it simpler to integrate and debug.
---
## Understanding WooCommerce endpoints
*Source: best-practices/urls-and-routing/woocommerce-endpoints.md*
# Understanding WooCommerce endpoints
Endpoints are an extra part in the website URL that is detected to show different content when present.
For example: You may have a 'my account' page shown at URL **yoursite.com/my-account**. When the endpoint 'edit-account' is appended to this URL, making it '**yoursite.com/my-account/edit-account**' then the **Edit account page** is shown instead of the **My account page**.
This allows us to show different content without the need for multiple pages and shortcodes, and reduces the amount of content that needs to be installed.
Endpoints are located at **WooCommerce > Settings > Advanced**.
## Checkout endpoints
The following endpoints are used for checkout-related functionality and are appended to the URL of the /checkout page:
- Pay page - `/order-pay/{ORDER_ID}`
- Order received (thanks) - `/order-received/`
- Add payment method - `/add-payment-method/`
- Delete payment method - `/delete-payment-method/`
- Set default payment method - `/set-default-payment-method/`
## Account endpoints
The following endpoints are used for account-related functionality and are appended to the URL of the /my-account page:
- Orders - `/orders/`
- View order - `/view-order/{ORDER_ID}`
- Downloads - `/downloads/`
- Edit account (and change password) - `/edit-account/`
- Addresses - `/edit-address/`
- Payment methods - `/payment-methods/`
- Lost password - `/lost-password/`
- Logout - `/customer-logout/`
## Learn more
- [Customizing endpoint URLs](./customizing-endpoint-urls.md)
---
## Blocks reference
*Source: block-development/block-references.md*
# Blocks reference
This page lists the Woo blocks included in the package. (Incomplete as there are still blocks that are not using block.json definition).
## Product Average Rating (Beta) - woocommerce/product-average-rating
Display the average rating of a product
- **Name:** woocommerce/product-average-rating
- **Category:** woocommerce-product-elements
- **Ancestor:** woocommerce/single-product
- **Parent:**
- **Supports:** color (background, text), interactivity (clientNavigation), spacing (margin, padding), typography (fontSize)
- **Attributes:** textAlign
## Add to Cart Button - woocommerce/product-button
Display a call to action button which either adds the product to the cart, or links to the product page.
- **Name:** woocommerce/product-button
- **Category:** woocommerce-product-elements
- **Ancestor:** woocommerce/all-products, woocommerce/single-product, core/post-template, woocommerce/product-template
- **Parent:**
- **Supports:** align (full, wide), color (background, text, ~~link~~), interactivity, spacing (margin, padding), typography (fontSize, lineHeight), ~~html~~
- **Attributes:** isDescendentOfQueryLoop, isDescendentOfSingleProductBlock, productId, textAlign, width
## Product Image - woocommerce/product-image
Display the main product image.
- **Name:** woocommerce/product-image
- **Category:** woocommerce-product-elements
- **Ancestor:** woocommerce/all-products, woocommerce/single-product, woocommerce/product-template, core/post-template
- **Parent:**
- **Supports:** dimensions (aspectRatio), interactivity (clientNavigation), spacing (margin, padding), typography (fontSize), ~~html~~
- **Attributes:** aspectRatio, height, imageSizing, isDescendentOfQueryLoop, isDescendentOfSingleProductBlock, productId, saleBadgeAlign, scale, showProductLink, showSaleBadge, width
## Product Price - woocommerce/product-price
Display the price of a product.
- **Name:** woocommerce/product-price
- **Category:** woocommerce-product-elements
- **Ancestor:** woocommerce/all-products, woocommerce/single-product, woocommerce/product-template, core/post-template
- **Parent:**
- **Supports:** color (background, text, ~~link~~), interactivity, spacing (margin, padding), typography (fontSize, lineHeight), ~~html~~
- **Attributes:** isDescendentOfQueryLoop, isDescendentOfSingleProductBlock, isDescendentOfSingleProductTemplate, productId, textAlign
## Product Image Gallery - woocommerce/product-image-gallery
Display a product's images.
- **Name:** woocommerce/product-image-gallery
- **Category:** woocommerce-product-elements
- **Ancestor:**
- **Parent:**
- **Supports:** align, interactivity (clientNavigation), ~~multiple~~
- **Attributes:**
## Product Meta - woocommerce/product-meta
Display a product’s SKU, categories, tags, and more.
- **Name:** woocommerce/product-meta
- **Category:** woocommerce-product-elements
- **Ancestor:**
- **Parent:**
- **Supports:** align, interactivity (clientNavigation), ~~reusable~~
- **Attributes:**
## Product Rating - woocommerce/product-rating
Display the average rating of a product.
- **Name:** woocommerce/product-rating
- **Category:** woocommerce-product-elements
- **Ancestor:** woocommerce/all-products, woocommerce/single-product, woocommerce/product-template, core/post-template
- **Parent:**
- **Supports:** color (text, ~~background~~, ~~link~~), interactivity (clientNavigation), spacing (margin, padding), typography (fontSize)
- **Attributes:** isDescendentOfQueryLoop, isDescendentOfSingleProductBlock, isDescendentOfSingleProductTemplate, productId, textAlign
## Product Rating Counter - woocommerce/product-rating-counter
Display the review count of a product
- **Name:** woocommerce/product-rating-counter
- **Category:** woocommerce-product-elements
- **Ancestor:** woocommerce/single-product
- **Parent:**
- **Supports:** color (link, ~~background~~, ~~text~~), interactivity (clientNavigation), spacing (margin, padding), typography (fontSize), ~~inserter~~
- **Attributes:** isDescendentOfQueryLoop, isDescendentOfSingleProductBlock, isDescendentOfSingleProductTemplate, productId, textAlign
## Product Rating Stars - woocommerce/product-rating-stars
Display the average rating of a product with stars
- **Name:** woocommerce/product-rating-stars
- **Category:** woocommerce-product-elements
- **Ancestor:** woocommerce/single-product
- **Parent:**
- **Supports:** color (text, ~~background~~, ~~link~~), interactivity (clientNavigation), spacing (margin, padding), typography (fontSize), ~~inserter~~
- **Attributes:** isDescendentOfQueryLoop, isDescendentOfSingleProductBlock, isDescendentOfSingleProductTemplate, productId, textAlign
## Related Products - woocommerce/related-products
Display related products.
- **Name:** woocommerce/related-products
- **Category:** woocommerce
- **Ancestor:**
- **Parent:**
- **Supports:** align, interactivity (clientNavigation), ~~inserter~~, ~~reusable~~
- **Attributes:**
## On-Sale Badge - woocommerce/product-sale-badge
Displays an on-sale badge if the product is on-sale.
- **Name:** woocommerce/product-sale-badge
- **Category:** woocommerce-product-elements
- **Ancestor:** woocommerce/single-product, woocommerce/product-template, core/post-template, woocommerce/product-gallery
- **Parent:**
- **Supports:** align, color (background, gradients, text, ~~link~~), interactivity (clientNavigation), spacing (margin), typography (fontSize, lineHeight), ~~html~~
- **Attributes:** isDescendentOfQueryLoop, isDescendentOfSingleProductBlock, isDescendentOfSingleProductTemplate, productId
## Product SKU - woocommerce/product-sku
Displays the SKU of a product.
- **Name:** woocommerce/product-sku
- **Category:** woocommerce-product-elements
- **Ancestor:** woocommerce/product-meta, woocommerce/all-products, woocommerce/single-product, woocommerce/product-template, core/post-template
- **Parent:**
- **Supports:** color (background, text), interactivity (clientNavigation), spacing (margin, padding), typography (fontSize, lineHeight), ~~html~~
- **Attributes:** isDescendantOfAllProducts, prefix, productId, showProductSelector, suffix
## Product Stock Indicator - woocommerce/product-stock-indicator
Let shoppers know when products are out of stock or on backorder. This block is hidden when products are in stock.
- **Name:** woocommerce/product-stock-indicator
- **Category:** woocommerce-product-elements
- **Ancestor:** woocommerce/all-products, woocommerce/single-product, woocommerce/product-template, core/post-template
- **Parent:**
- **Supports:** color (background, text), interactivity (clientNavigation), spacing (margin, padding), typography (fontSize, lineHeight), ~~html~~
- **Attributes:** isDescendantOfAllProducts, isDescendentOfQueryLoop
## Product Summary - woocommerce/product-summary
Display a short description about a product.
- **Name:** woocommerce/product-summary
- **Category:** woocommerce-product-elements
- **Ancestor:** woocommerce/all-products, woocommerce/single-product, woocommerce/product-template, core/post-template
- **Parent:**
- **Supports:** color (background, link, text), interactivity (clientNavigation), spacing (margin, padding), typography (fontSize, lineHeight)
- **Attributes:** isDescendantOfAllProducts, isDescendentOfQueryLoop, isDescendentOfSingleProductBlock, isDescendentOfSingleProductTemplate, linkText, productId, showDescriptionIfEmpty, showLink, summaryLength
## Product Title - woocommerce/product-title
Display the title of a product.
- **Name:** woocommerce/product-title
- **Category:** woocommerce-product-elements
- **Ancestor:** woocommerce/all-products
- **Parent:**
- **Supports:** color (background, gradients, text, ~~link~~), interactivity (~~clientNavigation~~), spacing (margin), typography (fontSize, lineHeight), ~~html~~
- **Attributes:** align, headingLevel, linkTarget, productId, showProductLink
## Accordion Group - woocommerce/accordion-group
A group of headers and associated expandable content.
- **Name:** woocommerce/accordion-group
- **Category:** woocommerce
- **Ancestor:**
- **Parent:**
- **Supports:** align (full, wide), background (backgroundImage, backgroundSize), color (background, gradient, text), interactivity, layout, shadow, spacing (blockGap, margin, padding), ~~html~~
- **Attributes:** allowedBlocks, autoclose, iconPosition
## Accordion Header - woocommerce/accordion-header
Accordion header.
- **Name:** woocommerce/accordion-header
- **Category:** woocommerce
- **Ancestor:**
- **Parent:** woocommerce/accordion-item
- **Supports:** anchor, border, color (background, gradient, text), interactivity, layout, shadow, spacing (margin, padding), typography (fontSize, textAlign), ~~align~~
- **Attributes:** icon, iconPosition, level, levelOptions, openByDefault, textAlignment, title
## Accordion - woocommerce/accordion-item
A single accordion that displays a header and expandable content.
- **Name:** woocommerce/accordion-item
- **Category:** woocommerce
- **Ancestor:**
- **Parent:** woocommerce/accordion-group
- **Supports:** align (full, wide), color (background, gradient, text), interactivity, layout, shadow, spacing (blockGap, margin)
- **Attributes:** openByDefault
## Accordion Panel - woocommerce/accordion-panel
Accordion Panel
- **Name:** woocommerce/accordion-panel
- **Category:** woocommerce
- **Ancestor:**
- **Parent:** woocommerce/accordion-item
- **Supports:** border, color (background, gradient, text), interactivity, layout, shadow, spacing (blockGap, margin, padding), typography (fontSize, lineHeight)
- **Attributes:** allowedBlocks, isSelected, openByDefault, templateLock
## Active Filters Controls - woocommerce/active-filters
Display the currently active filters.
- **Name:** woocommerce/active-filters
- **Category:** woocommerce
- **Ancestor:**
- **Parent:**
- **Supports:** color (text, ~~background~~), interactivity (~~clientNavigation~~), ~~html~~, ~~inserter~~, ~~lock~~, ~~multiple~~
- **Attributes:** displayStyle, headingLevel
## Add to Cart + Options (Beta) - woocommerce/add-to-cart-with-options
Use blocks to create an "Add to cart" area that's customized for different product types, such as variable and grouped.
- **Name:** woocommerce/add-to-cart-with-options
- **Category:** woocommerce-product-elements
- **Ancestor:**
- **Parent:**
- **Supports:** interactivity
- **Attributes:** isDescendantOfAddToCartWithOptions
## Grouped Product Selector (Beta) - woocommerce/add-to-cart-with-options-grouped-product-selector
Display a group of products that can be added to the cart.
- **Name:** woocommerce/add-to-cart-with-options-grouped-product-selector
- **Category:** woocommerce-product-elements
- **Ancestor:** woocommerce/add-to-cart-with-options
- **Parent:**
- **Supports:** interactivity
- **Attributes:**
## Grouped Product: Template (Beta) - woocommerce/add-to-cart-with-options-grouped-product-item
A list item template that represents a child product within the Grouped Product Selector block.
- **Name:** woocommerce/add-to-cart-with-options-grouped-product-item
- **Category:** woocommerce-product-elements
- **Ancestor:** woocommerce/add-to-cart-with-options-grouped-product-selector
- **Parent:**
- **Supports:** interactivity, ~~inserter~~
- **Attributes:**
## Grouped Product: Item Label (Beta) - woocommerce/add-to-cart-with-options-grouped-product-item-label
Display the product title as a label or paragraph.
- **Name:** woocommerce/add-to-cart-with-options-grouped-product-item-label
- **Category:** woocommerce-product-elements
- **Ancestor:** woocommerce/add-to-cart-with-options-grouped-product-item
- **Parent:**
- **Supports:** color (background, gradients, text), layout (selfStretch), spacing (blockGap, margin, padding), typography (fontSize, lineHeight, textAlign), ~~html~~
- **Attributes:**
## Grouped Product: Item Selector (Beta) - woocommerce/add-to-cart-with-options-grouped-product-item-selector
Add a way of selecting a child product within the Grouped Product block. Depending on the type of product and its properties, this might be a button, a checkbox, or a link.
- **Name:** woocommerce/add-to-cart-with-options-grouped-product-item-selector
- **Category:** woocommerce-product-elements
- **Ancestor:** woocommerce/add-to-cart-with-options-grouped-product-item
- **Parent:**
- **Supports:** interactivity, ~~inserter~~
- **Attributes:**
## Product Quantity (Beta) - woocommerce/add-to-cart-with-options-quantity-selector
Display an input field customers can use to select the number of products to add to their cart.
- **Name:** woocommerce/add-to-cart-with-options-quantity-selector
- **Category:** woocommerce-product-elements
- **Ancestor:** woocommerce/add-to-cart-with-options
- **Parent:**
- **Supports:** interactivity
- **Attributes:**
## Variation Selector: Template (Beta) - woocommerce/add-to-cart-with-options-variation-selector-attribute
A template for attribute name and options that will be applied to all variable products with attributes.
- **Name:** woocommerce/add-to-cart-with-options-variation-selector-attribute
- **Category:** woocommerce-product-elements
- **Ancestor:** woocommerce/add-to-cart-with-options-variation-selector
- **Parent:**
- **Supports:** interactivity, ~~inserter~~
- **Attributes:**
## Variation Selector: Attribute Name (Beta) - woocommerce/add-to-cart-with-options-variation-selector-attribute-name
Format the name of an attribute associated with a variable product.
- **Name:** woocommerce/add-to-cart-with-options-variation-selector-attribute-name
- **Category:** woocommerce-product-elements
- **Ancestor:** woocommerce/add-to-cart-with-options-variation-selector-attribute
- **Parent:**
- **Supports:** color (background, gradients, text), interactivity, spacing (padding), typography (fontSize, lineHeight), ~~alignWide~~, ~~align~~, ~~inserter~~
- **Attributes:**
## Variation Selector: Attribute Options (Beta) - woocommerce/add-to-cart-with-options-variation-selector-attribute-options
Display the attribute options associated with a variable product.
- **Name:** woocommerce/add-to-cart-with-options-variation-selector-attribute-options
- **Category:** woocommerce-product-elements
- **Ancestor:** woocommerce/add-to-cart-with-options-variation-selector-attribute
- **Parent:**
- **Supports:** interactivity, ~~inserter~~
- **Attributes:** style
## Variation Selector (Beta) - woocommerce/add-to-cart-with-options-variation-selector
Display any product variations available to select from and add to cart.
- **Name:** woocommerce/add-to-cart-with-options-variation-selector
- **Category:** woocommerce-product-elements
- **Ancestor:** woocommerce/add-to-cart-with-options
- **Parent:**
- **Supports:** interactivity
- **Attributes:**
## Filter by Attribute Controls - woocommerce/attribute-filter
Enable customers to filter the product grid by selecting one or more attributes, such as color.
- **Name:** woocommerce/attribute-filter
- **Category:** woocommerce
- **Ancestor:**
- **Parent:**
- **Supports:** color (text, ~~background~~), ~~html~~, ~~inserter~~, ~~interactivity~~, ~~lock~~
- **Attributes:** attributeId, className, displayStyle, headingLevel, isPreview, queryType, selectType, showCounts, showFilterButton
## Store Breadcrumbs - woocommerce/breadcrumbs
Enable customers to keep track of their location within the store and navigate back to parent pages.
- **Name:** woocommerce/breadcrumbs
- **Category:** woocommerce
- **Ancestor:**
- **Parent:**
- **Supports:** align (full, wide), color (link, text, ~~background~~), interactivity (clientNavigation), typography (fontSize, lineHeight), ~~html~~
- **Attributes:** align, contentJustification, fontSize
## Accepted Payment Methods - woocommerce/cart-accepted-payment-methods-block
Display accepted payment methods.
- **Name:** woocommerce/cart-accepted-payment-methods-block
- **Category:** woocommerce
- **Ancestor:**
- **Parent:** woocommerce/cart-totals-block
- **Supports:** inserter, ~~align~~, ~~html~~, ~~multiple~~, ~~reusable~~
- **Attributes:**
## Cart Cross-Sells - woocommerce/cart-cross-sells-block
Shows the Cross-Sells block.
- **Name:** woocommerce/cart-cross-sells-block
- **Category:** woocommerce
- **Ancestor:**
- **Parent:** woocommerce/cart-items-block
- **Supports:** inserter, ~~align~~, ~~html~~, ~~multiple~~, ~~reusable~~
- **Attributes:**
## Cart Cross-Sells Products - woocommerce/cart-cross-sells-products-block
Shows the Cross-Sells products.
- **Name:** woocommerce/cart-cross-sells-products-block
- **Category:** woocommerce
- **Ancestor:**
- **Parent:** woocommerce/cart-cross-sells-block
- **Supports:** ~~align~~, ~~html~~, ~~inserter~~, ~~lock~~, ~~multiple~~, ~~reusable~~
- **Attributes:** columns, lock
## Express Checkout - woocommerce/cart-express-payment-block
Allow customers to breeze through with quick payment options.
- **Name:** woocommerce/cart-express-payment-block
- **Category:** woocommerce
- **Ancestor:**
- **Parent:** woocommerce/cart-totals-block
- **Supports:** ~~align~~, ~~html~~, ~~inserter~~, ~~lock~~, ~~multiple~~, ~~reusable~~
- **Attributes:** buttonBorderRadius, buttonHeight, lock, showButtonStyles
## Cart Items - woocommerce/cart-items-block
Column containing cart items.
- **Name:** woocommerce/cart-items-block
- **Category:** woocommerce
- **Ancestor:**
- **Parent:** woocommerce/filled-cart-block
- **Supports:** ~~align~~, ~~html~~, ~~inserter~~, ~~lock~~, ~~multiple~~, ~~reusable~~
- **Attributes:** lock
## Cart Line Items - woocommerce/cart-line-items-block
Block containing current line items in Cart.
- **Name:** woocommerce/cart-line-items-block
- **Category:** woocommerce
- **Ancestor:**
- **Parent:** woocommerce/cart-items-block
- **Supports:** ~~align~~, ~~html~~, ~~inserter~~, ~~lock~~, ~~multiple~~, ~~reusable~~
- **Attributes:** lock
## Order Summary - woocommerce/cart-order-summary-block
Show customers a summary of their order.
- **Name:** woocommerce/cart-order-summary-block
- **Category:** woocommerce
- **Ancestor:**
- **Parent:** woocommerce/cart-totals-block
- **Supports:** ~~align~~, ~~html~~, ~~inserter~~, ~~lock~~, ~~multiple~~, ~~reusable~~
- **Attributes:** lock
## Coupon Form - woocommerce/cart-order-summary-coupon-form-block
Shows the apply coupon form.
- **Name:** woocommerce/cart-order-summary-coupon-form-block
- **Category:** woocommerce
- **Ancestor:**
- **Parent:** woocommerce/cart-order-summary-block
- **Supports:** ~~align~~, ~~html~~, ~~multiple~~, ~~reusable~~
- **Attributes:** className, lock
## Discount - woocommerce/cart-order-summary-discount-block
Shows the cart discount row.
- **Name:** woocommerce/cart-order-summary-discount-block
- **Category:** woocommerce
- **Ancestor:**
- **Parent:** woocommerce/cart-order-summary-totals-block
- **Supports:** ~~align~~, ~~html~~, ~~lock~~, ~~multiple~~, ~~reusable~~
- **Attributes:** className, lock
## Fees - woocommerce/cart-order-summary-fee-block
Shows the cart fee row.
- **Name:** woocommerce/cart-order-summary-fee-block
- **Category:** woocommerce
- **Ancestor:**
- **Parent:** woocommerce/cart-order-summary-totals-block
- **Supports:** ~~align~~, ~~html~~, ~~lock~~, ~~multiple~~, ~~reusable~~
- **Attributes:** className, lock
## Heading - woocommerce/cart-order-summary-heading-block
Shows the heading row.
- **Name:** woocommerce/cart-order-summary-heading-block
- **Category:** woocommerce
- **Ancestor:**
- **Parent:** woocommerce/cart-order-summary-block
- **Supports:** ~~align~~, ~~html~~, ~~multiple~~, ~~reusable~~
- **Attributes:** className, content, lock
## Shipping - woocommerce/cart-order-summary-shipping-block
Shows the cart shipping row.
- **Name:** woocommerce/cart-order-summary-shipping-block
- **Category:** woocommerce
- **Ancestor:**
- **Parent:** woocommerce/cart-order-summary-totals-block
- **Supports:** ~~align~~, ~~html~~, ~~lock~~, ~~multiple~~, ~~reusable~~
- **Attributes:** lock
## Subtotal - woocommerce/cart-order-summary-subtotal-block
Shows the cart subtotal row.
- **Name:** woocommerce/cart-order-summary-subtotal-block
- **Category:** woocommerce
- **Ancestor:**
- **Parent:** woocommerce/cart-order-summary-totals-block
- **Supports:** ~~align~~, ~~html~~, ~~lock~~, ~~multiple~~, ~~reusable~~
- **Attributes:** className, lock
## Taxes - woocommerce/cart-order-summary-taxes-block
Shows the cart taxes row.
- **Name:** woocommerce/cart-order-summary-taxes-block
- **Category:** woocommerce
- **Ancestor:**
- **Parent:** woocommerce/cart-order-summary-totals-block
- **Supports:** ~~align~~, ~~html~~, ~~lock~~, ~~multiple~~, ~~reusable~~
- **Attributes:** className, lock
## Totals - woocommerce/cart-order-summary-totals-block
Shows the subtotal, fees, discounts, shipping and taxes.
- **Name:** woocommerce/cart-order-summary-totals-block
- **Category:** woocommerce
- **Ancestor:**
- **Parent:** woocommerce/cart-order-summary-block
- **Supports:** ~~align~~, ~~html~~, ~~lock~~, ~~multiple~~, ~~reusable~~
- **Attributes:** className, lock
## Cart Totals - woocommerce/cart-totals-block
Column containing the cart totals.
- **Name:** woocommerce/cart-totals-block
- **Category:** woocommerce
- **Ancestor:**
- **Parent:** woocommerce/filled-cart-block
- **Supports:** ~~align~~, ~~html~~, ~~inserter~~, ~~lock~~, ~~multiple~~, ~~reusable~~
- **Attributes:** checkbox, lock, text
## Empty Cart - woocommerce/empty-cart-block
Contains blocks that are displayed when the cart is empty.
- **Name:** woocommerce/empty-cart-block
- **Category:** woocommerce
- **Ancestor:**
- **Parent:** woocommerce/cart
- **Supports:** align (wide), ~~html~~, ~~inserter~~, ~~lock~~, ~~multiple~~, ~~reusable~~
- **Attributes:** lock
## Filled Cart - woocommerce/filled-cart-block
Contains blocks that are displayed when the cart contains products.
- **Name:** woocommerce/filled-cart-block
- **Category:** woocommerce
- **Ancestor:**
- **Parent:** woocommerce/cart
- **Supports:** align (wide), ~~html~~, ~~inserter~~, ~~lock~~, ~~multiple~~, ~~reusable~~
- **Attributes:** lock
## Proceed to Checkout - woocommerce/proceed-to-checkout-block
Allow customers proceed to Checkout.
- **Name:** woocommerce/proceed-to-checkout-block
- **Category:** woocommerce
- **Ancestor:**
- **Parent:** woocommerce/cart-totals-block
- **Supports:** ~~align~~, ~~html~~, ~~inserter~~, ~~lock~~, ~~multiple~~, ~~reusable~~
- **Attributes:** lock
## Cart Link - woocommerce/cart-link
Display a link to the cart.
- **Name:** woocommerce/cart-link
- **Category:** woocommerce
- **Ancestor:**
- **Parent:**
- **Supports:** color (background, link, ~~text~~), interactivity (clientNavigation), spacing (padding), typography (fontSize), ~~html~~, ~~multiple~~
- **Attributes:** cartIcon, content, isPreview
## Catalog Sorting - woocommerce/catalog-sorting
Enable customers to change the sorting order of the products.
- **Name:** woocommerce/catalog-sorting
- **Category:** woocommerce
- **Ancestor:**
- **Parent:**
- **Supports:** color (text, ~~background~~), interactivity (clientNavigation), typography (fontSize)
- **Attributes:** fontSize, useLabel
## Checkout - woocommerce/checkout
Display a checkout form so your customers can submit orders.
- **Name:** woocommerce/checkout
- **Category:** woocommerce
- **Ancestor:**
- **Parent:**
- **Supports:** align (wide), ~~html~~, ~~multiple~~
- **Attributes:** align, isPreview, showFormStepNumbers
## Actions - woocommerce/checkout-actions-block
Allow customers to place their order.
- **Name:** woocommerce/checkout-actions-block
- **Category:** woocommerce
- **Ancestor:**
- **Parent:** woocommerce/checkout-fields-block
- **Supports:** ~~align~~, ~~html~~, ~~inserter~~, ~~lock~~, ~~multiple~~, ~~reusable~~
- **Attributes:** cartPageId, className, lock, priceSeparator, showReturnToCart
## Additional information - woocommerce/checkout-additional-information-block
Render additional fields in the 'Additional information' location.
- **Name:** woocommerce/checkout-additional-information-block
- **Category:** woocommerce
- **Ancestor:**
- **Parent:** woocommerce/checkout-fields-block
- **Supports:** ~~align~~, ~~html~~, ~~multiple~~, ~~reusable~~
- **Attributes:** className, lock
## Billing Address - woocommerce/checkout-billing-address-block
Collect your customer's billing address.
- **Name:** woocommerce/checkout-billing-address-block
- **Category:** woocommerce
- **Ancestor:**
- **Parent:** woocommerce/checkout-fields-block
- **Supports:** ~~align~~, ~~html~~, ~~inserter~~, ~~lock~~, ~~multiple~~, ~~reusable~~
- **Attributes:** lock
## Contact Information - woocommerce/checkout-contact-information-block
Collect your customer's contact information.
- **Name:** woocommerce/checkout-contact-information-block
- **Category:** woocommerce
- **Ancestor:**
- **Parent:** woocommerce/checkout-fields-block
- **Supports:** ~~align~~, ~~html~~, ~~inserter~~, ~~lock~~, ~~multiple~~, ~~reusable~~
- **Attributes:** lock
## Express Checkout - woocommerce/checkout-express-payment-block
Allow customers to breeze through with quick payment options.
- **Name:** woocommerce/checkout-express-payment-block
- **Category:** woocommerce
- **Ancestor:**
- **Parent:** woocommerce/checkout-fields-block
- **Supports:** ~~align~~, ~~html~~, ~~inserter~~, ~~lock~~, ~~multiple~~, ~~reusable~~
- **Attributes:** buttonBorderRadius, buttonHeight, className, lock, showButtonStyles
## Checkout Fields - woocommerce/checkout-fields-block
Column containing checkout address fields.
- **Name:** woocommerce/checkout-fields-block
- **Category:** woocommerce
- **Ancestor:**
- **Parent:** woocommerce/checkout
- **Supports:** ~~align~~, ~~html~~, ~~inserter~~, ~~lock~~, ~~multiple~~, ~~reusable~~
- **Attributes:** className, lock
## Order Note - woocommerce/checkout-order-note-block
Allow customers to add a note to their order.
- **Name:** woocommerce/checkout-order-note-block
- **Category:** woocommerce
- **Ancestor:**
- **Parent:** woocommerce/checkout-fields-block
- **Supports:** ~~align~~, ~~html~~, ~~multiple~~, ~~reusable~~
- **Attributes:** className, lock
## Order Summary - woocommerce/checkout-order-summary-block
Show customers a summary of their order.
- **Name:** woocommerce/checkout-order-summary-block
- **Category:** woocommerce
- **Ancestor:**
- **Parent:** woocommerce/checkout-totals-block
- **Supports:** ~~align~~, ~~html~~, ~~inserter~~, ~~lock~~, ~~multiple~~, ~~reusable~~
- **Attributes:** lock
## Cart Items - woocommerce/checkout-order-summary-cart-items-block
Shows cart items.
- **Name:** woocommerce/checkout-order-summary-cart-items-block
- **Category:** woocommerce
- **Ancestor:**
- **Parent:** woocommerce/checkout-order-summary-block
- **Supports:** ~~align~~, ~~html~~, ~~lock~~, ~~multiple~~, ~~reusable~~
- **Attributes:** className, disableProductDescriptions, lock
## Coupon Form - woocommerce/checkout-order-summary-coupon-form-block
Shows the apply coupon form.
- **Name:** woocommerce/checkout-order-summary-coupon-form-block
- **Category:** woocommerce
- **Ancestor:**
- **Parent:** woocommerce/checkout-order-summary-block
- **Supports:** ~~align~~, ~~html~~, ~~multiple~~, ~~reusable~~
- **Attributes:** className, lock
## Discount - woocommerce/checkout-order-summary-discount-block
Shows the cart discount row.
- **Name:** woocommerce/checkout-order-summary-discount-block
- **Category:** woocommerce
- **Ancestor:**
- **Parent:** woocommerce/checkout-order-summary-totals-block
- **Supports:** ~~align~~, ~~html~~, ~~lock~~, ~~multiple~~, ~~reusable~~
- **Attributes:** className, lock
## Fees - woocommerce/checkout-order-summary-fee-block
Shows the cart fee row.
- **Name:** woocommerce/checkout-order-summary-fee-block
- **Category:** woocommerce
- **Ancestor:**
- **Parent:** woocommerce/checkout-order-summary-totals-block
- **Supports:** ~~align~~, ~~html~~, ~~lock~~, ~~multiple~~, ~~reusable~~
- **Attributes:** className, lock
## Shipping - woocommerce/checkout-order-summary-shipping-block
Shows the cart shipping row.
- **Name:** woocommerce/checkout-order-summary-shipping-block
- **Category:** woocommerce
- **Ancestor:**
- **Parent:** woocommerce/checkout-order-summary-totals-block
- **Supports:** ~~align~~, ~~html~~, ~~lock~~, ~~multiple~~, ~~reusable~~
- **Attributes:** lock
## Subtotal - woocommerce/checkout-order-summary-subtotal-block
Shows the cart subtotal row.
- **Name:** woocommerce/checkout-order-summary-subtotal-block
- **Category:** woocommerce
- **Ancestor:**
- **Parent:** woocommerce/checkout-order-summary-totals-block
- **Supports:** ~~align~~, ~~html~~, ~~lock~~, ~~multiple~~, ~~reusable~~
- **Attributes:** className, lock
## Taxes - woocommerce/checkout-order-summary-taxes-block
Shows the cart taxes row.
- **Name:** woocommerce/checkout-order-summary-taxes-block
- **Category:** woocommerce
- **Ancestor:**
- **Parent:** woocommerce/checkout-order-summary-totals-block
- **Supports:** ~~align~~, ~~html~~, ~~lock~~, ~~multiple~~, ~~reusable~~
- **Attributes:** className, lock
## Totals - woocommerce/checkout-order-summary-totals-block
Shows the subtotal, fees, discounts, shipping and taxes.
- **Name:** woocommerce/checkout-order-summary-totals-block
- **Category:** woocommerce
- **Ancestor:**
- **Parent:** woocommerce/checkout-order-summary-block
- **Supports:** ~~align~~, ~~html~~, ~~lock~~, ~~multiple~~, ~~reusable~~
- **Attributes:** className, lock
## Payment Options - woocommerce/checkout-payment-block
Payment options for your store.
- **Name:** woocommerce/checkout-payment-block
- **Category:** woocommerce
- **Ancestor:**
- **Parent:** woocommerce/checkout-fields-block
- **Supports:** ~~align~~, ~~html~~, ~~inserter~~, ~~lock~~, ~~multiple~~, ~~reusable~~
- **Attributes:** lock
## Pickup Method - woocommerce/checkout-pickup-options-block
Shows local pickup locations.
- **Name:** woocommerce/checkout-pickup-options-block
- **Category:** woocommerce
- **Ancestor:**
- **Parent:** woocommerce/checkout-fields-block
- **Supports:** ~~align~~, ~~html~~, ~~inserter~~, ~~lock~~, ~~multiple~~, ~~reusable~~
- **Attributes:** lock
## Shipping Address - woocommerce/checkout-shipping-address-block
Collect your customer's shipping address.
- **Name:** woocommerce/checkout-shipping-address-block
- **Category:** woocommerce
- **Ancestor:**
- **Parent:** woocommerce/checkout-fields-block
- **Supports:** ~~align~~, ~~html~~, ~~inserter~~, ~~lock~~, ~~multiple~~, ~~reusable~~
- **Attributes:** lock
## Delivery - woocommerce/checkout-shipping-method-block
Select between shipping or local pickup.
- **Name:** woocommerce/checkout-shipping-method-block
- **Category:** woocommerce
- **Ancestor:**
- **Parent:** woocommerce/checkout-fields-block
- **Supports:** ~~align~~, ~~html~~, ~~inserter~~, ~~lock~~, ~~multiple~~, ~~reusable~~
- **Attributes:** lock
## Shipping Options - woocommerce/checkout-shipping-methods-block
Display shipping options and rates for your store.
- **Name:** woocommerce/checkout-shipping-methods-block
- **Category:** woocommerce
- **Ancestor:**
- **Parent:** woocommerce/checkout-fields-block
- **Supports:** ~~align~~, ~~html~~, ~~inserter~~, ~~lock~~, ~~multiple~~, ~~reusable~~
- **Attributes:** lock
## Terms and Conditions - woocommerce/checkout-terms-block
Ensure that customers agree to your Terms & Conditions and Privacy Policy.
- **Name:** woocommerce/checkout-terms-block
- **Category:** woocommerce
- **Ancestor:**
- **Parent:** woocommerce/checkout-fields-block
- **Supports:** ~~align~~, ~~html~~, ~~multiple~~, ~~reusable~~
- **Attributes:** checkbox, className, showSeparator, text
## Checkout Totals - woocommerce/checkout-totals-block
Column containing the checkout totals.
- **Name:** woocommerce/checkout-totals-block
- **Category:** woocommerce
- **Ancestor:**
- **Parent:** woocommerce/checkout
- **Supports:** ~~align~~, ~~html~~, ~~inserter~~, ~~lock~~, ~~multiple~~, ~~reusable~~
- **Attributes:** checkbox, className, text
## Classic Shortcode - woocommerce/classic-shortcode
Renders classic WooCommerce shortcodes.
- **Name:** woocommerce/classic-shortcode
- **Category:** woocommerce
- **Ancestor:**
- **Parent:**
- **Supports:** align, inserter, interactivity (~~clientNavigation~~), ~~html~~, ~~multiple~~, ~~reusable~~
- **Attributes:** align, shortcode
## Coming Soon - woocommerce/coming-soon
- **Name:** woocommerce/coming-soon
- **Category:** woocommerce
- **Ancestor:**
- **Parent:**
- **Supports:** color (background, text), ~~inserter~~
- **Attributes:** color, comingSoonPatternId, storeOnly
## Customer account - woocommerce/customer-account
A block that allows your customers to log in and out of their accounts in your store.
- **Name:** woocommerce/customer-account
- **Category:** woocommerce
- **Ancestor:**
- **Parent:**
- **Supports:** align, color (background, text), interactivity (clientNavigation), spacing (margin, padding), typography (fontSize)
- **Attributes:** displayStyle, iconClass, iconStyle
## Featured Category - woocommerce/featured-category
Visually highlight a product category and encourage prompt action.
- **Name:** woocommerce/featured-category
- **Category:** woocommerce
- **Ancestor:**
- **Parent:**
- **Supports:** align (full, wide), ariaLabel, color (background, text), interactivity (clientNavigation), spacing (padding), ~~html~~
- **Attributes:** alt, categoryId, contentAlign, dimRatio, editMode, focalPoint, hasParallax, imageFit, isRepeated, linkText, mediaId, mediaSrc, minHeight, overlayColor, overlayGradient, previewCategory, showDesc
## Featured Product - woocommerce/featured-product
Highlight a product or variation.
- **Name:** woocommerce/featured-product
- **Category:** woocommerce
- **Ancestor:**
- **Parent:**
- **Supports:** align (full, wide), ariaLabel, color (background, text), interactivity (clientNavigation), multiple, spacing (padding), ~~html~~
- **Attributes:** alt, contentAlign, dimRatio, editMode, focalPoint, hasParallax, imageFit, isRepeated, linkText, mediaId, mediaSrc, minHeight, overlayColor, overlayGradient, previewProduct, productId, showDesc, showPrice
## Filter Block - woocommerce/filter-wrapper
- **Name:** woocommerce/filter-wrapper
- **Category:** woocommerce
- **Ancestor:**
- **Parent:**
- **Supports:** interactivity (~~clientNavigation~~), ~~inserter~~
- **Attributes:** filterType, heading
## Hand-picked Products - woocommerce/handpicked-products
Display a selection of hand-picked products in a grid.
- **Name:** woocommerce/handpicked-products
- **Category:** woocommerce
- **Ancestor:**
- **Parent:**
- **Supports:** align (full, wide), interactivity (~~clientNavigation~~), ~~html~~, ~~inserter~~
- **Attributes:** align, alignButtons, columns, contentVisibility, isPreview, orderby, products
## Mini-Cart - woocommerce/mini-cart
Display a button for shoppers to quickly view their cart.
- **Name:** woocommerce/mini-cart
- **Category:** woocommerce
- **Ancestor:**
- **Parent:**
- **Supports:** typography (fontSize), ~~html~~, ~~multiple~~
- **Attributes:** addToCartBehaviour, cartAndCheckoutRenderStyle, hasHiddenPrice, iconColor, iconColorValue, isPreview, miniCartIcon, onCartClickBehaviour, priceColor, priceColorValue, productCountColor, productCountColorValue, productCountVisibility
## Empty Mini-Cart view - woocommerce/empty-mini-cart-contents-block
Blocks that are displayed when the Mini-Cart is empty.
- **Name:** woocommerce/empty-mini-cart-contents-block
- **Category:** woocommerce
- **Ancestor:**
- **Parent:** woocommerce/mini-cart-contents
- **Supports:** ~~align~~, ~~html~~, ~~inserter~~, ~~lock~~, ~~multiple~~, ~~reusable~~
- **Attributes:** lock
## Filled Mini-Cart view - woocommerce/filled-mini-cart-contents-block
Contains blocks that display the content of the Mini-Cart.
- **Name:** woocommerce/filled-mini-cart-contents-block
- **Category:** woocommerce
- **Ancestor:**
- **Parent:** woocommerce/mini-cart-contents
- **Supports:** ~~align~~, ~~html~~, ~~inserter~~, ~~lock~~, ~~multiple~~, ~~reusable~~
- **Attributes:** lock
## Mini-Cart View Cart Button - woocommerce/mini-cart-cart-button-block
Block that displays the cart button when the Mini-Cart has products.
- **Name:** woocommerce/mini-cart-cart-button-block
- **Category:** woocommerce
- **Ancestor:**
- **Parent:** woocommerce/mini-cart-footer-block
- **Supports:** color (background, text), inserter, ~~align~~, ~~html~~, ~~multiple~~, ~~reusable~~
- **Attributes:** lock
## Mini-Cart Proceed to Checkout Button - woocommerce/mini-cart-checkout-button-block
Block that displays the checkout button when the Mini-Cart has products.
- **Name:** woocommerce/mini-cart-checkout-button-block
- **Category:** woocommerce
- **Ancestor:**
- **Parent:** woocommerce/mini-cart-footer-block
- **Supports:** color (background, text), inserter, ~~align~~, ~~html~~, ~~multiple~~, ~~reusable~~
- **Attributes:** lock
## Mini-Cart Footer - woocommerce/mini-cart-footer-block
Block that displays the footer of the Mini-Cart block.
- **Name:** woocommerce/mini-cart-footer-block
- **Category:** woocommerce
- **Ancestor:**
- **Parent:** woocommerce/filled-mini-cart-contents-block
- **Supports:** ~~align~~, ~~html~~, ~~inserter~~, ~~lock~~, ~~multiple~~, ~~reusable~~
- **Attributes:** lock
## Mini-Cart Items - woocommerce/mini-cart-items-block
Contains the products table and other custom blocks of filled mini-cart.
- **Name:** woocommerce/mini-cart-items-block
- **Category:** woocommerce
- **Ancestor:**
- **Parent:** woocommerce/filled-mini-cart-contents-block
- **Supports:** ~~align~~, ~~html~~, ~~inserter~~, ~~lock~~, ~~multiple~~, ~~reusable~~
- **Attributes:** lock
## Mini-Cart Products Table - woocommerce/mini-cart-products-table-block
Block that displays the products table of the Mini-Cart block.
- **Name:** woocommerce/mini-cart-products-table-block
- **Category:** woocommerce
- **Ancestor:**
- **Parent:** woocommerce/mini-cart-items-block
- **Supports:** ~~align~~, ~~html~~, ~~inserter~~, ~~lock~~, ~~multiple~~, ~~reusable~~
- **Attributes:** lock
## Mini-Cart Shopping Button - woocommerce/mini-cart-shopping-button-block
Block that displays the shopping button when the Mini-Cart is empty.
- **Name:** woocommerce/mini-cart-shopping-button-block
- **Category:** woocommerce
- **Ancestor:**
- **Parent:** woocommerce/empty-mini-cart-contents-block
- **Supports:** color (background, text), inserter, ~~align~~, ~~html~~, ~~multiple~~, ~~reusable~~
- **Attributes:** lock
## Mini-Cart Title - woocommerce/mini-cart-title-block
Block that displays the title of the Mini-Cart block.
- **Name:** woocommerce/mini-cart-title-block
- **Category:** woocommerce
- **Ancestor:**
- **Parent:** woocommerce/filled-mini-cart-contents-block
- **Supports:** color (text, ~~background~~), typography (fontSize), ~~align~~, ~~html~~, ~~inserter~~, ~~lock~~, ~~multiple~~, ~~reusable~~
- **Attributes:** lock
## Mini-Cart Title Items Counter - woocommerce/mini-cart-title-items-counter-block
Block that displays the items counter part of the Mini-Cart Title block.
- **Name:** woocommerce/mini-cart-title-items-counter-block
- **Category:** woocommerce
- **Ancestor:**
- **Parent:** woocommerce/mini-cart-title-block
- **Supports:** color (background, text), spacing (padding), typography (fontSize), ~~align~~, ~~html~~, ~~inserter~~, ~~lock~~, ~~multiple~~, ~~reusable~~
- **Attributes:**
## Mini-Cart Title Label - woocommerce/mini-cart-title-label-block
Block that displays the 'Your cart' part of the Mini-Cart Title block.
- **Name:** woocommerce/mini-cart-title-label-block
- **Category:** woocommerce
- **Ancestor:**
- **Parent:** woocommerce/mini-cart-title-block
- **Supports:** color (background, text), spacing (padding), typography (fontSize), ~~align~~, ~~html~~, ~~inserter~~, ~~lock~~, ~~multiple~~, ~~reusable~~
- **Attributes:** label
## Additional Field List - woocommerce/order-confirmation-additional-fields
Display the list of additional field values from the current order.
- **Name:** woocommerce/order-confirmation-additional-fields
- **Category:** woocommerce
- **Ancestor:**
- **Parent:**
- **Supports:** align (full, wide), spacing (margin, padding), ~~html~~, ~~multiple~~
- **Attributes:** align, className
## Additional Fields - woocommerce/order-confirmation-additional-fields-wrapper
Display additional checkout fields from the 'contact' and 'order' locations.
- **Name:** woocommerce/order-confirmation-additional-fields-wrapper
- **Category:** woocommerce
- **Ancestor:**
- **Parent:**
- **Supports:** align (full, wide), spacing (margin, padding), ~~html~~, ~~multiple~~
- **Attributes:** heading
## Additional Information - woocommerce/order-confirmation-additional-information
Displays additional information provided by third-party extensions for the current order.
- **Name:** woocommerce/order-confirmation-additional-information
- **Category:** woocommerce
- **Ancestor:**
- **Parent:**
- **Supports:** align (full, wide), spacing (margin, padding), ~~html~~, ~~multiple~~
- **Attributes:** align, className
## Billing Address - woocommerce/order-confirmation-billing-address
Display the order confirmation billing address.
- **Name:** woocommerce/order-confirmation-billing-address
- **Category:** woocommerce
- **Ancestor:**
- **Parent:**
- **Supports:** align (full, wide), color (background, text), spacing (margin, padding), typography (fontSize, lineHeight), ~~html~~, ~~inserter~~, ~~multiple~~
- **Attributes:** align
## Billing Address Section - woocommerce/order-confirmation-billing-wrapper
Display the order confirmation billing section.
- **Name:** woocommerce/order-confirmation-billing-wrapper
- **Category:** woocommerce
- **Ancestor:**
- **Parent:**
- **Supports:** align (full, wide), spacing (margin, padding), ~~html~~, ~~multiple~~
- **Attributes:** heading
## Account Creation - woocommerce/order-confirmation-create-account
Allow customers to create an account after their purchase.
- **Name:** woocommerce/order-confirmation-create-account
- **Category:** woocommerce
- **Ancestor:**
- **Parent:**
- **Supports:** align (full, wide), color (background, button, text), spacing (margin, padding), ~~html~~, ~~inserter~~, ~~lock~~, ~~multiple~~
- **Attributes:** align, className, customerEmail, hasDarkControls, lock, nonceToken
## Order Downloads - woocommerce/order-confirmation-downloads
Display links to purchased downloads.
- **Name:** woocommerce/order-confirmation-downloads
- **Category:** woocommerce
- **Ancestor:**
- **Parent:**
- **Supports:** align (full, wide), color (background, gradients, link, text), spacing (margin, padding), typography (fontSize, lineHeight), ~~html~~, ~~multiple~~
- **Attributes:** align, className
## Downloads Section - woocommerce/order-confirmation-downloads-wrapper
Display the downloadable products section.
- **Name:** woocommerce/order-confirmation-downloads-wrapper
- **Category:** woocommerce
- **Ancestor:**
- **Parent:**
- **Supports:** align (full, wide), spacing (margin, padding), ~~html~~, ~~multiple~~
- **Attributes:** heading
## Shipping Address - woocommerce/order-confirmation-shipping-address
Display the order confirmation shipping address.
- **Name:** woocommerce/order-confirmation-shipping-address
- **Category:** woocommerce
- **Ancestor:**
- **Parent:**
- **Supports:** align (full, wide), color (background, text), spacing (margin, padding), typography (fontSize, lineHeight), ~~html~~, ~~inserter~~, ~~multiple~~
- **Attributes:** align
## Shipping Address Section - woocommerce/order-confirmation-shipping-wrapper
Display the order confirmation shipping section.
- **Name:** woocommerce/order-confirmation-shipping-wrapper
- **Category:** woocommerce
- **Ancestor:**
- **Parent:**
- **Supports:** align (full, wide), spacing (margin, padding), ~~html~~, ~~multiple~~
- **Attributes:** heading
## Order Status - woocommerce/order-confirmation-status
Display a "thank you" message, or a sentence regarding the current order status.
- **Name:** woocommerce/order-confirmation-status
- **Category:** woocommerce
- **Ancestor:**
- **Parent:**
- **Supports:** align (full, wide), color (background, gradients, text), spacing (margin, padding), typography (fontSize, lineHeight), ~~html~~, ~~multiple~~
- **Attributes:** align, className
## Order Summary - woocommerce/order-confirmation-summary
Display the order summary on the order confirmation page.
- **Name:** woocommerce/order-confirmation-summary
- **Category:** woocommerce
- **Ancestor:**
- **Parent:**
- **Supports:** align (full, wide), color (background, gradients, text), spacing (margin, padding), typography (fontSize, lineHeight), ~~html~~, ~~multiple~~
- **Attributes:** align, className
## Order Totals - woocommerce/order-confirmation-totals
Display the items purchased and order totals.
- **Name:** woocommerce/order-confirmation-totals
- **Category:** woocommerce
- **Ancestor:**
- **Parent:**
- **Supports:** align (full, wide), color (background, gradients, link, text), spacing (margin, padding), typography (fontSize, lineHeight), ~~html~~, ~~multiple~~
- **Attributes:** align, className
## Order Totals Section - woocommerce/order-confirmation-totals-wrapper
Display the order details section.
- **Name:** woocommerce/order-confirmation-totals-wrapper
- **Category:** woocommerce
- **Ancestor:**
- **Parent:**
- **Supports:** align (full, wide), spacing (margin, padding), ~~html~~, ~~multiple~~
- **Attributes:** heading
## WooCommerce Page - woocommerce/page-content-wrapper
Displays WooCommerce page content.
- **Name:** woocommerce/page-content-wrapper
- **Category:** woocommerce
- **Ancestor:**
- **Parent:**
- **Supports:** ~~html~~, ~~inserter~~, ~~multiple~~
- **Attributes:** page
## Filter by Price Controls - woocommerce/price-filter
Enable customers to filter the product grid by choosing a price range.
- **Name:** woocommerce/price-filter
- **Category:** woocommerce
- **Ancestor:**
- **Parent:**
- **Supports:** color (text, ~~background~~), interactivity (~~clientNavigation~~), ~~html~~, ~~inserter~~, ~~lock~~, ~~multiple~~
- **Attributes:** className, headingLevel, inlineInput, showFilterButton, showInputFields
## Best Selling Products - woocommerce/product-best-sellers
Display a grid of your all-time best selling products.
- **Name:** woocommerce/product-best-sellers
- **Category:** woocommerce
- **Ancestor:**
- **Parent:**
- **Supports:** align (full, wide), interactivity (~~clientNavigation~~), ~~html~~, ~~inserter~~
- **Attributes:** alignButtons, catOperator, categories, columns, contentVisibility, editMode, isPreview, orderby, rows, stockStatus
## Product Categories List - woocommerce/product-categories
Show all product categories as a list or dropdown.
- **Name:** woocommerce/product-categories
- **Category:** woocommerce
- **Ancestor:**
- **Parent:**
- **Supports:** align (full, wide), color (link, text, ~~background~~), interactivity (clientNavigation), typography (fontSize, lineHeight), ~~html~~
- **Attributes:** align, hasCount, hasEmpty, hasImage, isDropdown, isHierarchical, showChildrenOnly
## Products by Category - woocommerce/product-category
Display a grid of products from your selected categories.
- **Name:** woocommerce/product-category
- **Category:** woocommerce
- **Ancestor:**
- **Parent:**
- **Supports:** align (full, wide), interactivity (~~clientNavigation~~), ~~html~~, ~~inserter~~
- **Attributes:** alignButtons, catOperator, categories, columns, contentVisibility, editMode, isPreview, orderby, rows, stockStatus
## Product Collection - woocommerce/product-collection
Display a collection of products from your store.
- **Name:** woocommerce/product-collection
- **Category:** woocommerce
- **Ancestor:**
- **Parent:**
- **Supports:** align (full, wide), anchor, interactivity, ~~html~~
- **Attributes:** __privatePreviewState, collection, convertedFromProducts, dimensions, displayLayout, forcePageReload, hideControls, query, queryContextIncludes, queryId, tagName
## No results - woocommerce/product-collection-no-results
The contents of this block will display when there are no products found.
- **Name:** woocommerce/product-collection-no-results
- **Category:** woocommerce
- **Ancestor:** woocommerce/product-collection
- **Parent:**
- **Supports:** align, color (background, gradients, link, text), interactivity (clientNavigation), typography (fontSize, lineHeight), ~~html~~, ~~reusable~~
- **Attributes:**
## Product Description - woocommerce/product-description
Displays the description of the product.
- **Name:** woocommerce/product-description
- **Category:** woocommerce
- **Ancestor:** woocommerce/single-product, woocommerce/product-template, core/post-template
- **Parent:**
- **Supports:** align (full, wide), background (backgroundImage, backgroundSize), color (background, gradients, heading, link, text), dimensions (minHeight), interactivity (clientNavigation), layout, spacing (blockGap, margin, padding), typography (fontSize, lineHeight), ~~html~~
- **Attributes:**
## Product Details - woocommerce/product-details
Display a product's description, attributes, and reviews
- **Name:** woocommerce/product-details
- **Category:** woocommerce
- **Ancestor:**
- **Parent:**
- **Supports:** align (full, wide), interactivity (clientNavigation)
- **Attributes:**
## Add to Cart with Options - woocommerce/add-to-cart-form
Display a button that lets customers add a product to their cart. Use the added options to optimize for different product types.
- **Name:** woocommerce/add-to-cart-form
- **Category:** woocommerce-product-elements
- **Ancestor:**
- **Parent:**
- **Supports:** interactivity
- **Attributes:** quantitySelectorStyle
## Product Filters - woocommerce/product-filters
Let shoppers filter products displayed on the page.
- **Name:** woocommerce/product-filters
- **Category:** woocommerce
- **Ancestor:**
- **Parent:**
- **Supports:** align, color (background, button, heading, text, ~~enableContrastChecker~~), inserter, interactivity, layout (default, ~~allowEditing~~), multiple, spacing (blockGap), typography (fontSize)
- **Attributes:** isPreview
## Active - woocommerce/product-filter-active
Display the currently active filters.
- **Name:** woocommerce/product-filter-active
- **Category:** woocommerce
- **Ancestor:** woocommerce/product-filters
- **Parent:**
- **Supports:** interactivity, spacing (margin, padding, ~~blockGap~~)
- **Attributes:**
## Attribute - woocommerce/product-filter-attribute
Enable customers to filter the product grid by selecting one or more attributes, such as color.
- **Name:** woocommerce/product-filter-attribute
- **Category:** woocommerce
- **Ancestor:** woocommerce/product-filters
- **Parent:**
- **Supports:** color (text, ~~background~~), interactivity, spacing (blockGap, margin, padding), typography (fontSize, lineHeight)
- **Attributes:** attributeId, displayStyle, hideEmpty, isPreview, queryType, selectType, showCounts, sortOrder
## List - woocommerce/product-filter-checkbox-list
Display a list of filter options.
- **Name:** woocommerce/product-filter-checkbox-list
- **Category:** woocommerce
- **Ancestor:** woocommerce/product-filter-attribute, woocommerce/product-filter-status, woocommerce/product-filter-rating
- **Parent:**
- **Supports:** interactivity
- **Attributes:** customLabelElement, customOptionElement, customOptionElementBorder, customOptionElementSelected, labelElement, optionElement, optionElementBorder, optionElementSelected
## Chips - woocommerce/product-filter-chips
Display filter options as chips.
- **Name:** woocommerce/product-filter-chips
- **Category:** woocommerce
- **Ancestor:** woocommerce/product-filter-attribute, woocommerce/product-filter-status
- **Parent:**
- **Supports:** interactivity
- **Attributes:** chipBackground, chipBorder, chipText, customChipBackground, customChipBorder, customChipText, customSelectedChipBackground, customSelectedChipBorder, customSelectedChipText, selectedChipBackground, selectedChipBorder, selectedChipText
## Clear filters - woocommerce/product-filter-clear-button
Allows shoppers to clear active filters.
- **Name:** woocommerce/product-filter-clear-button
- **Category:** woocommerce
- **Ancestor:** woocommerce/product-filter-active
- **Parent:**
- **Supports:** inserter, interactivity
- **Attributes:**
## Price - woocommerce/product-filter-price
Let shoppers filter products by choosing a price range.
- **Name:** woocommerce/product-filter-price
- **Category:** woocommerce
- **Ancestor:** woocommerce/product-filters
- **Parent:**
- **Supports:** interactivity, ~~html~~
- **Attributes:**
## Price Slider - woocommerce/product-filter-price-slider
A slider helps shopper choose a price range.
- **Name:** woocommerce/product-filter-price-slider
- **Category:** woocommerce
- **Ancestor:** woocommerce/product-filter-price
- **Parent:**
- **Supports:** color (~~background~~, ~~enableContrastChecker~~, ~~text~~), interactivity, ~~html~~
- **Attributes:** customSlider, customSliderHandle, customSliderHandleBorder, inlineInput, showInputFields, slider, sliderHandle, sliderHandleBorder
## Rating - woocommerce/product-filter-rating
Enable customers to filter the product collection by rating.
- **Name:** woocommerce/product-filter-rating
- **Category:** woocommerce
- **Ancestor:** woocommerce/product-filters
- **Parent:**
- **Supports:** color (text, ~~background~~), interactivity
- **Attributes:** className, isPreview, minRating, showCounts
## Chips - woocommerce/product-filter-removable-chips
Display removable active filters as chips.
- **Name:** woocommerce/product-filter-removable-chips
- **Category:** woocommerce
- **Ancestor:** woocommerce/product-filter-active
- **Parent:**
- **Supports:** interactivity, layout (default, ~~allowInheriting~~, ~~allowSwitching~~, ~~allowVerticalAlignment~~)
- **Attributes:** chipBackground, chipBorder, chipText, customChipBackground, customChipBorder, customChipText
## Status - woocommerce/product-filter-status
Let shoppers filter products by choosing stock status.
- **Name:** woocommerce/product-filter-status
- **Category:** woocommerce
- **Ancestor:** woocommerce/product-filters
- **Parent:**
- **Supports:** color (text, ~~background~~), interactivity, spacing (blockGap, margin, padding), typography (fontSize, lineHeight), ~~html~~
- **Attributes:** displayStyle, hideEmpty, isPreview, showCounts
## Product Gallery (Beta) - woocommerce/product-gallery
Showcase your products relevant images and media.
- **Name:** woocommerce/product-gallery
- **Category:** woocommerce
- **Ancestor:** woocommerce/single-product
- **Parent:**
- **Supports:** align, interactivity, layout (allowEditing, allowOrientation, default, ~~allowJustification~~)
- **Attributes:** fullScreenOnClick, hoverZoom
## Large Image - woocommerce/product-gallery-large-image
Display the Large Image of a product.
- **Name:** woocommerce/product-gallery-large-image
- **Category:** woocommerce
- **Ancestor:** woocommerce/product-gallery
- **Parent:**
- **Supports:** interactivity
- **Attributes:**
## Next/Previous Buttons - woocommerce/product-gallery-large-image-next-previous
Display next and previous buttons.
- **Name:** woocommerce/product-gallery-large-image-next-previous
- **Category:** woocommerce
- **Ancestor:** woocommerce/product-gallery-large-image
- **Parent:**
- **Supports:** align, color (background, text), interactivity, layout (allowVerticalAlignment, default, ~~allowJustification~~, ~~allowOrientation~~), shadow, spacing (margin)
- **Attributes:**
## Thumbnails - woocommerce/product-gallery-thumbnails
Display the Thumbnails of a product.
- **Name:** woocommerce/product-gallery-thumbnails
- **Category:** woocommerce
- **Ancestor:** woocommerce/product-gallery
- **Parent:**
- **Supports:** interactivity, spacing (margin)
- **Attributes:** aspectRatio, thumbnailSize
## Newest Products - woocommerce/product-new
Display a grid of your newest products.
- **Name:** woocommerce/product-new
- **Category:** woocommerce
- **Ancestor:**
- **Parent:**
- **Supports:** align (full, wide), interactivity (~~clientNavigation~~), ~~html~~, ~~inserter~~
- **Attributes:** alignButtons, catOperator, categories, columns, contentVisibility, editMode, isPreview, orderby, rows, stockStatus
## On Sale Products - woocommerce/product-on-sale
Display a grid of products currently on sale.
- **Name:** woocommerce/product-on-sale
- **Category:** woocommerce
- **Ancestor:**
- **Parent:**
- **Supports:** align (full, wide), interactivity (~~clientNavigation~~), ~~html~~, ~~inserter~~
- **Attributes:** alignButtons, catOperator, categories, columns, contentVisibility, isPreview, orderby, rows, stockStatus
## Product Results Count - woocommerce/product-results-count
Display the number of products on the archive page or search result page.
- **Name:** woocommerce/product-results-count
- **Category:** woocommerce
- **Ancestor:**
- **Parent:**
- **Supports:** color (text, ~~background~~), interactivity (clientNavigation), typography (fontSize)
- **Attributes:**
## Product Reviews - woocommerce/product-reviews
Display a product's reviews
- **Name:** woocommerce/product-reviews
- **Category:** woocommerce
- **Ancestor:**
- **Parent:**
- **Supports:** align (full, wide), color (background, gradients, heading, link, text), interactivity, spacing (margin, padding), typography (fontSize, lineHeight), ~~html~~
- **Attributes:** tagName
## Review Author Name - woocommerce/product-review-author-name
Displays the name of the author of the review.
- **Name:** woocommerce/product-review-author-name
- **Category:** woocommerce
- **Ancestor:** woocommerce/product-reviews
- **Parent:**
- **Supports:** color (background, gradients, link, text), interactivity (clientNavigation), spacing (margin, padding), typography (fontSize, lineHeight), ~~html~~
- **Attributes:** isLink, linkTarget, textAlign
## Review Content - woocommerce/product-review-content
Displays the contents of a product review.
- **Name:** woocommerce/product-review-content
- **Category:** woocommerce
- **Ancestor:** woocommerce/product-reviews
- **Parent:**
- **Supports:** color (background, gradients, link, text), spacing (padding), typography (fontSize, lineHeight), ~~html~~
- **Attributes:** textAlign
## Review Date - woocommerce/product-review-date
Displays the date on which the review was posted.
- **Name:** woocommerce/product-review-date
- **Category:** woocommerce
- **Ancestor:** woocommerce/product-reviews
- **Parent:**
- **Supports:** color (background, gradients, link, text), interactivity (clientNavigation), spacing (margin, padding), typography (fontSize, lineHeight), ~~html~~
- **Attributes:** format, isLink
## Reviews Form - woocommerce/product-review-form
Display a product's reviews form.
- **Name:** woocommerce/product-review-form
- **Category:** woocommerce
- **Ancestor:**
- **Parent:**
- **Supports:** color (background, gradients, heading, link, text), spacing (margin, padding), typography (fontSize, lineHeight), ~~html~~
- **Attributes:** textAlign
## Review Rating - woocommerce/product-review-rating
Displays the rating of a product review.
- **Name:** woocommerce/product-review-rating
- **Category:** woocommerce
- **Ancestor:** woocommerce/product-reviews
- **Parent:**
- **Supports:** color (background, gradients, text), interactivity (clientNavigation)
- **Attributes:** textAlign
## Reviews Template - woocommerce/product-review-template
Contains the block elements used to display product reviews, like the title, author, date, rating and more.
- **Name:** woocommerce/product-review-template
- **Category:** woocommerce
- **Ancestor:** woocommerce/product-reviews
- **Parent:**
- **Supports:** align, interactivity (clientNavigation), spacing (margin, padding), typography (fontSize, lineHeight), ~~html~~, ~~reusable~~
- **Attributes:**
## Reviews Pagination - woocommerce/product-reviews-pagination
Displays a paginated navigation to next/previous set of product reviews, when applicable.
- **Name:** woocommerce/product-reviews-pagination
- **Category:** woocommerce
- **Ancestor:** woocommerce/product-reviews
- **Parent:**
- **Supports:** align, color (background, gradients, link, text), interactivity (clientNavigation), layout (default, ~~allowInheriting~~, ~~allowSwitching~~), typography (fontSize, lineHeight), ~~html~~, ~~reusable~~
- **Attributes:** paginationArrow
## Reviews Next Page - woocommerce/product-reviews-pagination-next
Displays the next product review's page link.
- **Name:** woocommerce/product-reviews-pagination-next
- **Category:** woocommerce
- **Ancestor:** woocommerce/product-reviews-pagination
- **Parent:**
- **Supports:** color (background, gradients, ~~text~~), interactivity (clientNavigation), typography (fontSize, lineHeight), ~~html~~, ~~reusable~~
- **Attributes:** label
## Reviews Page Numbers - woocommerce/product-reviews-pagination-numbers
Displays a list of page numbers for product reviews pagination.
- **Name:** woocommerce/product-reviews-pagination-numbers
- **Category:** woocommerce
- **Ancestor:** woocommerce/product-reviews-pagination
- **Parent:**
- **Supports:** color (background, gradients, ~~text~~), interactivity (clientNavigation), typography (fontSize, lineHeight), ~~html~~, ~~reusable~~
- **Attributes:**
## Reviews Previous Page - woocommerce/product-reviews-pagination-previous
Displays the previous product review's page link.
- **Name:** woocommerce/product-reviews-pagination-previous
- **Category:** woocommerce
- **Ancestor:** woocommerce/product-reviews-pagination
- **Parent:**
- **Supports:** color (background, gradients, ~~text~~), interactivity (clientNavigation), typography (fontSize, lineHeight), ~~html~~, ~~reusable~~
- **Attributes:** label
## Reviews Title - woocommerce/product-reviews-title
Displays a title with the number of reviews.
- **Name:** woocommerce/product-reviews-title
- **Category:** woocommerce
- **Ancestor:** woocommerce/product-reviews
- **Parent:**
- **Supports:** align, color (background, gradients, text), interactivity (clientNavigation), spacing (margin, padding), typography (fontSize, lineHeight), ~~anchor~~, ~~html~~
- **Attributes:** level, levelOptions, showProductTitle, showReviewsCount, textAlign
## Product Specifications - woocommerce/product-specifications
Display product weight, dimensions, and attributes.
- **Name:** woocommerce/product-specifications
- **Category:** woocommerce
- **Ancestor:** woocommerce/single-product, woocommerce/product-template, core/post-template
- **Parent:**
- **Supports:** align (full, wide), spacing (margin, padding), typography (fontSize, lineHeight), ~~html~~
- **Attributes:** showAttributes, showDimensions, showWeight
## Products by Tag - woocommerce/product-tag
Display a grid of products with selected tags.
- **Name:** woocommerce/product-tag
- **Category:** woocommerce
- **Ancestor:**
- **Parent:**
- **Supports:** align (full, wide), interactivity (~~clientNavigation~~), ~~html~~, ~~inserter~~
- **Attributes:** alignButtons, columns, contentVisibility, isPreview, orderby, rows, stockStatus, tagOperator, tags
## Product Template - woocommerce/product-template
Contains the block elements used to render a product.
- **Name:** woocommerce/product-template
- **Category:** woocommerce
- **Ancestor:**
- **Parent:**
- **Supports:** align (full, wide), anchor, color (background, gradients, link, text), interactivity, typography (fontSize, lineHeight), ~~html~~, ~~inserter~~, ~~reusable~~
- **Attributes:**
## Top Rated Products - woocommerce/product-top-rated
Display a grid of your top rated products.
- **Name:** woocommerce/product-top-rated
- **Category:** woocommerce
- **Ancestor:**
- **Parent:**
- **Supports:** align (full, wide), interactivity (~~clientNavigation~~), ~~html~~, ~~inserter~~
- **Attributes:** alignButtons, catOperator, categories, columns, contentVisibility, editMode, isPreview, orderby, rows, stockStatus
## All Products - woocommerce/all-products
Display products from your store in a grid layout.
- **Name:** woocommerce/all-products
- **Category:** woocommerce
- **Ancestor:**
- **Parent:**
- **Supports:** align (full, wide), interactivity (~~clientNavigation~~), ~~html~~, ~~inserter~~, ~~multiple~~
- **Attributes:** alignButtons, columns, contentVisibility, isPreview, layoutConfig, orderby, rows
## Products by Attribute - woocommerce/products-by-attribute
Display a grid of products with selected attributes.
- **Name:** woocommerce/products-by-attribute
- **Category:** woocommerce
- **Ancestor:**
- **Parent:**
- **Supports:** align (full, wide), interactivity (~~clientNavigation~~), ~~html~~, ~~inserter~~
- **Attributes:** alignButtons, attrOperator, attributes, columns, contentVisibility, isPreview, orderby, rows, stockStatus
## Filter by Rating Controls - woocommerce/rating-filter
Enable customers to filter the product grid by rating.
- **Name:** woocommerce/rating-filter
- **Category:** woocommerce
- **Ancestor:**
- **Parent:**
- **Supports:** color (background, button, text), interactivity (~~clientNavigation~~), ~~html~~, ~~inserter~~, ~~lock~~, ~~multiple~~
- **Attributes:** className, displayStyle, isPreview, selectType, showCounts, showFilterButton
## All Reviews - woocommerce/all-reviews
Show a list of all product reviews.
- **Name:** woocommerce/all-reviews
- **Category:** woocommerce
- **Ancestor:**
- **Parent:**
- **Supports:** color (text, ~~background~~), interactivity (clientNavigation), typography (fontSize), ~~html~~
- **Attributes:**
## Reviews by Category - woocommerce/reviews-by-category
Show product reviews from specific categories.
- **Name:** woocommerce/reviews-by-category
- **Category:** woocommerce
- **Ancestor:**
- **Parent:**
- **Supports:** color (text, ~~background~~), interactivity (clientNavigation), typography (fontSize), ~~html~~
- **Attributes:**
## Reviews by Product - woocommerce/reviews-by-product
Display reviews for your products.
- **Name:** woocommerce/reviews-by-product
- **Category:** woocommerce
- **Ancestor:**
- **Parent:**
- **Supports:** color (text, ~~background~~), interactivity (clientNavigation), typography (fontSize), ~~html~~
- **Attributes:**
## Product - woocommerce/single-product
Display a single product of your choice with full control over its presentation.
- **Name:** woocommerce/single-product
- **Category:** woocommerce
- **Ancestor:**
- **Parent:**
- **Supports:** align (full, wide), interactivity
- **Attributes:** isPreview, productId
## Filter by Stock Controls - woocommerce/stock-filter
Enable customers to filter the product grid by stock status.
- **Name:** woocommerce/stock-filter
- **Category:** woocommerce
- **Ancestor:**
- **Parent:**
- **Supports:** color (background, button, text), interactivity (~~clientNavigation~~), ~~html~~, ~~inserter~~, ~~lock~~, ~~multiple~~
- **Attributes:** className, displayStyle, headingLevel, isPreview, selectType, showCounts, showFilterButton
## Store Notices - woocommerce/store-notices
Display shopper-facing notifications generated by WooCommerce or extensions.
- **Name:** woocommerce/store-notices
- **Category:** woocommerce
- **Ancestor:**
- **Parent:**
- **Supports:** align (full, wide), interactivity (clientNavigation), ~~multiple~~
- **Attributes:** align
---
## Additional checkout fields
*Source: block-development/cart-and-checkout-blocks/additional-checkout-fields.md*
# Additional checkout fields
A common use-case for developers and merchants is to add a new field to the Checkout form to collect additional data about a customer or their order.
This document will outline the steps an extension should take to register some additional checkout fields.
## Available field locations
Additional checkout fields can be registered in three different places:
| Title | Identifier |
| ------------------------------------ | ---------- |
| Contact information | **`contact`** |
| Addresses (Shipping **and** Billing) | **`address`** |
| Order information | **`order`** |
A field can only be shown in one location, it is not possible to render the same field in multiple locations in the same registration.
### Contact information
The contact information section currently renders at the top of the form. It contains the `email` field and any other additional fields.

Fields rendered here will be saved to the shopper's account. They will be visible and editable render in the shopper's "Account details" section.
### Address
The "Address" section currently contains a form for the shipping address and the billing address. Additional checkout fields can be registered to appear within these forms.

Fields registered here will be saved to both the customer _and_ the order, so returning customers won't need to refill those values again.
If a field is registered in the `address` location it will appear in both the shipping **and** the billing address. It is not possible to have the field in only one of the addresses.
You will also end up collecting two values for this field, one for shipping and one for billing.
### Order information
As part of the additional checkout fields feature, the checkout block has a new inner block called the "Order information block".
This block is used to render fields that aren't part of the contact information or address information, for example it may be a "How did you hear about us" field or a "Gift message" field.
Fields rendered here will be saved to the order. They will not be part of the customer's saved address or account information. New orders will not have any previously used values pre-filled.

By default, this block will render as the last step in the Checkout form, however it can be moved using the Gutenberg block controls in the editor.

## Accessing values
Additional fields are saved to individual meta keys in both the customer meta and order meta, you can access them using helper methods, or using the meta keys directly, we recommend using the helper methods, as they're less likely to change, can handle future migrations, and will support future enhancements (e.g. reading from different locations).
For address fields, two values are saved: one for shipping, and one for billing. If the customer has selected 'Use same address for billing` then the values will be the same, but still saved independently of each other.
For contact and order fields, only one value is saved per field.
### Helper methods
`CheckoutFields` provides a function to access values from both customers and orders, it's are `get_field_from_object`.
To access a customer billing and/or shipping value:
```php
use Automattic\WooCommerce\Blocks\Package;
use Automattic\WooCommerce\Blocks\Domain\Services\CheckoutFields;
$field_id = 'my-plugin-namespace/my-field';
$customer = wc()->customer; // Or new WC_Customer( $id )
$checkout_fields = Package::container()->get( CheckoutFields::class );
$my_customer_billing_field = $checkout_fields->get_field_from_object( $field_id, $customer, 'billing' );
$my_customer_shipping_field = $checkout_fields->get_field_from_object( $field_id, $customer, 'shipping' );
```
To access an order field:
```php
use Automattic\WooCommerce\Blocks\Package;
use Automattic\WooCommerce\Blocks\Domain\Services\CheckoutFields;
$field_id = 'my-plugin-namespace/my-field';
$order = wc_get_order( 1234 );
$checkout_fields = Package::container()->get( CheckoutFields::class );
$my_order_billing_field = $checkout_fields->get_field_from_object( $field_id, $order, 'billing' );
$my_order_shipping_field = $checkout_fields->get_field_from_object( $field_id, $order, 'shipping' );
```
After an order is placed, the data saved to the customer and the data saved to the order will be the same. Customers can change the values for _future_ orders, or from within their My Account page. If you're looking at a customer value at a specific point in time (i.e. when the order was placed), access it from the order object, if you're looking for the most up to date value regardless, access it from the customer object.
#### Guest customers
When a guest customer places an order with additional fields, those fields will be saved to its session, so as long as the customer still has a valid session going, the values will always be there.
#### Logged-in customers
For logged-in customers, the value is only persisted once they place an order. Accessing a logged-in customer object during the place order lifecycle will return null or stale data.
If you're at a place order hook, doing this will return previous data (not the currently inserted one):
```php
$customer = new WC_Customer( $order->customer_id ); // Or new WC_Customer( 1234 )
$my_customer_billing_field = $checkout_fields->get_field_from_object( $field_id, $customer, 'billing' );
```
Instead, always access the latest data if you want to run some extra validation/data-moving:
```php
$customer = wc()->customer // This will return the current customer with its session.
$my_customer_billing_field = $checkout_fields->get_field_from_object( $field_id, $customer, 'billing' );
```
#### Accessing all fields
You can use `get_all_fields_from_object` to access all additional fields saved to an order or a customer.
```php
use Automattic\WooCommerce\Blocks\Package;
use Automattic\WooCommerce\Blocks\Domain\Services\CheckoutFields;
$order = wc_get_order( 1234 );
$checkout_fields = Package::container()->get( CheckoutFields::class );
$order_additional_billing_fields = $checkout_fields->get_all_fields_from_object( $order, 'billing' );
$order_additional_shipping_fields = $checkout_fields->get_all_fields_from_object( $order, 'shipping' );
$order_other_additional_fields = $checkout_fields->get_all_fields_from_object( $order, 'other' ); // Contact and Order are saved in the same place under the additional group.
```
This will return an array of all values, it will only include fields currently registered, if you want to include fields no longer registered, you can pass a third `true` parameter.
```php
$order = wc_get_order( 1234 );
$checkout_fields = Package::container()->get( CheckoutFields::class );
$order_additional_billing_fields = $checkout_fields->get_all_fields_from_object( $order, 'billing' ); // array( 'my-plugin-namespace/my-field' => 'my-value' );
$order_additional_billing_fields = $checkout_fields->get_all_fields_from_object( $order, 'billing', true ); // array( 'my-plugin-namespace/my-field' => 'my-value', 'old-namespace/old-key' => 'old-value' );
```
### Accessing values directly
While not recommended, you can use the direct meta key to access certain values, this is useful for external engines or page/email builders who only provide access to meta values.
Values are saved under a predefined prefix, this is needed to able to query fields without knowing which ID the field was registered under, for a field with key `'my-plugin-namespace/my-field'`, it's meta key will be the following if it's an address field:
- `_wc_billing/my-plugin-namespace/my-field`
- `_wc_shipping/my-plugin-namespace/my-field`
Or the following if it's a contact/order field:
- `_wc_other/my-plugin-namespace/my-field`.
Those prefixes are part of `CheckoutFields` class, and can be accessed using the following constants:
```php
echo ( CheckoutFields::BILLING_FIELDS_PREFIX ); // _wc_billing/
echo ( CheckoutFields::SHIPPING_FIELDS_PREFIX ); // _wc_shipping/
echo ( CheckoutFields::OTHER_FIELDS_PREFIX ); // _wc_other/
```
`CheckoutFields` provides a couple of helpers to get the group name or key based on one or the other:
```php
CheckoutFields::get_group_name( "_wc_billing" ); // "billing"
CheckoutFields::get_group_name( "_wc_billing/" ); // "billing"
CheckoutFields::get_group_key( "shipping" ); // "_wc_shipping/"
```
Use cases here would be to build the key name to access the meta directly:
```php
$key = CheckoutFields::get_group_key( "other" ) . 'my-plugin/is-opt-in';
$opted_in = get_user_meta( 123, $key, true ) === "1" ? true : false;
```
#### Checkboxes values
When accessing a checkbox values directly, it will either return `"1"` for true, `"0"` for false, or `""` if the value doesn't exist, only the provided functions will sanitize that to a boolean.
## Supported field types
The following field types are supported:
- `select`
- `text`
- `checkbox`
There are plans to expand this list, but for now these are the types available.
## Using the API
To register additional checkout fields you must use the `woocommerce_register_additional_checkout_field` function.
It is recommended to run this function after the `woocommerce_init` action.
The registration function takes an array of options describing your field. Some field types take additional options.
### Options
#### General options
These options apply to all field types (except in a few circumstances which are noted inline).
| Option name | Description | Required? | Example | Default value |
|---------------------|-------------------------------------------------------------------------------------------------------------------------------------|-------------------------------------------------------------------------------------------------------------------------------------|----------------------------------------------|------------------------------------------------------------------------------------------------------------------------------------------------------------------------------------------------------------------------------------------------------------------------------------------------|
| `id` | The field's ID. This should be a unique identifier for your field. It is composed of a namespace and field name separated by a `/`. | Yes | `plugin-namespace/how-did-you-hear` | No default - this must be provided. |
| `label` | The label shown on your field. This will be the placeholder too. | Yes | `How did you hear about us?` | No default - this must be provided. |
| `optionalLabel` | The label shown on your field if it is optional. This will be the placeholder too. | No | `How did you hear about us? (Optional)` | The default value will be the value of `label` with `(optional)` appended. |
| `location` | The location to render your field. | Yes | `contact`, `address`, or `order` | No default - this must be provided. |
| `type` | The type of field you're rendering. It defaults to `text` and must match one of the supported field types. | No | `text`, `select`, or `checkbox` | `text` |
| `attributes` | An array of additional attributes to render on the field's input element. This is _not_ supported for `select` fields. | No | `[ 'data-custom-data' => 'my-custom-data' ]` | `[]` |
| `required` | Can be a boolean or a JSON Schema array. If boolean and `true`, the shopper _must_ provide a value for this field during the checkout process. For checkbox fields, the shopper must check the box to place the order. If a JSON Schema array, the field will be required based on the schema conditions. See [Conditional visibility and validation via JSON Schema](#conditional-visibility-and-validation-via-json-schema). | No | `true` or `["type" => "object", "properties" => [...]]` | `false` |
| `hidden` | Can be a boolean or a JSON Schema array. Must be `false` when used as a boolean. If a JSON Schema array, the field will be hidden based on the schema conditions. See [Conditional visibility and validation via JSON Schema](#conditional-visibility-and-validation-via-json-schema). | No | `false` or `["type" => "object", "properties" => [...]]` | `false` |
| `validation` | An array of JSON Schema objects that define validation rules for the field. See [Conditional visibility and validation via JSON Schema](#conditional-visibility-and-validation-via-json-schema). | No | `[{"type": "object", "properties": {...}}]` | `[]` |
| `sanitize_callback` | A function called to sanitize the customer provided value when posted. | No | See example below | By default the field's value is returned unchanged. |
| `validate_callback` | A function called to validate the customer provided value when posted. This runs _after_ sanitization. | No | See example below | The default validation function will add an error to the response if the field is required and does not have a value. [See the default validation function.](https://github.com/woocommerce/woocommerce/blob/trunk/plugins/woocommerce/src/Blocks/Domain/Services/CheckoutFields.php#L270-L281) |
##### Example of `sanitize_callback`. This function will remove spaces from the value
```php
'sanitize_callback' => function( $field_value ) {
return str_replace( ' ', '', $field_value );
},
```
##### Example of `validate_callback`. This function will check if the value is an email
```php
'validate_callback' => function( $field_value ) {
if ( ! is_email( $field_value ) ) {
return new WP_Error( 'invalid_alt_email', 'Please ensure your alternative email matches the correct format.' );
}
},
```
#### Options for `text` fields
Text fields don't have any additional options beyond the general options listed above.
#### Options for `select` fields
As well as the options above, select fields must also be registered with an `options` option. This is used to specify what options the shopper can select.
Select fields will mount with no value selected by default, if the field is required, the user will be required to select a value.
You can set a placeholder to be shown on the select by passing a `placeholder` value when registering the field. This will be the first option in the select and will not be selectable if the field is required.
| Option name | Description | Required? | Example | Default value |
|-----|-----|-----|----------------|--------------|
| `options` | An array of options to show in the select input. Each options must be an array containing a `label` and `value` property. Each entry must have a unique `value`. Any duplicate options will be removed. The `value` is what gets submitted to the server during checkout and the `label` is simply a user-friendly representation of this value. It is not transmitted to the server in any way. | Yes | see below | No default - this must be provided. |
| `placeholder` | If this value is set, the shopper will see this option in the select. If the select is required, the shopper cannot select this option. | No | `Select a role` | Select a $label |
##### Example of `options` value
```php
[
[
'value' => 'store_1',
'label' => 'Our London Store'
],
[
'value' => 'store_2',
'label' => 'Our Paris Store'
],
[
'value' => 'store_3',
'label' => 'Our New York Store'
]
]
```
#### Options for `checkbox` fields
As well as the options above, checkbox field support showing an error message if it's required and not checked.
| Option name | Description | Required? | Example | Default value |
|-----------------|------------------------------------------------------------------------------|-----------|--------------------------------------------------------------|---|
| `error_message` | A custom message to show if the box is unchecked. | No | `You must confirm you are over 18 before placing the order.` | `Please check this box if you want to proceed.` |
### Attributes
Adding additional attributes to checkbox and text fields is supported. Adding them to select fields is **not possible for now**.
These attributes have a 1:1 mapping to the HTML attributes on `input` elements (except `pattern` on checkbox).
The supported attributes are:
- `data-*` attributes
- `aria-*` attributes
- `autocomplete`
- `autocapitalize`
- `pattern` (not supported on checkbox fields)
- `title`
- `maxLength` (equivalent to `maxlength` HTML attribute)
- `readOnly` (equivalent to `readonly` HTML attribute)
`maxLength` and `readOnly` are in camelCase because the attributes are rendered on a React element which must receive them in this format.
Certain attributes are not passed through to the field intentionally, these are `autofocus` and `disabled`. We are welcome to hear feedback and adjust this behaviour if valid use cases are provided.
## Usage examples
### Rendering a text field
This example demonstrates rendering a text field in the address section:
```php
add_action(
'woocommerce_init',
function() {
woocommerce_register_additional_checkout_field(
array(
'id' => 'namespace/gov-id',
'label' => 'Government ID',
'optionalLabel' => 'Government ID (optional)',
'location' => 'address',
'required' => true,
'attributes' => array(
'autocomplete' => 'government-id',
'aria-describedby' => 'some-element',
'aria-label' => 'custom aria label',
'pattern' => '[A-Z0-9]{5}', // A 5-character string of capital letters and numbers.
'title' => 'Title to show on hover',
'data-custom' => 'custom data',
),
),
);
}
);
```
This results in the following address form (the billing form will be the same):

The rendered markup looks like this:
```html
```
### Rendering a checkbox field
This example demonstrates rendering a checkbox field in the contact information section:
```php
add_action(
'woocommerce_init',
function() {
woocommerce_register_additional_checkout_field(
array(
'id' => 'namespace/marketing-opt-in',
'label' => 'Do you want to subscribe to our newsletter?',
'location' => 'contact',
'type' => 'checkbox',
)
);
}
);
```
This results in the following contact information section:

Note that because an `optionalLabel` was not supplied, the string `(optional)` is appended to the label. To remove that an `optionalLabel` property should be supplied to override this.
### Rendering a select field
This example demonstrates rendering a select field in the order information section:
```php
add_action(
'woocommerce_init',
function() {
woocommerce_register_additional_checkout_field(
array(
'id' => 'namespace/how-did-you-hear-about-us',
'label' => 'How did you hear about us?',
'placeholder' => 'Select a source',
'location' => 'order',
'type' => 'select',
'options' => [
[
'value' => 'google',
'label' => 'Google'
],
[
'value' => 'facebook',
'label' => 'Facebook'
],
[
'value' => 'friend',
'label' => 'From a friend'
],
[
'value' => 'other',
'label' => 'Other'
],
]
)
);
}
);
```
This results in the order information section being rendered like so:
### The select input before being focused

### The select input when focused

If it is undesirable to force the shopper to select a value, mark the select as optional by setting the `required` option to `false`.
## Validation and sanitization
It is possible to add custom validation and sanitization for additional checkout fields using WordPress action hooks.
These actions happen in two places:
1. Updating and submitting the form during the checkout process and,
2. Updating address/contact information in the "My account" area.
### Sanitization
Sanitization is used to ensure the value of a field is in a specific format. An example is when taking a government ID, you may want to format it so that all letters are capitalized and there are no spaces. At this point, the value should **not** be checked for _validity_. That will come later. This step is only intended to set the field up for validation.
#### Using the `woocommerce_sanitize_additional_field` filter
To run a custom sanitization function for a field you can use the `sanitize_callback` function on registration, or the `woocommerce_sanitize_additional_field` filter.
| Argument | Type | Description |
|--------------|-------------------|-------------------------------------------------------------------------|
| `$field_value` | `boolean\|string` | The value of the field. |
| `$field_key` | `string` | The ID of the field. This is the same ID the field was registered with. |
##### Example of sanitization
This example shows how to remove whitespace and capitalize all letters in the example Government ID field we added above.
```php
add_action(
'woocommerce_sanitize_additional_field',
function ( $field_value, $field_key ) {
if ( 'namespace/gov-id' === $field_key ) {
$field_value = str_replace( ' ', '', $field_value );
$field_value = strtoupper( $field_value );
}
return $field_value;
},
10,
2
);
```
### Validation
There are two phases of validation in the additional checkout fields system. The first is validating a single field based on its key and value.
#### Single field validation
##### Using the `woocommerce_validate_additional_field` action
When the `woocommerce_validate_additional_field` action is fired the callback receives the field's key, the field's value, and a `WP_Error` object.
To add validation errors to the response, use the [`WP_Error::add`](https://developer.wordpress.org/reference/classes/wp_error/add/) method.
| Argument | Type | Description |
|--------------|-------------------|---------------------------------------------------------------------------------------------------------------------------------------------------------------------------------------|
| `$errors` | `WP_Error` | An error object containing errors that were already encountered while processing the request. If no errors were added yet, it will still be a `WP_Error` object but it will be empty. |
| `$field_key` | `string` | The id of the field. This is the ID the field was registered with. |
| `$field_value` | `boolean\|string` | The value of the field |
###### The `WP_Error` object
When adding your error to the `WP_Error` object, it should have a unique error code. You may want to prefix the error code with the plugin namespace to reduce the chance of collision. Using codes that are already in use across other plugins may result in the error message being overwritten or showing in a different location.
###### Example of single-field validation
The below example shows how to apply custom validation to the `namespace/gov-id` text field from above. The code here ensures the field is made up of 5 characters, either upper-case letters or numbers. The sanitization function from the example above ensures that all whitespace is removed and all letters are capitalized, so this check is an extra safety net to ensure the input matches the pattern.
```php
add_action(
'woocommerce_validate_additional_field',
function ( WP_Error $errors, $field_key, $field_value ) {
if ( 'namespace/gov-id' === $field_key ) {
$match = preg_match( '/[A-Z0-9]{5}/', $field_value );
if ( 0 === $match || false === $match ) {
$errors->add( 'invalid_gov_id', 'Please ensure your government ID matches the correct format.' );
}
}
},
10,
3
);
```
It is important to note that this action must _add_ errors to the `WP_Error` object it receives. Returning a new `WP_Error` object or any other value will result in the errors not showing.
If no validation errors are encountered the function can just return void.
#### Multiple field validation
There are cases where the validity of a field depends on the value of another field, for example validating the format of a government ID based on what country the shopper is in. In this case, validating only single fields (as above) is not sufficient as the country may be unknown during the `woocommerce_validate_additional_field` action.
To solve this, it is possible to validate a field in the context of the location it renders in. The other fields in that location will be passed to this action.
##### Using the `woocommerce_blocks_validate_location_{location}_fields` action
This action will be fired for each location that additional fields can render in (`address`, `contact`, and `order`). For `address` it fires twice, once for the billing address and once for the shipping address.
The callback receives the keys and values of the other additional fields in the same location.
It is important to note that any fields rendered in other locations will not be passed to this action, however it might be possible to get those values by accessing the customer or order object, however this is not supported and there are no guarantees regarding backward compatibility in future versions.
| Argument | Type | Description |
|----------|-----------------------------|---------------------------------------------------------------------------------------------------------------------------------------------------------------------------------------|
| `$errors` | `WP_Error` | An error object containing errors that were already encountered while processing the request. If no errors were added yet, it will still be a `WP_Error` object but it will be empty. |
| `$fields` | `array` | The fields rendered in this locations. |
| `$group` | `'billing'\|'shipping'\|'other'` | If the action is for the address location, the type of address will be set here. If it is for contact or order, this will be 'other'. |
There are several places where these hooks are fired.
- When checking out using the Checkout block or Store API.
- `woocommerce_blocks_validate_location_address_fields` (x2)
- `woocommerce_blocks_validate_location_contact_fields`
- `woocommerce_blocks_validate_location_other_fields`
- When updating addresses in the "My account" area
- `woocommerce_blocks_validate_location_address_fields` (**x1** - only the address being edited)
- When updating the "Account details" section in the "My account" area
- `woocommerce_blocks_validate_location_contact_fields`
##### Example of location validation
In this example, assume there is another field registered alongside the `namespace/gov-id` called `namespace/confirm-gov-id`. This field will be a confirmation for the Government ID field.
The example below illustrates how to verify that the value of the confirmation field matches the value of the main field.
```php
add_action(
'woocommerce_blocks_validate_location_address_fields',
function ( \WP_Error $errors, $fields, $group ) {
if ( $fields['namespace/gov-id'] !== $fields['namespace/confirm-gov-id'] ) {
$errors->add( 'gov_id_mismatch', 'Please ensure your government ID matches the confirmation.' );
}
},
10,
3
);
```
If these fields were rendered in the "contact" location instead, the code would be the same except the hook used would be: `woocommerce_blocks_validate_location_contact_fields`.
## Conditional visibility and validation via JSON Schema
The `required`, `hidden`, and `validation` properties accept an `array` of [JSON Schema](https://json-schema.org/understanding-json-schema/about) to create conditional logic for fields. This allows you to dynamically control field visibility, requirement status, and validation rules based on the values of other fields.
Schema is evaluated in the frontend in real-time, and on the backend at any update. This ensures fast and responsive UI, and consistent results between the client and server.
### JSON Schema Structure
Each schema in the array should be a valid JSON Schema object that defines conditions for when the property should be applied. The schema is evaluated against the current cart and checkout state, which includes all field values and various options (payment, shipping, customer).
Basic structure of a JSON Schema object:
```json
{
"type": "object",
"properties": {
"fieldId": {
"enum": ["value1", "value2"]
}
},
"required": ["fieldId"]
}
```
If you're not familiar with JSON Schema, you can get a quick introduction to it [from the official website](https://json-schema.org/understanding-json-schema/basics), or from one of the libraries used [like AJV](https://ajv.js.org/json-schema.html) or [OPIS.](https://opis.io/json-schema/2.x/examples.html) Checkout builds an abstraction on top of both of them.
### Document object
When you're writing your rules, you're writing a partial schema for the document object, essentially describing the ideal state you want for your field to be required or hidden. An example of the document object looks like this:
Document object
```json
{
"cart": {
"coupons": [
"my_coupon"
],
"shipping_rates": [
"free_shipping:1"
],
"items": [
27,
27,
68
],
"items_type": [
"simple",
"variation"
],
"items_count": 3,
"items_weight": 0,
"needs_shipping": true,
"prefers_collection": false,
"totals": {
"totalPrice": 6600,
"totalTax": 600
},
"extensions": {}
},
"checkout": {
"create_account": false,
"customer_note": "",
"additional_fields": {
"namespace/mycontact-field": "myvalue"
},
"payment_method": "bacs"
},
"customer": {
"id": 1,
"billing_address": {
"first_name": "First Name",
"last_name": "Last Name",
"company": "Company",
"address_1": "Address 1",
"address_2": "Address 2",
"city": "City",
"state": "State",
"postcode": "08000",
"country": "US",
"email": "email@example.com",
"phone": "1234567890",
"namespace/myfield": "myvalue"
},
"shipping_address": {
"first_name": "First Name",
"last_name": "Last Name",
"company": "Company",
"address_1": "Address 1",
"address_2": "Address 2",
"city": "City",
"state": "State",
"postcode": "08000",
"country": "US",
"phone": "1234567890",
"namespace/myfield": "myvalue"
},
"address": {
"first_name": "First Name",
"last_name": "Last Name",
"company": "Company",
"address_1": "Address 1",
"address_2": "Address 2",
"city": "City",
"state": "State",
"postcode": "08000",
"country": "US",
"phone": "1234567890",
"namespace/myfield": "myvalue"
}
}
}
```
It's full schema is this one:
Document schema
```json
{
"$schema": "http://json-schema.org/draft-07/schema#",
"title": "Cart and Checkout Schema",
"description": "Schema for cart, checkout, and customer information",
"type": "object",
"properties": {
"cart": {
"type": "object",
"description": "Information about the shopping cart",
"properties": {
"coupons": {
"type": "array",
"description": "List of coupon codes applied to the cart",
"items": {
"type": "string"
}
},
"shipping_rates": {
"type": "array",
"description": "List of currently selected shipping rates",
"items": {
"type": "string",
"description": "Shipping rate identifier using the full shipping rate ID so method_id:instance_id, for example: flat_rate:1"
}
},
"items": {
"type": "array",
"description": "List of product IDs in the cart, IDs will be dubplicated depending on the quantity of the product in the cart, so if you have 2 of product ID 1, the array will have 2 entries of product ID 1",
"items": {
"type": "integer"
}
},
"items_type": {
"type": "array",
"description": "Types of items in the cart, for example: simple, variation, subscription, etc.",
"items": {
"type": "string"
}
},
"items_count": {
"type": "integer",
"description": "Total number of items in the cart",
"minimum": 0
},
"items_weight": {
"type": "number",
"description": "Total weight of items in the cart",
"minimum": 0
},
"needs_shipping": {
"type": "boolean",
"description": "Whether the items in the cart require shipping"
},
"prefers_collection": {
"type": "boolean",
"description": "Whether the customer prefers using Local Pickup"
},
"totals": {
"type": "object",
"description": "Cart totals information",
"properties": {
"totalPrice": {
"type": "integer",
"description": "Total price of the cart in smallest currency unit (e.g., cents), after applying all discounts, shipping, and taxes"
},
"totalTax": {
"type": "integer",
"description": "Total tax amount in smallest currency unit (e.g., cents), after applying all discounts, shipping, and taxes"
}
}
},
"extensions": {
"type": "object",
"description": "Additional cart extension data, this is similar to what's passed in Store API's extensions parameter"
}
}
},
"checkout": {
"type": "object",
"description": "Checkout preferences and settings",
"properties": {
"create_account": {
"type": "boolean",
"description": "Whether the customer checked the create account checkbox, this will be false if the customer is logged in, cannot create an account, or forced to create an account."
},
"customer_note": {
"type": "string",
"description": "Customer's note or special instructions for the order, this will be empty if the customer didn't add a note."
},
"additional_fields": {
"type": "object",
"description": "Additional checkout fields, both applied to the contact or the order locations.",
"additionalProperties": {
"type": "string"
},
"patternProperties": {
"^[a-zA-Z0-9_-]+/[a-zA-Z0-9_-]+$": {
"type": "string",
"description": "Custom fields with namespace identifiers"
}
}
},
"payment_method": {
"type": "string",
"description": "Selected payment method identifier, this will be the payment method ID regardless if the customer selected a saved payment method or new payment method"
}
}
},
"customer": {
"type": "object",
"description": "Customer information",
"properties": {
"id": {
"type": "integer",
"description": "Customer ID, this will be 0 if the customer is not logged in"
},
"billing_address": {
"$ref": "#/definitions/address",
"description": "Customer's billing address"
},
"shipping_address": {
"$ref": "#/definitions/address",
"description": "Customer's shipping address"
},
"address": {
"$ref": "#/definitions/address",
"description": "This is a dynamic field that will be the billing or shipping address depending on the context of the field being evaluted."
}
}
}
},
"definitions": {
"address": {
"type": "object",
"description": "Customer address information",
"properties": {
"first_name": {
"type": "string",
"description": "First name of the recipient"
},
"last_name": {
"type": "string",
"description": "Last name of the recipient"
},
"company": {
"type": "string",
"description": "Company name"
},
"address_1": {
"type": "string",
"description": "Primary address line"
},
"address_2": {
"type": "string",
"description": "Secondary address line"
},
"city": {
"type": "string",
"description": "City name"
},
"state": {
"type": "string",
"description": "State or province, this will be the state code if it's a predefined list, for example: CA, TX, NY, etc, or the field value if it's a freeform state, for example: London."
},
"postcode": {
"type": "string",
"description": "Postal or ZIP code"
},
"country": {
"type": "string",
"description": "Country code (e.g., US, UK)"
},
"email": {
"type": "string",
"format": "email",
"description": "Email address"
},
"phone": {
"type": "string",
"description": "Phone number"
}
},
"additionalProperties": {
"type": "string",
"description": "Custom fields with namespace identifiers"
},
"patternProperties": {
"^[a-zA-Z0-9_-]+/[a-zA-Z0-9_-]+$": {
"type": "string",
"description": "Custom fields with namespace identifiers"
}
}
}
}
}
```
### Examples
#### Required and visible field
In this example we make the field required and visible only if local pickup is being used.
```php
'required' => [
"type" => "object",
"properties" => [
"cart" => [
"properties" => [
"prefers_collection" => [
"const" => true
]
]
]
]
],
'hidden' => [
"type" => "object",
"properties" => [
"cart" => [
"properties" => [
"prefers_collection" => [
"const" => false
]
]
]
]
]
```
Notice that for hidden, we inverse the field, meaning, this field should only be hidden if `prefers_collection` is false, which is almost all cases except when it's selected. In the examples above, we used [the keyword `const`](https://ajv.js.org/json-schema.html#const).
#### Validation schema example
Validation is slightly different from conditional visibility and requirement. In validation, you will pass in a subset of schema (only applicable to your field), and its role is to validate the field and show any errors if there.
In this example, we ensure that VAT is made up of a country code and 8-12 numbers.
```php
'validation' => [
"type" => "string",
"pattern" => "^[A-Z]{2}[0-9]{8,12}$"
"errorMessage" => "Please enter a valid VAT code with 2 letters for country code and 8-12 numbers."
]
```
Validation can also be against other fields, for example, an alternative email field that shouldn't the current email:
```php
'validation' => [
"type" => "string",
"format" => "email",
"not" => [
"const" => ["$data", "0/customer/billing_address/email"]
]
"errorMessage" => "Please enter a valid VAT code with 2 letters for country code and 8-12 numbers."
]
```
In the example above, we used [format keyword](https://github.com/ajv-validator/ajv-formats) and `$data` to refer to the current field value via [JSON pointers](https://ajv.js.org/guide/combining-schemas.html#data-reference). We also used the `errorMessage` property to provide a custom error message.
#### `$data` keyword and JSON pointers
`$data` keyword is a way in JSON schema to reference another field's value. In the above example, we use it to refer to the billing email via [JSON pointers](https://ajv.js.org/guide/combining-schemas.html#data-reference).
When dealing with JSON pointers, there are some things to keep in mind:
- The forward slash `/` is used to navigate through the JSON object, so for additional fields, a field named `my-plugin-namespace/my-field` will need to be referenced as `my-plugin-namespace~1my-field`.
- Navigation in JSON pointers can be from the current field backward, or from the root. If you have an address field and want to validate say the phone field, this means you will validate 2 values, one for shipping, and one for billing, so you can reference the phone field in 2 ways:
- `0/customer/address/phone` which uses root navigation (via the `0/`) prefix, and uses the dynamic `address` group, which will change depending if the billing or shipping value is being validated.
- `1/phone` which uses relative pointers to step back, in this case, it will access its sibling field, the `phone` field. Increase the number to step back even further, for example, `2/id` will access the customer ID.
### Keywords and values that are not in spec
We support [JSON Schema Draft-07](https://json-schema.org/draft-07), which is simple and doesn't support all the keywords and values that are in the latest spec, but we feel like it covers most of the use cases. On top of that, we introduced some non-standard keywords and values that are not in the spec, their implementation might be different between Opis and AJV (or any future implementation), this is the list of such keywords and values:
- `errorMessage`: Custom error message for validation, in AJV, this is `errorMessage` and in Opis, this is `$error`, we only support `errorMessage` and maps that internally for Opis. We also don't support templates in `errorMessage` for now.
- `$data`: Refers to the current field value via [JSON pointers](https://ajv.js.org/guide/combining-schemas.html#data-reference), both Opis and AJV use the same implementation.
### Evaluation Logic
- For `required`: If any schema in the array matches the current checkout state, the field will be required.
- For `hidden`: If any schema in the array matches the current checkout state, the field will be hidden.
- For `validation`: The value of the field will be evaluated against the partial schema provided and an error will be shown if it didn't match.
### Performance Considerations
Complex JSON Schema conditions can impact checkout performance. Keep your schemas as simple as possible and limit the number of conditions to what's necessary for your use case.
## Backward compatibility
Due to technical reasons, it's not yet possible to specify the meta key for fields, as we want them to be prefixed and managed. Plugins with existing fields in shortcode Checkout can be compatible and react to reading and saving fields using hooks.
Assuming 2 fields, named `my-plugin-namespace/address-field` in the address step and `my-plugin-namespace/my-other-field` in the order step, you can:
### React to saving fields
You can react to those fields being saved by hooking into `woocommerce_set_additional_field_value` action.
```php
add_action(
'woocommerce_set_additional_field_value',
function ( $key, $value, $group, $wc_object ) {
if ( 'my-plugin-namespace/address-field' !== $key ) {
return;
}
if ( 'billing' === $group ) {
$my_plugin_address_key = 'existing_billing_address_field_key';
} else {
$my_plugin_address_key = 'existing_shipping_address_field_key';
}
$wc_object->update_meta_data( $my_plugin_address_key, $value, true );
},
10,
4
);
add_action(
'woocommerce_set_additional_field_value',
function ( $key, $value, $group, $wc_object ) {
if ( 'my-plugin-namespace/my-other-field' !== $key ) {
return;
}
$my_plugin_key = 'existing_order_field_key';
$wc_object->update_meta_data( $my_plugin_key, $value, true );
},
10,
4
);
```
This way, you can ensure existing systems will continue working and your integration will continue to work. However, ideally, you should migrate your existing data and systems to use the new meta fields.
### React to reading fields
You can use the `woocommerce_get_default_value_for_{$key}` filters to provide a different default value (a value coming from another meta field for example):
```php
add_filter(
"woocommerce_get_default_value_for_my-plugin-namespace/address-field",
function ( $value, $group, $wc_object ) {
if ( 'billing' === $group ) {
$my_plugin_key = 'existing_billing_address_field_key';
} else {
$my_plugin_key = 'existing_shipping_address_field_key';
}
return $wc_object->get_meta( $my_plugin_key );
},
10,
3
);
add_filter(
"woocommerce_get_default_value_for_my-plugin-namespace/my-other-field",
function ( $value, $group, $wc_object ) {
$my_plugin_key = 'existing_order_field_key';
return $wc_object->get_meta( $my_plugin_key );
},
10,
3
);
```
## A full example
In this full example we will register the Government ID text field and verify that it conforms to a specific pattern.
This example is just a combined version of the examples shared above.
```php
add_action(
'woocommerce_init',
function() {
woocommerce_register_additional_checkout_field(
array(
'id' => 'namespace/gov-id',
'label' => 'Government ID',
'location' => 'address',
'required' => true,
'attributes' => array(
'autocomplete' => 'government-id',
'pattern' => '[A-Z0-9]{5}', // A 5-character string of capital letters and numbers.
'title' => 'Your 5-digit Government ID',
),
),
);
woocommerce_register_additional_checkout_field(
array(
'id' => 'namespace/confirm-gov-id',
'label' => 'Confirm government ID',
'location' => 'address',
'required' => true,
'attributes' => array(
'autocomplete' => 'government-id',
'pattern' => '[A-Z0-9]{5}', // A 5-character string of capital letters and numbers.
'title' => 'Confirm your 5-digit Government ID',
),
),
);
add_action(
'woocommerce_sanitize_additional_field',
function ( $field_value, $field_key ) {
if ( 'namespace/gov-id' === $field_key || 'namespace/confirm-gov-id' === $field_key ) {
$field_value = str_replace( ' ', '', $field_value );
$field_value = strtoupper( $field_value );
}
return $field_value;
},
10,
2
);
add_action(
'woocommerce_validate_additional_field',
function ( WP_Error $errors, $field_key, $field_value ) {
if ( 'namespace/gov-id' === $field_key ) {
$match = preg_match( '/[A-Z0-9]{5}/', $field_value );
if ( 0 === $match || false === $match ) {
$errors->add( 'invalid_gov_id', 'Please ensure your government ID matches the correct format.' );
}
}
return $error;
},
10,
3
);
}
);
add_action(
'woocommerce_blocks_validate_location_address_fields',
function ( \WP_Error $errors, $fields, $group ) {
if ( $fields['namespace/gov-id'] !== $fields['namespace/confirm-gov-id'] ) {
$errors->add( 'gov_id_mismatch', 'Please ensure your government ID matches the confirmation.' );
}
},
10,
3
);
```
---
## Available Filters
*Source: block-development/cart-and-checkout-blocks/available-filters/README.md*
# Available Filters
This document lists the filters that are currently available to extensions and offers usage information for each one of them. Information on registering filters can be found on the [Checkout - Filter Registry](https://github.com/woocommerce/woocommerce/blob/trunk/plugins/woocommerce/client/blocks/packages/checkout/filter-registry/README.md) page.
## Cart Line Items filters
The following [Cart Line Items filters](https://developer.woocommerce.com/docs/cart-and-checkout-filters-cart-line-items/) are available:
- `cartItemClass`
- `cartItemPrice`
- `itemName`
- `saleBadgePriceFormat`
- `showRemoveItemLink`
- `subtotalPriceFormat`
The following screenshot shows which parts the individual filters affect:
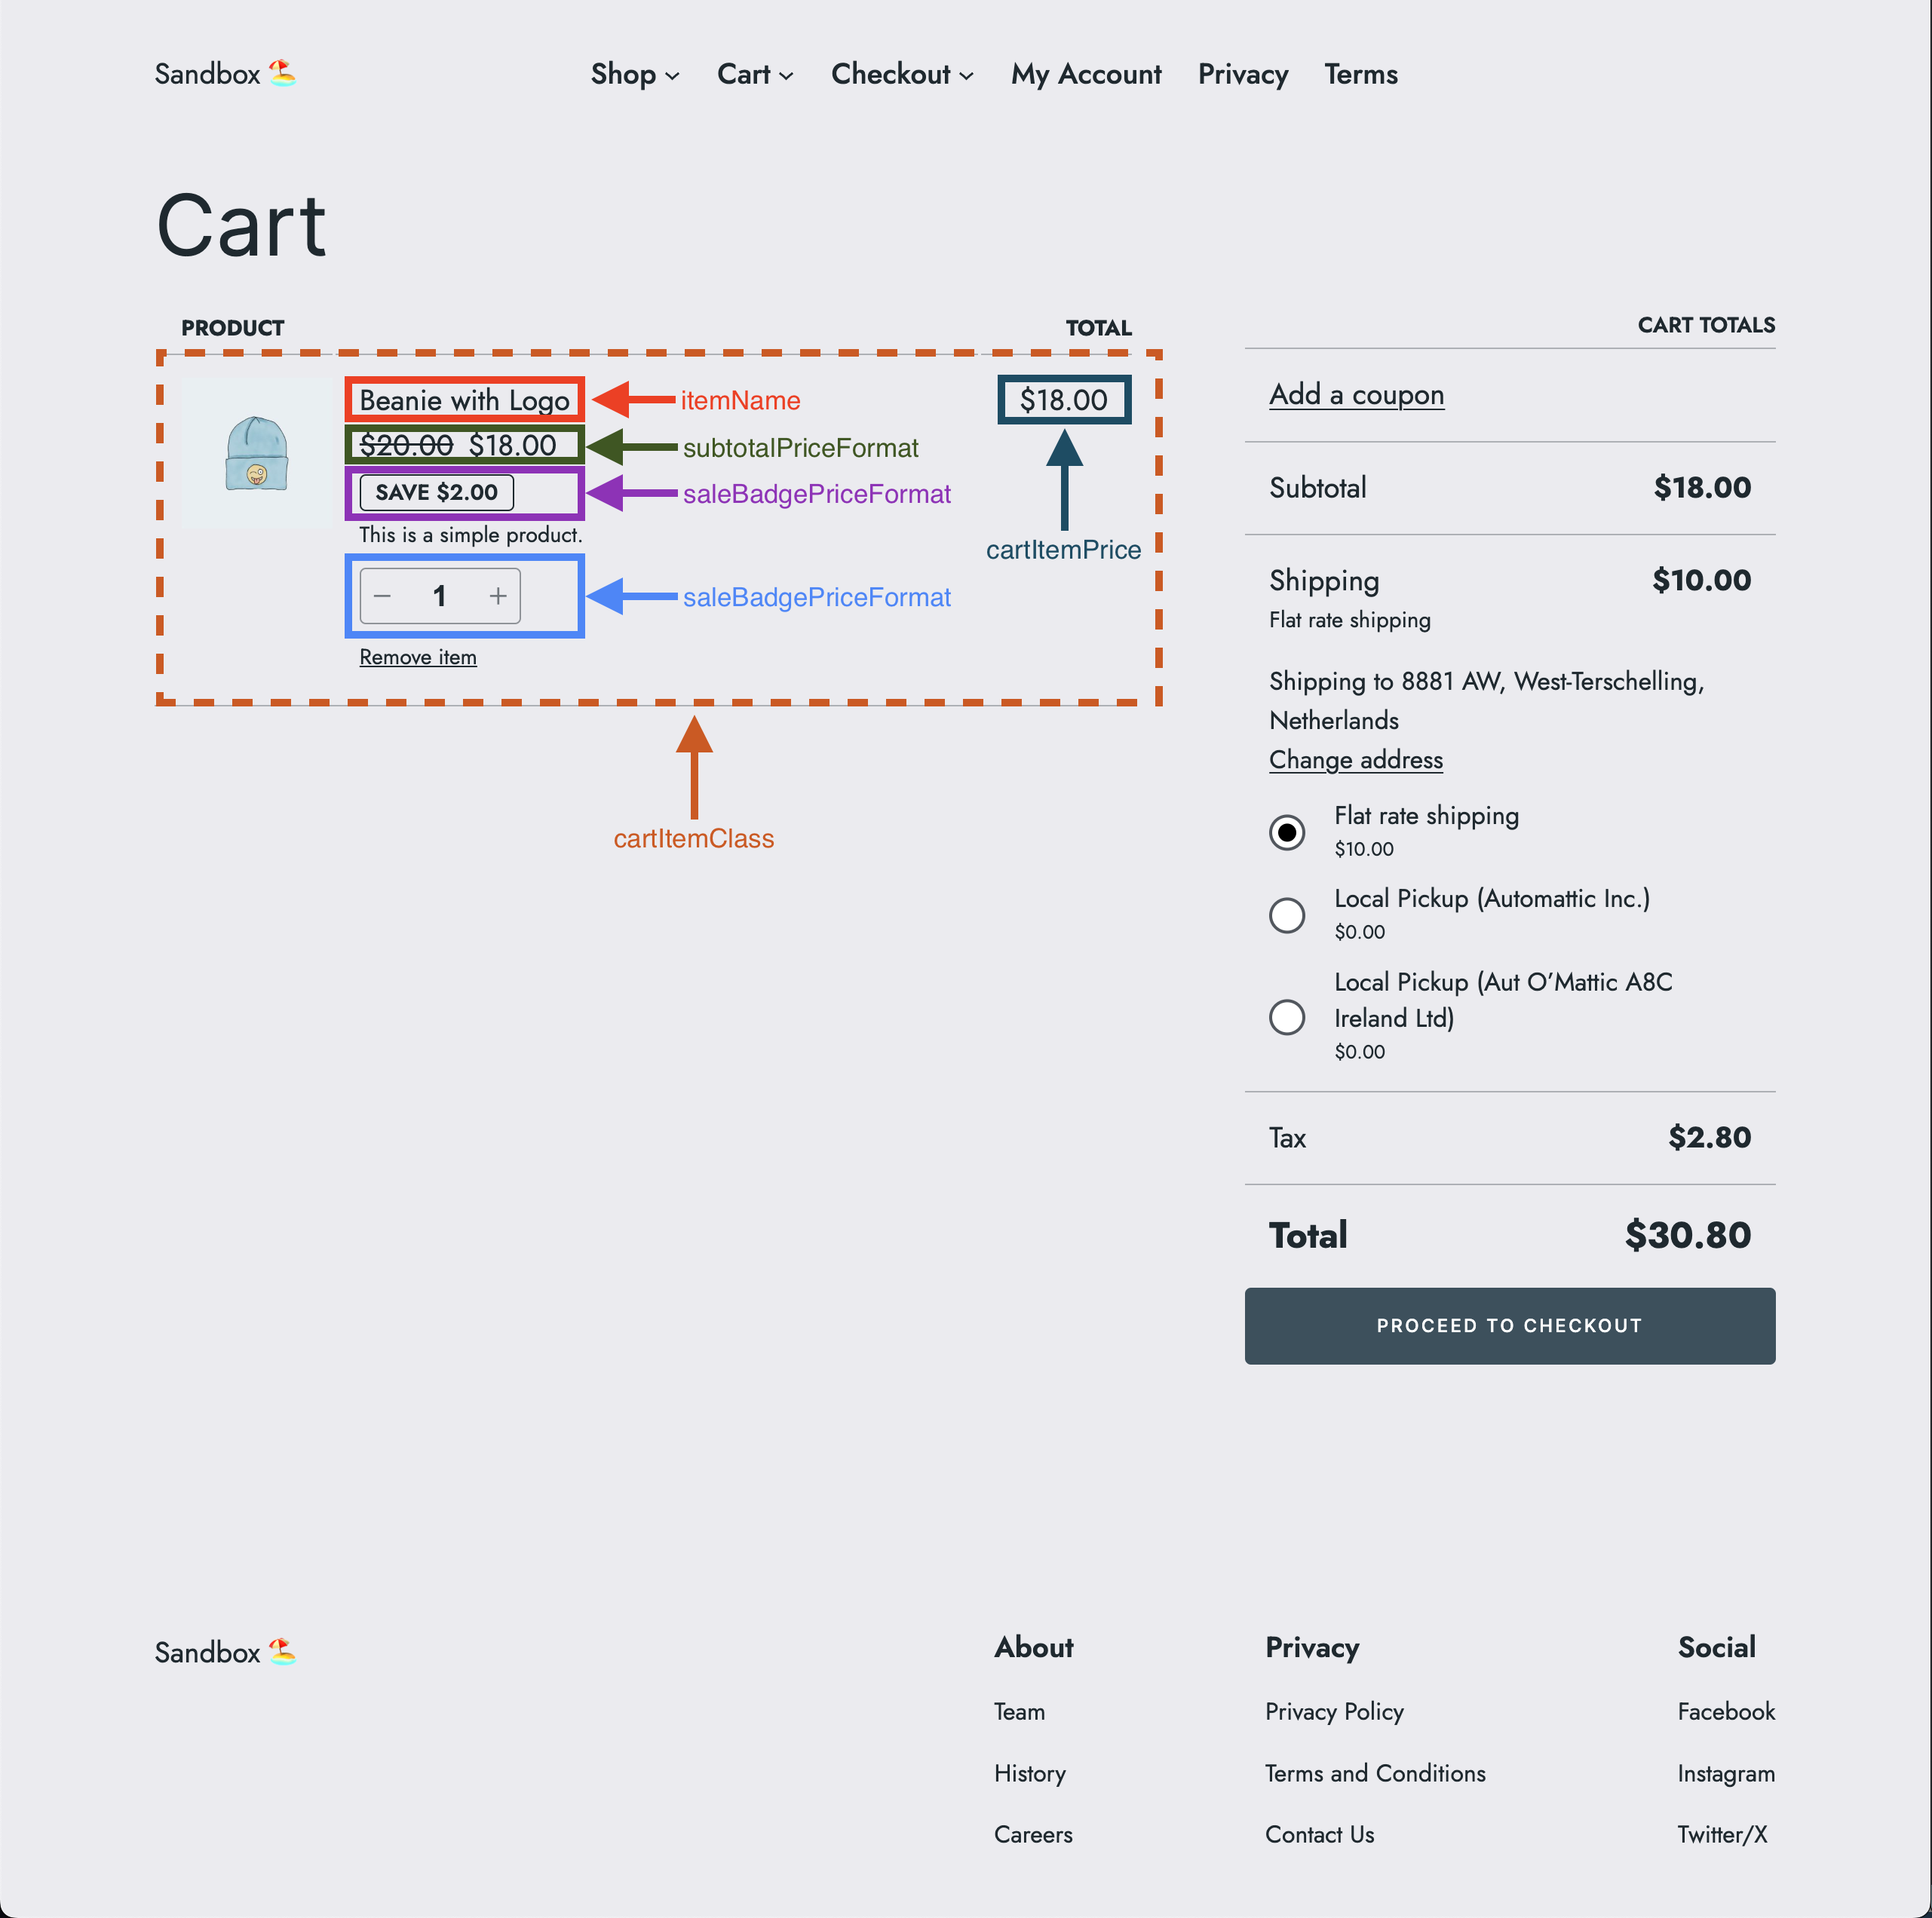
## Order Summary Items filters
The following [Order Summary Items filters](https://developer.woocommerce.com/docs/cart-and-checkout-filters-order-summary-items/) are available:
- `cartItemClass`
- `cartItemPrice`
- `itemName`
- `subtotalPriceFormat`
The following screenshot shows which parts the individual filters affect:
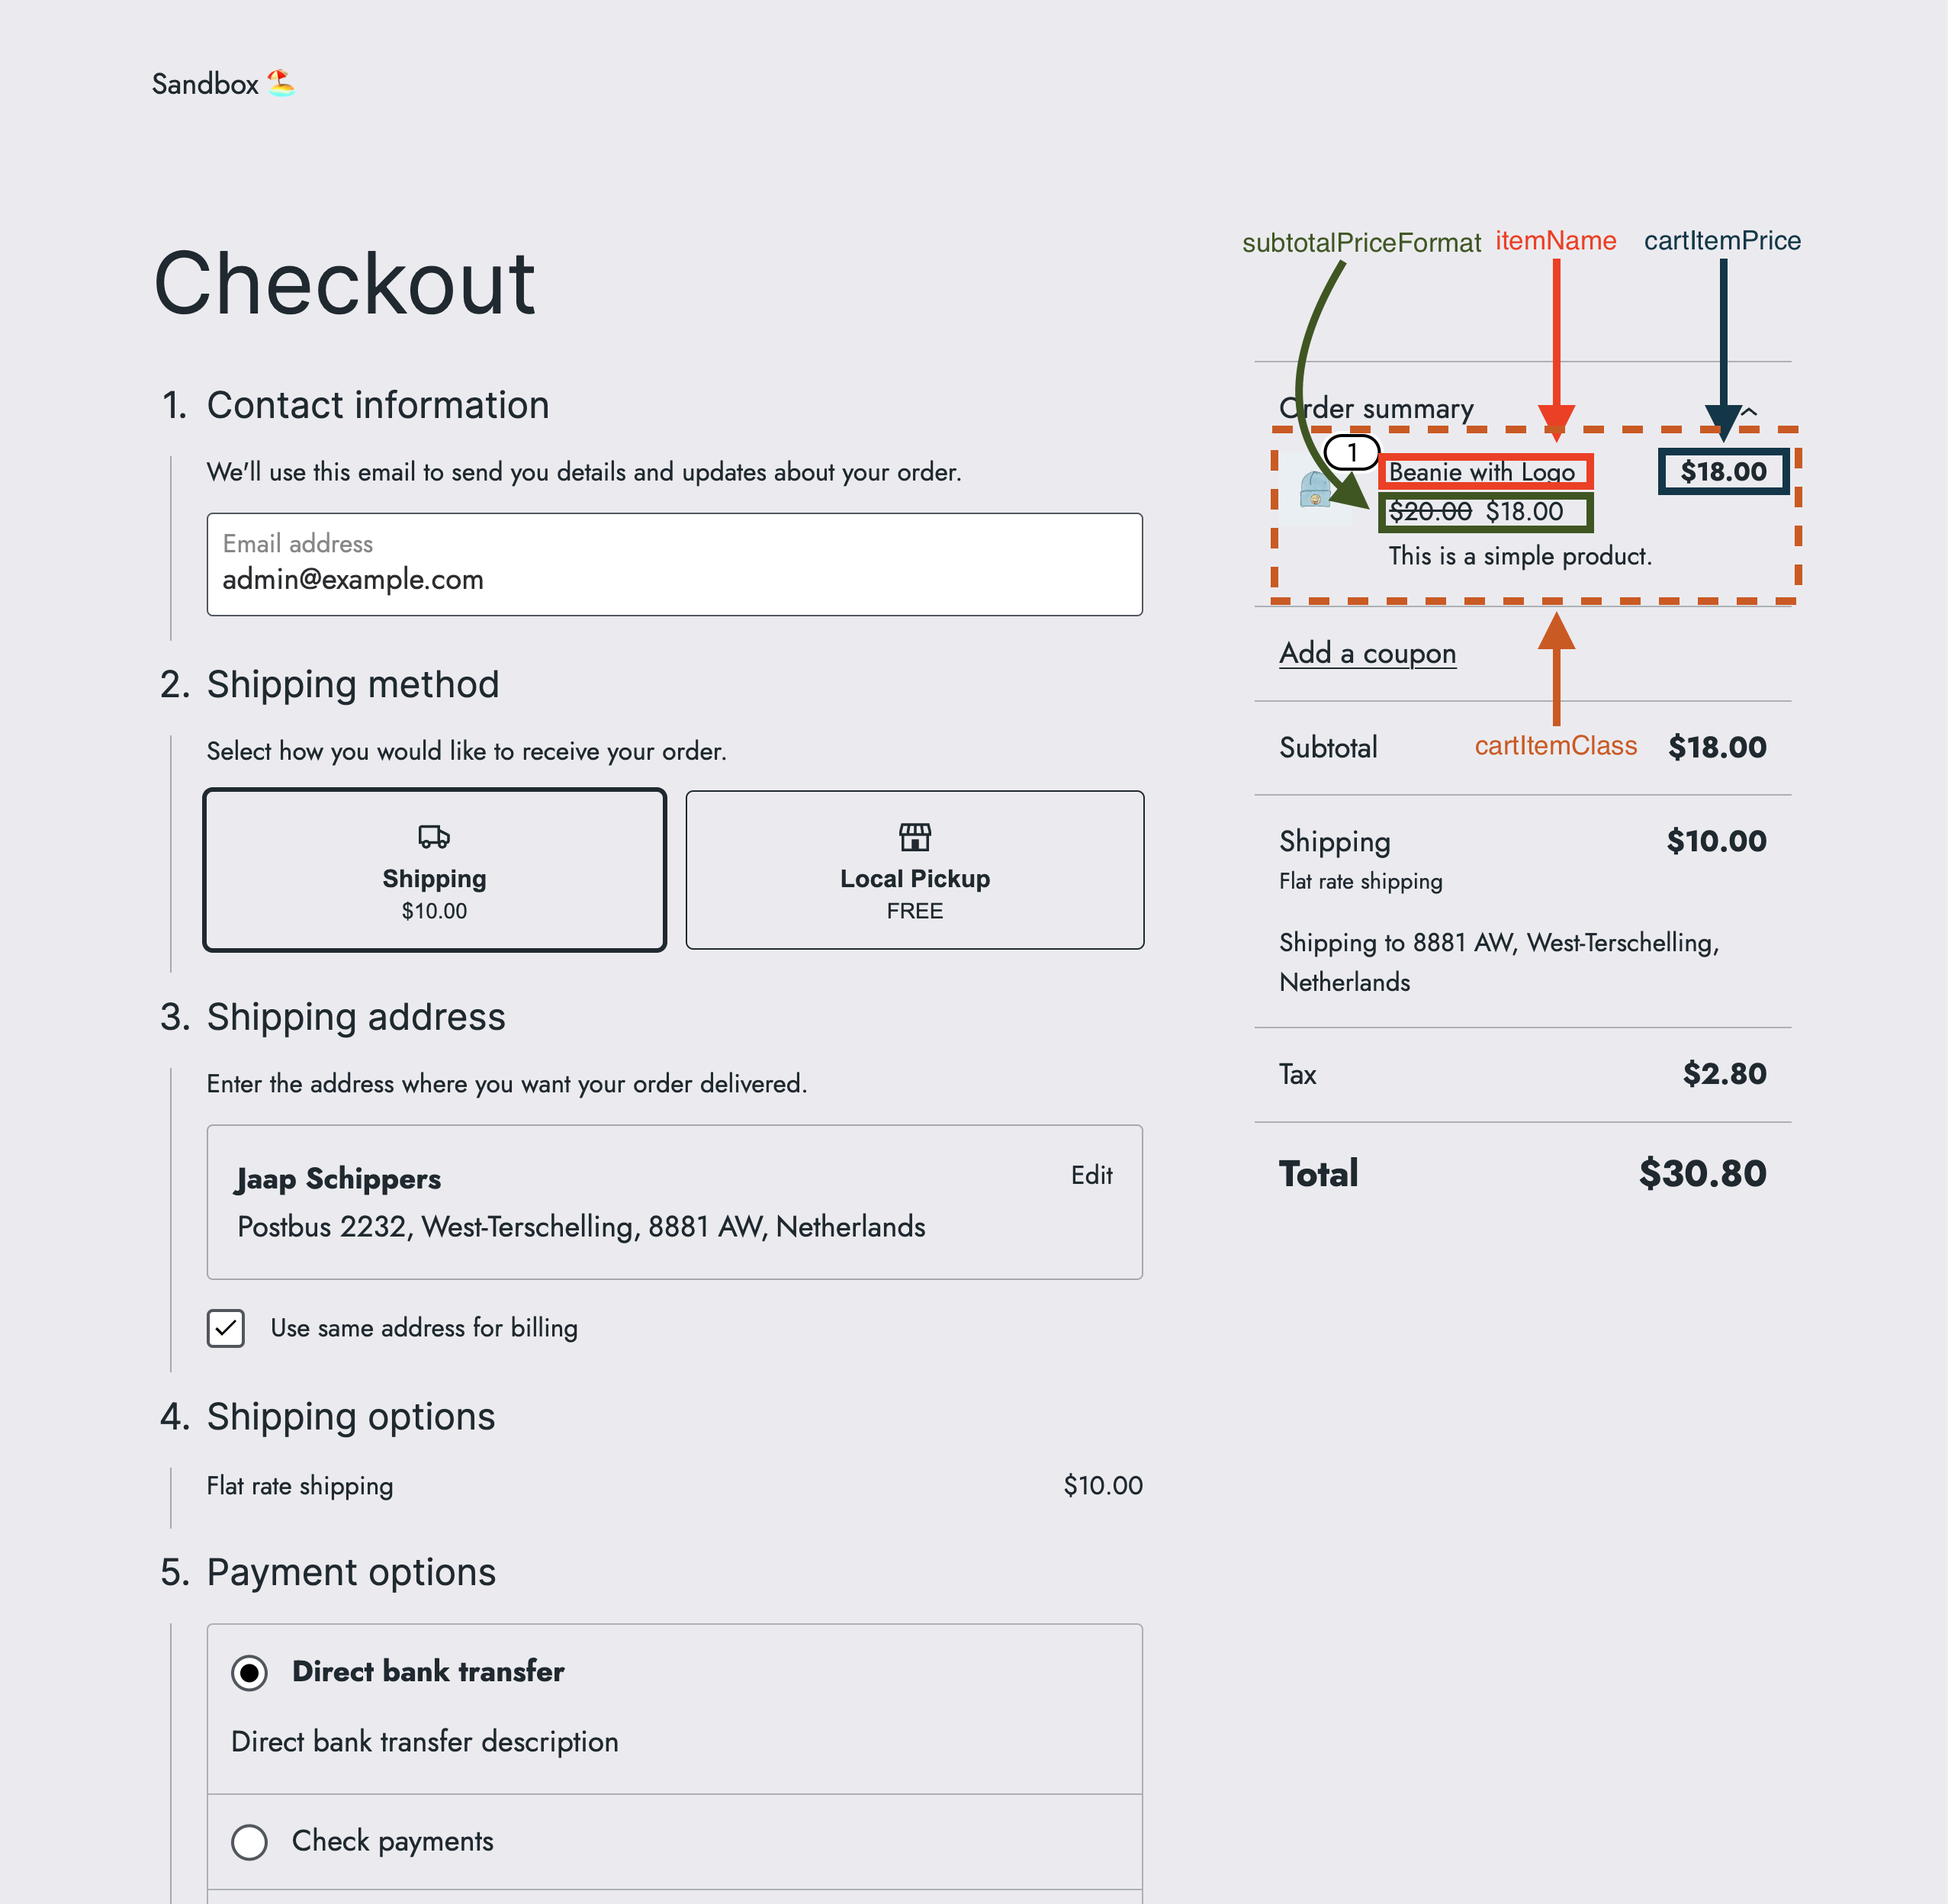
## Totals Footer Item filter
The following [Totals Footer Item filter](https://developer.woocommerce.com/docs/cart-and-checkout-filters-totals-footer-item/) is available:
- `totalLabel`
- `totalValue`
## Checkout and place order button filters
The following [Checkout and place order button filters](https://developer.woocommerce.com/docs/cart-and-checkout-filters-checkout-and-place-order-button/) are available:
- `proceedToCheckoutButtonLabel`
- `proceedToCheckoutButtonLink`
- `placeOrderButtonLabel`
## Coupon filters
The following [Coupon filters](https://developer.woocommerce.com/docs/cart-and-checkout-filters-coupons/) are available:
- `coupons`
- `showApplyCouponNotice`
- `showRemoveCouponNotice`
## Additional Cart and Checkout inner block types filter
The following [Additional Cart and Checkout inner block types filter](https://developer.woocommerce.com/docs/cart-and-checkout-filters-inner-block-types/) is available:
- `additionalCartCheckoutInnerBlockTypes`
## Combined filters
Filters can also be combined. The following example shows how to combine some of the available filters.
```tsx
const { registerCheckoutFilters } = window.wc.blocksCheckout;
const isOrderSummaryContext = ( args ) => args?.context === 'summary';
const modifyCartItemClass = ( defaultValue, extensions, args ) => {
if ( isOrderSummaryContext( args ) ) {
return 'my-custom-class';
}
return defaultValue;
};
const modifyCartItemPrice = ( defaultValue, extensions, args ) => {
if ( isOrderSummaryContext( args ) ) {
return ' for all items';
}
return defaultValue;
};
const modifyItemName = ( defaultValue, extensions, args ) => {
if ( isOrderSummaryContext( args ) ) {
return `${ defaultValue }`;
}
return defaultValue;
};
const modifySubtotalPriceFormat = ( defaultValue, extensions, args ) => {
if ( isOrderSummaryContext( args ) ) {
return ' per item';
}
return defaultValue;
};
registerCheckoutFilters( 'example-extension', {
cartItemClass: modifyCartItemClass,
cartItemPrice: modifyCartItemPrice,
itemName: modifyItemName,
subtotalPriceFormat: modifySubtotalPriceFormat,
} );
```
## Troubleshooting
If you are logged in to the store as an administrator, you should be shown an error like this if your filter is not
working correctly. The error will also be shown in your console.
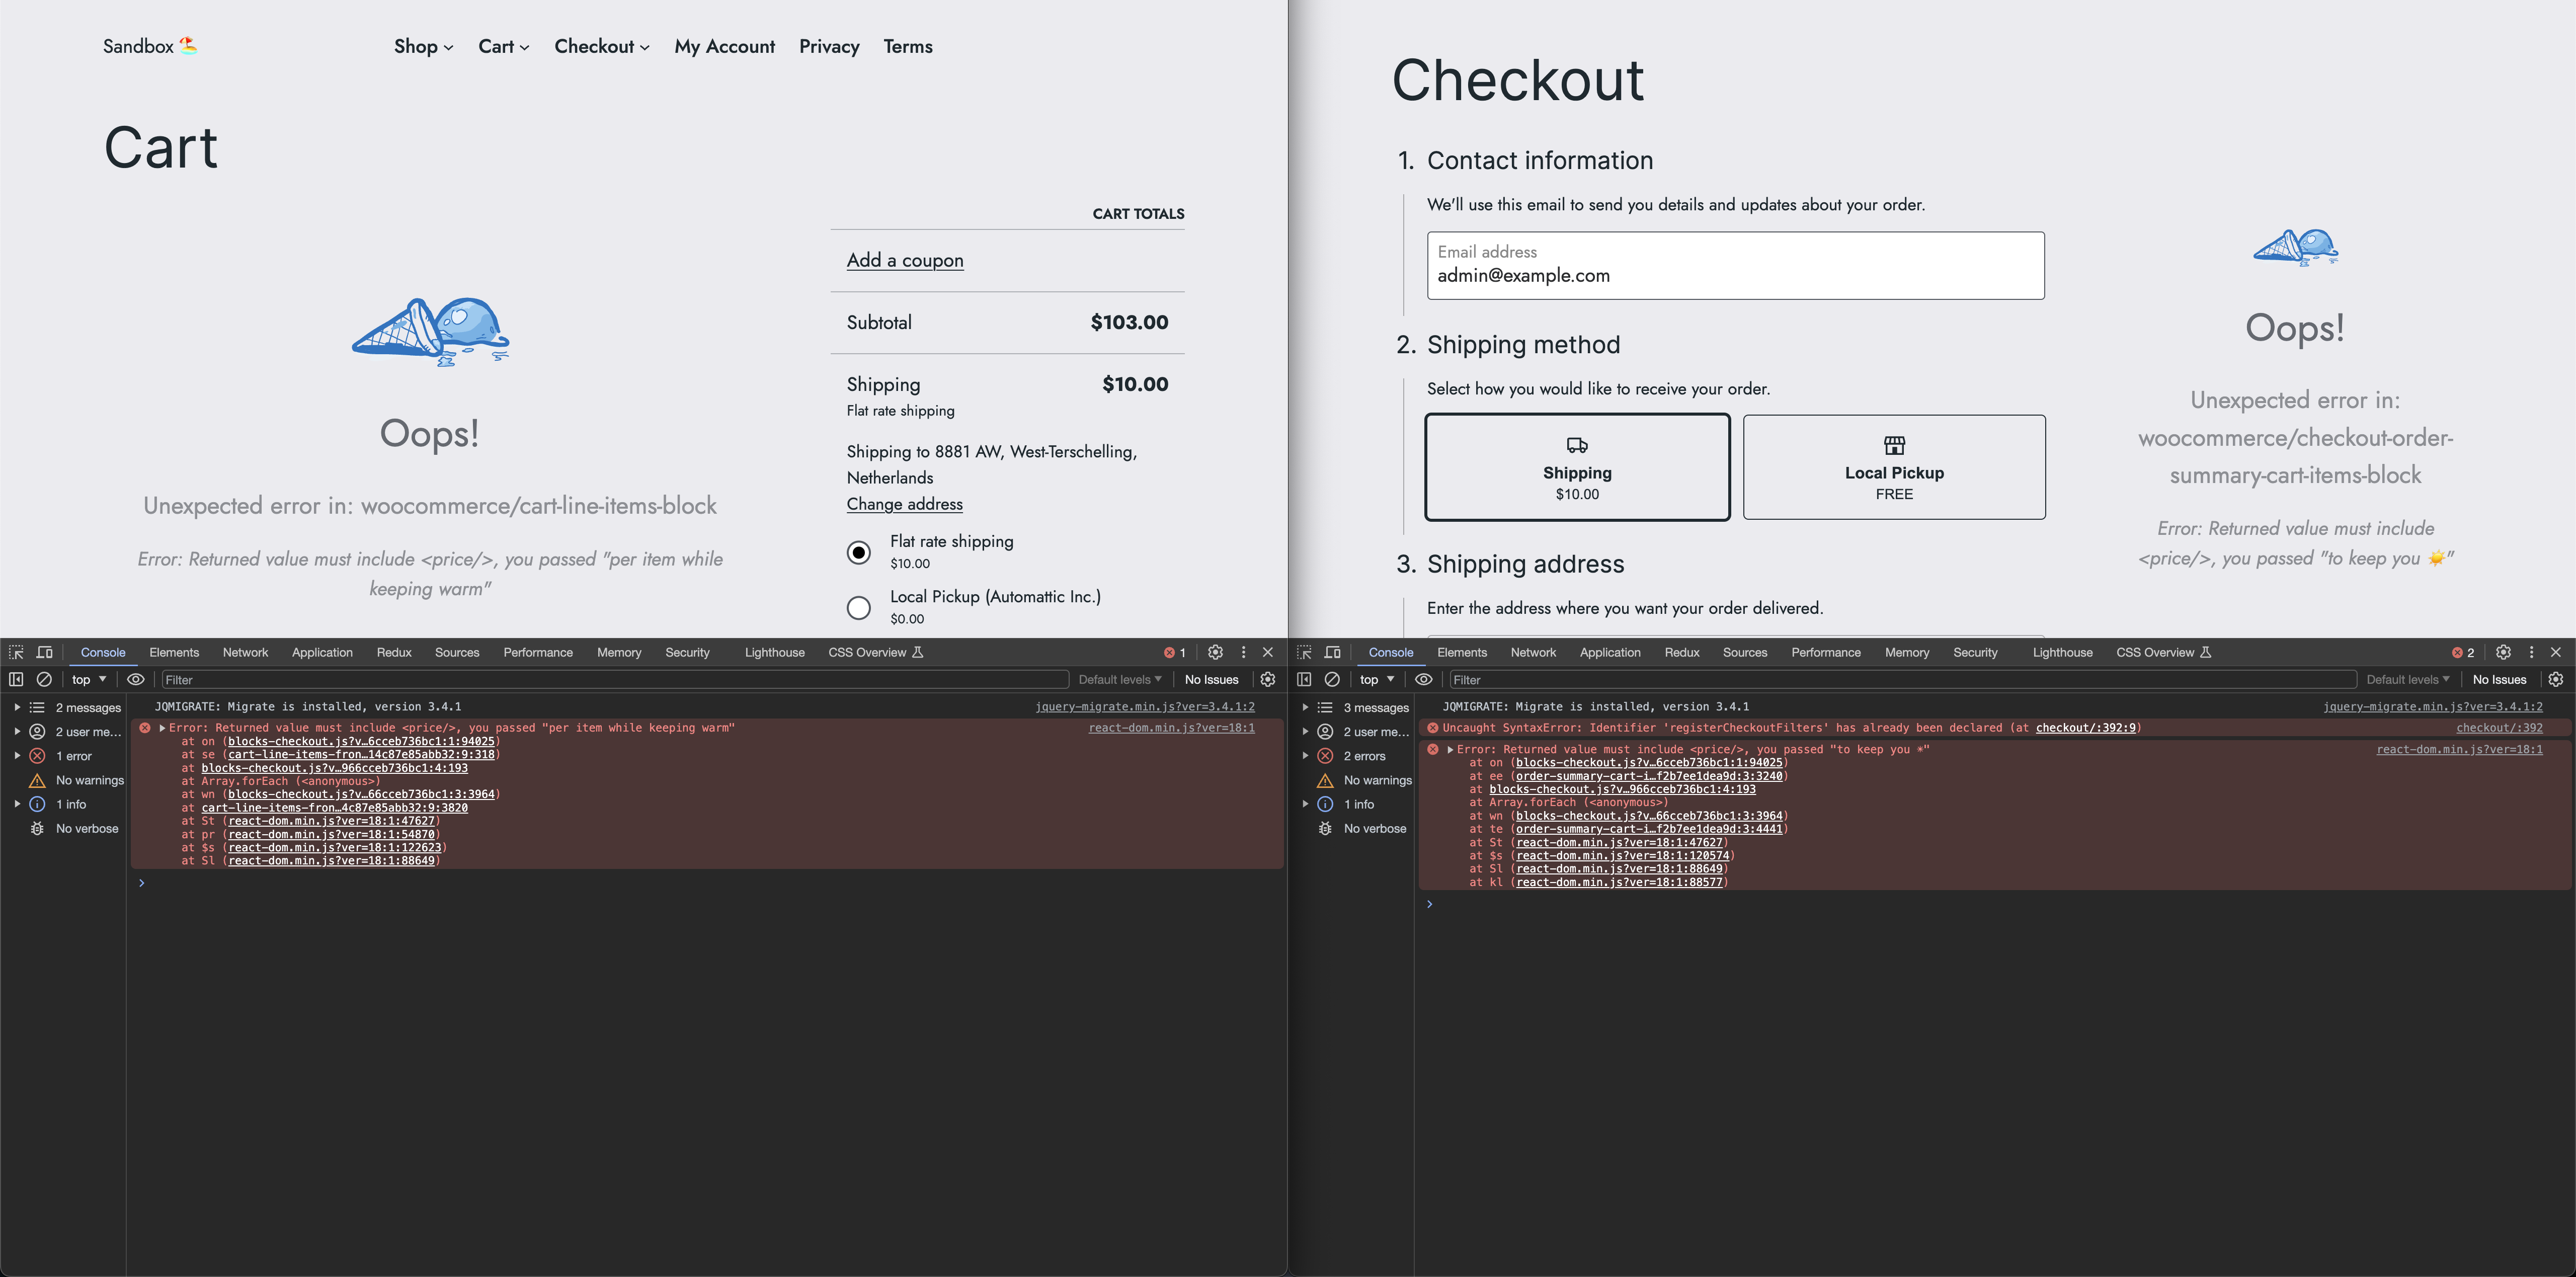
---
## Inner block types
*Source: block-development/cart-and-checkout-blocks/available-filters/additional-cart-checkout-inner-block-types.md*
# Inner block types
The following Additional Cart and Checkout inner block types filter is available:
- `additionalCartCheckoutInnerBlockTypes`
## `additionalCartCheckoutInnerBlockTypes`
### Description
The Cart and Checkout blocks are made up of inner blocks. These inner blocks areas allow certain block types to be added as children. By default, only `core/paragraph`, `core/image`, and `core/separator` are available to add.
By using the `additionalCartCheckoutInnerBlockTypes` filter it is possible to add items to this array to control what the editor can into an inner block.
This filter is called once for each inner block area, so it is possible to be very granular when determining what blocks can be added where.
### Parameters
- _defaultValue_ `array` (default: `[]`) - The default value of the filter.
- _extensions_ `object` (default: `{}`) - The extensions object.
- _args_ `object` - The arguments object with the following key:
- _block_ `string` - The block name of the inner block area, e.g. `woocommerce/checkout-shipping-address-block`.
- _validation_ `boolean` or `Error` - Checks if the returned value is an array of strings. If an error occurs, it will be thrown.
### Returns
- `array` - The modified array with allowed block types for the corresponding inner block area.
### Code example
Let's suppose we want to allow the editor to add some blocks in specific places in the Cart and Checkout blocks.
1. Allow `core/quote` to be inserted in every block area in the Cart and Checkout blocks.
2. Allow `core/table` to be inserted in the Shipping Address block in the Checkout.
In our extension we could register a filter satisfy both of these conditions like so:
```tsx
document.addEventListener( 'DOMContentLoaded', function () {
const { registerCheckoutFilters } = window.wc.blocksCheckout;
const modifyAdditionalInnerBlockTypes = (
defaultValue,
extensions,
args,
validation
) => {
defaultValue.push( 'core/quote' );
if ( args?.block === 'woocommerce/checkout-shipping-address-block' ) {
defaultValue.push( 'core/table' );
}
return defaultValue;
};
registerCheckoutFilters( 'example-extension', {
additionalCartCheckoutInnerBlockTypes: modifyAdditionalInnerBlockTypes,
} );
} );
```
To call this filter within the editor, wrap the filter registration in a `DOMContentLoaded` event listener and ensure the code runs in the admin panel.
> Filters can be also combined. See [Combined filters](../available-filters/README.md) for an example.
### Screenshots
| Before | After |
|:---------------------------------------------------------------------:|:---------------------------------------------------------------------:|
| | |
---
## Cart line items
*Source: block-development/cart-and-checkout-blocks/available-filters/cart-line-items.md*
# Cart line items
The following Cart Line Items filters are available:
- `cartItemClass`
- `cartItemPrice`
- `itemName`
- `saleBadgePriceFormat`
- `showRemoveItemLink`
- `subtotalPriceFormat`
The following objects are shared between the filters:
- Cart object
- Cart Item object
The following screenshot shows which parts the individual filters affect:

## `cartItemClass`
### Description
The `cartItemClass` filter allows to change the cart item class.
### Parameters
- _defaultValue_ `object` (default: `''`) - The default cart item class.
- _extensions_ `object` (default: `{}`) - The extensions object.
- _args_ `object` - The arguments object with the following keys:
- _cart_ `object` - The cart object from `wc/store/cart`, see Cart object.
- _cartItem_ `object` - The cart item object from `wc/store/cart`, see Cart Item object.
- _context_ `string` (allowed values: `cart` or `summary`) - The context of the item.
### Returns
- `string` - The modified cart item class, or an empty string.
### Code examples
#### Basic example
```tsx
const { registerCheckoutFilters } = window.wc.blocksCheckout;
const modifyCartItemClass = ( defaultValue, extensions, args ) => {
const isCartContext = args?.context === 'cart';
if ( ! isCartContext ) {
return defaultValue;
}
return 'my-custom-class';
};
registerCheckoutFilters( 'example-extension', {
cartItemClass: modifyCartItemClass,
} );
```
#### Advanced example
```tsx
const { registerCheckoutFilters } = window.wc.blocksCheckout;
const modifyCartItemClass = ( defaultValue, extensions, args ) => {
const isCartContext = args?.context === 'cart';
if ( ! isCartContext ) {
return defaultValue;
}
if ( args?.cartItem?.name === 'Beanie with Logo' ) {
return 'cool-class';
}
if ( args?.cartItem?.name === 'Sunglasses' ) {
return 'hot-class';
}
return 'my-custom-class';
};
registerCheckoutFilters( 'example-extension', {
cartItemClass: modifyCartItemClass,
} );
```
> Filters can be also combined. See [Combined filters](../available-filters/README.md) for an example.
### Screenshots
| Before | After |
|:---------------------------------------------------------------------:|:---------------------------------------------------------------------:|
| | |
## `cartItemPrice`
### Description
The `cartItemPrice` filter allows to format the cart item price.
### Parameters
- _defaultValue_ `string` (default: ``) - The default cart item price.
- _extensions_ `object` (default: `{}`) - The extensions object.
- _args_ `object` - The arguments object with the following keys:
- _cart_ `object` - The cart object from `wc/store/cart`, see Cart object.
- _cartItem_ `object` - The cart item object from `wc/store/cart`, see Cart Item object.
- _context_ `string` (allowed values: `cart` or `summary`) - The context of the item.
- _validation_ `boolean` - Checks if the return value contains the substring ``.
### Returns
- `string` - The modified format of the cart item price, which must contain the substring ``, or the original price format.
### Code examples
#### Basic example
```tsx
const { registerCheckoutFilters } = window.wc.blocksCheckout;
const modifyCartItemPrice = ( defaultValue, extensions, args, validation ) => {
const isCartContext = args?.context === 'cart';
if ( ! isCartContext ) {
return defaultValue;
}
return ' for all items';
};
registerCheckoutFilters( 'example-extension', {
cartItemPrice: modifyCartItemPrice,
} );
```
#### Advanced example
```tsx
const { registerCheckoutFilters } = window.wc.blocksCheckout;
const modifyCartItemPrice = ( defaultValue, extensions, args, validation ) => {
const isCartContext = args?.context === 'cart';
if ( ! isCartContext ) {
return defaultValue;
}
if ( args?.cartItem?.name === 'Beanie with Logo' ) {
return ' to keep you warm';
}
if ( args?.cartItem?.name === 'Sunglasses' ) {
return ' to keep you cool';
}
return ' for all items';
};
registerCheckoutFilters( 'example-extension', {
cartItemPrice: modifyCartItemPrice,
} );
```
> Filters can be also combined. See [Combined filters](../available-filters/README.md) for an example.
### Screenshots
| Before | After |
|:---------------------------------------------------------------------:|:---------------------------------------------------------------------:|
| | |
## `itemName`
### Description
The `itemName` filter allows to change the cart item name.
### Parameters
- _defaultValue_ `string` - The default cart item name.
- _extensions_ `object` (default: `{}`) - The extensions object.
- _args_ `object` - The arguments object with the following keys:
- _cart_ `object` - The cart object from `wc/store/cart`, see Cart object.
- _cartItem_ `object` - The cart item object from `wc/store/cart`, see Cart Item object.
- _context_ `string` (allowed values: `cart` or `summary`) - The context of the item.
### Returns
- `string` - The original or modified cart item name.
### Code examples
#### Basic example
```tsx
const { registerCheckoutFilters } = window.wc.blocksCheckout;
const modifyItemName = ( defaultValue, extensions, args ) => {
const isCartContext = args?.context === 'cart';
if ( ! isCartContext ) {
return defaultValue;
}
return `🪴 ${ defaultValue } 🪴`;
};
registerCheckoutFilters( 'example-extension', {
itemName: modifyItemName,
} );
```
#### Advanced example
```tsx
const { registerCheckoutFilters } = window.wc.blocksCheckout;
const modifyItemName = ( defaultValue, extensions, args ) => {
const isCartContext = args?.context === 'cart';
if ( ! isCartContext ) {
return defaultValue;
}
if ( args?.cartItem?.name === 'Beanie with Logo' ) {
return `⛷️ ${ defaultValue } ⛷️`;
}
if ( args?.cartItem?.name === 'Sunglasses' ) {
return `🏄♂️ ${ defaultValue } 🏄♂️`;
}
return `🪴 ${ defaultValue } 🪴`;
};
registerCheckoutFilters( 'example-extension', {
itemName: modifyItemName,
} );
```
> Filters can be also combined. See [Combined filters](../available-filters/README.md) for an example.
### Screenshots
| Before | After |
|:---------------------------------------------------------------------:|:---------------------------------------------------------------------:|
| | |
## `saleBadgePriceFormat`
### Description
The `saleBadgePriceFormat` filter allows to format the cart item sale badge price.
### Parameters
- _defaultValue_ `string` (default: ``) - The default cart item sale badge price.
- _extensions_ `object` (default: `{}`) - The extensions object.
- _args_ `object` - The arguments object with the following keys:
- _cart_ `object` - The cart object from `wc/store/cart`, see Cart object.
- _cartItem_ `object` - The cart item object from `wc/store/cart`, see Cart Item object.
- _context_ `string` (allowed values: `cart` or `summary`) - The context of the item.
- _validation_ `boolean` - Checks if the return value contains the substring ``.
### Returns
- `string` - The modified format of the cart item sale badge price, which must contain the substring ``, or the original price format.
### Code examples
```tsx
const { registerCheckoutFilters } = window.wc.blocksCheckout;
const modifySaleBadgePriceFormat = (
defaultValue,
extensions,
args,
validation
) => {
const isCartContext = args?.context === 'cart';
if ( ! isCartContext ) {
return defaultValue;
}
return ' per item';
};
registerCheckoutFilters( 'example-extension', {
saleBadgePriceFormat: modifySaleBadgePriceFormat,
} );
```
#### Advanced example
```tsx
const { registerCheckoutFilters } = window.wc.blocksCheckout;
const modifySaleBadgePriceFormat = (
defaultValue,
extensions,
args,
validation
) => {
const isCartContext = args?.context === 'cart';
if ( ! isCartContext ) {
return defaultValue;
}
if ( args?.cartItem?.name === 'Beanie with Logo' ) {
return ' per item while keeping warm';
}
if ( args?.cartItem?.name === 'Sunglasses' ) {
return ' per item while looking cool';
}
return ' per item';
};
registerCheckoutFilters( 'example-extension', {
saleBadgePriceFormat: modifySaleBadgePriceFormat,
} );
```
> Filters can be also combined. See [Combined filters](../available-filters/README.md) for an example.
### Screenshots
| Before | After |
|:---------------------------------------------------------------------:|:---------------------------------------------------------------------:|
| | |
## `showRemoveItemLink`
### Description
The `showRemoveItemLink` is used to show or hide the cart item remove link.
### Parameters
- _defaultValue_ (type: `boolean`, default: `true`) - The default value of the remove link.
- _extensions_ `object` (default: `{}`) - The extensions object.
- _args_ `object` - The arguments object with the following keys:
- _cart_ `object` - The cart object from `wc/store/cart`, see Cart object.
- _cartItem_ `object` - The cart item object from `wc/store/cart`, see Cart Item object.
- _context_ `string` (allowed values: `cart` or `summary`) - The context of the item.
### Returns
- `boolean` - `true` if the cart item remove link should be shown, `false` otherwise.
### Code examples
#### Basic example
```tsx
const { registerCheckoutFilters } = window.wc.blocksCheckout;
const modifyShowRemoveItemLink = ( defaultValue, extensions, args ) => {
const isCartContext = args?.context === 'cart';
if ( ! isCartContext ) {
return defaultValue;
}
return false;
};
registerCheckoutFilters( 'example-extension', {
showRemoveItemLink: modifyShowRemoveItemLink,
} );
```
#### Advanced example
```tsx
const { registerCheckoutFilters } = window.wc.blocksCheckout;
const modifyShowRemoveItemLink = ( defaultValue, extensions, args ) => {
const isCartContext = args?.context === 'cart';
if ( ! isCartContext ) {
return defaultValue;
}
if ( args?.cartItem?.name === 'Beanie with Logo' ) {
return false;
}
if ( args?.cartItem?.name === 'Sunglasses' ) {
return false;
}
return true;
};
registerCheckoutFilters( 'example-extension', {
showRemoveItemLink: modifyShowRemoveItemLink,
} );
```
> Filters can be also combined. See [Combined filters](../available-filters/README.md) for an example.
### Screenshots
| Before | After |
|:---------------------------------------------------------------------:|:---------------------------------------------------------------------:|
| | |
## `subtotalPriceFormat`
### Description
The `subtotalPriceFormat` filter allows to format the cart item subtotal price.
### Parameters
- _defaultValue_ `string` (default: ``) - The default cart item subtotal price.
- _extensions_ `object` (default: `{}`) - The extensions object.
- _args_ `object` - The arguments object with the following keys:
- _cart_ `object` - The cart object from `wc/store/cart`, see Cart object.
- _cartItem_ `object` - The cart item object from `wc/store/cart`, see Cart Item object.
- _context_ `string` (allowed values: `cart` or `summary`) - The context of the item.
- _validation_ `boolean` - Checks if the return value contains the substring ``.
### Returns
- `string` - The modified format of the cart item subtotal price, which must contain the substring ``, or the original price format.
### Code examples
#### Basic example
```tsx
const { registerCheckoutFilters } = window.wc.blocksCheckout;
const modifySubtotalPriceFormat = (
defaultValue,
extensions,
args,
validation
) => {
const isCartContext = args?.context === 'cart';
if ( ! isCartContext ) {
return defaultValue;
}
return ' per item';
};
registerCheckoutFilters( 'example-extension', {
subtotalPriceFormat: modifySubtotalPriceFormat,
} );
```
#### Advanced example
```tsx
const { registerCheckoutFilters } = window.wc.blocksCheckout;
const modifySubtotalPriceFormat = (
defaultValue,
extensions,
args,
validation
) => {
const isCartContext = args?.context === 'cart';
if ( ! isCartContext ) {
return defaultValue;
}
if ( args?.cartItem?.name === 'Beanie with Logo' ) {
return ' per warm beanie';
}
if ( args?.cartItem?.name === 'Sunglasses' ) {
return ' per cool sunglasses';
}
return ' per item';
};
registerCheckoutFilters( 'example-extension', {
subtotalPriceFormat: modifySubtotalPriceFormat,
} );
```
> Filters can be also combined. See [Combined filters](../available-filters/README.md) for an example.
### Screenshots
| Before | After |
|:---------------------------------------------------------------------:|:---------------------------------------------------------------------:|
| | |
## Cart object
The Cart object of the filters above has the following keys:
- _billingAddress_ `object` - The billing address object with the following keys:
- _address_1_ `string` - The first line of the address.
- _address_2_ `string` - The second line of the address.
- _city_ `string` - The city of the address.
- _company_ `string` - The company of the address.
- _country_ `string` - The country of the address.
- _email_ `string` - The email of the address.
- _first_name_ `string` - The first name of the address.
- _last_name_ `string` - The last name of the address.
- _phone_ `string` - The phone of the address.
- _postcode_ `string` - The postcode of the address.
- _state_ `string` - The state of the address.
- ~~_billingData_~~ `object` - The billing data object with the same keys as the `billingAddress` object.
- _cartCoupons_ `array` - The cart coupons array.
- _cartErrors_ `array` - The cart errors array.
- _cartFees_ `array` - The cart fees array.
- _cartHasCalculatedShipping_ `boolean` - Whether the cart has calculated shipping.
- _cartIsLoading_ `boolean` - Whether the cart is loading.
- _cartItemErrors_ `array` - The cart item errors array.
- _cartItems_ `array` - The cart items array with cart item objects, see Cart Item object.
- _cartItemsCount_ `number` - The cart items count.
- _cartItemsWeight_ `number` - The cart items weight.
- _cartNeedsPayment_ `boolean` - Whether the cart needs payment.
- _cartNeedsShipping_ `boolean` - Whether the cart needs shipping.
- _cartTotals_ `object` - The cart totals object with the following keys:
- _currency_code_ `string` - The currency code.
- _currency_decimal_separator_ `string` - The currency decimal separator.
- _currency_minor_unit_ `number` - The currency minor unit.
- _currency_prefix_ `string` - The currency prefix.
- _currency_suffix_ `string` - The currency suffix.
- _currency_symbol_ `string` - The currency symbol.
- _currency_thousand_separator_ `string` - The currency thousand separator.
- _tax_lines_ `array` - The tax lines array with tax line objects with the following keys:
- _name_ `string` - The name of the tax line.
- _price_ `number` - The price of the tax line.
- _rate_ `string` - The rate ID of the tax line.
- _total_discount_ `string` - The total discount.
- _total_discount_tax_ `string` - The total discount tax.
- _total_fees_ `string` - The total fees.
- _total_fees_tax_ `string` - The total fees tax.
- _total_items_ `string` - The total items.
- _total_items_tax_ `string` - The total items tax.
- _total_price_ `string` - The total price.
- _total_shipping_ `string` - The total shipping.
- _total_shipping_tax_ `string` - The total shipping tax.
- _total_tax_ `string` - The total tax.
- _crossSellsProducts_ `array` - The cross sells products array with cross sells product objects.
- _extensions_ `object` (default: `{}`) - The extensions object.
- _isLoadingRates_ `boolean` - Whether the cart is loading shipping rates.
- _paymentRequirements_ `array` - The payment requirements array.
- _shippingAddress_ `object` - The shipping address object with the same keys as the `billingAddress` object.
- _shippingRates_ `array` - The shipping rates array.
## Cart Item object
The Cart Item object of the filters above has the following keys:
- _backorders_allowed_ `boolean` - Whether backorders are allowed.
- _catalog_visibility_ `string` - The catalog visibility.
- _decsription_ `string` - The cart item description.
- _extensions_ `object` (default: `{}`) - The extensions object.
- _id_ `number` - The item ID.
- _images_ `array` - The item images array.
- _item_data_ `array` - The item data array.
- _key_ `string` - The item key.
- _low_stock_remaining_ `number` - The low stock remaining.
- _name_ `string` - The item name.
- _permalink_ `string` - The item permalink.
- _prices_ `object` - The item prices object with the following keys:
- _currency_code_ `string` - The currency code.
- _currency_decimal_separator_ `string` - The currency decimal separator.
- _currency_minor_unit_ `number` - The currency minor unit.
- _currency_prefix_ `string` - The currency prefix.
- _currency_suffix_ `string` - The currency suffix.
- _currency_symbol_ `string` - The currency symbol.
- _currency_thousand_separator_ `string` - The currency thousand separator.
- _price_ `string` - The price.
- _price_range_ `string` - The price range.
- _raw_prices_ `object` - The raw prices object with the following keys:
- _precision_ `number` - The precision.
- _price_ `number` - The price.
- _regular_price_ `number` - The regular price.
- _sale_price_ `number` - The sale price.
- _regular_price_ `string` - The regular price.
- _sale_price_ `string` - The sale price.
- _quantity_ `number` - The item quantity.
- _quantity_limits_ `object` - The item quantity limits object with the following keys:
- _editable_ `boolean` - Whether the quantity is editable.
- _maximum_ `number` - The maximum quantity.
- _minimum_ `number` - The minimum quantity.
- _multiple_of_ `number` - The multiple of quantity.
- _short_description_ `string` - The item short description.
- _show_backorder_badge_ `boolean` - Whether to show the backorder badge.
- _sku_ `string` - The item SKU.
- _sold_individually_ `boolean` - Whether the item is sold individually.
- _totals_ `object` - The item totals object with the following keys:
- _currency_code_ `string` - The currency code.
- _currency_decimal_separator_ `string` - The currency decimal separator.
- _currency_minor_unit_ `number` - The currency minor unit.
- _currency_prefix_ `string` - The currency prefix.
- _currency_suffix_ `string` - The currency suffix.
- _currency_symbol_ `string` - The currency symbol.
- _currency_thousand_separator_ `string` - The currency thousand separator.
- _line_subtotal_ `string` - The line subtotal.
- _line_subtotal_tax_ `string` - The line subtotal tax.
- _line_total_ `string` - The line total.
- _line_total_tax_ `string` - The line total tax.
- _type_ `string` - The item type.
- _variation_ `array` - The item variation array.
---
## Checkout and place order button
*Source: block-development/cart-and-checkout-blocks/available-filters/checkout-and-place-order-button.md*
# Checkout and place order button
The following Checkout and place order button filters are available:
- `proceedToCheckoutButtonLabel`
- `proceedToCheckoutButtonLink`
- `placeOrderButtonLabel`
The following objects are shared between the filters:
- Cart object
- Cart Item object
## `proceedToCheckoutButtonLabel`
### Description
The `proceedToCheckoutButtonLabel` filter allows change the label of the "Proceed to checkout" button.
### Parameters
- _defaultValue_ `string` (default: `Proceed to Checkout`) - The label of the "Proceed to checkout" button.
- _extensions_ `object` (default: `{}`) - The extensions object.
- _args_ `object` - The arguments object with the following keys:
- _cart_ `object` - The cart object from `wc/store/cart`, see [Cart object](#cart-object).
### Returns
- `string` - The label of the "Proceed to checkout" button.
### Code examples
#### Basic example
```ts
const { registerCheckoutFilters } = window.wc.blocksCheckout;
const modifyProceedToCheckoutButtonLabel = (
defaultValue,
extensions,
args
) => {
if ( ! args?.cart.items ) {
return defaultValue;
}
return 'Go to checkout';
};
registerCheckoutFilters( 'example-extension', {
proceedToCheckoutButtonLabel: modifyProceedToCheckoutButtonLabel,
} );
```
#### Advanced example
```ts
const { registerCheckoutFilters } = window.wc.blocksCheckout;
const modifyProceedToCheckoutButtonLabel = (
defaultValue,
extensions,
args
) => {
if ( ! args?.cart.items ) {
return defaultValue;
}
const isSunglassesInCart = args?.cart.items.some(
( item ) => item.name === 'Sunglasses'
);
if ( isSunglassesInCart ) {
return '😎 Proceed to checkout 😎';
}
return defaultValue;
};
registerCheckoutFilters( 'example-extension', {
proceedToCheckoutButtonLabel: modifyProceedToCheckoutButtonLabel,
} );
```
> Filters can be also combined. See [Combined filters](../available-filters/README.md) for an example.
### Screenshots
| Before | After |
|:---------------------------------------------------------------------:|:---------------------------------------------------------------------:|
| | |
## `proceedToCheckoutButtonLink`
### Description
The `proceedToCheckoutButtonLink` filter allows change the link of the "Proceed to checkout" button.
### Parameters
- _defaultValue_ `string` (default: `/checkout`) - The link of the "Proceed to checkout" button.
- _extensions_ `object` (default: `{}`) - The extensions object.
- _args_ `object` - The arguments object with the following keys:
- _cart_ `object` - The cart object from `wc/store/cart`, see [Cart object](../available-filters/README.md).
### Returns
- `string` - The link of the "Proceed to checkout" button.
### Code examples
#### Basic example
```ts
const { registerCheckoutFilters } = window.wc.blocksCheckout;
const modifyProceedToCheckoutButtonLink = (
defaultValue,
extensions,
args
) => {
if ( ! args?.cart.items ) {
return defaultValue;
}
return '/custom-checkout';
};
registerCheckoutFilters( 'example-extension', {
proceedToCheckoutButtonLink: modifyProceedToCheckoutButtonLink,
} );
```
#### Advanced example
```ts
const { registerCheckoutFilters } = window.wc.blocksCheckout;
const modifyProceedToCheckoutButtonLink = (
defaultValue,
extensions,
args
) => {
if ( ! args?.cart.items ) {
return defaultValue;
}
const isSunglassesInCart = args?.cart.items.some(
( item ) => item.name === 'Sunglasses'
);
if ( isSunglassesInCart ) {
return '/custom-checkout';
}
return defaultValue;
};
registerCheckoutFilters( 'example-extension', {
proceedToCheckoutButtonLink: modifyProceedToCheckoutButtonLink,
} );
```
> Filters can be also combined. See [Combined filters](../available-filters/README.md) for an example.
### Screenshots
| Before | After |
|:---------------------------------------------------------------------:|:---------------------------------------------------------------------:|
| | |
## `placeOrderButtonLabel`
### Description
The `placeOrderButtonLabel` filter allows change the label of the "Place order" button.
### Parameters
- _defaultValue_ (type: `string`, default: `Place order`) - The label of the "Place order" button.
- _extensions_ `object` (default: `{}`) - The extensions object.
### Returns
- `string` - The label of the "Place order" button.
### Code example
```ts
const { registerCheckoutFilters } = window.wc.blocksCheckout;
const modifyPlaceOrderButtonLabel = ( defaultValue, extensions ) => {
return '😎 Pay now 😎';
};
registerCheckoutFilters( 'example-extension', {
placeOrderButtonLabel: modifyPlaceOrderButtonLabel,
} );
```
> Filters can be also combined. See [Combined filters](../available-filters/README.md) for an example.
### Screenshots
| Before | After |
|:---------------------------------------------------------------------:|:---------------------------------------------------------------------:|
| | |
## Cart object
The Cart object of the filters above has the following keys:
- _billingAddress_ `object` - The billing address object with the following keys:
- _address_1_ `string` - The first line of the address.
- _address_2_ `string` - The second line of the address.
- _city_ `string` - The city of the address.
- _company_ `string` - The company of the address.
- _country_ `string` - The country of the address.
- _email_ `string` - The email of the address.
- _first_name_ `string` - The first name of the address.
- _last_name_ `string` - The last name of the address.
- _phone_ `string` - The phone of the address.
- _postcode_ `string` - The postcode of the address.
- _state_ `string` - The state of the address.
- _coupons_ `array` - The coupons array.
- _crossSells_ `array` - The cross sell items array.
- _errors_ `array` - The errors array.
- _extensions_ `object` (default: `{}`) - The extensions object.
- _fees_ `array` - The fees array.
- _hasCalculatedShipping_ `boolean` - Whether the cart has calculated shipping.
- _items_ `array` - The cart items array with cart item objects, see [Cart Item object](#cart-item-object).
- _itemsCount_ `number` - The number of items in the cart.
- _itemsWeight_ `number` - The total weight of the cart items.
- _needsPayment_ `boolean` - Whether the cart needs payment.
- _needsShipping_ `boolean` - Whether the cart needs shipping.
- _paymentMethods_ `array` - The payment methods array.
- _paymentRequirements_ `array` - The payment requirements array.
- _shippingAddress_ `object` - The shipping address object with the same keys as the billing address object.
- _shippingRates_ `array` - The shipping rates array.
- _totals_ `object` - The totals object with the following keys:
- _currency_code_ `string` - The currency code.
- _currency_decimal_separator_ `string` - The currency decimal separator.
- _currency_minor_unit_ `number` - The currency minor unit.
- _currency_prefix_ `string` - The currency prefix.
- _currency_suffix_ `string` - The currency suffix.
- _currency_symbol_ `string` - The currency symbol.
- _currency_thousand_separator_ `string` - The currency thousand separator.
- _tax_lines_ `array` - The tax lines array of objects with the following keys:
- _name_ `string` - The tax name.
- _price_ `string` - The tax price.
- _rate_ `string` - The tax rate.
- _total_discount_ `string` - The total discount.
- _total_discount_tax_ `string` - The total discount tax.
- _total_fee_ `string` - The total fee.
- _total_fee_tax_ `string` - The total fee tax.
- _total_items_ `string` - The total items.
- _total_items_tax_ `string` - The total items tax.
- _total_price_ `string` - The total price.
- _total_shipping_ `string` - The total shipping.
- _total_shipping_tax_ `string` - The total shipping tax.
- _total_tax_ `string` - The total tax.
## Cart Item object
The Cart Item object of the filters above has the following keys:
- _backorders_allowed_ `boolean` - Whether backorders are allowed.
- _catalog_visibility_ `string` - The catalog visibility.
- _decsription_ `string` - The cart item description.
- _extensions_ `object` (default: `{}`) - The extensions object.
- _id_ `number` - The item ID.
- _images_ `array` - The item images array.
- _item_data_ `array` - The item data array.
- _key_ `string` - The item key.
- _low_stock_remaining_ `number` - The low stock remaining.
- _name_ `string` - The item name.
- _permalink_ `string` - The item permalink.
- _prices_ `object` - The item prices object with the following keys:
- _currency_code_ `string` - The currency code.
- _currency_decimal_separator_ `string` - The currency decimal separator.
- _currency_minor_unit_ `number` - The currency minor unit.
- _currency_prefix_ `string` - The currency prefix.
- _currency_suffix_ `string` - The currency suffix.
- _currency_symbol_ `string` - The currency symbol.
- _currency_thousand_separator_ `string` - The currency thousand separator.
- _price_ `string` - The price.
- _price_range_ `string` - The price range.
- _raw_prices_ `object` - The raw prices object with the following keys:
- _precision_ `number` - The precision.
- _price_ `number` - The price.
- _regular_price_ `number` - The regular price.
- _sale_price_ `number` - The sale price.
- _regular_price_ `string` - The regular price.
- _sale_price_ `string` - The sale price.
- _quantity_ `number` - The item quantity.
- _quantity_limits_ `object` - The item quantity limits object with the following keys:
- _editable_ `boolean` - Whether the quantity is editable.
- _maximum_ `number` - The maximum quantity.
- _minimum_ `number` - The minimum quantity.
- _multiple_of_ `number` - The multiple of quantity.
- _short_description_ `string` - The item short description.
- _show_backorder_badge_ `boolean` - Whether to show the backorder badge.
- _sku_ `string` - The item SKU.
- _sold_individually_ `boolean` - Whether the item is sold individually.
- _totals_ `object` - The item totals object with the following keys:
- _currency_code_ `string` - The currency code.
- _currency_decimal_separator_ `string` - The currency decimal separator.
- _currency_minor_unit_ `number` - The currency minor unit.
- _currency_prefix_ `string` - The currency prefix.
- _currency_suffix_ `string` - The currency suffix.
- _currency_symbol_ `string` - The currency symbol.
- _currency_thousand_separator_ `string` - The currency thousand separator.
- _line_subtotal_ `string` - The line subtotal.
- _line_subtotal_tax_ `string` - The line subtotal tax.
- _line_total_ `string` - The line total.
- _line_total_tax_ `string` - The line total tax.
- _type_ `string` - The item type.
- _variation_ `array` - The item variation array.
---
## Coupons
*Source: block-development/cart-and-checkout-blocks/available-filters/coupons.md*
# Coupons
The following Coupon filters are available:
- `coupons`
- `showApplyCouponNotice`
- `showRemoveCouponNotice`
## `coupons`
### Description
The current functionality is to display the coupon codes in the Cart and Checkout sidebars. This could be undesirable if you dynamically generate a coupon code that is not user-friendly. It may, therefore, be desirable to change the way this code is displayed. To achieve this, the filter `coupons` exists. This filter could also be used to show or hide coupons. This filter must _not_ be used to alter the value/totals of a coupon. This will not carry through to the Cart totals.
### Parameters
- _coupons_ `object` - The coupons object with the following keys:
- _code_ `string` - The coupon code.
- _discount_type_ `string` - The type of discount. Can be `percent` or `fixed_cart`.
- _totals_ `object` - The totals object with the following keys:
- _currency_code_ `string` - The currency code.
- _currency_decimal_separator_ `string` - The currency decimal separator.
- _currency_minor_unit_ `number` - The currency minor unit.
- _currency_prefix_ `string` - The currency prefix.
- _currency_suffix_ `string` - The currency suffix.
- _currency_symbol_ `string` - The currency symbol.
- _currency_thousand_separator_ `string` - The currency thousand separator.
- _total_discount_ `string` - The total discount.
- _total_discount_tax_ `string` - The total discount tax.
- _extensions_ `object` (default: `{}`) - The extensions object.
- _args_ `object` - The arguments object with the following key:
- _context_ `string` (default: `summary`) - The context of the item.
### Returns
- `array` - The coupons array of objects with the same keys as above.
### Code example
```ts
const { registerCheckoutFilters } = window.wc.blocksCheckout;
const modifyCoupons = ( coupons, extensions, args ) => {
return coupons.map( ( coupon ) => {
if ( ! coupon.label.match( /autocoupon(?:_\d+)+/ ) ) {
return coupon;
}
return {
...coupon,
label: 'Automatic coupon',
};
} );
};
registerCheckoutFilters( 'example-extension', {
coupons: modifyCoupons,
} );
```
> Filters can be also combined. See [Combined filters](../available-filters/README.md) for an example.
### Screenshots
| Before | After |
|:---------------------------------------------------------------------:|:---------------------------------------------------------------------:|
| | |
## `showApplyCouponNotice`
### Description
### Parameters
- _value_ `boolean` (default: `true`) - Weather to show the apply coupon notice.
- _extensions_ `object` (default: `{}`) - The extensions object.
- _args_ `object` - The arguments object with the following keys:
- _context_ `string` (allowed values: `wc/cart` and `wc/checkout`) - The context of the coupon notice.
- _code_ `string` - The coupon code.
### Returns
- `boolean` - Weather to show the apply coupon notice.
### Code examples
#### Basic example
```ts
const { registerCheckoutFilters } = window.wc.blocksCheckout;
const modifyShowApplyCouponNotice = ( defaultValue, extensions, args ) => {
return false;
};
registerCheckoutFilters( 'example-extension', {
showApplyCouponNotice: modifyShowApplyCouponNotice,
} );
```
#### Advanced example
```ts
const { registerCheckoutFilters } = window.wc.blocksCheckout;
const modifyShowApplyCouponNotice = ( defaultValue, extensions, args ) => {
if ( args?.couponCode === '10off' ) {
return false;
}
return defaultValue;
};
registerCheckoutFilters( 'example-extension', {
showApplyCouponNotice: modifyShowApplyCouponNotice,
} );
```
> Filters can be also combined. See [Combined filters](../available-filters/README.md) for an example.
### Screenshots
| Before | After |
|:---------------------------------------------------------------------:|:---------------------------------------------------------------------:|
| | |
## `showRemoveCouponNotice`
### Description
### Parameters
- _value_ `boolean` (default: `true`) - Weather to show the remove coupon notice.
- _extensions_ `object` (default: `{}`) - The extensions object.
- _args_ `object` - The arguments object with the following keys:
- _context_ `string` (allowed values: `wc/cart` and `wc/checkout`) - The context of the coupon notice.
- _code_ `string` - The coupon code.
### Returns
- `boolean` - Weather to show the apply coupon notice.
### Code examples
#### Basic example
```ts
const { registerCheckoutFilters } = window.wc.blocksCheckout;
const modifyShowRemoveCouponNotice = ( defaultValue, extensions, args ) => {
return false;
};
registerCheckoutFilters( 'example-extension', {
showRemoveCouponNotice: modifyShowRemoveCouponNotice,
} );
```
#### Advanced example
```ts
const { registerCheckoutFilters } = window.wc.blocksCheckout;
const modifyShowRemoveCouponNotice = ( defaultValue, extensions, args ) => {
if ( args?.couponCode === '10off' ) {
return false;
}
return defaultValue;
};
registerCheckoutFilters( 'example-extension', {
showRemoveCouponNotice: modifyShowRemoveCouponNotice,
} );
```
> Filters can be also combined. See [Combined filters](../available-filters/README.md) for an example.
### Screenshots
| Before | After |
|:---------------------------------------------------------------------:|:---------------------------------------------------------------------:|
| | |
---
## Order summary items
*Source: block-development/cart-and-checkout-blocks/available-filters/order-summary-items.md*
# Order summary items
The following Order Summary Items filters are available:
- `cartItemClass`
- `cartItemPrice`
- `itemName`
- `subtotalPriceFormat`
The following objects are shared between the filters:
- Cart object
- Cart Item object
The following screenshot shows which parts the individual filters affect:

## `cartItemClass`
### Description
The `cartItemClass` filter allows to change the order summary item class.
### Parameters
- _defaultValue_ `string` (default: `''`) - The default order summary item class.
- _extensions_ `object` (default: `{}`) - The extensions object.
- _args_ `object` - The arguments object with the following keys:
- _cart_ `object` - The cart object from `wc/store/cart`, see [Cart object](#cart-object).
- _cartItem_ `object` - The order summary item object from `wc/store/cart`, see [order summary item object](#cart-item-object).
- _context_ `string` (allowed values: `cart` or `summary`) - The context of the item.
### Returns
- `string` - The modified order summary item class, or an empty string.
### Code examples
#### Basic example
```tsx
const { registerCheckoutFilters } = window.wc.blocksCheckout;
const modifyCartItemClass = ( defaultValue, extensions, args ) => {
const isOrderSummaryContext = args?.context === 'summary';
if ( ! isOrderSummaryContext ) {
return defaultValue;
}
return 'my-custom-class';
};
registerCheckoutFilters( 'example-extension', {
cartItemClass: modifyCartItemClass,
} );
```
#### Advanced example
```tsx
const { registerCheckoutFilters } = window.wc.blocksCheckout;
const modifyCartItemClass = ( defaultValue, extensions, args ) => {
const isOrderSummaryContext = args?.context === 'summary';
if ( ! isOrderSummaryContext ) {
return defaultValue;
}
if ( args?.cartItem?.name === 'Beanie with Logo' ) {
return 'cool-class';
}
if ( args?.cartItem?.name === 'Sunglasses' ) {
return 'hot-class';
}
return 'my-custom-class';
};
registerCheckoutFilters( 'example-extension', {
cartItemClass: modifyCartItemClass,
} );
```
> Filters can be also combined. See [Combined filters](../available-filters/README.md) for an example.
### Screenshots
| Before | After |
|:---------------------------------------------------------------------:|:---------------------------------------------------------------------:|
| | |
## `cartItemPrice`
### Description
The `cartItemPrice` filter allows to format the order summary item price.
### Parameters
- _defaultValue_ `string` (default: ``) - The default order summary item price.
- _extensions_ `object` (default: `{}`) - The extensions object.
- _args_ `object` - The arguments object with the following keys:
- _cart_ `object` - The cart object from `wc/store/cart`, see [Cart object](#cart-object).
- _cartItem_ `object` - The order summary item object from `wc/store/cart`, see [order summary item object](#cart-item-object).
- _context_ `string` (allowed values: `cart` or `summary`) - The context of the item.
- _validation_ `boolean` - Checks if the return value contains the substring ``.
### Returns
- `string` - The modified format of the order summary item price, which must contain the substring ``, or the original price format.
### Code examples
#### Basic example
```tsx
const { registerCheckoutFilters } = window.wc.blocksCheckout;
const modifyCartItemPrice = ( defaultValue, extensions, args, validation ) => {
const isOrderSummaryContext = args?.context === 'summary';
if ( ! isOrderSummaryContext ) {
return defaultValue;
}
return ' for all items';
};
registerCheckoutFilters( 'example-extension', {
cartItemPrice: modifyCartItemPrice,
} );
```
#### Advanced example
```tsx
const { registerCheckoutFilters } = window.wc.blocksCheckout;
const modifyCartItemPrice = ( defaultValue, extensions, args, validation ) => {
const isOrderSummaryContext = args?.context === 'summary';
if ( ! isOrderSummaryContext ) {
return defaultValue;
}
if ( args?.cartItem?.name === 'Beanie with Logo' ) {
return ' to keep you ☀️';
}
if ( args?.cartItem?.name === 'Sunglasses' ) {
return ' to keep you ❄️';
}
return ' for all items';
};
registerCheckoutFilters( 'example-extension', {
cartItemPrice: modifyCartItemPrice,
} );
```
> Filters can be also combined. See [Combined filters](../available-filters/README.md) for an example.
### Screenshots
| Before | After |
|:---------------------------------------------------------------------:|:---------------------------------------------------------------------:|
| | |
## `itemName`
### Description
The `itemName` filter allows to change the order summary item name.
### Parameters
- _defaultValue_ `string` - The default order summary item name.
- _extensions_ `object` (default: `{}`) - The extensions object.
- _args_ `object` - The arguments object with the following keys:
- _cart_ `object` - The cart object from `wc/store/cart`, see [Cart object](#cart-object).
- _cartItem_ `object` - The order summary item object from `wc/store/cart`, see [order summary item object](#cart-item-object).
- _context_ `string` (allowed values: `cart` or `summary`) - The context of the item.
### Returns
- `string` - The original or modified order summary item name.
### Code examples
#### Basic example
```tsx
const { registerCheckoutFilters } = window.wc.blocksCheckout;
const modifyItemName = ( defaultValue, extensions, args ) => {
const isOrderSummaryContext = args?.context === 'summary';
if ( ! isOrderSummaryContext ) {
return defaultValue;
}
return `🪴 ${ defaultValue } 🪴`;
};
registerCheckoutFilters( 'example-extension', {
itemName: modifyItemName,
} );
```
#### Advanced example
```tsx
const { registerCheckoutFilters } = window.wc.blocksCheckout;
const modifyItemName = ( defaultValue, extensions, args ) => {
const isOrderSummaryContext = args?.context === 'summary';
if ( ! isOrderSummaryContext ) {
return defaultValue;
}
if ( args?.cartItem?.name === 'Beanie with Logo' ) {
return `⛷️ ${ defaultValue } ⛷️`;
}
if ( args?.cartItem?.name === 'Sunglasses' ) {
return `🏄♂️ ${ defaultValue } 🏄♂️`;
}
return `🪴 ${ defaultValue } 🪴`;
};
registerCheckoutFilters( 'example-extension', {
itemName: modifyItemName,
} );
```
> Filters can be also combined. See [Combined filters](../available-filters/README.md) for an example.
### Screenshots
| Before | After |
|:---------------------------------------------------------------------:|:---------------------------------------------------------------------:|
| | |
## `subtotalPriceFormat`
### Description
The `subtotalPriceFormat` filter allows to format the order summary item subtotal price.
### Parameters
- _defaultValue_ `string` (default: ``) - The default order summary item subtotal price.
- _extensions_ `object` (default: `{}`) - The extensions object.
- _args_ `object` - The arguments object with the following keys:
- _cart_ `object` - The cart object from `wc/store/cart`, see [Cart object](#cart-object).
- _cartItem_ `object` - The order summary item object from `wc/store/cart`, see [order summary item object](#cart-item-object).
- _context_ `string` (allowed values: `cart` or `summary`) - The context of the item.
- _validation_ `boolean` - Checks if the return value contains the substring ``.
### Returns
- `string` - The modified format of the order summary item subtotal price, which must contain the substring ``, or the original price format.
### Code examples
#### Basic example
```tsx
const { registerCheckoutFilters } = window.wc.blocksCheckout;
const modifySubtotalPriceFormat = (
defaultValue,
extensions,
args,
validation
) => {
const isOrderSummaryContext = args?.context === 'summary';
if ( ! isOrderSummaryContext ) {
return defaultValue;
}
return ' per item';
};
registerCheckoutFilters( 'example-extension', {
subtotalPriceFormat: modifySubtotalPriceFormat,
} );
```
#### Advanced example
```tsx
const { registerCheckoutFilters } = window.wc.blocksCheckout;
const modifySubtotalPriceFormat = (
defaultValue,
extensions,
args,
validation
) => {
const isOrderSummaryContext = args?.context === 'summary';
if ( ! isOrderSummaryContext ) {
return defaultValue;
}
if ( args?.cartItem?.name === 'Beanie with Logo' ) {
return ' per warm beanie';
}
if ( args?.cartItem?.name === 'Sunglasses' ) {
return ' per cool sunglasses';
}
return ' per item';
};
registerCheckoutFilters( 'example-extension', {
subtotalPriceFormat: modifySubtotalPriceFormat,
} );
```
> Filters can be also combined. See [Combined filters](../available-filters/README.md) for an example.
### Screenshots
| Before | After |
|:---------------------------------------------------------------------:|:---------------------------------------------------------------------:|
| | |
## Cart object
The Cart object of the filters above has the following keys:
- _billingAddress_ `object` - The billing address object with the following keys:
- _address_1_ `string` - The first line of the address.
- _address_2_ `string` - The second line of the address.
- _city_ `string` - The city of the address.
- _company_ `string` - The company of the address.
- _country_ `string` - The country of the address.
- _email_ `string` - The email of the address.
- _first_name_ `string` - The first name of the address.
- _last_name_ `string` - The last name of the address.
- _phone_ `string` - The phone of the address.
- _postcode_ `string` - The postcode of the address.
- _state_ `string` - The state of the address.
- ~~_billingData_~~ `object` - The billing data object with the same keys as the `billingAddress` object.
- _cartCoupons_ `array` - The cart coupons array.
- _cartErrors_ `array` - The cart errors array.
- _cartFees_ `array` - The cart fees array.
- _cartHasCalculatedShipping_ `boolean` - Whether the cart has calculated shipping.
- _cartIsLoading_ `boolean` - Whether the cart is loading.
- _cartItemErrors_ `array` - The cart item errors array.
- _cartItems_ `array` - The cart items array with cart item objects, see [Cart Item object](#cart-item-object).
- _cartItemsCount_ `number` - The cart items count.
- _cartItemsWeight_ `number` - The cart items weight.
- _cartNeedsPayment_ `boolean` - Whether the cart needs payment.
- _cartNeedsShipping_ `boolean` - Whether the cart needs shipping.
- _cartTotals_ `object` - The cart totals object with the following keys:
- _currency_code_ `string` - The currency code.
- _currency_decimal_separator_ `string` - The currency decimal separator.
- _currency_minor_unit_ `number` - The currency minor unit.
- _currency_prefix_ `string` - The currency prefix.
- _currency_suffix_ `string` - The currency suffix.
- _currency_symbol_ `string` - The currency symbol.
- _currency_thousand_separator_ `string` - The currency thousand separator.
- _tax_lines_ `array` - The tax lines array with tax line objects with the following keys:
- _name_ `string` - The name of the tax line.
- _price_ `number` - The price of the tax line.
- _rate_ `string` - The rate ID of the tax line.
- _total_discount_ `string` - The total discount.
- _total_discount_tax_ `string` - The total discount tax.
- _total_fees_ `string` - The total fees.
- _total_fees_tax_ `string` - The total fees tax.
- _total_items_ `string` - The total items.
- _total_items_tax_ `string` - The total items tax.
- _total_price_ `string` - The total price.
- _total_shipping_ `string` - The total shipping.
- _total_shipping_tax_ `string` - The total shipping tax.
- _total_tax_ `string` - The total tax.
- _crossSellsProducts_ `array` - The cross sells products array with cross sells product objects.
- _extensions_ `object` (default: `{}`) - The extensions object.
- _isLoadingRates_ `boolean` - Whether the cart is loading shipping rates.
- _paymentRequirements_ `array` - The payment requirements array.
- _shippingAddress_ `object` - The shipping address object with the same keys as the `billingAddress` object.
- _shippingRates_ `array` - The shipping rates array.
## Cart Item object
The Cart Item object of the filters above has the following keys:
- _backorders_allowed_ `boolean` - Whether backorders are allowed.
- _catalog_visibility_ `string` - The catalog visibility.
- _decsription_ `string` - The cart item description.
- _extensions_ `object` (default: `{}`) - The extensions object.
- _id_ `number` - The item ID.
- _images_ `array` - The item images array.
- _item_data_ `array` - The item data array.
- _key_ `string` - The item key.
- _low_stock_remaining_ `number` - The low stock remaining.
- _name_ `string` - The item name.
- _permalink_ `string` - The item permalink.
- _prices_ `object` - The item prices object with the following keys:
- _currency_code_ `string` - The currency code.
- _currency_decimal_separator_ `string` - The currency decimal separator.
- _currency_minor_unit_ `number` - The currency minor unit.
- _currency_prefix_ `string` - The currency prefix.
- _currency_suffix_ `string` - The currency suffix.
- _currency_symbol_ `string` - The currency symbol.
- _currency_thousand_separator_ `string` - The currency thousand separator.
- _price_ `string` - The price.
- _price_range_ `string` - The price range.
- _raw_prices_ `object` - The raw prices object with the following keys:
- _precision_ `number` - The precision.
- _price_ `number` - The price.
- _regular_price_ `number` - The regular price.
- _sale_price_ `number` - The sale price.
- _regular_price_ `string` - The regular price.
- _sale_price_ `string` - The sale price.
- _quantity_ `number` - The item quantity.
- _quantity_limits_ `object` - The item quantity limits object with the following keys:
- _editable_ `boolean` - Whether the quantity is editable.
- _maximum_ `number` - The maximum quantity.
- _minimum_ `number` - The minimum quantity.
- _multiple_of_ `number` - The multiple of quantity.
- _short_description_ `string` - The item short description.
- _show_backorder_badge_ `boolean` - Whether to show the backorder badge.
- _sku_ `string` - The item SKU.
- _sold_individually_ `boolean` - Whether the item is sold individually.
- _totals_ `object` - The item totals object with the following keys:
- _currency_code_ `string` - The currency code.
- _currency_decimal_separator_ `string` - The currency decimal separator.
- _currency_minor_unit_ `number` - The currency minor unit.
- _currency_prefix_ `string` - The currency prefix.
- _currency_suffix_ `string` - The currency suffix.
- _currency_symbol_ `string` - The currency symbol.
- _currency_thousand_separator_ `string` - The currency thousand separator.
- _line_subtotal_ `string` - The line subtotal.
- _line_subtotal_tax_ `string` - The line subtotal tax.
- _line_total_ `string` - The line total.
- _line_total_tax_ `string` - The line total tax.
- _type_ `string` - The item type.
- _variation_ `array` - The item variation array.
---
## Totals footer item
*Source: block-development/cart-and-checkout-blocks/available-filters/totals-footer-item.md*
# Totals footer item
The following Totals Footer Item filter are available:
- `totalLabel`
- `totalValue`
## `totalLabel`
The following object is used in the filter:
- [Cart object](#cart-object)
### Description
The `totalLabel` filter allows to change the label of the total item in the footer of the Cart and Checkout blocks.
### Parameters
- _defaultValue_ `string` (default: `Total`) - The total label.
- _extensions_ `object` (default: `{}`) - The extensions object.
- _args_ `object` - The arguments object with the following keys:
- _cart_ `object` - The cart object from `wc/store/cart`, see [Cart object](#cart-object).
### Returns
- `string` - The updated total label.
### Code example
```ts
const { registerCheckoutFilters } = window.wc.blocksCheckout;
const modifyTotalLabel = ( defaultValue, extensions, args ) => {
return 'Deposit due today';
};
registerCheckoutFilters( 'example-extension', {
totalLabel: modifyTotalLabel,
} );
```
> Filters can be also combined. See [Combined filters](../available-filters/README.md) for an example.
### Screenshots
| Before | After |
|:---------------------------------------------------------------------:|:---------------------------------------------------------------------:|
| | |
## `totalValue`
The following object is used in the filter:
- [Cart object](#cart-object)
### Description
The `totalValue` filter allows to format the total price in the footer of the Cart and Checkout blocks.
### Parameters
- _defaultValue_ `string` (default: `Total`) - The total label.
- _extensions_ `object` (default: `{}`) - The extensions object.
- _args_ `object` - The arguments object with the following keys:
- _cart_ `object` - The cart object from `wc/store/cart`, see [Cart object](#cart-object).
- _validation_ `boolean` - Checks if the return value contains the substring ``.
### Returns
- `string` - The modified format of the total price, which must contain the substring ``, or the original price format.
### Code example
```ts
const { registerCheckoutFilters } = window.wc.blocksCheckout;
const modifyTotalsPrice = ( defaultValue, extensions, args, validation ) => {
return 'Pay now';
};
registerCheckoutFilters( 'my-extension', {
totalValue: modifyTotalsPrice,
} );
```
> Filters can be also combined. See [Combined filters](../available-filters/README.md) for an example.
### Screenshots
| Before | After |
|:---------------------------------------------------------------------:|:---------------------------------------------------------------------:|
| | |
## Cart object
The Cart object of the filters above has the following keys:
- _billingAddress_ `object` - The billing address object with the following keys:
- _address_1_ `string` - The first line of the address.
- _address_2_ `string` - The second line of the address.
- _city_ `string` - The city of the address.
- _company_ `string` - The company of the address.
- _country_ `string` - The country of the address.
- _email_ `string` - The email of the address.
- _first_name_ `string` - The first name of the address.
- _last_name_ `string` - The last name of the address.
- _phone_ `string` - The phone of the address.
- _postcode_ `string` - The postcode of the address.
- _state_ `string` - The state of the address.
- ~~_billingData_~~ `object` - The billing data object with the same keys as the `billingAddress` object.
- _cartCoupons_ `array` - The cart coupons array.
- _cartErrors_ `array` - The cart errors array.
- _cartFees_ `array` - The cart fees array.
- _cartHasCalculatedShipping_ `boolean` - Whether the cart has calculated shipping.
- _cartIsLoading_ `boolean` - Whether the cart is loading.
- _cartItemErrors_ `array` - The cart item errors array.
- _cartItems_ `array` - The cart items array with cart item objects, see [Cart Item object](#cart-item-object).
- _cartItemsCount_ `number` - The cart items count.
- _cartItemsWeight_ `number` - The cart items weight.
- _cartNeedsPayment_ `boolean` - Whether the cart needs payment.
- _cartNeedsShipping_ `boolean` - Whether the cart needs shipping.
- _cartTotals_ `object` - The cart totals object with the following keys:
- _currency_code_ `string` - The currency code.
- _currency_decimal_separator_ `string` - The currency decimal separator.
- _currency_minor_unit_ `number` - The currency minor unit.
- _currency_prefix_ `string` - The currency prefix.
- _currency_suffix_ `string` - The currency suffix.
- _currency_symbol_ `string` - The currency symbol.
- _currency_thousand_separator_ `string` - The currency thousand separator.
- _tax_lines_ `array` - The tax lines array with tax line objects with the following keys:
- _name_ `string` - The name of the tax line.
- _price_ `number` - The price of the tax line.
- _rate_ `string` - The rate ID of the tax line.
- _total_discount_ `string` - The total discount.
- _total_discount_tax_ `string` - The total discount tax.
- _total_fees_ `string` - The total fees.
- _total_fees_tax_ `string` - The total fees tax.
- _total_items_ `string` - The total items.
- _total_items_tax_ `string` - The total items tax.
- _total_price_ `string` - The total price.
- _total_shipping_ `string` - The total shipping.
- _total_shipping_tax_ `string` - The total shipping tax.
- _total_tax_ `string` - The total tax.
- _crossSellsProducts_ `array` - The cross sells products array with cross sells product objects.
- _extensions_ `object` (default: `{}`) - The extensions object.
- _isLoadingRates_ `boolean` - Whether the cart is loading shipping rates.
- _paymentRequirements_ `array` - The payment requirements array.
- _shippingAddress_ `object` - The shipping address object with the same keys as the `billingAddress` object.
- _shippingRates_ `array` - The shipping rates array.
## Cart Item object
The Cart Item object of the filters above has the following keys:
- _backorders_allowed_ `boolean` - Whether backorders are allowed.
- _catalog_visibility_ `string` - The catalog visibility.
- _decsription_ `string` - The cart item description.
- _extensions_ `object` (default: `{}`) - The extensions object.
- _id_ `number` - The item ID.
- _images_ `array` - The item images array.
- _item_data_ `array` - The item data array.
- _key_ `string` - The item key.
- _low_stock_remaining_ `number` - The low stock remaining.
- _name_ `string` - The item name.
- _permalink_ `string` - The item permalink.
- _prices_ `object` - The item prices object with the following keys:
- _currency_code_ `string` - The currency code.
- _currency_decimal_separator_ `string` - The currency decimal separator.
- _currency_minor_unit_ `number` - The currency minor unit.
- _currency_prefix_ `string` - The currency prefix.
- _currency_suffix_ `string` - The currency suffix.
- _currency_symbol_ `string` - The currency symbol.
- _currency_thousand_separator_ `string` - The currency thousand separator.
- _price_ `string` - The price.
- _price_range_ `string` - The price range.
- _raw_prices_ `object` - The raw prices object with the following keys:
- _precision_ `number` - The precision.
- _price_ `number` - The price.
- _regular_price_ `number` - The regular price.
- _sale_price_ `number` - The sale price.
- _regular_price_ `string` - The regular price.
- _sale_price_ `string` - The sale price.
- _quantity_ `number` - The item quantity.
- _quantity_limits_ `object` - The item quantity limits object with the following keys:
- _editable_ `boolean` - Whether the quantity is editable.
- _maximum_ `number` - The maximum quantity.
- _minimum_ `number` - The minimum quantity.
- _multiple_of_ `number` - The multiple of quantity.
- _short_description_ `string` - The item short description.
- _show_backorder_badge_ `boolean` - Whether to show the backorder badge.
- _sku_ `string` - The item SKU.
- _sold_individually_ `boolean` - Whether the item is sold individually.
- _totals_ `object` - The item totals object with the following keys:
- _currency_code_ `string` - The currency code.
- _currency_decimal_separator_ `string` - The currency decimal separator.
- _currency_minor_unit_ `number` - The currency minor unit.
- _currency_prefix_ `string` - The currency prefix.
- _currency_suffix_ `string` - The currency suffix.
- _currency_symbol_ `string` - The currency symbol.
- _currency_thousand_separator_ `string` - The currency thousand separator.
- _line_subtotal_ `string` - The line subtotal.
- _line_subtotal_tax_ `string` - The line subtotal tax.
- _line_total_ `string` - The line total.
- _line_total_tax_ `string` - The line total tax.
- _type_ `string` - The item type.
- _variation_ `array` - The item variation array.
---
## Available slots
*Source: block-development/cart-and-checkout-blocks/available-slot-fills.md*
# Available slots
This document presents the list of available Slots that you can use for adding your custom content (Fill).
If you want to add a new SlotFill component, check the [Checkout - Slot Fill document](https://github.com/woocommerce/woocommerce/blob/trunk/plugins/woocommerce/client/blocks/packages/checkout/slot/README.md). To read more about Slot and Fill, check the [Slot and Fill document](./slot-fills.md).
**Note About Naming:** Slots that are prefixed with `Experimental` are experimental and subject to change or remove. Once they graduate from the experimental stage, the naming would change and the `Experimental` prefix would be dropped. Check the [Feature Gating document](https://github.com/woocommerce/woocommerce/blob/trunk/plugins/woocommerce/client/blocks/docs/internal-developers/blocks/feature-flags-and-experimental-interfaces.md) from more information.
## ExperimentalOrderMeta
This Slot renders below the Checkout summary section and above the "Proceed to Checkout" button in the Cart.
```ts
const { __ } = window.wp.i18n;
const { registerPlugin } = window.wp.plugins;
const { ExperimentalOrderMeta } = window.wc.blocksCheckout;
const render = () => {
return (
{ __( 'Yearly recurring total ...', 'YOUR-TEXTDOMAIN' ) }
);
};
registerPlugin( 'slot-and-fill-examples', {
render,
scope: 'woocommerce-checkout',
} );
```
Cart:

Checkout:

### Passed parameters
- `cart`: `wc/store/cart` data but in `camelCase` instead of `snake_case`. [Object breakdown.](https://github.com/woocommerce/woocommerce-gutenberg-products-block/blob/c00da597efe4c16fcf5481c213d8052ec5df3766/assets/js/type-defs/cart.ts#L172-L188)
- `extensions`: external data registered by third-party developers using `ExtendSchema`. If you used `ExtendSchema` on `wc/store/cart` you would find your data under your namespace here.
- `context`, equal to the name of the Block in which the fill is rendered: `woocommerce/cart` or `woocommerce/checkout`
## ExperimentalOrderShippingPackages
This slot renders inside the shipping step of Checkout and inside the shipping options in Cart.
```ts
const { __ } = window.wp.i18n;
const { registerPlugin } = window.wp.plugins;
const { ExperimentalOrderShippingPackages } = window.wc.blocksCheckout;
const render = () => {
return (
{ __( 'Express Shipping', 'YOUR-TEXTDOMAIN' ) }
);
};
registerPlugin( 'slot-and-fill-examples', {
render,
scope: 'woocommerce-checkout',
} );
```
Cart:

Checkout:

### Passed parameters
- `collapsible`: `Boolean|undefined` If a shipping package panel should be collapsible or not, this is false in Checkout and undefined in Cart.
- `collapse`: `Boolean` If a panel should be collapsed by default, this is true if if panels are collapsible.
- `showItems`: `Boolean|undefined` If we should show the content of each package, this is undefined in Cart and Checkout and is left to the actual package logic to decide.
- `noResultsMessage`: A React element that you can render if there are no shipping options.
- `renderOption`: a render function that takes a rate object and returns a render option.
- `cart`: `wc/store/cart` data but in `camelCase` instead of `snake_case`. [Object breakdown.](https://github.com/woocommerce/woocommerce-gutenberg-products-block/blob/c00da597efe4c16fcf5481c213d8052ec5df3766/assets/js/type-defs/cart.ts#L172-L188)
- `extensions`: external data registered by third-party developers using `ExtendSchema`, if you used `ExtendSchema` on `wc/store/cart` you would find your data under your namespace here.
- `components`: an object containing components you can use to render your own shipping rates, it contains `ShippingRatesControlPackage`.
- `context`, equal to the name of the Block in which the fill is rendered: `woocommerce/cart` or `woocommerce/checkout`
## ExperimentalOrderLocalPickupPackages
This slot renders inside the Checkout Pickup Options block in the Checkout block. It does not render in the Cart block.
```ts
const { __ } = window.wp.i18n;
const { registerPlugin } = window.wp.plugins;
const { ExperimentalOrderLocalPickupPackages } = window.wc.blocksCheckout;
const render = () => {
return (
{ __(
'By using our convenient local pickup option, you can come to our store and pick up your order. We will send you and email when your order is ready for pickup.',
'YOUR-TEXTDOMAIN'
) }
);
};
registerPlugin( 'slot-and-fill-examples', {
render,
scope: 'woocommerce-checkout',
} );
```
Checkout:

### Passed parameters
- `renderPickupLocation`: a render function that renders the address details of a local pickup option.
- `cart`: `wc/store/cart` data but in `camelCase` instead of `snake_case`. [Object breakdown.](https://github.com/woocommerce/woocommerce-gutenberg-products-block/blob/c00da597efe4c16fcf5481c213d8052ec5df3766/assets/js/type-defs/cart.ts#L172-L188)
- `extensions`: external data registered by third-party developers using `ExtendSchema`, if you used `ExtendSchema` on `wc/store/cart` you would find your data under your namespace here.
- `components`: an object containing components you can use to render your own pickup rates, it contains `ShippingRatesControlPackage` and `RadioControl`.
## ExperimentalDiscountsMeta
This slot renders below the `CouponCode` input.
```ts
const { __ } = window.wp.i18n;
const { registerPlugin } = window.wp.plugins;
const { ExperimentalDiscountsMeta } = window.wc.blocksCheckout;
const render = () => {
return (
{ __( 'You have 98683 coins to spend ...', 'YOUR-TEXTDOMAIN' ) }
);
};
registerPlugin( 'slot-and-fill-examples', {
render,
scope: 'woocommerce-checkout',
} );
```
Cart:

Checkout:

### Passed parameters
- `cart`: `wc/store/cart` data but in `camelCase` instead of `snake_case`. [Object breakdown.](https://github.com/woocommerce/woocommerce-gutenberg-products-block/blob/c00da597efe4c16fcf5481c213d8052ec5df3766/assets/js/type-defs/cart.ts#L172-L188)
- `extensions`: external data registered by third-party developers using `ExtendSchema`, if you used `ExtendSchema` on `wc/store/cart` you would find your data under your namespace here.
- `context`, equal to the name of the Block in which the fill is rendered: `woocommerce/cart` or `woocommerce/checkout`
---
## Checkout flow and events
*Source: block-development/cart-and-checkout-blocks/checkout-payment-methods/checkout-flow-and-events.md*
# Checkout flow and events
This document gives an overview of the flow for the checkout in the WooCommerce checkout block, and some general architectural overviews.
The architecture of the Checkout Block is derived from the following principles:
- A single source of truth for data within the checkout flow.
- Provide a consistent interface for extension integrations (eg Payment methods). This interface protects the integrity of the checkout process and isolates extension logic from checkout logic. The checkout block handles _all_ communication with the server for processing the order. Extensions are able to react to and communicate with the checkout block via the provided interface.
- Checkout flow state is tracked by checkout status.
- Extensions are able to interact with the checkout flow via subscribing to emitted events.
Here's a high level overview of the flow:

## General Concepts
### Tracking flow through status
At any point in the checkout lifecycle, components should be able to accurately detect the state of the checkout flow. This includes things like:
- Is something loading? What is loading?
- Is there an error? What is the error?
- is the checkout calculating totals?
Using simple booleans can be fine in some cases, but in others it can lead to complicated conditionals and bug prone code (especially for logic behaviour that reacts to various flow state).
To surface the flow state, the block uses statuses that are tracked in the various contexts. _As much as possible_ these statuses are set internally in reaction to various actions so there's no implementation needed in children components (components just have to _consume_ the status not set status).
The following statuses exist in the Checkout.
#### Checkout Data Store Status
There are various statuses that are exposed on the Checkout data store via selectors. All the selectors are detailed below and in the [Checkout API docs](https://github.com/woocommerce/woocommerce/blob/trunk/plugins/woocommerce/client/blocks/docs/internal-developers/block-client-apis/checkout/checkout-api.md).
You can use them in your component like so
```jsx
const { useSelect } = window.wp.data;
const { checkoutStore } = window.wc.wcBlocksData;
const MyComponent = ( props ) => {
const isComplete = useSelect( ( select ) =>
select( checkoutStore ).isComplete()
);
// do something with isComplete
};
```
The following boolean flags available related to status are:
**isIdle**: When the checkout status is `IDLE` this flag is true. Checkout will be this status after any change to checkout state after the block is loaded. It will also be this status when retrying a purchase is possible after processing happens with an error.
**isBeforeProcessing**: When the checkout status is `BEFORE_PROCESSING` this flag is true. Checkout will be this status when the user submits checkout for processing.
**isProcessing**: When the checkout status is `PROCESSING` this flag is true. Checkout will be this status when all the observers on the event emitted with the `BEFORE_PROCESSING` status are completed without error. It is during this status that the block will be sending a request to the server on the checkout endpoint for processing the order. **Note:** there are some checkout payment status changes that happen during this state as well (outlined in the `PaymentProvider` exposed statuses section).
**isAfterProcessing**: When the checkout status is `AFTER_PROCESSING` this flag is true. Checkout will have this status after the block receives the response from the server side processing request.
**isComplete**: When the checkout status is `COMPLETE` this flag is true. Checkout will have this status after all observers on the events emitted during the `AFTER_PROCESSING` status are completed successfully. When checkout is at this status, the shopper's browser will be redirected to the value of `redirectUrl` at that point (usually the `order-received` route).
#### Special States
The following booleans are exposed via the checkout provider. They are independent from each other and checkout statuses, but can be used in combination to react to various states in the checkout.
##### **isCalculating**
`isCalculating` is true when the total is being re-calculated for the order, or when a plugin is intentionally disabling the checkout using the `disableCheckoutFor` action (covered in the next section).
There are numerous things that might trigger a recalculation of the total—coupons being added or removed, shipping rates updating, shipping rates being selected, etc. Instead of having to check each of those individual states, you can reliably check if this boolean is true (calculating) or false (not calculating).
What `isCalculating` affects:
- Disables the "Place Order" button in the checkout block
- Disables the "Proceed to Checkout" button in the cart block
- Shows a loading state for Express Payment methods while calculations are pending
###### Controlling `isCalculating` with `disableCheckoutFor`
You can programmatically control `isCalculating` using the `disableCheckoutFor` thunk:
```jsx
const { dispatch } = window.wp.data;
const { checkoutStore } = window.wc.wcBlocksData;
// Example: Disable checkout while performing an async operation
dispatch( checkoutStore ).disableCheckoutFor( async () => {
// Your async operation here, e.g. validating data with an API
await myAsyncOperation();
// No need to return anything - we only care about the promise resolving
} );
```
The thunk controls internal state, ensuring that the client won't be able to attempt completing the flow until the provided promise resolves, regardless of whether it succeeds or fails.
##### **hasError**
`hasError` is true when anything in the checkout has created an error condition state. This might be validation errors, request errors, coupon application errors, payment processing errors etc.
### `ShippingProvider` Exposed Statuses
The shipping context provider exposes everything related to shipping in the checkout. Included in this are a set of error statuses that inform what error state the shipping context is in and the error state is affected by requests to the server on address changes, rate retrieval and selection.
Currently the error status may be one of `NONE`, `INVALID_ADDRESS` or `UNKNOWN` (note, this may change in the future).
The status is exposed on the `currentErrorStatus` object provided by the `useShippingDataContext` hook. This object has the following properties on it:
- `isPristine` and `isValid`: Both of these booleans are connected to the same error status. When the status is `NONE` the values for these booleans will be `true`. It basically means there is no shipping error.
- `hasInvalidAddress`: When the address provided for shipping is invalid, this will be true.
- `hasError`: This is `true` when the error status for shipping is either `UNKNOWN` or `hasInvalidAddress`.
### Payment Method Data Store Status
The status of the payment lives in the payment data store. You can query the status with the following selectors:
```jsx
const { select } = window.wp.data;
const { paymentStore } = window.wc.wcBlocksData;
const MyComponent = ( props ) => {
const isPaymentIdle = select( paymentStore ).isPaymentIdle();
const isExpressPaymentStarted =
select( paymentStore ).isExpressPaymentStarted();
const isPaymentProcessing = select( paymentStore ).isPaymentProcessing();
const isPaymentReady = select( paymentStore ).isPaymentReady();
const hasPaymentError = select( paymentStore ).hasPaymentError();
// do something with the boolean values
};
```
The status here will help inform the current state of _client side_ processing for the payment and are updated via the store actions at different points throughout the checkout processing cycle. _Client side_ means the state of processing any payments by registered and active payment methods when the checkout form is submitted via those payment methods registered client side components. It's still possible that payment methods might have additional server side processing when the order is being processed but that is not reflected by these statuses (more in the [payment method integration doc](./payment-method-integration.md)).
The possible _internal_ statuses that may be set are:
- `IDLE`: This is the status when checkout is initialized and there are payment methods that are not doing anything. This status is also set whenever the checkout status is changed to `IDLE`.
- `EXPRESS_STARTED`: **Express Payment Methods Only** - This status is used when an express payment method has been triggered by the user clicking it's button. This flow happens before processing, usually in a modal window.
- `PROCESSING`: This status is set when the checkout status is `PROCESSING`, checkout `hasError` is false, checkout is not calculating, and the current payment status is not `FINISHED`. When this status is set, it will trigger the payment processing event emitter.
- `READY`: This status is set after all the observers hooked into the payment processing event have completed successfully. The `CheckoutProcessor` component uses this along with the checkout `PROCESSING` status to signal things are ready to send the order to the server with data for processing and to take payment
- `ERROR`: This status is set after an observer hooked into the payment processing event returns an error response. This in turn will end up causing the checkout `hasError` flag to be set to true.
### Emitting Events
Another tricky thing for extensibility, is providing opinionated, yet flexible interfaces for extensions to act and react to specific events in the flow. For stability, it's important that the core checkout flow _controls_ all communication to and from the server specific to checkout/order processing and leave extension specific requirements for the extension to handle. This allows for extensions to predictably interact with the checkout data and flow as needed without impacting other extensions hooking into it.
One of the most reliable ways to implement this type of extensibility is via the usage of an events system. Thus the various context providers:
- expose subscriber APIs for extensions to subscribe _observers_ to the events they want to react to.
- emit events at specific points of the checkout flow that in turn will feed data to the registered observers and, in some cases, react accordingly to the responses from observers.
One _**very important rule**_ when it comes to observers registered to any event emitter in this system is that they _cannot_ update context state. Updating state local to a specific component is okay but not any context or global state. The reason for this is that the observer callbacks are run sequentially at a specific point and thus subsequent observers registered to the same event will not react to any change in global/context state in earlier executed observers.
```jsx
const unsubscribe = emitter( myCallback );
```
You could substitute in whatever emitter you are registering for the `emitter` function. So for example if you are registering for the `onCheckoutValidation` event emitter, you'd have something like:
```jsx
const unsubscribe = onCheckoutValidation( myCallback );
```
You can also indicate what priority you want your observer to execute at. Lower priority is run before higher priority, so you can affect when your observer will run in the stack of observers registered to an emitter. You indicate priority via an number on the second argument:
```jsx
const unsubscribe = onCheckoutValidation( myCallback, 10 );
```
In the examples, `myCallback`, is your subscriber function. The subscriber function could receive data from the event emitter (described in the emitter details below) and may be expected to return a response in a specific shape (also described in the specific emitter details). The subscriber function can be a `Promise` and when the event emitter cycles through the registered observers it will await for any registered Promise to resolve.
Finally, the return value of the call to the emitter function is an unsubscribe function that can be used to unregister your observer. This is especially useful in a React component context where you need to make sure you unsubscribe the observer on component unmount. An example is usage in a `useEffect` hook:
```jsx
const MyComponent = ( { onCheckoutValidation } ) => {
useEffect( () => {
const unsubscribe = onCheckoutValidation( () => true );
return unsubscribe;
}, [ onCheckoutValidation ] );
return null;
};
```
**`Event Emitter Utilities`**
There are a bunch of utility methods that can be used related to events. These are available in `assets/js/base/context/event-emit/utils.ts` and can be imported as follows:
```jsx
import {
noticeContexts,
responseTypes,
shouldRetry,
} from '@woocommerce/base-context';
import {
isSuccessResponse,
isErrorResponse,
isFailResponse,
} from '@woocommerce/types';
```
The helper functions are described below:
- `isSuccessResponse`, `isErrorResponse` and `isFailResponse`: These are helper functions that receive a value and report via boolean whether the object is a type of response expected. For event emitters that receive responses from registered observers, a `type` property on the returned object from the observer indicates what type of response it is and event emitters will react according to that type. So for instance if an observer returned `{ type: 'success' }` the emitter could feed that to `isSuccessResponse` and it would return `true`. You can see an example of this being implemented for the [payment processing emitted event here](https://github.com/woocommerce/woocommerce-gutenberg-products-block/blob/34e17c3622637dbe8b02fac47b5c9b9ebf9e3596/assets/js/base/context/cart-checkout/payment-methods/payment-method-data-context.js#L281-L307).
- `noticeContexts`: This is an object containing properties referencing areas where notices can be targeted in the checkout. The object has the following properties:
- `PAYMENTS`: This is a reference to the notice area in the payment methods step.
- `EXPRESS_PAYMENTS`: This is a reference to the notice area in the express payment methods step.
- `responseTypes`: This is an object containing properties referencing the various response types that can be returned by observers for some event emitters. It makes it easier for autocompleting the types and avoiding typos due to human error. The types are `SUCCESS`, `FAIL`, `ERROR`. The values for these types also correspond to the [payment status types](https://github.com/woocommerce/woocommerce-gutenberg-products-block/blob/34e17c3622637dbe8b02fac47b5c9b9ebf9e3596/src/Payments/PaymentResult.php#L21) from the [checkout endpoint response from the server](https://github.com/woocommerce/woocommerce-gutenberg-products-block/blob/34e17c3622637dbe8b02fac47b5c9b9ebf9e3596/src/RestApi/StoreApi/Schemas/CheckoutSchema.php#L103-L113).
- `shouldRetry`: This is a function containing the logic whether the checkout flow should allow the user to retry the payment after a previous payment failed. It receives the `response` object and by default checks whether the `retry` property is true/undefined or false. Refer to the [`onCheckoutSuccess`](#oncheckoutsuccess) documentation for more details.
Note: `noticeContexts` and `responseTypes` are exposed to payment methods via the `emitResponse` prop given to their component:
```jsx
const MyPaymentMethodComponent = ( { emitResponse } ) => {
const { noticeContexts, responseTypes } = emitResponse;
// other logic for payment method...
};
```
The following event emitters are available to extensions to register observers to:
### `onCheckoutValidation`
Observers registered to this event emitter will receive nothing as an argument. Also, all observers will be executed before the checkout handles the responses from the emitters. Observers registered to this emitter can return `true` if they have nothing to communicate back to checkout, `false` if they want checkout to go back to `IDLE` status state, or an object with any of the following properties:
- `errorMessage`: This will be added as an error notice on the checkout context.
- `validationErrors`: This will be set as inline validation errors on checkout fields. If your observer wants to trigger validation errors it can use the following shape for the errors:
- This is an object where keys are the property names the validation error is for (that correspond to a checkout field, eg `country` or `coupon`) and values are the error message describing the validation problem.
This event is emitted when the checkout status is `BEFORE_PROCESSING` (which happens at validation time, after the checkout form submission is triggered by the user - or Express Payment methods).
If all observers return `true` for this event, then the checkout status will be changed to `PROCESSING`.
This event emitter subscriber can be obtained via the checkout context using the `useCheckoutContext` hook or to payment method extensions as a prop on their registered component:
_For internal development:_
```jsx
import { useCheckoutContext } from '@woocommerce/base-contexts';
import { useEffect } from '@wordpress/element';
const Component = () => {
const { onCheckoutValidation } = useCheckoutContext();
useEffect( () => {
const unsubscribe = onCheckoutValidation( () => true );
return unsubscribe;
}, [ onCheckoutValidation ] );
return null;
};
```
_For registered payment method components:_
```jsx
const { useEffect } = window.wp.element;
const PaymentMethodComponent = ( { eventRegistration } ) => {
const { onCheckoutValidation } = eventRegistration;
useEffect( () => {
const unsubscribe = onCheckoutValidation( () => true );
return unsubscribe;
}, [ onCheckoutValidation ] );
};
```
_For anything else:_
```jsx
const { onCheckoutValidation } = wc.blocksCheckoutEvents;
useEffect( () => {
const unsubscribe = onCheckoutValidation( () => true );
return unsubscribe;
}, [ onCheckoutValidation ] );
```
### ~~`onPaymentProcessing`~~
This is now deprecated and replaced by the `onPaymentSetup` event emitter.
### `onPaymentSetup`
This event emitter was fired when the payment method context status is `PROCESSING` and that status is set when the checkout status is `PROCESSING`, checkout `hasError` is false, checkout is not calculating, and the current payment status is not `FINISHED`.
This event emitter will execute through each registered observer (passing in nothing as an argument) _until_ an observer returns a non-truthy value at which point it will _abort_ further execution of registered observers.
When a payment method returns a non-truthy value, if it returns a valid response type the event emitter will update various internal statuses according to the response. Here's the possible response types that will get handled by the emitter:
#### Success
A successful response should be given when the user's entered data is correct and the payment checks are successful. A response is considered successful if, at a minimum, it is an object with this shape:
```js
const successResponse = { type: 'success' };
```
When a success response is returned, the payment method context status will be changed to `SUCCESS`. In addition, including any of the additional properties will result in extra actions:
- `paymentMethodData`: The contents of this object will be included as the value for `payment_data` when checkout sends a request to the checkout endpoint for processing the order. This is useful if a payment method does additional server side processing.
- `billingAddress`: This allows payment methods to update any billing data information in the checkout (typically used by Express payment methods) so it's included in the checkout processing request to the server. This data should be in the [shape outlined here](https://github.com/woocommerce/woocommerce/blob/trunk/plugins/woocommerce/client/blocks/assets/js/settings/shared/default-fields.ts).
- `shippingAddress`: This allows payment methods to update any shipping data information for the order (typically used by Express payment methods) so it's included in the checkout processing request to the server. This data should be in the [shape outlined here](https://github.com/woocommerce/woocommerce/blob/trunk/plugins/woocommerce/client/blocks/assets/js/settings/shared/default-fields.ts).
If `billingAddress` or `shippingAddress` properties aren't in the response object, then the state for the data is left alone.
#### Fail
A fail response should be given when there is an error with the payment processing. A response is considered a fail response when it is an object with this shape:
```js
const failResponse = { type: 'failure' };
```
When a fail response is returned by an observer, the payment method context status will be changed to `FAIL`. In addition, including any of the following properties will result in extra actions:
- `message`: The string provided here will be set as an error notice in the checkout.
- `messageContext`: If provided, this will target the given area for the error notice (this is where `noticeContexts` mentioned earlier come in to play). Otherwise the notice will be added to the `noticeContexts.PAYMENTS` area.
- `paymentMethodData`: (same as for success responses).
- `billingAddress`: (same as for success responses).
#### Error
An error response should be given when there is an error with the user input on the checkout form. A response is considered an error response when it is an object with this shape:
```js
const errorResponse = { type: 'error' };
```
When an error response is returned by an observer, the payment method context status will be changed to `ERROR`. In addition, including any of the following properties will result in extra actions:
- `message`: The string provided here will be set as an error notice.
- `messageContext`: If provided, this will target the given area for the error notice (this is where `noticeContexts` mentioned earlier come in to play). Otherwise, the notice will be added to the `noticeContexts.PAYMENTS` area.
- `validationErrors`: This will be set as inline validation errors on checkout fields. If your observer wants to trigger validation errors it can use the following shape for the errors:
- This is an object where keys are the property names the validation error is for (that correspond to a checkout field, eg `country` or `coupon`) and values are the error message describing the validation problem.
If the response object doesn't match any of the above conditions, then the fallback is to set the payment status as `SUCCESS`.
When the payment status is set to `SUCCESS` and the checkout status is `PROCESSING`, the `CheckoutProcessor` component will trigger the request to the server for processing the order.
This event emitter subscriber can be obtained via the checkout context using the `usePaymentEventsContext` hook or to payment method extensions as a prop on their registered component:
_For internal development:_
```jsx
import { usePaymentEventsContext } from '@woocommerce/base-contexts';
import { useEffect } from '@wordpress/element';
const Component = () => {
const { onPaymentSetup } = usePaymentEventsContext();
useEffect( () => {
const unsubscribe = onPaymentSetup( () => true );
return unsubscribe;
}, [ onPaymentSetup ] );
return null;
};
```
_For registered payment method components:_
```jsx
const { useEffect } = window.wp.element;
const PaymentMethodComponent = ( { eventRegistration } ) => {
const { onPaymentSetup } = eventRegistration;
useEffect( () => {
const unsubscribe = onPaymentSetup( () => true );
return unsubscribe;
}, [ onPaymentSetup ] );
};
```
### `onCheckoutSuccess`
This event emitter is fired when the checkout status is `AFTER_PROCESSING` and the checkout `hasError` state is false. The `AFTER_PROCESSING` status is set by the `CheckoutProcessor` component after receiving a response from the server for the checkout processing request.
Observers registered to this event emitter will receive the following object as an argument:
```js
const onCheckoutProcessingData = {
redirectUrl,
orderId,
customerId,
orderNotes,
paymentResult,
};
```
The properties are:
- `redirectUrl`: This is a string that is the url the checkout will redirect to as returned by the processing on the server.
- `orderId`: Is the id of the current order being processed.
- `customerId`: Is the id for the customer making the purchase (that is attached to the order).
- `orderNotes`: This will be any custom note the customer left on the order.
- `paymentResult`: This is the value of [`payment_result` from the /checkout StoreApi response](https://github.com/woocommerce/woocommerce-gutenberg-products-block/blob/34e17c3622637dbe8b02fac47b5c9b9ebf9e3596/src/RestApi/StoreApi/Schemas/CheckoutSchema.php#L103-L138). The data exposed on this object is (via the object properties):
- `paymentStatus`: Whatever the status is for the payment after it was processed server side. Will be one of `success`, `failure`, `pending`, `error`.
- `paymentDetails`: This will be an arbitrary object that contains any data the payment method processing server side sends back to the client in the checkout processing response. Payment methods are able to hook in on the processing server side and set this data for returning.
This event emitter will invoke each registered observer until a response from any of the registered observers does not equal `true`. At that point any remaining non-invoked observers will be skipped and the response from the observer triggering the abort will be processed.
This emitter will handle a `success` response type (`{ type: success }`) by setting the checkout status to `COMPLETE`. Along with that, if the response includes `redirectUrl` then the checkout will redirect to the given address.
This emitter will also handle a `failure` response type or an `error` response type and if no valid type is detected it will treat it as an `error` response type.
In all cases, if there are the following properties in the response, additional actions will happen:
- `message`: This string will be added as an error notice.
- `messageContext`: If present, the notice will be configured to show in the designated notice area (otherwise it will just be a general notice for the checkout block).
- `retry`: If this is `true` or not defined, then the checkout status will be set to `IDLE`. This basically means that the error is recoverable (for example try a different payment method) and so checkout will be reset to `IDLE` for another attempt by the shopper. If this is `false`, then the checkout status is set to `COMPLETE` and the checkout will redirect to whatever is currently set as the `redirectUrl`.
- `redirectUrl`: If this is present, then the checkout will redirect to this url when the status is `COMPLETE`.
If all observers return `true`, then the checkout status will just be set to `COMPLETE`.
This event emitter subscriber can be obtained via the checkout context using the `useCheckoutContext` hook or to payment method extensions as a prop on their registered component:
_For internal development:_
```jsx
import { useCheckoutContext } from '@woocommerce/base-contexts';
import { useEffect } from '@wordpress/element';
const Component = () => {
const { onCheckoutSuccess } = useCheckoutContext();
useEffect( () => {
const unsubscribe = onCheckoutSuccess( () => true );
return unsubscribe;
}, [ onCheckoutSuccess ] );
return null;
};
```
_For registered payment method components:_
```jsx
const { useEffect } = window.wp.element;
const PaymentMethodComponent = ( { eventRegistration } ) => {
const { onCheckoutSuccess } = eventRegistration;
useEffect( () => {
const unsubscribe = onCheckoutSuccess( () => true );
return unsubscribe;
}, [ onCheckoutSuccess ] );
};
```
_For anything else:_
```jsx
const { onCheckoutSuccess } = wc.blocksCheckoutEvents;
useEffect( () => {
const unsubscribe = onCheckoutSuccess( () => true );
return unsubscribe;
}, [ onCheckoutSuccess ] );
```
### `onCheckoutFail`
This event emitter is fired when the checkout status is `AFTER_PROCESSING` and the checkout `hasError` state is `true`. The `AFTER_PROCESSING` status is set by the `CheckoutProcessor` component after receiving a response from the server for the checkout processing request.
Observers registered to this emitter will receive the same data package as those registered to `onCheckoutSuccess`.
The response from the first observer returning a value that does not `===` true will be handled similarly as the `onCheckoutSuccess` except it only handles when the type is `error` or `failure`.
If all observers return `true`, then the checkout status will just be set to `IDLE` and a default error notice will be shown in the checkout context.
This event emitter subscriber can be obtained via the checkout context using the `useCheckoutContext` hook or to payment method extensions as a prop on their registered component:
_For internal development:_
```jsx
import { useCheckoutContext } from '@woocommerce/base-contexts';
import { useEffect } from '@wordpress/element';
const Component = () => {
const { onCheckoutFail } = useCheckoutContext();
useEffect( () => {
const unsubscribe = onCheckoutFail( () => true );
return unsubscribe;
}, [ onCheckoutFail ] );
return null;
};
```
_For registered payment method components:_
```jsx
const { useEffect } = window.wp.element;
const PaymentMethodComponent = ( { eventRegistration } ) => {
const { onCheckoutFail } = eventRegistration;
useEffect( () => {
const unsubscribe = onCheckoutFail( () => true );
return unsubscribe;
}, [ onCheckoutFail ] );
};
```
_For anything else:_
```jsx
const { onCheckoutFail } = wc.blocksCheckoutEvents;
useEffect( () => {
const unsubscribe = onCheckoutFail( () => true );
return unsubscribe;
}, [ onCheckoutFail ] );
```
### `onShippingRateSuccess`
This event emitter is fired when shipping rates are not loading and the shipping data context error state is `NONE` and there are shipping rates available.
This event emitter doesn't care about any registered observer response and will simply execute all registered observers passing them the current shipping rates retrieved from the server.
### `onShippingRateFail`
This event emitter is fired when shipping rates are not loading and the shipping data context error state is `UNKNOWN` or `INVALID_ADDRESS`.
This event emitter doesn't care about any registered observer response and will simply execute all registered observers passing them the current error status in the context.
### `onShippingRateSelectSuccess`
This event emitter is fired when a shipping rate selection is not being persisted to the server and there are selected rates available and the current error status in the context is `NONE`.
This event emitter doesn't care about any registered observer response and will simply execute all registered observers passing them the current selected rates.
### `onShippingRateSelectFail`
This event emitter is fired when a shipping rate selection is not being persisted to the server and the shipping data context error state is `UNKNOWN` or `INVALID_ADDRESS`.
This event emitter doesn't care about any registered observer response and will simply execute all registered observers passing them the current error status in the context.
---
## Filtering payment methods in the Checkout block
*Source: block-development/cart-and-checkout-blocks/checkout-payment-methods/filtering-payment-methods.md*
# Filtering payment methods in the Checkout block
## The problem
You're an extension developer, and your extension is conditionally hiding payment gateways on the checkout step. You need to be able to hide payment gateways on the Checkout block using a front-end extensibility point.
### The solution
WooCommerce Blocks provides a function called `registerPaymentMethodExtensionCallbacks` which allows extensions to register callbacks for specific payment methods to determine if they can make payments.
### Importing
#### Aliased import
```js
import { registerPaymentMethodExtensionCallbacks } from '@woocommerce/blocks-registry';
```
#### `wc global`
```js
const { registerPaymentMethodExtensionCallbacks } = window.wc.wcBlocksRegistry;
```
### Signature
| Parameter | Description | Type |
| ----------- | ------------------------------------------------------------------------------------------------------------------- | ------------------------------------------------- |
| `namespace` | Unique string to identify your extension. Choose something that eliminates a name collision with another extension. | `string` |
| `callbacks` | An object containing callbacks registered for different payment methods | Record< string, CanMakePaymentExtensionCallback > |
Read more below about [callbacks](#callbacks-registered-for-payment-methods).
#### Extension namespace collision
When trying to register callbacks under an extension namespace already used with `registerPaymentMethodExtensionCallbacks`, the registration will be aborted and you will be notified that you are not using a unique namespace. This will be shown in the JavaScript console.
### Usage example
```js
registerPaymentMethodExtensionCallbacks( 'my-hypothetical-extension', {
cod: ( arg ) => {
return arg.shippingAddress.city === 'Berlin';
},
cheque: ( arg ) => {
return false;
},
} );
```
### Callbacks registered for payment methods
Extensions can register only one callback per payment method:
```text
payment_method_name: ( arg ) => {...}
```
`payment_method_name` is the value of the [name property](/docs/block-development/cart-and-checkout-blocks/checkout-payment-methods/payment-method-integration) used when the payment method was registered with WooCommerce Blocks.
The registered callbacks are used to determine whether the corresponding payment method should be available as an option for the shopper. The function will be passed an object containing data about the current order.
```ts
type CanMakePaymentExtensionCallback = (
cartData: CanMakePaymentArgument
) => boolean;
```
Each callback will have access to the information bellow
```ts
interface CanMakePaymentArgument {
cart: Cart;
cartTotals: CartTotals;
cartNeedsShipping: boolean;
billingAddress: CartResponseBillingAddress;
shippingAddress: CartResponseShippingAddress;
selectedShippingMethods: Record< string, unknown >;
paymentRequirements: Array< string >;
}
```
If you need data that is not available in the parameter received by the callback you can consider [exposing your data in the Store API](https://github.com/woocommerce/woocommerce/blob/trunk/plugins/woocommerce/client/blocks/docs/third-party-developers/extensibility/rest-api/extend-rest-api-add-data.md).
## Filtering payment methods using requirements
### The problem
Your extension has added functionality to your store in such a way that only specific payment gateways can process orders that contain certain products.
Using the example of `Bookings` if the shopper adds a `Bookable` product to their cart, for example a stay in a hotel, and you, the merchant, want to confirm all bookings before taking payment. You would still need to capture the customer's checkout details but not their payment method at that point.
### The solution
To allow the shopper to check out without entering payment details, but still require them to fill in the other checkout details it is possible to create a new payment method which will handle carts containing a `Bookable` item.
Using the `supports` configuration of payment methods it is possible to prevent other payment methods (such as credit card, PayPal etc.) from being used to check out, and only allow the one your extension has added to appear in the Checkout block.
For more information on how to register a payment method with WooCommerce Blocks, please refer to the [Payment method integration](./payment-method-integration.md) documentation.
### Basic usage
Following the documentation for registering payment methods linked above, you should register your payment method with a unique `supports` feature, for example `booking_availability`. This will be used to isolate it and prevent other methods from displaying.
First you will need to create a function that will perform the checks on the cart to determine what the specific payment requirements of the cart are. Below is an example of doing this for our `Bookable` products.
Then you will need to use the `register_payment_requirements` on the `ExtendSchema` class to tell the Checkout block to execute a callback to check for requirements.
### Putting it all together
This code example assumes there is some class called `Pseudo_Booking_Class` that has the `cart_contains_bookable_product` method available. The implementation of this method is not relevant here.
```php
/**
* Check the content of the cart and add required payment methods.
*
*
* @return array list of features required by cart items.
*/
function inject_payment_feature_requirements_for_cart_api() {
// Cart contains a bookable product, so return an array containing our requirement of booking_availability.
if ( Pseudo_Booking_Class::cart_contains_bookable_product() ) {
return array( 'booking_availability' );
}
// No bookable products in the cart, no need to add anything.
return array();
}
```
To summarise the above: if there's a bookable product in the cart then this function will return an array containing `booking_availability`, otherwise it will return an empty array.
The next step will tell the `ExtendSchema` class to execute this callback when checking which payment methods to display.
To do this you could use the following code:
```php
add_action('woocommerce_blocks_loaded', function() {
woocommerce_store_api_register_payment_requirements(
array(
'data_callback' => 'inject_payment_feature_requirements_for_cart_api',
)
);
});
```
It is important to note the comment in this code block, you must not instantiate your own version of `ExtendSchema`.
If you've added your payment method correctly with the correct `supports` values then when you reach the checkout page with a `Bookable` item in your cart, any method that does not `supports` the `booking_availability` requirement should not display, while yours, the one that _does_ support this requirement _will_ display.
---
## Payment method integration
*Source: block-development/cart-and-checkout-blocks/checkout-payment-methods/payment-method-integration.md*
# Payment method integration
## Client Side integration
The client side integration consists of an API for registering both _regular_ and _express_ payment methods.
In both cases, the client side integration is done using registration methods exposed on the `blocks-registry` API. You can access this via the `wc` global in a WooCommerce environment (`wc.wcBlocksRegistry`).
> Note: In your build process, you could do something similar to what is done in the blocks repository which [aliases this API as an external on `@woocommerce/blocks-registry`](https://github.com/woocommerce/woocommerce-gutenberg-products-block/blob/e089ae17043fa525e8397d605f0f470959f2ae95/bin/webpack-helpers.js#L16-L35).
## Express Payment Methods
Express payment methods are payment methods that consist of a one-button payment process initiated by the shopper such as Stripe, ApplePay, or GooglePay.
### Registration
To register an express payment method, you use the `registerExpressPaymentMethod` function from the blocks registry.
```js
const { registerExpressPaymentMethod } = window.wc.wcBlocksRegistry;
```
If you're using an aliased import for `@woocommerce/blocks-registry`, you can import the function like this:
```js
import { registerExpressPaymentMethod } from '@woocommerce/blocks-registry';
```
The registry function expects a JavaScript object with options specific to the payment method:
```js
registerExpressPaymentMethod( options );
```
The options you feed the configuration instance should be an object in this shape (see `ExpressPaymentMethodConfiguration` typedef):
```js
const options = {
name: 'my_payment_method',
title: 'My Mayment Method',
description: 'A setence or two about your payment method',
gatewayId: 'gateway-id',
label: ,
content: ,
edit: ,
canMakePayment: () => true,
paymentMethodId: 'my_payment_method',
supports: {
features: [],
style: [],
},
};
```
#### `ExpressPaymentMethodConfiguration`
| Option | Type | Description | Required |
|-----------------------|------------|-----------------------------------------------------------------------------------------------------------------------------------------------------------------------------------------------------------------------------------------------------------------------------------------------------------------------------------------------------------------|----------|
| `name` | String | Unique identifier for the gateway client side. | Yes |
| `title` | String | Human readable name of your payment method. Displayed to the merchant in the editor. | No |
| `description` | String | One or two sentences describing your payment gateway. Displayed to the merchant in the editor. | No |
| `gatewayId` | String | ID of the Payment Gateway registered server side. Used to direct the merchant to the right settings page within the editor. If this is not provided, the merchant will be redirected to the general Woo payment settings page. | No |
| `content` | ReactNode | React node output in the express payment method area when the block is rendered in the frontend. Receives props from the checkout payment method interface. | Yes |
| `edit` | ReactNode | React node output in the express payment method area when the block is rendered in the editor. Receives props from the payment method interface to checkout (with preview data). | Yes |
| `canMakePayment` | Function | Callback to determine whether the payment method should be available for the shopper. | Yes |
| `paymentMethodId` | String | Identifier accompanying the checkout processing request to the server. Used to identify the payment method gateway class for processing the payment. | No |
| `supports:features` | Array | Array of payment features supported by the gateway. Used to crosscheck if the payment method can be used for the cart content. Defaults to `['products']` if no value is provided. | No |
| `supports:style` | Array | This is an array of style variations supported by the express payment method. These are styles that are applied across all the active express payment buttons and can be controlled from the express payment block in the editor. Supported values for these are one of `['height', 'borderRadius']`. | No |
#### The `canMakePayment` option
`canMakePayment` is a callback to determine whether the payment method should be available as an option for the shopper. The function will be passed an object containing data about the current order.
```ts
canMakePayment( {
cart: Cart,
cartTotals: CartTotals,
cartNeedsShipping: boolean,
shippingAddress: CartShippingAddress,
billingAddress: CartBillingAddress,
selectedShippingMethods: Record,
paymentRequirements: string[],
} )
```
`canMakePayment` returns a boolean value. If your gateway needs to perform async initialization to determine availability, you can return a promise (resolving to boolean). This allows a payment method to be hidden based on the cart, e.g. if the cart has physical/shippable products (example: [`Cash on delivery`](https://github.com/woocommerce/woocommerce-gutenberg-products-block/blob/e089ae17043fa525e8397d605f0f470959f2ae95/assets/js/payment-method-extensions/payment-methods/cod/index.js#L48-L70)); or for payment methods to control whether they are available depending on other conditions.
`canMakePayment` only runs on the frontend of the Store. In editor context, rather than use `canMakePayment`, the editor will assume the payment method is available (true) so that the defined `edit` component is shown to the merchant.
**Keep in mind this function could be invoked multiple times in the lifecycle of the checkout and thus any expensive logic in the callback provided on this property should be memoized.**
### Button Attributes for Express Payment Methods
This API provides a way to synchronise the look and feel of the express payment buttons for a coherent shopper experience. Express Payment Methods must prefer the values provided in the `buttonAttributes`, and use it's own configuration settings as backup when the buttons are rendered somewhere other than the Cart or Checkout block.
For example, in your button component, you would do something like this:
```js
// Get your extension specific settings and set defaults if not available
let {
borderRadius = '4',
height = '48',
} = getButtonSettingsFromConfig();
// In a cart & checkout block context, we receive `buttonAttributes` as a prop which overwrite the extension specific settings
if ( typeof buttonAttributes !== 'undefined' ) {
height = buttonAttributes.height;
borderRadius = buttonAttributes.borderRadius;
}
...
return
```
## Payment Methods
Payment methods are the payment method options that are displayed in the checkout block. Examples include _cheque_, PayPal Standard, and Stripe Credit Card.
### Registration
To register a payment method, you use the `registerPaymentMethod` function from the blocks registry.
```js
const { registerPaymentMethod } = window.wc.wcBlocksRegistry;
```
If you're using an aliased import for `@woocommerce/blocks-registry`, you can import the function like this:
```js
import { registerPaymentMethod } from '@woocommerce/blocks-registry';
```
The registry function expects a JavaScript object with options specific to the payment method:
```js
registerPaymentMethod( options );
```
The options you feed the configuration instance should be an object in this shape (see `PaymentMethodRegistrationOptions` typedef). The options you feed the configuration instance are the same as those for express payment methods with the following additions:
| Property | Type | Description |
|----------|------|-------------|
| `savedTokenComponent` | ReactNode | A React node that contains logic for handling saved payment methods. Rendered when a customer's saved token for this payment method is selected. |
| `label` | ReactNode | A React node used to output the label for the payment method option. Can be text or images. |
| `ariaLabel` | string | The label read by screen-readers when the payment method is selected. |
| `placeOrderButtonLabel` | string | Optional label to change the default "Place Order" button text when this payment method is selected. |
| `supports` | object | Contains information about supported features: |
| `supports.showSavedCards` | boolean | Determines if saved cards for this payment method are shown to the customer. |
| `supports.showSaveOption` | boolean | Controls whether to show the checkbox for saving the payment method for future use. |
## Props Fed to Payment Method Nodes
A big part of the payment method integration is the interface that is exposed for payment methods to use via props when the node provided is cloned and rendered on block mount. While all the props are listed below, you can find more details about what the props reference, their types etc via the [typedefs described in this file](https://github.com/woocommerce/woocommerce/blob/trunk/plugins/woocommerce-blocks/assets/js/types/type-defs/payment-method-interface.ts).
| Property | Type | Description |
| ------------------------ | ------------------------------------------------------------------------------------------------------------------------------------------------------------------------------------------------------------------------------------------------------------------------------------------------------------------------------------------------------------------------- | ------------------------------------------------------------------------------------------------------------------------------------------------------------------------------------------------------------------------------------------------------------------------------------------------------------------ |
| `activePaymentMethod` | String | The slug of the current active payment method in the checkout. |
| `billing` | Object with billingAddress, cartTotal, currency, cartTotalItems, displayPricesIncludingTax, appliedCoupons, customerId properties | Contains everything related to billing. |
| `cartData` | Object with cartItems, cartFees, extensions properties | Data exposed from the cart including items, fees, and any registered extension data. Note that this data should be treated as immutable (should not be modified/mutated) or it will result in errors in your application. |
| `checkoutStatus` | Object with isCalculating, isComplete, isIdle, isProcessing properties | The current checkout status exposed as various boolean state. |
| `components` | Object with ValidationInputError, PaymentMethodLabel, PaymentMethodIcons, LoadingMask properties | It exposes React components that can be implemented by your payment method for various common interface elements used by payment methods. |
| `emitResponse` | Object with noticeContexts and responseTypes properties | Contains some constants that can be helpful when using the event emitter. Read the _[Emitting Events](https://github.com/woocommerce/woocommerce-gutenberg-products-block/blob/e267cd96a4329a4eeef816b2ef627e113ebb72a5/docs/extensibility/checkout-flow-and-events.md#emitting-events)_ section for more details. |
| `eventRegistration` | Object with onCheckoutValidation, onCheckoutSuccess, onCheckoutFail, onPaymentSetup, onShippingRateSuccess, onShippingRateFail, onShippingRateSelectSuccess, onShippingRateSelectFail properties | Contains all the checkout event emitter registration functions. These are functions the payment method can register observers on to interact with various points in the checkout flow (see [this doc](./checkout-flow-and-events.md) for more info). |
| `onClick` | Function | **Provided to express payment methods** that should be triggered when the payment method button is clicked (which will signal to checkout the payment method has taken over payment processing) |
| `onClose` | Function | **Provided to express payment methods** that should be triggered when the express payment method modal closes and control is returned to checkout. |
| `onSubmit` | Function | Submits the checkout and begins processing |
| `buttonAttributes` | Object with height, borderRadius properties | Styles set by the merchant that should be respected by all express payment buttons |
| `paymentStatus` | Object | Various payment status helpers. Note, your payment method does not have to handle setting this status client side. Checkout will handle this via the responses your payment method gives from observers registered to [checkout event emitters](./checkout-flow-and-events.md). |
| `paymentStatus.isPristine` | Boolean | This is true when the current payment status is `PRISTINE`. |
| `paymentStatus.isStarted` | Boolean | This is true when the current payment status is `EXPRESS_STARTED`. |
| `paymentStatus.isProcessing` | Boolean | This is true when the current payment status is `PROCESSING`. |
| `paymentStatus.isFinished` | Boolean | This is true when the current payment status is one of `ERROR`, `FAILED`, or `SUCCESS`. |
| `paymentStatus.hasError` | Boolean | This is true when the current payment status is `ERROR`. |
| `paymentStatus.hasFailed` | Boolean | This is true when the current payment status is `FAILED`. |
| `paymentStatus.isSuccessful` | Boolean | This is true when the current payment status is `SUCCESS`. |
| `setExpressPaymentError` | Function | Receives a string and allows express payment methods to set an error notice for the express payment area on demand. This can be necessary because some express payment method processing might happen outside of checkout events. |
| `shippingData` | Object with shippingRates, shippingRatesLoading, selectedRates, setSelectedRates, isSelectingRate, shippingAddress, setShippingAddress, needsShipping properties | Contains all shipping related data (outside of the shipping status). |
| `shippingStatus` | Object with shippingErrorStatus, shippingErrorTypes properties | Various shipping status helpers. |
| `shouldSavePayment` | Boolean | Indicates whether or not the shopper has selected to save their payment method details (for payment methods that support saved payments). True if selected, false otherwise. Defaults to false. |
Any registered `savedTokenComponent` node will also receive a `token` prop which includes the id for the selected saved token in case your payment method needs to use it for some internal logic. However, keep in mind, this is just the id representing this token in the database (and the value of the radio input the shopper checked), not the actual customer payment token (since processing using that usually happens on the server for security).
## Server Side Integration
For the server side integration, you need to create a class that extends the `Automattic\WooCommerce\Blocks\Payments\Integrations\AbstractPaymentMethodType` class.
This class is the server side representation of your payment method. It is used to handle the registration of your payment methods assets with the Store API and Checkout block at the correct time. It is not the same as the [Payment Gateway API](/features/payments/payment-gateway-api.md) that you need to implement separately for payment processing.
### Example Payment Method Integration Class
```php
settings = get_option( 'woocommerce_my_payment_method_settings', [] );
}
/**
* This should return whether the payment method is active or not.
*
* If false, the scripts will not be enqueued.
*
* @return boolean
*/
public function is_active() {
return filter_var( $this->get_setting( 'enabled', false ), FILTER_VALIDATE_BOOLEAN );
}
/**
* Returns an array of scripts/handles to be registered for this payment method.
*
* In this function you should register your payment method scripts (using `wp_register_script`) and then return the
* script handles you registered with. This will be used to add your payment method as a dependency of the checkout script
* and thus take sure of loading it correctly.
*
* Note that you should still make sure any other asset dependencies your script has are registered properly here, if
* you're using Webpack to build your assets, you may want to use the WooCommerce Webpack Dependency Extraction Plugin
* (https://www.npmjs.com/package/@woocommerce/dependency-extraction-webpack-plugin) to make this easier for you.
*
* @return array
*/
public function get_payment_method_script_handles() {
wp_register_script(
'my-payment-method',
'path/to/your/script/my-payment-method.js',
[],
'1.0.0',
true
);
return [ 'my-payment-method' ];
}
/**
* Returns an array of script handles to be enqueued for the admin.
*
* Include this if your payment method has a script you _only_ want to load in the editor context for the checkout block.
* Include here any script from `get_payment_method_script_handles` that is also needed in the admin.
*/
public function get_payment_method_script_handles_for_admin() {
return $this->get_payment_method_script_handles();
}
/**
* Returns an array of key=>value pairs of data made available to the payment methods script client side.
*
* This data will be available client side via `wc.wcSettings.getSetting`. So for instance if you assigned `stripe` as the
* value of the `name` property for this class, client side you can access any data via:
* `wc.wcSettings.getSetting( 'stripe_data' )`. That would return an object matching the shape of the associative array
* you returned from this function.
*
* @return array
*/
public function get_payment_method_data() {
return [
'title' => $this->get_setting( 'title' ),
'description' => $this->get_setting( 'description' ),
'supports' => $this->get_supported_features(),
];
}
}
```
### Registering the Payment Method Integration
After creating a class that extends `Automattic\WooCommerce\Blocks\Payments\Integrations\AbstractPaymentMethodType`, you need to register it with the server side handling of payment methods.
You can do this by using the `register` method on the `PaymentMethodRegistry` class.
```php
use MyPlugin\MyPaymentMethod\MyPaymentMethodType;
use Automattic\WooCommerce\Blocks\Payments\PaymentMethodRegistry;
add_action(
'woocommerce_blocks_payment_method_type_registration',
function( PaymentMethodRegistry $payment_method_registry ) {
$payment_method_registry->register( new MyPaymentMethodType() );
}
);
```
## Processing Payments (legacy support)
Payments are still handled via the [Payment Gateway API](/features/payments/payment-gateway-api.md). This is a separate API from the one used for the payment methods integration above.
The checkout block converts incoming `payment_data` provided by the client-side script to `$_POST` and calls the Payment Gateway `process_payment` method.
_If you already have a WooCommerce Payment method extension integrated with the shortcode checkout flow, the legacy handling will take care of processing your payment for you on the server side._
## Processing Payments via the Store API
There may be more advanced cases where the legacy payment processing mentioned earlier doesn't work for your existing payment method integration. For these cases, there is also an action hook you can use to handle the server side processing of the order which provides more context and is specific to the Store API.
This hook is the _preferred_ place to hook in your payment processing:
```php
do_action_ref_array( 'woocommerce_rest_checkout_process_payment_with_context', [ $context, &$result ] );
```
> Note: A good place to register your callback on this hook is in the `initialize` method of the payment method type class you created earlier
A callback on this hook will receive:
- A `PaymentContext` object which contains the chosen `payment_method` (this is the same as the `paymentMethodId` value defined when registering your payment method), the `order` being placed, and any additional `payment_data` provided by the payment method client.
- A `PaymentResult` object which you can use to set the status, redirect url, and any additional payment details back to the client via the Store API.
If you set a status on the provided `PaymentResult` object, legacy payment processing will be ignored for your payment method. If there is an error, your callback can throw an exception which will be handled by the Store API.
Here is an example callback:
```php
add_action(
'woocommerce_rest_checkout_process_payment_with_context',
function( $context, $result ) {
if ( $context->payment_method === 'my_payment_method' ) {
// Order processing would happen here!
// $context->order contains the order object if needed
// ...
// If the logic above was successful, we can set the status to success.
$result->set_status( 'success' );
$result->set_payment_details(
array_merge(
$result->payment_details,
[
'custom-data' => '12345',
]
)
);
$result->set_redirect_url( 'some/url/to/redirect/to' );
}
},
10,
2
);
```
## Passing values from the client to the server side payment processing
In this example, lets pass some data from the BACS payment method to the server. Registration of BACS looks something like this:
```js
// Get our settings that were provided when the payment method was registered
const settings = window.wc.wcSettings.getSetting( 'bacs_data' );
// This is a component that would be rendered in the checkout block when the BACS payment method is selected
const Content = () => {
return decodeEntities( settings?.description || '' );
};
// This is the label for the payment method
const Label = ( props ) => {
const { PaymentMethodLabel } = props.components;
return ;
};
// Register the payment method
const bankTransferPaymentMethod = {
name: 'BACS',
label: ,
content: ,
edit: ,
canMakePayment: () => true,
supports: {
features: settings?.supports ?? [],
},
};
```
Payment method nodes are passed everything from the [usePaymentMethodInterface hook](https://github.com/woocommerce/woocommerce-blocks/blob/trunk/docs/internal-developers/block-client-apis/checkout/checkout-api.md#usepaymentmethodinterface). So we can consume this in our `` component like this:
```js
const Content = ( props ) => {
const { eventRegistration, emitResponse } = props;
const { onPaymentProcessing } = eventRegistration;
useEffect( () => {
const unsubscribe = onPaymentProcessing( async () => {
// Here we can do any processing we need, and then emit a response.
// For example, we might validate a custom field, or perform an AJAX request, and then emit a response indicating it is valid or not.
const myGatewayCustomData = '12345';
const customDataIsValid = !! myGatewayCustomData.length;
if ( customDataIsValid ) {
return {
type: emitResponse.responseTypes.SUCCESS,
meta: {
paymentMethodData: {
myGatewayCustomData,
},
},
};
}
return {
type: emitResponse.responseTypes.ERROR,
message: 'There was an error',
};
} );
// Unsubscribes when this component is unmounted.
return () => {
unsubscribe();
};
}, [
emitResponse.responseTypes.ERROR,
emitResponse.responseTypes.SUCCESS,
onPaymentProcessing,
] );
return decodeEntities( settings.description || '' );
};
```
Now when an order is placed, if we look at the API request payload, we can see the following JSON:
```json
{
"shipping_address": {},
"billing_address": {},
"customer_note": "",
"create_account": false,
"payment_method": "bacs",
"payment_data": [
{
"key": "myGatewayCustomData",
"value": "12345"
}
],
"extensions": {}
}
```
A callback on `woocommerce_rest_checkout_process_payment_with_context` can then access this data and use it to process the payment.
```php
add_action( 'woocommerce_rest_checkout_process_payment_with_context', function( $context, $result ) {
if ( $context->payment_method === 'bacs' ) {
$myGatewayCustomData = $context->payment_data['myGatewayCustomData'];
// Here we would use the $myGatewayCustomData to process the payment
---
## DOM events
*Source: block-development/cart-and-checkout-blocks/dom-events.md*
# DOM events
Some blocks need to react to certain events in order to display the most up to date data or behave in a certain way. That's the case of the Cart block, for example, that must listen to 'add to cart' events in order to update the cart contents; or the Mini-Cart block, that gets opened every time a product is added to the cart.
## WooCommerce core events in WooCommerce Blocks
WooCommerce core uses jQuery events to trigger and listen to certain events, like when a product is added or removed from the cart. In WooCommerce Blocks, we moved away from using jQuery, but we still need to listen to those events. To achieve that, we have a utility named [`translatejQueryEventToNative()`](https://github.com/woocommerce/woocommerce-gutenberg-products-block/blob/3f7c3e517d7bf13008a22d0c2eb89434a9c35ae7/assets/js/base/utils/legacy-events.ts#L79-L106) that listens to those jQuery events, and every time one is triggered, it triggers an associated DOM native event (with the `wc-blocks_` prefix).
## WooCommerce Blocks events
### `wc-blocks_adding_to_cart`
This event is the equivalent to the jQuery event `adding_to_cart` triggered by WooCommerce core. It indicates that the process of adding a product to the cart was sent to the server, but there is still no indication on whether the product was successfully added or not.
_Example usage in WC Blocks:_ Mini-Cart block listens to this event to append its dependencies.
### `wc-blocks_added_to_cart`
This event is the equivalent to the jQuery event `added_to_cart` triggered by WooCommerce core. It indicates that the process of adding a product to the cart has finished with success.
_Example usage in WC Blocks:_ Cart and Mini-Cart blocks (via the `useStoreCart()` hook) listen to this event to know if they need to update their contents.
#### `detail` parameters
| Parameter | Type | Default value | Description |
| ------------------ | ------- | ------------- | --------------------------------------------------------------------------------------------------------------------------------------------------------------------------------------------------------------------------------------------------------------------------------------------------------------------------------------------------------------------------------------------- |
| `preserveCartData` | boolean | `false` | Whether Cart data in the store should be preserved. By default, it's `false` so any `wc-blocks_added_to_cart` event will invalidate cart data and blocks listening to it will refetch cart data again. However, if the code triggering the event already updates the store (ie: All Products block), it can set `preserveCartData: true` to avoid the other blocks refetching the data again. |
### `wc-blocks_removed_from_cart`
This event is the equivalent to the jQuery event `removed_from_cart` triggered by WooCommerce core. It indicates that a product has been removed from the cart.
_Example usage in WC Blocks:_ Cart and Mini-Cart blocks (via the `useStoreCart()` hook) listen to this event to know if they need to update their contents.
---
## Getting started with Cart and Checkout extensibility
*Source: block-development/cart-and-checkout-blocks/extensibility-getting-started.md*
# Getting started with Cart and Checkout extensibility
This document is a high-level overview of the moving parts required to extend the Cart and Checkout blocks.
To get started, it is recommended to first read the [Block Development Environment](https://developer.wordpress.org/block-editor/getting-started/devenv/) documentation from WordPress and follow [Tutorial: Build your first block
](https://developer.wordpress.org/block-editor/getting-started/tutorial/).
## Example block template package
There is an example block template in the WooCommerce repository. Having this template set up while reading this document may help to understand some of the concepts discussed. See the [`@woocommerce/extend-cart-checkout-block` package documentation](https://github.com/woocommerce/woocommerce/tree/trunk/packages/js/extend-cart-checkout-block/README.md) for how to install and run the example block.
(Note: the code in the repository linked above will not be very useful alone; the code there is templating code. It will be transformed into regular JS and PHP after following the README instructions.)
## Front-end extensibility
To extend the front-end of the blocks, extensions must use JavaScript. The JavaScript files must be enqueued and loaded on the page before they will have any effect.
### Build system
Some extensions may be very simple and include only a single JavaScript file, other extensions may be complex and the code may be split into multiple files. Either way, it is recommended that the files are bundled together and minified into a single output file. If your extension has several distinct parts that only load on specific pages, bundle splitting is recommended, though that is out of scope for this document.
To set up the build system, the recommended approach is to align with WordPress and use a JavaScript package called [`@wordpress/scripts`](https://developer.wordpress.org/block-editor/reference-guides/packages/packages-scripts/). This package contains a script called `build`. By default, this will build your scripts into a single output file that can be enqueued using `wp_enqueue_script`.
The base configuration of the `build` script in `@wordpress/scripts` can be overridden by creating a `webpack.config.js` file in the root of your plugin. The example block shows how the base config can be extended.
#### `WooCommerceDependencyExtractionWebpackPlugin`
See [`WordPress Dependency Extraction Webpack Plugin`](https://github.com/WordPress/gutenberg/tree/trunk/packages/dependency-extraction-webpack-plugin) and
[`WooCommerce Dependency Extraction Webpack Plugin`](https://github.com/woocommerce/woocommerce/tree/trunk/packages/js/dependency-extraction-webpack-plugin#dependency-extraction-webpack-plugin).
This Webpack plugin is used to:
- Externalize dependencies that are available as shared scripts or modules on WordPress sites.
- This means when you import something from `@woocommerce/blocks-checkout` it resolves that path to `window.wc.wcBlocksCheckout` without you needing to change your code. It makes your code easier to read and allows these packages to be loaded onto the page once.
- Add an asset file for each entry point that declares an object with the list of WordPress script or module dependencies for the entry point. The asset file also contains the current version calculated for the current source code.
The PHP "asset file" that this plugin outputs contains information your script needs to register itself, such as dependencies and paths.
If you have written code that is built by Webpack and using the WooCommerce Dependency Extraction Webpack Plugin, there will be an asset file output for each entry point. This asset file is a PHP file that contains information about your script, specifically dependencies and version, here's an example:
```php
array(
'react',
'wc-settings',
'wp-block-editor',
'wp-blocks',
'wp-components',
'wp-element',
'wp-i18n',
'wp-primitives'
),
'version' => '455da4f55e1ac73b6d34'
);
```
When enqueueing your script, using this asset file will ensure the dependencies are loaded correctly and that the client gets the most up-to-date version of your script (the version is used to ensure your script is fetched fresh, rather than from the cache).
```php
[],
'version' => $this->get_file_version( $script_path ),
];
wp_register_script(
'example-blocks-integration-handle',
$script_url,
$script_asset['dependencies'],
$script_asset['version'],
true
);
```
Please see the [Cart and Checkout – Handling scripts, styles, and data](https://developer.woocommerce.com/docs/cart-and-checkout-handling-scripts-styles-and-data/) document for more information about how to correctly register scripts using the `IntegrationInterface`.
### Creating a block
In the example block, there is a "checkout-newsletter-subscription-block" directory which contains the files needed to register an inner block in the Checkout. The example block template is only set up to import and build a single block, but the Webpack config can be modified to build multiple blocks. Doing this is not supported as part of this document, refer to the [Webpack documentation](https://webpack.js.org/concepts/) instead.
The principles covered in [Tutorial: Build your first block
](https://developer.wordpress.org/block-editor/getting-started/tutorial/) apply here too.
### Modifying existing values on the front-end
You may not need to create a block to get your extension working the way you want, for example, if your extension only modifies existing content through filters.
In this case, you could remove the block folder from the example block, modify the Webpack config file so it no longer reads from that directory, and include the code you need in the entry JavaScript file.
More information about how to use filters can be found in the [Filter Registry](https://github.com/woocommerce/woocommerce/blob/trunk/plugins/woocommerce/client/blocks/packages/checkout/filter-registry/README.md) and [Available Filters](https://developer.woocommerce.com/docs/category/cart-and-checkout-blocks/available-filters/) documents.
### Importing WooCommerce components into your extension
Components can be imported from `@woocommerce/blocks-components` (externalized to `window.wc.blocksComponents` by `@woocommerce/dependency-extraction-webpack-plugin`). The list of available components can be seen in [the WooCommerce Storybook](https://woocommerce.github.io/woocommerce/?path=/docs/woocommerce-blocks_external-components-button--docs), listed under "WooCommerce Blocks -> External components".
An example of importing the `Button` component is:
```js
import { Button } from '@woocommerce/blocks-components';
const MyComponent = () => {
return
;
}
```
### Importing WooCommerce (React) hooks
Currently, none of our hooks are designed to be used externally, so trying to import hooks such as `useStoreCart` is not supported. Instead, getting the data from the [`wc/store/...`](https://github.com/woocommerce/woocommerce/blob/trunk/plugins/woocommerce/client/blocks/docs/third-party-developers/extensibility/data-store/) data stores is preferred.
## Back-end extensibility
### Modifying information during the Checkout process
Modifying the server-side part of the Cart and Checkout blocks is possible using PHP. Some actions and filters from the shortcode cart/checkout experience will work too, but not all of them. We have a working document ([Hook alternatives document](https://github.com/woocommerce/woocommerce/blob/trunk/plugins/woocommerce/client/blocks/docs/third-party-developers/extensibility/hooks/hook-alternatives.md)) that outlines which hooks are supported as well as alternatives.
### Extending Store API
If you need to change how the Store API works, or extend the data in the responses, see [Extending the Store API](https://github.com/woocommerce/woocommerce/blob/trunk/plugins/woocommerce/client/blocks/docs/third-party-developers/extensibility/rest-api).
---
## Frequently Asked Questions
*Source: block-development/cart-and-checkout-blocks/faq.md*
# Frequently Asked Questions
This document aims to answer some of the frequently asked questions we see from developers extending WooCommerce Blocks.
We will add to the FAQ document as we receive questions, this isn't the document's final form.
If you have questions that aren't addressed here, we invite you to ask them on [GitHub Discussions](https://github.com/woocommerce/woocommerce/discussions) or in the [WooCommerce Community Slack](https://woocommerce.com/community-slack/)
## General questions
### How do I react to changes to the Cart or Checkout e.g. shipping method selection, or address changes?
The Cart and Checkout blocks read all their data from [`@wordpress/data` data stores](https://developer.wordpress.org/block-editor/reference-guides/packages/packages-data/). We also have [documentation for the data stores WooCommerce Blocks uses](https://github.com/woocommerce/woocommerce/tree/trunk/plugins/woocommerce/client/blocks/docs/third-party-developers/extensibility/data-store).
It is common for developers to want to react to changes in the cart or checkout. For example, if a user changes their shipping method, or changes a line of their address.
There are two ways to do this, depending on how your code is running.
#### If your code is running in a React component
If your component is an inner block of the Cart/Checkout, or rendered in a [Slot/Fill](./slot-fills.md), you can directly select the data you need from the relevant data store and perform any necessary actions when the data changes. For more information on available selectors, refer to the [documentation for the relevant data store](https://github.com/woocommerce/woocommerce/tree/trunk/plugins/woocommerce/client/blocks/docs/third-party-developers/extensibility/data-store).
```js
/**
* External dependencies
*/
import { useSelect } from '@wordpress/data';
import { cartStore } from '@woocommerce/block-data';
import { useEffect } from '@wordpress/element';
export const MyComponent = () => {
const { shippingAddress } = useSelect(
( select ) => select( cartStore ).getCartData(),
[]
);
useEffect( () => {
// Do something when shippingAddress changes
}, [ shippingAddress ] );
};
```
#### If your code is running in a non-React context
This would be true if you're not rendering a block, or running any React code. This means you won't have access to React hooks or custom hooks like `useSelect`. In this case you'd need to use the non-hook alternative to `useSelect` which is `select`. Given the requirement to react to changes, simply calling `select` will not be enough as this will only run once. You'll need to use the `subscribe` method to subscribe to changes to the data you're interested in.
```ts
/**
* External dependencies
*/
import { select, subscribe } from '@wordpress/data';
import { cartStore } from '@woocommerce/block-data';
let previousCountry = '';
const unsubscribe = subscribe( () => {
const { shippingAddress } = select( cartStore ).getCartData();
if ( shippingAddress.country !== previousCountry ) {
previousCountry = shippingAddress.country;
// Do something when shipping country changes.
}
if ( /* some other condition that makes this subscription no longer needed */ ) {
unsubscribe();
}
}, cartStore );
```
Since the `subscribe` callback would run every time the data store receives an action, you'll need to use caching to avoid doing work when it isn't required. For example, if you only want to do work when the country changes, you would need to cache the previous value and compare it to the current value before running the task.
If you no longer need to react to changes, you can unsubscribe from the data store using the `unsubscribe` method which is returned by the `subscribe` method, like in the example above.
## Cart modifications
### How do I dynamically make changes to the cart from the client?
To perform actions on the server based on a client-side action, you'll need to use [`extensionCartUpdate`](https://github.com/woocommerce/woocommerce/blob/trunk/plugins/woocommerce/client/blocks/docs/third-party-developers/extensibility/rest-api/extend-rest-api-update-cart.md)
As an example, to add a "Get 10% off if you sign up to the mailing list" checkbox on your site you can use `extensionCartUpdate` to automatically apply a 10% coupon to the cart.

Assuming you've already added the checkbox, either through the Additional Checkout Fields API, or by creating an inner block, the next step will be to register the server-side code to apply the coupon if the box is checked, and remove it if it's not.
```php
add_action('woocommerce_blocks_loaded', function() {
woocommerce_store_api_register_update_callback(
[
'namespace' => 'extension-unique-namespace',
'callback' => function( $data ) {
if ( isset( $data['checked'] ) && filter_var( $data['checked'], FILTER_VALIDATE_BOOLEAN ) === true ) {
WC()->cart->apply_coupon( 'mailing-list-10-percent-coupon' );
} else {
WC()->cart->remove_coupon( 'mailing-list-10-percent-coupon' );
}
}
]
);
} );
```
The code in the checkbox's event listener on the front end would look like this:
```js
const { extensionCartUpdate } = window.wc.blocksCheckout;
const onChange = ( checked ) => {
extensionCartUpdate(
{
namespace: 'extension-unique-namespace',
data: {
checked
}
}
)
}
```
To change how this coupon is displayed in the list of coupons in the order summary, you can use the `coupons` checkout filter, like so:
```js
const { registerCheckoutFilters } = window.wc.blocksCheckout;
const modifyCoupons = ( coupons, extensions, args ) => {
return coupons.map( ( coupon ) => {
if ( ! coupon.label === 'mailing-list-10-percent-coupon' ) {
return coupon;
}
return {
...coupon,
label: 'Mailing list discount',
};
} );
};
registerCheckoutFilters( 'extension-unique-namespace', {
coupons: modifyCoupons,
} );
```
### How do I add fees to the cart when a specific payment method is chosen?
You need to add the fees on the server based on the selected payment method, this can be achieved using the `woocommerce_cart_calculate_fees` action.
This is the server-side code required to add the fee:
```php
add_action(
'woocommerce_cart_calculate_fees',
function () {
if ( is_admin() && ! defined( 'DOING_AJAX' ) ) {
return;
}
$chosen_payment_method_id = WC()->session->get( 'chosen_payment_method' );
$cart = WC()->cart;
if ( 'your-payment-method-slug' === $chosen_payment_method_id ) {
$percentage = 0.05;
$surcharge = ( $cart->cart_contents_total + $cart->shipping_total ) * $percentage;
$cart->add_fee( 'Payment method fee', $surcharge );
}
}
);
```
### How to force-refresh the cart from the server
This can be achieved using [`extensionCartUpdate`](https://github.com/woocommerce/woocommerce/blob/trunk/plugins/woocommerce/client/blocks/docs/third-party-developers/extensibility/rest-api/extend-rest-api-update-cart.md) which is the preferred way, but it is also possible by executing the `receiveCart` action on the `wc/store/cart` data store with a valid cart object, like so:
```js
const { dispatch } = window.wp.data;
dispatch( 'wc/store/cart' ).receiveCart( cartObject )
```
All the cart routes on Store API return a cart object which can be used here. Passing an invalid cart object here will cause errors in the block.
You can also use:
```js
const { dispatch } = window.wp.data;
dispatch('wc/store/cart').invalidateResolutionForStore()
```
However, this will cause a brief flash of an empty cart while the new cart is fetched.
### How do I render something in each cart item?
This is currently **not** officially supported, however we have heard of developers doing this using DOM manipulation and React portals. If you choose to take this route, please note that your integrations may stop working if we make changes to the Cart block in the future.
## Checkout modifications
### How do I remove checkout fields?
We don't encourage this due to the wide array of plugins WordPress and Woo support. Some of these may rely on certain checkout fields to function, but if you're certain the fields are safe to remove, please see [Removing Checkout Fields](./removing-checkout-fields.md).
### How do I modify the order or customer data during checkout?
If you want to modify order or customer data submitted during checkout you can use the `woocommerce_store_api_checkout_order_processed` action.
This action fires just before payment is processed. At this point you can modify the order as you would at any other point in the WooCommerce lifecycle, you still have to call `$order->save()` to persist the changes.
As an example, let's make sure the user's first and last names are capitalized:
```php
add_action(
'woocommerce_store_api_checkout_order_processed',
function( WC_Order $order ) {
$order->set_shipping_first_name( ucfirst( $order->get_shipping_first_name() ) );
$order->set_shipping_last_name( ucfirst( $order->get_shipping_last_name() ) );
$order->set_billing_first_name( ucfirst( $order->get_billing_first_name() ) );
$order->set_billing_last_name( ucfirst( $order->get_billing_last_name() ) );
$order->save();
}
);
```
### How do I render something in the Checkout block?
This depends on what you want to render.
#### Rendering a field
The recommended approach to rendering fields in the Checkout block is to use the [Additional Checkout Fields API](https://developer.woocommerce.com/docs/cart-and-checkout-additional-checkout-fields/).
#### Rendering a custom block
To render a custom block in the Checkout block, the recommended approach is to create a child block of one of the existing Checkout inner blocks. We have an example template that can be used to set up and study an inner block. To install and use it, follow the instructions in [`@woocommerce/extend-cart-checkout-block`](https://github.com/woocommerce/woocommerce/blob/trunk/packages/js/extend-cart-checkout-block/README.md). Please note that this example contains multiple other examples of extensibility, not just inner blocks.
---
## Hook support and common extensibility paths
*Source: block-development/cart-and-checkout-blocks/hooks/hook-alternatives.md*
# Hook support and common extensibility paths
Please see the [hook alternatives document](https://github.com/woocommerce/woocommerce/blob/trunk/plugins/woocommerce/client/blocks/docs/third-party-developers/extensibility/hooks/hook-alternatives.md) for more information on supported hooks and alternatvies for unsupported hooks in WooCommerce Blocks.
---
## Legacy hooks
*Source: block-development/cart-and-checkout-blocks/hooks/migrated-hooks.md*
# Legacy hooks
Below are the hooks that exist in WooCommerce core and that were brough over to WooCommerce Blocks.
Please note that the actions and filters here run on the server side. The client-side blocks won't necessarily change based on a callback added to a server side hook. [Please see our documentation relating to APIs for manipulating the blocks on the client-side](../../extensibility-in-blocks/README.md).
## Legacy Filters
- [loop_shop_per_page](https://github.com/woocommerce/woocommerce/blob/trunk/plugins/woocommerce/client/blocks/docs/third-party-developers/extensibility/hooks/filters.md#loop_shop_per_page)
- [wc_session_expiration](https://github.com/woocommerce/woocommerce/blob/trunk/plugins/woocommerce/client/blocks/docs/third-party-developers/extensibility/hooks/filters.md#wc_session_expiration)
- [woocommerce_add_cart_item](https://github.com/woocommerce/woocommerce/blob/trunk/plugins/woocommerce/client/blocks/docs/third-party-developers/extensibility/hooks/filters.md#woocommerce_add_cart_item)
- [woocommerce_add_cart_item_data](https://github.com/woocommerce/woocommerce/blob/trunk/plugins/woocommerce/client/blocks/docs/third-party-developers/extensibility/hooks/filters.md#woocommerce_add_cart_item_data)
- [woocommerce_add_to_cart_quantity](https://github.com/woocommerce/woocommerce/blob/trunk/plugins/woocommerce/client/blocks/docs/third-party-developers/extensibility/hooks/filters.md#woocommerce_add_to_cart_quantity)
- [woocommerce_add_to_cart_sold_individually_quantity](https://github.com/woocommerce/woocommerce/blob/trunk/plugins/woocommerce/client/blocks/docs/third-party-developers/extensibility/hooks/filters.md#woocommerce_add_to_cart_sold_individually_quantity)
- [woocommerce_adjust_non_base_location_prices](https://github.com/woocommerce/woocommerce/blob/trunk/plugins/woocommerce/client/blocks/docs/third-party-developers/extensibility/hooks/filters.md#woocommerce_adjust_non_base_location_prices)
- [woocommerce_apply_base_tax_for_local_pickup](https://github.com/woocommerce/woocommerce/blob/trunk/plugins/woocommerce/client/blocks/docs/third-party-developers/extensibility/hooks/filters.md#woocommerce_apply_base_tax_for_local_pickup)
- [woocommerce_apply_individual_use_coupon](https://github.com/woocommerce/woocommerce/blob/trunk/plugins/woocommerce/client/blocks/docs/third-party-developers/extensibility/hooks/filters.md#woocommerce_apply_individual_use_coupon)
- [woocommerce_apply_with_individual_use_coupon](https://github.com/woocommerce/woocommerce/blob/trunk/plugins/woocommerce/client/blocks/docs/third-party-developers/extensibility/hooks/filters.md#woocommerce_apply_with_individual_use_coupon)
- [woocommerce_cart_contents_changed](https://github.com/woocommerce/woocommerce/blob/trunk/plugins/woocommerce/client/blocks/docs/third-party-developers/extensibility/hooks/filters.md#woocommerce_cart_contents_changed)
- [woocommerce_cart_item_permalink](https://github.com/woocommerce/woocommerce/blob/trunk/plugins/woocommerce/client/blocks/docs/third-party-developers/extensibility/hooks/filters.md#woocommerce_cart_item_permalink)
- [woocommerce_get_item_data](https://github.com/woocommerce/woocommerce/blob/trunk/plugins/woocommerce/client/blocks/docs/third-party-developers/extensibility/hooks/filters.md#woocommerce_get_item_data)
- [woocommerce_loop_add_to_cart_args](https://github.com/woocommerce/woocommerce/blob/trunk/plugins/woocommerce/client/blocks/docs/third-party-developers/extensibility/hooks/filters.md#woocommerce_loop_add_to_cart_args)
- [woocommerce_loop_add_to_cart_link](https://github.com/woocommerce/woocommerce/blob/trunk/plugins/woocommerce/client/blocks/docs/third-party-developers/extensibility/hooks/filters.md#woocommerce_loop_add_to_cart_link)
- [woocommerce_new_customer_data](https://github.com/woocommerce/woocommerce/blob/trunk/plugins/woocommerce/client/blocks/docs/third-party-developers/extensibility/hooks/filters.md#woocommerce_new_customer_data)
- [woocommerce_pay_order_product_has_enough_stock](https://github.com/woocommerce/woocommerce/blob/trunk/plugins/woocommerce/client/blocks/docs/third-party-developers/extensibility/hooks/filters.md#woocommerce_pay_order_product_has_enough_stock)
- [woocommerce_pay_order_product_in_stock](https://github.com/woocommerce/woocommerce/blob/trunk/plugins/woocommerce/client/blocks/docs/third-party-developers/extensibility/hooks/filters.md#woocommerce_pay_order_product_in_stock)
- [woocommerce_registration_errors](https://github.com/woocommerce/woocommerce/blob/trunk/plugins/woocommerce/client/blocks/docs/third-party-developers/extensibility/hooks/filters.md#woocommerce_registration_errors)
- [woocommerce_shipping_package_name](https://github.com/woocommerce/woocommerce/blob/trunk/plugins/woocommerce/client/blocks/docs/third-party-developers/extensibility/hooks/filters.md#woocommerce_shipping_package_name)
- [woocommerce_show_page_title](https://github.com/woocommerce/woocommerce/blob/trunk/plugins/woocommerce/client/blocks/docs/third-party-developers/extensibility/hooks/filters.md#woocommerce_show_page_title)
- [woocommerce_single_product_image_thumbnail_html](https://github.com/woocommerce/woocommerce/blob/trunk/plugins/woocommerce/client/blocks/docs/third-party-developers/extensibility/hooks/filters.md#woocommerce_single_product_image_thumbnail_html)
## Legacy Actions
- [woocommerce_add_to_cart](https://github.com/woocommerce/woocommerce/blob/trunk/plugins/woocommerce/client/blocks/docs/third-party-developers/extensibility/hooks/actions.md#woocommerce_add_to_cart)
- [woocommerce_after_main_content](https://github.com/woocommerce/woocommerce/blob/trunk/plugins/woocommerce/client/blocks/docs/third-party-developers/extensibility/hooks/actions.md#woocommerce_after_main_content)
- [woocommerce_after_shop_loop](https://github.com/woocommerce/woocommerce/blob/trunk/plugins/woocommerce/client/blocks/docs/third-party-developers/extensibility/hooks/actions.md#woocommerce_after_shop_loop)
- [woocommerce_applied_coupon](https://github.com/woocommerce/woocommerce/blob/trunk/plugins/woocommerce/client/blocks/docs/third-party-developers/extensibility/hooks/actions.md#woocommerce_applied_coupon)
- [woocommerce_archive_description](https://github.com/woocommerce/woocommerce/blob/trunk/plugins/woocommerce/client/blocks/docs/third-party-developers/extensibility/hooks/actions.md#woocommerce_archive_description)
- [woocommerce_before_main_content](https://github.com/woocommerce/woocommerce/blob/trunk/plugins/woocommerce/client/blocks/docs/third-party-developers/extensibility/hooks/actions.md#woocommerce_before_main_content)
- [woocommerce_before_shop_loop](https://github.com/woocommerce/woocommerce/blob/trunk/plugins/woocommerce/client/blocks/docs/third-party-developers/extensibility/hooks/actions.md#woocommerce_before_shop_loop)
- [woocommerce_check_cart_items](https://github.com/woocommerce/woocommerce/blob/trunk/plugins/woocommerce/client/blocks/docs/third-party-developers/extensibility/hooks/actions.md#woocommerce_check_cart_items)
- [woocommerce_created_customer](https://github.com/woocommerce/woocommerce/blob/trunk/plugins/woocommerce/client/blocks/docs/third-party-developers/extensibility/hooks/actions.md#woocommerce_created_customer)
- [woocommerce_no_products_found](https://github.com/woocommerce/woocommerce/blob/trunk/plugins/woocommerce/client/blocks/docs/third-party-developers/extensibility/hooks/actions.md#woocommerce_no_products_found)
- [woocommerce_register_post](https://github.com/woocommerce/woocommerce/blob/trunk/plugins/woocommerce/client/blocks/docs/third-party-developers/extensibility/hooks/actions.md#woocommerce_register_post)
- [woocommerce_shop_loop](https://github.com/woocommerce/woocommerce/blob/trunk/plugins/woocommerce/client/blocks/docs/third-party-developers/extensibility/hooks/actions.md#woocommerce_shop_loop)
---
## How the checkout block processes an order
*Source: block-development/cart-and-checkout-blocks/how-checkout-processes-an-order.md*
# How the checkout block processes an order
This document will shed some light on the inner workings of the Checkout flow. More specifically, what happens after a user hits the "Place Order" button.
## Structure
The following areas are associated with processing the checkout for a user.
### The Payment Registry [(file)](https://href.li/?https://github.com/woocommerce/woocommerce-blocks/blob/4af2c0916a936369be8a4f0044683b90b3af4f0d/assets/js/blocks-registry/payment-methods/registry.ts#L1)
The payment registry stores all the configuration information for each payment method. We can register a new payment method here with the `registerPaymentMethod` and `registerExpressPaymentMethod `functions, also available to other plugins.
### Data Stores
Data stores are used to keep track of data that is likely to change during a user's session, such as the active payment method, whether the checkout has an error, etc. We split these data stores by areas of concern, so we have 2 data stores related to the checkout: `wc/store/checkout` [(file)](https://href.li/?https://github.com/woocommerce/woocommerce-blocks/blob/4af2c0916a936369be8a4f0044683b90b3af4f0d/assets/js/data/checkout/index.ts#L1) and `wc/store/payment` [(file)](https://href.li/?https://github.com/woocommerce/woocommerce-blocks/blob/4af2c0916a936369be8a4f0044683b90b3af4f0d/assets/js/data/payment-methods/index.ts#L1) . Data stores live in the `assets/js/data` folder.
### Contexts
Contexts are used to make data available to the Checkout block. Each of these provide data and functions related to a specific area of concern, via the use of a hook. For example, if we wanted to use the `onPaymentSetup` handler from the `PaymentEventsContext` context, we can do it like this:
```js
const { onPaymentSetup } = usePaymentEventsContext();
```
The other job of contexts is to run side effects for our Checkout block. What typically happens is that the `CheckoutEvents` and `PaymentEvents` will listen for changes in the checkout and payment data stores, and dispatch actions on those stores based on some logic.
For example, in the `CheckoutEvents` context, we dispatch the `emitValidateEvent` action when the checkout status is `before_processing`. There is a lot of similar logic that reacts to changes in status and other state data from these two stores.
The Checkout contexts are:
| Context | Description |
| ---------------------------------------------------------------------------------------------------------------------------------------------------------------------------------------------------------------------- | ---------------------------------------------------- |
| [CheckoutEvents](https://github.com/woocommerce/woocommerce-blocks/blob/4af2c0916a936369be8a4f0044683b90b3af4f0d/assets/js/base/context/providers/cart-checkout/checkout-events/index.tsx#L4) | Provides some checkout related event handlers |
| [ PaymentEvents ](https://github.com/woocommerce/woocommerce-blocks/blob/4af2c0916a936369be8a4f0044683b90b3af4f0d/assets/js/base/context/providers/cart-checkout/payment-methods/payment-method-events-context.tsx#L3) | Provides event handlers related to payments |
| [ CustomerData ](https://github.com/woocommerce/woocommerce-blocks/blob/4af2c0916a936369be8a4f0044683b90b3af4f0d/assets/js/base/context/providers/cart-checkout/customer/index.tsx#L1) | Provides data related to the current customer |
| [ ShippingData ](https://github.com/woocommerce/woocommerce-blocks/blob/4af2c0916a936369be8a4f0044683b90b3af4f0d/assets/js/base/context/providers/cart-checkout/shipping/index.js#L1) | Provides data and actions related to shipping errors |
### The Checkout Processor (checkout-processor.js)
The checkout processor component subscribes to changes in the checkout or payment data stores, packages up some of this data and calls the StoreApi `/checkout` endpoint when the conditions are right.
## The Checkout Provider
The [checkout provider](https://github.com/woocommerce/woocommerce-blocks/blob/trunk/assets/js/base/context/providers/cart-checkout/checkout-provider.js), wraps all the contexts mentioned above around the `CheckoutProcessor` component.
---
## Checkout User Flow
Below is the complete checkout flow
### 1\. Click the "Place Order" button
The checkout process starts when a user clicks the button
### 2\. Checkout status is set to `before_processing` [(file)](https://github.com/woocommerce/woocommerce-blocks/blob/4af2c0916a936369be8a4f0044683b90b3af4f0d/assets/js/base/context/providers/cart-checkout/checkout-events/index.tsx#L167)
As soon as the user clicks the "Place Order" button, we change the checkout status to _"before_processing"_. This is where we handle the validation of the checkout information.
### 3\. Emit the `checkout_validation_before_processing` event [(file)](https://github.com/woocommerce/woocommerce-blocks/blob/4af2c0916a936369be8a4f0044683b90b3af4f0d/assets/js/base/context/providers/cart-checkout/checkout-events/index.tsx#L113)
This is where the WooCommerce Blocks plugin and other plugins can register event listeners for dealing with validation. The event listeners for this event will run and if there are errors, we set checkout status to `idle` and display the errors to the user.
If there are no errors, we move to step 4 below.
### 4\. Checkout status is set to `processing` [(file)](https://github.com/woocommerce/woocommerce-blocks/blob/4af2c0916a936369be8a4f0044683b90b3af4f0d/assets/js/data/checkout/thunks.ts#L76)
The processing status is used by step 5 below to change the payment status
### 5\. Payment status is set to `processing` [(file)](https://github.com/woocommerce/woocommerce-blocks/blob/4af2c0916a936369be8a4f0044683b90b3af4f0d/assets/js/base/context/providers/cart-checkout/payment-methods/payment-method-events-context.tsx#L94)
Once all the checkout processing is done and if there are no errors, the payment processing begins
### 6\. Emit the `payment_processing` event [(file)](https://github.com/woocommerce/woocommerce-blocks/blob/4af2c0916a936369be8a4f0044683b90b3af4f0d/assets/js/data/payment-methods/thunks.ts#L42)
The `payment_processing` event is emitted. Otherplugins can register event listeners for this event and run their own code.
For example, the Stripe plugin checks the address and payment details here, and uses the stripe APIs to create a customer and payment reference within Stripe.
**Important note: The actual payment is not taken here**. **It acts like a pre-payment hook to run any payment plugin code before the actual payment is attempted.**
### 7\. Execute the `payment_processing` event listeners and set the payment and checkout states accordingly [(file)](https://github.com/woocommerce/woocommerce-blocks/blob/4af2c0916a936369be8a4f0044683b90b3af4f0d/assets/js/data/payment-methods/thunks.ts#L54-L132)
If the registered event listeners return errors, we will display this to the user.
If the event listeners are considered successful, we sync up the address of the checkout with the payment address, store the `paymentMethodData` in the payment store, and set the payment status property `{ isProcessing: true }`.
### 8\. POST to `/wc/store/v1/checkout` [(file)](https://github.com/woocommerce/woocommerce-blocks/blob/4af2c0916a936369be8a4f0044683b90b3af4f0d/assets/js/base/context/providers/cart-checkout/checkout-processor.js#L234)
The `/checkout` StoreApi endpoint is called if there are no payment errors. This will take the final customer addresses and chosen payment method, and any additional payment data, then attempts payment and returns the result.
**Important: payment is attempted through the StoreApi, NOT through the `payment_processing` event that is sent from the client**
### 9\. The `processCheckoutResponse` action is triggered on the checkout store [(file)](https://github.com/woocommerce/woocommerce-blocks/blob/4af2c0916a936369be8a4f0044683b90b3af4f0d/assets/js/data/checkout/thunks.ts#L33)
Once the fetch to the StoreApi `/checkout` endpoint returns a response, we pass this to the `processCheckoutResponse` action on the `checkout` data store.
It will perform the following actions:
- It sets the redirect url to redirect to once the order is complete
- It stores the payment result in the `checkout` data store.
- It changes the checkout status to `after_processing` (step 10)
### 10\. Checkout status is set to `after_processing` [(file)](https://github.com/woocommerce/woocommerce-blocks/blob/4af2c0916a936369be8a4f0044683b90b3af4f0d/assets/js/data/checkout/thunks.ts#L42)
The `after_processing` status indicates that we've finished the main checkout processing step. In this step, we run cleanup actions and display any errors that have been triggered during the last step.
### 11\. Emit the `checkout_after_processing_with_success` event [(file)](https://github.com/woocommerce/woocommerce-blocks/blob/4af2c0916a936369be8a4f0044683b90b3af4f0d/assets/js/data/checkout/thunks.ts#L118-L128)
If there are no errors, the `checkout_after_processing_with_success` event is triggered. This is where other plugins can run some code after the checkout process has been successful.
Any event listeners registered on the `checkout_after_processing_with_success` event will be executed. If there are no errors from the event listeners, `setComplete` action is called on the `checkout` data store to set the status to `complete` (step 13). An event listener can also return an error here, which will be displayed to the user.
### 12\. Emit the `checkout_after_processing_with_error` event [(file)](https://github.com/woocommerce/woocommerce-blocks/blob/4af2c0916a936369be8a4f0044683b90b3af4f0d/assets/js/data/checkout/thunks.ts#L104-L116)
If there has been an error from step 5, the `checkout_after_processing_with_error` event will be emitted. Other plugins can register event listeners to run here to display an error to the user. The event listeners are processed and display any errors to the user.
### 13\. Set checkout status to `complete` [(file)](https://github.com/woocommerce/woocommerce-blocks/blob/4af2c0916a936369be8a4f0044683b90b3af4f0d/assets/js/data/checkout/utils.ts#L146)
If there are no errors, the `status` property changes to `complete` in the checkout data store. This indicates that the checkout process is complete.
### 14\. Redirect [(file)](https://github.com/woocommerce/woocommerce-blocks/blob/4af2c0916a936369be8a4f0044683b90b3af4f0d/assets/js/base/context/providers/cart-checkout/checkout-processor.js#L193-L197)
Once the checkout status is set to `complete`, if there is a `redirectUrl` in the checkout data store, then we redirect the user to the URL.
## Other notable things
### Checking payment methods
A payment method is registered with a [configuration object](https://github.com/woocommerce/woocommerce-blocks/blob/4af2c0916a936369be8a4f0044683b90b3af4f0d/assets/js/types/type-defs/payments.ts#L60-L83). It must include a function named `canMakePayment`. This function should return true if the payment method can be used to pay for the current cart. The current cart (items, addresses, shipping methods etc.) is passed to this function, and each payment method is responsible for reporting whether it can be used.
The `checkPaymentMethodsCanPay()` [function](https://github.com/woocommerce/woocommerce-blocks/blob/4af2c0916a936369be8a4f0044683b90b3af4f0d/assets/js/data/payment-methods/check-payment-methods.ts#L26) goes through all the registered payment methods, checks if they can pay, and if so, adds them to the `availablePaymentMethods` property on the payment data store.
The `checkPaymentMethodsCanPay()` [function](https://github.com/woocommerce/woocommerce-blocks/blob/4af2c0916a936369be8a4f0044683b90b3af4f0d/assets/js/data/payment-methods/check-payment-methods.ts#L26) must be called in a few places in order to validate the payment methods before they can be displayed to the user as viable options.
- [Once the cart loads](https://github.com/woocommerce/woocommerce-blocks/blob/4af2c0916a936369be8a4f0044683b90b3af4f0d/assets/js/data/cart/index.ts#L46-L57), we want to be able to display express payment methods, so we need to validate them first.
- [Once the cart changes](https://github.com/woocommerce/woocommerce-blocks/blob/4af2c0916a936369be8a4f0044683b90b3af4f0d/assets/js/data/cart/index.ts#L42-L43), we may want to enable/disable certain payment methods
- [once the checkout loads](https://github.com/woocommerce/woocommerce-blocks/blob/4af2c0916a936369be8a4f0044683b90b3af4f0d/assets/js/data/checkout/index.ts#L44-L49), we want to verify all registered payment methods
---
## How to Add Additional Fields to the WooCommerce Checkout Block
*Source: block-development/cart-and-checkout-blocks/how-to-additional-checkout-fields-guide.md*
# How to Add Additional Fields to the WooCommerce Checkout Block
This feature requires a minimum version of WooCommerce 8.9.0
The WooCommerce Checkout Block provides a powerful API for developers to add additional fields to collect information from customers during the checkout process. Whether you need to gather special delivery instructions, business details, or marketing preferences, additional checkout fields make it easy to extend your store’s functionality.
In this guide, we’ll walk through the process of adding your own additional fields to your checkout form and show you practical examples you can implement right away.
## Getting Started
To add additional checkout fields, you’ll use the `woocommerce_register_additional_checkout_field()` function. This should be called after the `woocommerce_init` action to ensure WooCommerce is fully loaded.
Here's the basic structure:
```php
add_action( 'woocommerce_init', function() {
if ( ! function_exists( 'woocommerce_register_additional_checkout_field' ) ) {
return;
}
woocommerce_register_additional_checkout_field(
array(
'id' => 'your-namespace/field-name',
'label' => __( 'Your Field Label', 'your-text-domain'),
'location' => 'contact', // or 'address' or 'order'
'type' => 'text', // or 'select' or 'checkbox'
'required' => false,
)
);
});
```
## Field Locations: Where Your Fields Appear
You can place your additional fields in three different locations:

### Contact Information (`contact`)
Fields here appear at the top of the checkout form alongside the email field. Data saved here becomes part of the customer’s account and will be visible in their “Account details” section.
Example:
```php
woocommerce_register_additional_checkout_field(
array(
'id' => 'my-plugin/marketing-opt-in',
'label' => __('Subscribe to our newsletter?', 'your-text-domain'),
'location' => 'contact',
'type' => 'checkbox',
)
);
```

### Address (`address`)
These fields appear in both the shipping and billing address forms. They’re saved to both the customer and the order, so returning customers won’t need to refill them.
Example:
```php
woocommerce_register_additional_checkout_field(
array(
'id' => 'my-plugin/delivery-instructions',
'label' => __('Special delivery instructions', 'your-text-domain'),
'location' => 'address',
'type' => 'text',
)
);
```

### Order Information (`order`)
Fields in this location appear in a separate “Order information” block and are saved only to the order, not the customer’s account. Perfect for order-specific details that don’t need to be remembered for future purchases.
Example:
```php
woocommerce_register_additional_checkout_field(
array(
'id' => 'my-plugin/gift-message',
'label' => __('Gift message', 'your-text-domain'),
'location' => 'order',
'type' => 'text',
)
);
```

## Supported Field Types
The API supports three field types:
### Text Fields
Perfect for collecting short text input:
```php
woocommerce_register_additional_checkout_field(
array(
'id' => 'my-plugin/company-vat',
'label' => __('VAT Number', 'your-text-domain'),
'location' => 'address',
'type' => 'text',
'required' => true,
)
);
```
### Select Dropdowns
Great for predefined options:
```php
woocommerce_register_additional_checkout_field(
array(
'id' => 'my-plugin/preferred-delivery-time',
'label' => __('Preferred delivery time', 'your-text-domain'),
'location' => 'order',
'type' => 'select',
'options' => array(
array(
'value' => 'morning',
'label' => __('Morning (9AM - 12PM)', 'your-text-domain')
),
array(
'value' => 'afternoon',
'label' => __('Afternoon (12PM - 5PM)', 'your-text-domain')
),
array(
'value' => 'evening',
'label' => __('Evening (5PM - 8PM)', 'your-text-domain')
),
),
)
);
```
### Checkboxes
Ideal for yes/no questions or opt-ins:
```php
woocommerce_register_additional_checkout_field(
array(
'id' => 'my-plugin/age-verification',
'label' => __('I confirm I am over 18 years old', 'your-text-domain'),
'location' => 'contact',
'type' => 'checkbox',
'required' => true,
'error_message' => __('You must be over 18 to place this order.', 'your-text-domain'),
)
);
```
## Adding Field Attributes
You can enhance your fields with HTML attributes for better user experience:
Example:
```php
woocommerce_register_additional_checkout_field(
array(
'id' => 'my-plugin/phone-number',
'label' => __('Alternative phone number', 'your-text-domain'),
'location' => 'contact',
'type' => 'text',
'attributes' => array(
'autocomplete' => 'tel',
'pattern' => '[0-9]{10}',
'title' => __('Please enter a 10-digit phone number', 'your-text-domain'),
'placeholder' => '1234567890',
),
)
);
```
## Validation and Sanitization
To ensure the data entered into your custom fields is valid and secure, you can add custom validation and sanitization functions.
```php
add_action( 'woocommerce_init', function() {
woocommerce_register_additional_checkout_field(
array(
'id' => 'my-plugin/business-email',
'label' => __('Business Email', 'your-text-domain'),
'location' => 'contact',
'type' => 'text',
'required' => true,
'sanitize_callback' => function( $value ) {
return sanitize_email( $value );
},
'validate_callback' => function( $value ) {
if ( ! is_email( $value ) ) {
return new WP_Error(
'invalid_business_email',
__('Please enter a valid business email address.', 'your-text-domain')
);
}
},
)
);
});
```
### Validation
You can also use WordPress action hooks for validation:
```php
add_action( 'woocommerce_validate_additional_field', function( $errors, $field_key, $field_value ) {
if ( 'my-plugin/business-email' === $field_key ) {
if ( ! is_email( $field_value ) ) {
$errors->add( 'invalid_business_email', __('Please enter a valid email address.', 'your-text-domain') );
}
}
}, 10, 3 );
```
## Accessing Field Values
After checkout, you can retrieve the field values using helper methods:
```php
use Automattic\WooCommerce\Blocks\Package;
use Automattic\WooCommerce\Blocks\Domain\Services\CheckoutFields;
$checkout_fields = Package::container()->get( CheckoutFields::class );
$order = wc_get_order( $order_id );
// Get a specific field value
$business_email = $checkout_fields->get_field_from_object(
'my-plugin/business-email',
$order,
'other' // Use 'billing' or 'shipping' for address fields
);
// Get all additional fields
$all_fields = $checkout_fields->get_all_fields_from_object( $order, 'other' );
```
### Complete Example
```php
add_action( 'woocommerce_init', function() {
if ( ! function_exists( 'woocommerce_register_additional_checkout_field' ) ) {
return;
}
// Company information
woocommerce_register_additional_checkout_field(
array(
'id' => 'my-business-store/company-size',
'label' => __('Company size', 'your-text-domain'),
'location' => 'contact',
'type' => 'select',
'required' => true,
'options' => array(
array( 'value' => '1-10', 'label' => __('1-10 employees', 'your-text-domain') ),
array( 'value' => '11-50', 'label' => __('11-50 employees', 'your-text-domain') ),
array( 'value' => '51-200', 'label' => __('51-200 employees', 'your-text-domain') ),
array( 'value' => '200+', 'label' => __('200+ employees', 'your-text-domain') ),
),
)
);
// Delivery preferences
woocommerce_register_additional_checkout_field(
array(
'id' => 'my-business-store/requires-appointment',
'label' => __('Delivery requires appointment', 'your-text-domain'),
'location' => 'address',
'type' => 'checkbox',
)
);
// Order-specific notes
woocommerce_register_additional_checkout_field(
array(
'id' => 'my-business-store/po-number',
'label' => __('Purchase Order Number', 'your-text-domain'),
'location' => 'order',
'type' => 'text',
)
);
});
```
## Next Steps
You now have the foundation for adding additional checkout fields to your WooCommerce store using the checkout block.
The additional checkout fields API provides a robust foundation for customizing your checkout experience while maintaining compatibility with WooCommerce’s block-based checkout system. Start with simple fields and gradually add more sophisticated validation and conditional logic as your needs grow.
---
## How to Make Your WooCommerce Additional Checkout Fields Conditionally Visible in the Checkout Block
*Source: block-development/cart-and-checkout-blocks/how-to-conditional-additional-fields.md*
# How to Make Your WooCommerce Additional Checkout Fields Conditionally Visible in the Checkout Block
This feature requires a minimum version of WooCommerce 9.9.0
Conditional visibility allows you to create smart, adaptive checkout forms that only show relevant fields when needed, reducing form clutter and improving the customer experience.
## Why Use Conditional Visibility?
Conditional fields help you:
* Reduce form complexity by hiding irrelevant fields
* Create dynamic checkout flows based on customer selections
* Show specialized fields only for specific products or customer types
* Improve conversion rates with cleaner, more focused forms
* Collect contextual information that's only relevant in certain situations
## Understanding JSON Schema for Conditions
WooCommerce’s additional checkout fields use JSON Schema to define conditional logic. Don’t worry if you’re not familiar with JSON Schema – we’ll walk through practical examples that you can adapt for your needs.
The basic structure looks like this:
```php
'required' => [
// Define when to hide here
],
'hidden' => [
// Define when to hide here
]
```
## Common Conditional Scenarios
### Show Fields Based on Shipping Method
One of the most common use cases is showing fields only when specific shipping methods are selected (e.g., Local Pickup):
```php
woocommerce_register_additional_checkout_field(
array(
'id' => 'my-plugin/delivery-instructions',
'label' => __('Special delivery instructions', 'your-text-domain'),
'location' => 'order',
'type' => 'text',
'required' => [
'cart' => [
'properties' => [
'prefers_collection' => [
'const' => true
]
]
]
],
'hidden' => [
'cart' => [
'properties' => [
'prefers_collection' => [
'const' => false
]
]
]
]
)
);
```
### Show Fields Based on Cart Contents
Display fields only when specific products are in the cart:
```php
woocommerce_register_additional_checkout_field(
array(
'id' => 'my-plugin/fragile-handling',
'label' => __('This order contains fragile items - special handling required?','your-text-domain'),
'location' => 'order',
'type' => 'checkbox',
'required' => [
'cart' => [
'properties' => [
'items' => [
'contains' => [
'enum' => [2766, 456, 789] // Product IDs for fragile items
]
]
]
]
]
)
);
```
### Show Fields Based on Cart Value
Display premium service options only for high-value orders:
```php
woocommerce_register_additional_checkout_field(
array(
'id' => 'my-plugin/white-glove-service',
'label' => __('Add white glove delivery service?', 'your-text-domain'),
'location' => 'order',
'type' => 'checkbox',
'hidden' => [
'cart' => [
'properties' => [
'totals' => [
'properties' => [
'totalPrice' => [
'maximum' => 50000 // Hide if cart total is less than $500 (in cents)
]
]
]
]
]
]
)
);
```
### Show Fields Based on Customer Location
Display fields only for customers from specific countries:
```php
woocommerce_register_additional_checkout_field(
array(
'id' => 'my-plugin/tax-exemption-number',
'label' => __('Tax exemption number', 'your-text-domain'),
'location' => 'address',
'type' => 'text',
'required' => [
'customer' => [
'properties' => [
'address' => [
'properties' => [
'country' => [
'enum' => ['US', 'CA'] // Required only for US and Canada
]
]
]
]
]
],
'hidden' => [
'customer' => [
'properties' => [
'address' => [
'properties' => [
'country' => [
'not' => [
'enum' => ['US', 'CA'] // Hide for countries other than US and Canada
]
]
]
]
]
]
]
)
);
```
### Show Fields Based on Other Field Values
Create dependent fields where one field’s visibility depends on another field’s value:
```php
// First field - service type selection
woocommerce_register_additional_checkout_field(
array(
'id' => 'my-plugin/service-type',
'label' => __('Type of service needed', 'your-text-domain'),
'location' => 'order',
'type' => 'select',
'options' => array(
array( 'value' => 'standard', 'label' => 'Standard' ),
array( 'value' => 'express', 'label' => 'Express' ),
array( 'value' => 'custom', 'label' => 'Custom' ),
),
)
);
// Second field - only show when "custom" is selected
woocommerce_register_additional_checkout_field(
array(
'id' => 'my-plugin/custom-requirements',
'label' => __('Describe your custom requirements', 'your-text-domain'),
'location' => 'order',
'type' => 'text',
'required' => [
'checkout' => [
'properties' => [
'additional_fields' => [
'properties' => [
'my-plugin/service-type' => [
'const' => 'custom'
]
]
]
]
]
],
'hidden' => [
'checkout' => [
'properties' => [
'additional_fields' => [
'properties' => [
'my-plugin/service-type' => [
'not' => [
'const' => 'custom'
]
]
]
]
]
]
]
)
);
```
## Practical Complete Example
Here’s a comprehensive example for a store that offers both digital and physical products:
```php
add_action( 'woocommerce_init', function() {
if ( ! function_exists( 'woocommerce_register_additional_checkout_field' ) ) {
return;
}
// Delivery preference - only for physical products
woocommerce_register_additional_checkout_field(
array(
'id' => 'my-store/delivery-preference',
'label' => __('Delivery preference', 'your-text-domain'),
'location' => 'order',
'type' => 'select',
'options' => array(
array( 'value' => 'doorstep', 'label' => __('Leave at doorstep', 'your-text-domain') ),
array( 'value' => 'neighbor', 'label' => __('Leave with neighbor', 'your-text-domain') ),
array( 'value' => 'pickup_point', 'label' => __('Delivery to pickup point', 'your-text-domain') ),
),
'required' => [
'cart' => [
'properties' => [
'needs_shipping' => [
'const' => true
]
]
]
],
'hidden' => [
'cart' => [
'properties' => [
'needs_shipping' => [
'const' => false
]
]
]
]
)
);
// Delivery instructions - only when 'doorstep' is selected
woocommerce_register_additional_checkout_field(
array(
'id' => 'my-store/doorstep-instructions',
'label' => __('Specific doorstep delivery instructions', 'your-text-domain'),
'location' => 'order',
'type' => 'text',
'required' => [
'checkout' => [
'properties' => [
'additional_fields' => [
'properties' => [
'my-store/delivery-preference' => [
'const' => 'doorstep'
]
]
]
]
]
],
'hidden' => [
'checkout' => [
'properties' => [
'additional_fields' => [
'properties' => [
'my-store/delivery-preference' => [
'not' => [
'const' => 'doorstep'
]
]
]
]
]
]
]
)
);
// Digital delivery email - only for digital products
woocommerce_register_additional_checkout_field(
array(
'id' => 'my-store/digital-delivery-email',
'label' => __('Alternative email for digital products', 'your-text-domain'),
'location' => 'contact',
'type' => 'text',
'required' => [
'cart' => [
'properties' => [
'needs_shipping' => [
'const' => false
]
]
]
],
'hidden' => [
'cart' => [
'properties' => [
'needs_shipping' => [
'const' => true
]
]
]
],
'sanitize_callback' => function ( $field_value ) {
return sanitize_email( $field_value );
},
'validate_callback' => function ( $field_value ) {
if ( ! is_email( $field_value ) ) {
return new \WP_Error( 'invalid_alt_email', __('Please ensure your alternative email matches the correct format.', 'your-text-domain') );
}
},
)
);
});
```
## Available data for conditions
You can create conditions based on various checkout data:
1. Cart information: Total price, items, shipping rates, coupons, weight
2. Customer data: ID, billing/shipping addresses, email
3. Other additional fields: Reference values from other custom fields and more!
## Next Steps
Conditional visibility transforms static checkout forms into dynamic, intelligent interfaces that adapt to your customers’ needs. Combined with the basic additional fields from our previous post, you can create sophisticated checkout experiences that collect exactly the right information at exactly the right time.
Start experimenting with simple conditions and gradually build more complex logic as you become comfortable with the JSON Schema syntax. Your customers will appreciate the cleaner, more relevant checkout experience!
---
## Handling scripts, styles, and data
*Source: block-development/cart-and-checkout-blocks/integration-interface.md*
# Handling scripts, styles, and data
## The problem
You are an extension developer, and to allow users to interact with your extension on the client-side, you have written some CSS and JavaScript that you would like to be included on the page. Your JavaScript also relies on some server-side data, and you'd like this to be available to your scripts.
## The solution
You may use the `IntegrationRegistry` to register an `IntegrationInterface` this will be a class that will handle the enqueuing of scripts, styles, and data. You may have a different `IntegrationInterface` for each block (Mini-Cart, Cart and Checkout), or you may use the same one, it is entirely dependent on your use case.
You should use the hooks: `woocommerce_blocks_mini-cart_block_registration`. `woocommerce_blocks_cart_block_registration` and `woocommerce_blocks_checkout_block_registration`. These hooks pass an instance of [`IntegrationRegistry`](https://github.com/woocommerce/woocommerce-gutenberg-products-block/blob/trunk/src/Integrations/IntegrationRegistry.php) to the callback.
You may then use the `register` method on this object to register your `IntegrationInterface`.
## `IntegrationInterface` methods
To begin, we'll need to create our integration class, our `IntegrationInterface`. This will be a class that implements WooCommerce Blocks' interface named [`IntegrationInterface`](https://github.com/woocommerce/woocommerce-gutenberg-products-block/blob/trunk/src/Integrations/IntegrationInterface.php).
In this section, we will step through the interface's members and discuss what they are used for.
### `get_name()`
This is the `IntegrationInterface`'s way of namespacing your integration. The name chosen here should be unique to your extension. This method should return a string.
### `initialize()`
This is where any setup, or initialization for your integration should be placed. For example, you could register the scripts and styles your extension needs here. This method should not return anything.
### `get_script_handles()`
This is where the handles of any scripts you want to be enqueued on the client-side in the frontend context should be placed. This method should return an array of strings.
### `get_editor_script_handles()`
This is where the handles of any scripts you want to be enqueued on the client-side in the editor context should be placed. This method should return an array of strings.
### `get_script_data()`
This is where you can set values you want to be available to your scripts on the frontend. This method should return an associative array, the keys of which will be used to get the data using the JavaScript function `getSetting`.
The keys and values of this array should all be serializable.
## Usage example
Let's suppose we're the author of an extension: `WooCommerce Example Plugin`. We want to enqueue scripts, styles, and data on the frontend when either the Mini-Cart, Cart or Checkout blocks are being used.
We also want some data from a server-side function to be available to our front-end scripts.
You will notice that in the example below, we reference the `/build/index.asset.php` file. This is created by the [`DependencyExtractionWebpackPlugin`](https://www.npmjs.com/package/@wordpress/dependency-extraction-webpack-plugin) which creates a PHP file mapping the dependencies of your client-side scripts, so that they can be added in the `dependencies` array of `wp_register_script`.
Let's create our `IntegrationInterface`.
```php
array(),
'version' => $this->get_file_version( $script_path ),
);
wp_enqueue_style(
'wc-blocks-integration',
$style_url,
[],
$this->get_file_version( $style_path )
);
wp_register_script(
'wc-blocks-integration',
$script_url,
$script_asset['dependencies'],
$script_asset['version'],
true
);
wp_set_script_translations(
'wc-blocks-integration',
'woocommerce-example-plugin',
dirname( \WooCommerce_Example_Plugin_Assets::$plugin_file ) . '/languages'
);
}
/**
* Returns an array of script handles to enqueue in the frontend context.
*
* @return string[]
*/
public function get_script_handles() {
return array( 'wc-blocks-integration' );
}
/**
* Returns an array of script handles to enqueue in the editor context.
*
* @return string[]
*/
public function get_editor_script_handles() {
return array( 'wc-blocks-integration' );
}
/**
* An array of key, value pairs of data made available to the block on the client side.
*
* @return array
*/
public function get_script_data() {
$woocommerce_example_plugin_data = some_expensive_serverside_function();
return [
'expensive_data_calculation' => $woocommerce_example_plugin_data
];
}
/**
* Get the file modified time as a cache buster if we're in dev mode.
*
* @param string $file Local path to the file.
* @return string The cache buster value to use for the given file.
*/
protected function get_file_version( $file ) {
if ( defined( 'SCRIPT_DEBUG' ) && SCRIPT_DEBUG && file_exists( $file ) ) {
return filemtime( $file );
}
// As above, let's assume that WooCommerce_Example_Plugin_Assets::VERSION resolves to some versioning number our
// extension uses.
return \WooCommerce_Example_Plugin_Assets::VERSION;
}
}
```
As mentioned, we will need register our `IntegrationInterface` with WooCommerce Blocks, as we want our scripts to be included when either the Mini-Cart, Cart or Checkout is used, we need to register callbacks for three actions.
```php
add_action(
'woocommerce_blocks_mini-cart_block_registration',
function( $integration_registry ) {
$integration_registry->register( new WooCommerce_Example_Plugin_Integration() );
}
);
add_action(
'woocommerce_blocks_cart_block_registration',
function( $integration_registry ) {
$integration_registry->register( new WooCommerce_Example_Plugin_Integration() );
}
);
add_action(
'woocommerce_blocks_checkout_block_registration',
function( $integration_registry ) {
$integration_registry->register( new WooCommerce_Example_Plugin_Integration() );
}
);
```
Now, when we load a page containing either block, we should see the scripts we registered in `initialize` being loaded!
### Getting data added in `get_script_data`
We associated some data with the extension in the `get_script_data` method of our interface, we need to know how to get this!
In the `@woocommerce/settings` package there is a method you can import called `getSetting`. This method accepts a string. The name of the setting containing the data added in `get_script_data` is the name of your integration (i.e. the value returned by `get_name`) suffixed with `_data`. In our example it would be: `woocommerce-example-plugin_data`.
The value returned here is a plain old JavaScript object, keyed by the keys of the array returned by `get_script_data`, the values will serialized.
---
## Overview of data flow between client and server
*Source: block-development/cart-and-checkout-blocks/overview-of-data-flow.md*
# Overview of data flow between client and server
In the WooCommerce Cart and Checkout blocks, the server is the source of truth for critical transactional and persistent data. This includes:
- Cart item details (items, quantities, and prices)
- Cart totals (e.g. taxes, fees, subtotals)
- Customer information (shipping and billing addresses, other customer data)
- Additional fields added using the [Additional Checkout Fields API](https://developer.woocommerce.com/docs/cart-and-checkout-additional-checkout-fields/) are also persisted server-side.
- Shipping methods and rates
- Other cart details, such as applied coupons
Such data must be persisted server-side to ensure accuracy, consistency, and reliability across different user sessions and devices.
Ephemeral UI state—such as temporary validation states, or UI-specific interactions like expanded/collapsed sections should remain client-side and not be automatically persisted on the server, unless the specific state needs to be maintained across page loads or is critical to the user's checkout process.
You may wish to get data from the server into the client, and vice/versa. This document will outline the general concepts and data flow in the Cart/Checkout blocks, and provide links, or guidance on some common use cases.
## Where is data stored?
All the data relating to a cart, customer, and order is stored on the server, either in the database or in the customer's session. When it is sent to the client, it is stored in [`@wordpress/data`](https://developer.wordpress.org/block-editor/reference-guides/packages/packages-data/) data stores.
## How do I get my Server-side (PHP) data into the client (JavaScript) and vice/versa
Since the server is the source of truth, all data from the client should eventually make its way there if it needs to be persisted with the order.
There is also the case that your client needs data that can only be derived server-side, such as configuration options set in the WooCommerce settings dashboard, or data coming from external services (e.g. courier rates or payment APIs).
### Server (PHP) to Client (JavaScript)
There are two ways to get your data from the server to the client, depending on whether it is static or dynamic.
#### Static data
Static data is not likely to change based on actions the shopper takes, for example, an option from the WooCommerce settings dashboard. The recommended way of getting this data to the client is using the `AssetDataRegistry`.
When data is added here, it is serialized and sent to the client on page load. It will not change based on actions the shopper takes, e.g. adding items to the cart or changing their address.
A key/value pair can be added to the registry like so:
```php
add_action(
'woocommerce_blocks_loaded',
function() {
$asset_data_registry = \Automattic\WooCommerce\Blocks\Package::container()->get( \Automattic\WooCommerce\Blocks\Assets\AssetDataRegistry::class );
$asset_data_registry->add( 'namespace/value', 'this is a custom value' );
}
);
```
If a duplicate key exists, it will not be overwritten. Using a unique identifier is important, the recommendation is `namespace/value` to help ensure the key is unique.
To get this data on the client, use `wc.wcSettings.getSetting` like so:
```js
const myCustomValue = wc.wcSettings.getSetting(
'namespace/value',
'Fallback value.'
);
```
#### Dynamic data
Dynamic data is data that is likely to change in response to the shopper's actions, for example, changing location, or items in the cart. In this case, you need to add this to the cart API response. The cart response is sent on many routes during the shopper's journey, and on almost every API response triggered by the Cart/Checkout blocks.
To add data here, you'll need to extend the API response. See [Exposing your data in the Store API](https://github.com/woocommerce/woocommerce/blob/trunk/plugins/woocommerce/client/blocks/docs/third-party-developers/extensibility/rest-api/extend-rest-api-add-data.md).
### Client (JavaScript) to Server (PHP)
Getting data from the client to the server can be done in three different ways:
#### Checkout field updates
When the shopper updates a checkout field, the data is sent to the server immediately. For Additional Fields, this is sent via a PUT request to the `/checkout` endpoint. For address fields, this is sent via a POST request to the `cart/update-customer` endpoint (via batch). Both will return an updated cart, which is then applied to the client and totals are updated.
#### Piggybacking on a Store API request
This is useful for things that don't require an immediate response from the server, for example if you've added a new block to the Checkout and it contains a form field that should be saved along with the order. If this form field just needs to be saved and doesn't need to update any other values in the cart, then the data should be sent with the checkout request. The [Add a new inner block containing a custom field to the WooCommerce Checkout Block](https://github.com/woocommerce/woocommerce/blob/trunk/plugins/woocommerce/client/blocks/docs/third-party-developers/extensibility/rest-api/extend-rest-api-add-custom-fields.md) documentation provides a worked example of using `setExtensionData` along with extending the Store API to receive your data in an existing request.
#### Sending data on-demand using `extensionCartUpdate`
You may wish to send your data to the server immediately, rather than waiting for a Store API request to be made. This may be desired if the data may update the cart, for example adding fees, changing which shipping methods are available, or changing the tax rates.
The [Updating the cart on-demand with the Store API](https://github.com/woocommerce/woocommerce/blob/trunk/plugins/woocommerce/client/blocks/docs/third-party-developers/extensibility/rest-api/extend-rest-api-update-cart.md) document outlines how to do this.
## When is data sent/received in the Cart/Checkout blocks?
### Page load
On page load, if the Cart or Checkout block is present, the cart state is sent along with the initial request, and is hydrated into a client-side [`@wordpress/data`](https://developer.wordpress.org/block-editor/reference-guides/packages/packages-data/) data store.
On page load, the `wc/store/cart` and `wc/store/checkout` data stores are hydrated with the data from the server. The `wc/store/payment` data store is populated partly with data from the server, but needs some client-side processing to finish before all payment methods are registered there.
### Entering customer data into the checkout form
When the shopper enters data into the form, the data is immediately written to the `wc/store/cart` data store, and a debounced method called [`pushChanges`](https://github.com/woocommerce/woocommerce/blob/4861ec250ef1789f814f4209755165e8abe7b838/plugins/woocommerce-blocks/assets/js/data/cart/push-changes.ts#L167) is called. This method sends the customer data to the server where it is persisted against the customer. The full cart is sent back as a response, and the data store is updated with this.
This is important to note, because if any code is running on the server that modifies the customer addresses, then it will be reflected in the response.
For example, if a plugin modifies the address data to ensure all city names are capitalised, and the shopper enters "london" into the city, when the data is returned to the client, the text would change to "London" and the input field would update.
Modifying form fields while the shopper is interacting with them is a jarring experience, so instead of making these changes while the user is interacting with the form, consider making them while processing the checkout action on the server.
### Adding coupons
When the shopper expands the coupon form, the state is stored locally. This kind of data is not sent to the server. The request to add the coupon is made when the shopper presses the Apply button. A Store API request is made and it returns a new cart which is then applied.
### Changing shipping method
When the shopper changes shipping method, a Store API request is made and it returns a new cart which is then applied.
### Changing payment method
When the shopper changes payment method, it does not automatically send a Store API request to the server. If you need to update the server when the payment method is changed and before the order is placed, the correct approach would be to use [`cartExtensionUpdate`](https://github.com/woocommerce/woocommerce/blob/trunk/plugins/woocommerce/client/blocks/docs/third-party-developers/extensibility/rest-api/extend-rest-api-update-cart.md).
### Adding/editing order notes
Adding or editing order notes is stored locally on the client, these notes are not sent to the server until the shopper submits the checkout form.
## Cart
The items listed in the Checkout section above also apply to the Cart block (besides changing payment method, the shopper cannot select their payment method on the Cart block unless it's an express payment method, which behaves differently and is implemented entirely client-side).
### Changing item quantity, adding, or removing items
When the shopper updates an item's quantity, removes an item from their cart, or adds an item (e.g. from the Cart cross-sells block) a Store API request is made. The local cart is updated with the response.
### Using the shipping calculator
This behaves the same way as the address forms in the Checkout block, however the address in the shipping calculator is only sent to the server if the postcode is valid, and all required fields have values.
---
## Removing checkout fields
*Source: block-development/cart-and-checkout-blocks/removing-checkout-fields.md*
# Removing checkout fields
If you're trying to extend the new Checkout block, you might notice the previous `checkout_fields` isn't working. This is intentional as we want to offer more curated extensibility paths. With that said, one of the most common requests we get is how to disable Checkout fields for certain order types. This is not something we encourage, but we are sharing the details due to how commonly requested it is.
## Why we don't encourage removing fields
The simple reason is that Checkout is complex, and many plugins need different data, payment methods will need your address info to run fraud detection, or validate your card, tax (including core) will need your full address to calculate taxes correctly, this is something we still think about in Checkout and are looking for a universal solution. While we work on this solution, the document below will help you remove checkout fields.
## Disabling fields for a single country
Checkout fields still respect country locale, which means you can modify fields for a country via PHP and this would work fine. The following billing form has 10 fields, 7 of them are required:

Let's say that in Algeria, we know for sure that postal code and city are redundant, so we can remove them:
```php
add_filter('woocommerce_get_country_locale', function( $locale ) {
$locale['DZ']['postcode']['required'] = false;
$locale['DZ']['postcode']['hidden'] = true;
$locale['DZ']['city']['required'] = false;
$locale['DZ']['city']['hidden'] = true;
return $locale;
});
```
With the code above, both of those fields are removed for Algeria, but not for other countries, which is a good and safe update.

Keep in mind that this will remove fields for both shipping and billing. We think strongly that billing shape should match shipping shape.
## Removing every field except Country and names
We can follow up with removing all other fields except Country, removing the country would fail your order, as we need country to know which fields to remove:
```php
add_filter('woocommerce_get_country_locale', function( $locale ) {
$locale['DZ']['address_1'] = [
'required' => false,
'hidden' => true,
];
$locale['DZ']['postcode'] = [
'required' => false,
'hidden' => true,
];
$locale['DZ']['city'] = [
'required' => false,
'hidden' => true,
];
$locale['DZ']['company'] = [
'required' => false,
'hidden' => true,
];
$locale['DZ']['state'] = [
'required' => false,
'hidden' => true,
];
$locale['DZ']['phone'] = [
'required' => false,
'hidden' => true,
];
return $locale;
});
```
This is the result:

You notice that Address Line 2 is not visible, this is because it will always be skipped if Address Line 1 is skipped.
## Removing Company and Phone
One easy way (if you have access to the website), is to just toggle off the fields from the editor:

This would be the result:

## Removing Company and Phone via code
Unlike other fields, Phone, Company, and Address 2 state is persisted to the database via an option:
- `woocommerce_checkout_phone_field`
- `woocommerce_checkout_company_field`
- `woocommerce_checkout_address_2_field`
The value of those options can be: `required`, `optional`, or `hidden`. They manage the default state of the field. So you can edit that, but still leave agency to the merchant to set it as they see fit. You can also edit them based on locale/country.
To edit the default value:
```php
add_filter(
'default_option_woocommerce_checkout_phone_field',
function ( $default_value ) {
return "required";
},
10,
1
);
```
If you want to change the value depending on locale (overriding the merchant value for that country), you can use the examples above.
Till now, all changes are applied to Algeria only, customers switching would see the correct fields for each country:

## Applying changes to all countries you sell to
As with the above, this is not something we recommend unless you sell to a very controlled set of countries and tested this with each country. Some payment gateways would only enable fraud detection on production mode and not test mode, and your fields that passed test mode fails in production mode, but here it is regardless:
```php
add_filter('woocommerce_get_country_locale', function( $locale ) {
foreach ( $locale as $key => $value ) {
$locale[ $key ]['address_1'] = [
'required' => false,
'hidden' => true,
];
$locale[ $key ]['postcode'] = [
'required' => false,
'hidden' => true,
];
$locale[ $key ]['city'] = [
'required' => false,
'hidden' => true,
];
$locale[ $key ]['state'] = [
'required' => false,
'hidden' => true,
];
}
return $locale;
});
```
The above code would loop over all counties you sell and disable the fields there.
## Limiting changes to virtual carts only
We can choose to remove fields for virtual cart (ones that only require billing and no shipping), this can be done with some extra checks:
```php
add_filter('woocommerce_get_country_locale', function( $locale ) {
$cart = wc()->cart;
// Only remove fields if we're operating on a cart.
if ( ! $cart ) {
return $locale;
}
// Only remove fields if we're dealing with a virtual cart.
if ( $cart->needs_shipping() ) {
return $locale;
}
// Perform the rest of the logic below...
```
## Editing the address card text
For future visits, Checkout will show an address card for saved addresses, this isn't working constantly right now for billing, but once it works, it will show up like this:

We can edit that using PHP, because the value is coming from `get_address_formats` function, which passes through the `woocommerce_localisation_address_formats` filter.
We can use the following code:
```php
add_filter( 'woocommerce_localisation_address_formats', function( $formats ) {
foreach ( $formats as $key => $format ) {
$formats[ $key ] = "{first_name} {last_name}\n{country}";
// You can also use `{name}` instead of first name and last name.
}
return $formats;
} );
```

A note that you need to pass the string in double quotes for it to work; otherwise the line breaks won't be recognized.
---
## Slot and fill
*Source: block-development/cart-and-checkout-blocks/slot-fills.md*
# Slot and fill
## The problem
You added custom data to the [Store API](https://github.com/woocommerce/woocommerce/blob/trunk/plugins/woocommerce/client/blocks/docs/third-party-developers/extensibility/rest-api/extend-rest-api-add-data.md). You changed several strings using [Checkout filters](./available-filters/README.md). Now you want to render your own components in specific places in the Cart and Checkout.
## Solution
Slot and Fill are a pair of components that add the possibility to render your own HTML in pre-defined places in the Cart and Checkout. Your component will get access to contextual data and will get re-rendered when needed.
A _Slot_ is a place in the Cart and Checkout that can render an indefinite number of external components.
A _Fill_ is the component provided by third-party developers to render inside a _Slot_.
Slot and Fill use WordPress' API, and you can learn more about how they work in [the Slot and Fill documentation.](https://github.com/WordPress/gutenberg/tree/trunk/packages/components/src/slot-fill).
## Basic Usage
`ExperimentalOrderMeta` is a fill that will render in a slot below the Order summary section in the Cart and Checkout blocks.
The `ExperimentalOrderMeta` will automatically pass props to its top level child:
- `cart` which contains cart data
- `extensions` which contains data registered with `ExtendSchema::class` in `wc/store/cart` endpoint
- `context`, equal to the name of the Block in which the fill is rendered: `woocommerce/cart` or `woocommerce/checkout`
```jsx
const { registerPlugin } = wp.plugins;
const { ExperimentalOrderMeta } = wc.blocksCheckout;
const MyCustomComponent = ( { cart, extensions } ) => {
return Hello WooCommerce
;
};
const render = () => {
return (
);
};
registerPlugin( 'my-plugin-namespace', {
render,
scope: 'woocommerce-checkout',
} );
```
## registerPlugin
In the above example, we're using `registerPlugin`. This plugin will take our component and render it, but it won't make it visible. The SlotFill part is the one responsible for actually having it show up in the correct place.
You use `registerPlugin` to feed in your plugin namespace, your component `render`, and the scope of your `registerPlugin`. The value of scope should always be `woocommerce-checkout`.
## Requirements
For this to work, your script must be enqueued after Cart and Checkout. You can follow the [IntegrationInterface](https://github.com/woocommerce/woocommerce-gutenberg-products-block/blob/50f9b3e8d012f425d318908cc13d9c601d97bd68/docs/extensibility/integration-interface.md) documentation for enqueueing your script.
---
## Extensibility in blocks
*Source: block-development/extensibility-in-blocks/README.md*
# Extensibility in blocks
These documents are all dealing with extensibility in the various WooCommerce Blocks.
## Imports and dependency extraction
The documentation in this section will use window globals in code examples, for example:
```js
const { registerCheckoutFilters } = window.wc.blocksCheckout;
```
However, if you're using `@woocommerce/dependency-extraction-webpack-plugin` for enhanced dependency management you can instead use ES module syntax:
```js
import { registerCheckoutFilters } from '@woocommerce/blocks-checkout';
```
See [@woocommerce/dependency-extraction-webpack-plugin](https://www.npmjs.com/package/@woocommerce/dependency-extraction-webpack-plugin) for more information.
## Hooks (actions and filters)
| Document | Description |
| ------------------------------------------------------------------------------------------------------------------------------------------------------ | ----------------------------------------------------------- |
| [Actions](https://github.com/woocommerce/woocommerce/blob/trunk/plugins/woocommerce/client/blocks/docs/third-party-developers/extensibility/hooks/actions.md) | Documentation covering action hooks on the server side. |
| [Filters](https://github.com/woocommerce/woocommerce/blob/trunk/plugins/woocommerce/client/blocks/docs/third-party-developers/extensibility/hooks/filters.md) | Documentation covering filter hooks on the server side. |
| [Migrated Hooks](https://developer.woocommerce.com/docs/cart-and-checkout-legacy-hooks/) | Documentation covering the migrated WooCommerce core hooks. |
## REST API
| Document | Description |
| ----------------------------------------------------------------------------------------------------------------------------------------------------------------------------------------------------------------------- | ------------------------------------------------------------------- |
| [Exposing your data in the Store API.](https://github.com/woocommerce/woocommerce/blob/trunk/plugins/woocommerce/client/blocks/docs/third-party-developers/extensibility/rest-api/extend-rest-api-add-data.md) | Explains how you can add additional data to Store API endpoints. |
| [Available endpoints to extend with ExtendSchema](https://github.com/woocommerce/woocommerce/blob/trunk/plugins/woocommerce/client/blocks/docs/third-party-developers/extensibility/rest-api/available-endpoints-to-extend.md) | A list of all available endpoints to extend. |
| [Available Formatters](https://github.com/woocommerce/woocommerce/blob/trunk/plugins/woocommerce/client/blocks/docs/third-party-developers/extensibility/rest-api/extend-rest-api-formatters.md) | Available `Formatters` to format data for use in the Store API. |
| [Updating the cart with the Store API](https://github.com/woocommerce/woocommerce/blob/trunk/plugins/woocommerce/client/blocks/docs/third-party-developers/extensibility/rest-api/extend-rest-api-update-cart.md) | Update the server-side cart following an action from the front-end. |
## Checkout Payment Methods
| Document | Description |
| ----------------------------------------------------------------------------------------------------------------------------------------- | ----------------------------------------------------------------------------------------------------------- |
| [Checkout Flow and Events](https://developer.woocommerce.com/docs/cart-and-checkout-checkout-flow-and-events/) | All about the checkout flow in the checkout block and the various emitted events that can be subscribed to. |
| [Payment Method Integration](https://developer.woocommerce.com/docs/cart-and-checkout-payment-method-integration-for-the-checkout-block/) | Information about implementing payment methods. |
| [Filtering Payment Methods](https://developer.woocommerce.com/docs/cart-and-checkout-filtering-payment-methods-in-the-checkout-block/) | Information about filtering the payment methods available in the Checkout Block. |
## Checkout Block
In addition to the reference material below, [please see the `block-checkout` package documentation](https://github.com/woocommerce/woocommerce/blob/trunk/plugins/woocommerce/client/blocks/packages/checkout/README.md) which is used to extend checkout with Filters, Slot Fills, and Inner Blocks.
| Document | Description |
| ------------------------------------------------------------------------------------------------------------------------------------------------ | ----------------------------------------------------------------------------------------------------------------- |
| [How the Checkout Block processes an order](https://developer.woocommerce.com/docs/cart-and-checkout-how-the-checkout-block-processes-an-order/) | The detailed inner workings of the Checkout Flow. |
| [IntegrationInterface](https://developer.woocommerce.com/docs/cart-and-checkout-handling-scripts-styles-and-data/) | The `IntegrationInterface` class and how to use it to register scripts, styles, and data with WooCommerce Blocks. |
| [Available Filters](https://developer.woocommerce.com/docs/category/cart-and-checkout-blocks/available-filters/) | All about the filters that you may use to change values of certain elements of WooCommerce Blocks. |
| [Slots and Fills](https://developer.woocommerce.com/docs/cart-and-checkout-slot-and-fill/) | Explains Slot Fills and how to use them to render your own components in Cart and Checkout. |
| [Available Slot Fills](https://developer.woocommerce.com/docs/cart-and-checkout-available-slots/) | Available Slots that you can use and their positions in Cart and Checkout. |
| [DOM Events](https://developer.woocommerce.com/docs/cart-and-checkout-dom-events/) | A list of DOM Events used by some blocks to communicate between them and with other parts of WooCommerce. |
| [Filter Registry](https://github.com/woocommerce/woocommerce/blob/trunk/plugins/woocommerce/client/blocks/packages/checkout/filter-registry/README.md) | The filter registry allows callbacks to be registered to manipulate certain values. |
| [Additional Checkout Fields](https://developer.woocommerce.com/docs/cart-and-checkout-additional-checkout-fields/) | The filter registry allows callbacks to be registered to manipulate certain values. |
---
## Product collection block
*Source: block-development/product-collection-block/README.md*
# Product collection block
---
## DOM events sent from product collection block
*Source: block-development/product-collection-block/dom-events.md*
# DOM events sent from product collection block
## `wc-blocks_product_list_rendered`
This event is triggered when Product Collection block was rendered or re-rendered (e.g. due to page change).
### `detail` parameters
| Parameter | Type | Default value | Description |
| ------------------ | ------- | ------------- | --------------------------------------------------------------------------------------------------------------------------------------------------------------------------------------------------------------------------------------------------------------------------------------------------------------------------------------------------------------------------------------------- |
| `collection` | string | `undefined` | Collection type. It's `undefined` for "create your own" collections as the type is not specified. For other Core collections it can be one of type: `woocommerce/product-collection/best-sellers`, `woocommerce/product-collection/featured`, `woocommerce/product-collection/new-arrivals`, `woocommerce/product-collection/on-sale`, `woocommerce/product-collection/top-rated`. For custom collections it will hold their name. |
### Example usage
```javascript
window.document.addEventListener(
'wc-blocks_product_list_rendered',
( e ) => {
const { collection } = e.detail;
console.log( collection ) // -> collection name, e.g. woocommerce/product-collection/on-sale
}
);
```
## Event: `wc-blocks_viewed_product`
This event is triggered when some blocks are clicked in order to view product (redirect to product page).
### `detail` parameters
| Parameter | Type | Default value | Description |
| ------------------ | ------- | ------------- | --------------------------------------------------------------------------------------------------------------------------------------------------------------------------------------------------------------------------------------------------------------------------------------------------------------------------------------------------------------------------------------------- |
| `collection` | string | `undefined` | Collection type. It's `undefined` for "create your own" collections as the type is not specified. For other Core collections it can be one of type: `woocommerce/product-collection/best-sellers`, `woocommerce/product-collection/featured`, `woocommerce/product-collection/new-arrivals`, `woocommerce/product-collection/on-sale`, `woocommerce/product-collection/top-rated`. For custom collections it will hold their name. |
| `productId` | number | | Product ID |
### Example usage
```javascript
window.document.addEventListener(
'wc-blocks_viewed_product',
( e ) => {
const { collection, productId } = e.detail;
console.log( collection ) // -> collection name, e.g. "woocommerce/product-collection/featured" or undefined for default one
console.log( productId ) // -> product ID, e.g. 34
}
);
```
---
## Registering custom collections in product collection block
*Source: block-development/product-collection-block/register-product-collection.md*
# Registering custom collections in product collection block
The `__experimentalRegisterProductCollection` function is part of the `@woocommerce/blocks-registry` package. This function allows third party developers to register a new collection. This function accepts most of the arguments that are accepted by [Block Variation](https://developer.wordpress.org/block-editor/reference-guides/block-api/block-variations/#defining-a-block-variation).
**CAUTION:** It's experimental and may change in the future. Please use it with caution.
**There are two ways to use this function:**
1. Using `@woocommerce/dependency-extraction-webpack-plugin` in a Webpack configuration: This will allow you to import the function from the package & use it in your code. For example:
```tsx
import { __experimentalRegisterProductCollection } from "@woocommerce/blocks-registry";
```
2. Using the global `wc` object: This will allow you to use the function using the global JS object without importing it. For example:
```tsx
wc.wcBlocksRegistry.__experimentalRegisterProductCollection({
...
});
```
Be sure to add `wc-blocks-registry` as a dependency to your script if you opt to use the `wc` global.
```php
function enqueue_my_custom_product_collection_script() {
wp_enqueue_script(
'my-custom-product-collection',
plugins_url( '/dist/my-custom-product-collection.js', __FILE__ ),
array( 'wc-blocks-registry' ),
10
);
}
add_action( 'enqueue_block_editor_assets', 'enqueue_my_custom_product_collection_script' );
```
**Tip:** The first method is recommended if you are using Webpack.
## Defining a Collection
We will explain important arguments that can be passed to `__experimentalRegisterProductCollection`. For other arguments, you can refer to the [Block Variation](https://developer.wordpress.org/block-editor/reference-guides/block-api/block-variations/#defining-a-block-variation) documentation.
A Collection is defined by an object that can contain the following fields:
- `name` (type `string`): A unique and machine-readable collection name. We recommend using the format `/product-collection/`. Both `` and `` should consist only of alphanumeric characters and hyphens (e.g., `my-plugin/product-collection/my-collection`).
- `title` (type `string`): The title of the collection, which will be displayed in various places including the block inserter and collection chooser.
- `description` (optional, type `string`): A human-readable description of the collection.
- `innerBlocks` (optional, type `Array[]`): An array of inner blocks that will be added to the collection. If not provided, the default inner blocks will be used.
- `isDefault`: It's set to `false` for all collections. Third party developers don't need to pass this argument.
- `isActive`: It will be managed by us. Third party developers don't need to pass this argument.
- `usesReference` (optional, type `Array[]`): An array of strings specifying the required reference for the collection. Acceptable values are `product`, `archive`, `cart`, and `order`. When the required reference isn't available on Editor side but will be available in Frontend, we will show a preview label.
- `scope` (optional, type `Array[]`): The list of scopes where the collection is applicable. Acceptable values are `block`, `inserter`, and `transform`. Defaults to `["block", "inserter"]`.
- **Note:** For Product Collection block, `block` scope means that the collection will be shown in Collection Chooser and "Choose Collection" toolbar button will be visible. For other scopes, you can refer to the [Block Variation](https://developer.wordpress.org/block-editor/reference-guides/block-api/block-variations/#defining-a-block-variation) documentation.
### Attributes
Attributes are the properties that define the behavior of the collection. All the attributes are *optional*. Here are some of the important attributes that can be passed to `__experimentalRegisterProductCollection`:
- `query` (type `object`): The query object that defines the query for the collection. It can contain the following fields:
- `offset` (type `number`): The number of items to offset the query by.
- `order` (type `string`): The order of the query. Accepted values are `asc` and `desc`.
- `orderBy` (type `string`): The field to order the query by.
- `pages` (type `number`): The number of pages to query.
- `perPage` (type `number`): The number of products per page.
- `search` (type `string`): The search term to query by.
- `taxQuery` (type `object`): The tax query to filter the query by. For example, if you wanna fetch products with category `Clothing` & `Accessories` and tag `Summer` then you can pass `taxQuery` as `{"product_cat":[20,17],"product_tag":[36]}`. Where array values are the term IDs.
- `featured` (type `boolean`): Whether to query for featured items.
- `timeFrame` (type `object`): The time frame to query by.
- `operator` (type `string`): The operator to use for the time frame query. Accepted values are `in` and `not-in`.
- `value` (type `string`): The value to query by. It should be a valid date string that PHP's `strtotime` function can parse.
- `woocommerceOnSale` (type `boolean`): Whether to query for items on sale.
- `woocommerceStockStatus` (type `array`): The stock status to query by. Some of the accepted values are `instock`, `outofstock`, `onbackorder`.
- `woocommerceAttributes` (type `array`): The attributes to query by.
- For example, if you wanna fetch products with color `blue` & `gray` and size `Large` then you can pass `woocommerceAttributes` as `[{"termId":23,"taxonomy":"pa_color"},{"termId":26,"taxonomy":"pa_size"},{"termId":29,"taxonomy":"pa_color"}]`.
- `woocommerceHandPickedProducts` (type `array`): The hand-picked products to query by. It should contain the product IDs.
- `priceRange` (type `object`): The price range to query by.
- `min` (type `number`): The minimum price.
- `max` (type `number`): The maximum price.
- `displayLayout` (type `object`): The display layout object that defines the layout of the collection. It can contain the following fields:
- `type` (type `string`): The type of layout. Accepted values are `grid` and `stack`.
- `columns` (type `number`): The number of columns to display.
- `shrinkColumns` (type `boolean`): Whether the layout should be responsive.
- `hideControls` (type `array`): The controls to hide. Possible values:
- `order` - "Order by" setting
- `attributes` - "Product Attributes" filter
- `created` - "Created" filter
- `featured` - "Featured" filter
- `hand-picked` - "Hand-picked Products" filter
- `keyword` - "Keyword" filter
- `on-sale` - "On Sale" filter
- `stock-status` - "Stock Status" filter
- `taxonomy` - "Product Categories", "Product Tags" and custom taxonomies filters
- `price-range` - "Price Range" filter
#### Preview Attribute
The `preview` attribute is optional, and it is used to set the preview state of the collection. It can contain the following fields:
- `initialPreviewState` (type `object`): The initial preview state of the collection. It can contain the following fields:
- `isPreview` (type `boolean`): Whether the collection is in preview mode.
- `previewMessage` (type `string`): The message to be displayed in the Tooltip when the user hovers over the preview label.
- `setPreviewState` (optional, type `function`): The function to set the preview state of the collection. It receives the following arguments:
- `setState` (type `function`): The function to set the preview state. You can pass a new preview state to this function containing `isPreview` and `previewMessage`.
- `attributes` (type `object`): The current attributes of the collection.
- `location` (type `object`): The location of the collection. Accepted values are `product`, `archive`, `cart`, `order`, `site`.
For more info, you may check [PR #46369](https://github.com/woocommerce/woocommerce/pull/46369), in which the Preview feature was added
## Examples
### Example 1: Registering a new collection
```tsx
__experimentalRegisterProductCollection({
name: "your-plugin-name/product-collection/my-custom-collection",
title: "My Custom Collection",
icon: "games",
description: "This is a custom collection.",
keywords: ["custom collection", "product collection"],
});
```
As you can see in the example above, we are registering a new collection with the name `woocommerce/product-collection/my-custom-collection` & title `My Custom Collection`. Here is screenshot of how it will look like:

### Example 2: Register a new collection with a preview
As you can see below, setting the initial preview state is possible. In the example below, we are setting `isPreview` and `previewMessage`.
```tsx
__experimentalRegisterProductCollection({
name: "your-plugin-name/product-collection/my-custom-collection-with-preview",
title: "My Custom Collection with Preview",
icon: "games",
description: "This is a custom collection with preview.",
keywords: ["My Custom Collection with Preview", "product collection"],
preview: {
initialPreviewState: {
isPreview: true,
previewMessage:
"This is a preview message for my custom collection with preview.",
},
},
attributes: {
query: {
perPage: 5,
featured: true,
},
displayLayout: {
type: "grid",
columns: 3,
shrinkColumns: true,
},
hideControls: [ "created", "stock-status" ]
},
});
```
Here is how it will look like:

### Example 3: Advanced usage of preview
As you can see below, it's also possible to use `setPreviewState` to set the preview state. In the example below, we are setting `initialPreviewState` and using `setPreviewState` to change the preview state after 5 seconds.
**This example shows:**
- How to access current attributes and location in the preview state
- How to use async operations
- We are using `setTimeout` to change the preview state after 5 seconds. You can use any async operation, like fetching data from an API, to decide the preview state.
- How to use the cleanup function as a return value
- We are returning a cleanup function that will clear the timeout after the component is unmounted. You can use this to clean up any resources you have used in `setPreviewState`.
```tsx
__experimentalRegisterProductCollection({
name: "your-plugin-name/product-collection/my-custom-collection-with-advanced-preview",
title: "My Custom Collection with Advanced Preview",
icon: "games",
description: "This is a custom collection with advanced preview.",
keywords: [
"My Custom Collection with Advanced Preview",
"product collection",
],
preview: {
setPreviewState: ({
setState,
attributes: currentAttributes,
location,
}) => {
// setPreviewState has access to the current attributes and location.
// console.log( currentAttributes, location );
const timeoutID = setTimeout(() => {
setState({
isPreview: false,
previewMessage: "",
});
}, 5000);
return () => clearTimeout(timeoutID);
},
initialPreviewState: {
isPreview: true,
previewMessage:
"This is a preview message for my custom collection with advanced preview.",
},
},
});
```
### Example 4: Collection with inner blocks
As you can see below, it's also possible to define inner blocks for the collection. In the example below, we are defining inner blocks for the collection.
```tsx
__experimentalRegisterProductCollection({
name: "your-plugin-name/product-collection/my-custom-collection-with-inner-blocks",
title: "My Custom Collection with Inner Blocks",
icon: "games",
description: "This is a custom collection with inner blocks.",
keywords: ["My Custom Collection with Inner Blocks", "product collection"],
innerBlocks: [
[
"core/heading",
{
textAlign: "center",
level: 2,
content: "Title of the collection",
},
],
[
"woocommerce/product-template",
{},
[
["woocommerce/product-image"],
[
"woocommerce/product-price",
{
textAlign: "center",
fontSize: "small",
},
],
],
],
],
});
```
This will create a collection with a heading, product image, and product price. Here is how it will look like:

**Tip:** You can learn more about inner blocks template in the [Inner Blocks](https://developer.wordpress.org/block-editor/how-to-guides/block-tutorial/nested-blocks-inner-blocks/#template) documentation.
### Example 5: Collection with `usesReference` argument
When a collection requires a reference to work properly, you can specify it using the `usesReference` argument. In the example below, we are defining a collection that requires a `product` reference.
```tsx
__experimentalRegisterProductCollection({
name: "your-plugin-name/product-collection/my-custom-collection",
title: "My Custom Collection",
icon: "games",
description: "This is a custom collection.",
keywords: ["custom collection", "product collection"],
usesReference: ["product"],
});
```
This will create a collection that requires a `product` reference. If the required reference isn't available on the Editor side but will be available in the Frontend, we will show a preview label.
When a collection need one of the multiple references, you can specify it using the `usesReference` argument. In the example below, we are defining a collection that requires either a `product` or `order` reference.
```tsx
__experimentalRegisterProductCollection({
name: "your-plugin-name/product-collection/my-custom-collection",
title: "My Custom Collection",
icon: "games",
description: "This is a custom collection.",
keywords: ["custom collection", "product collection"],
usesReference: ["product", "order"],
});
```
### Example 6: Scope argument
When you don't specify the `scope` argument, its default value is `["block", "inserter"]`. This default behavior is inherited from the [Block Variation API](https://developer.wordpress.org/block-editor/reference-guides/block-api/block-variations/#defining-a-block-variation).
The Product Collection block uses the `block` scope to control:
1. Visibility in the Collection Chooser
2. Display of the "Choose Collection" toolbar button
#### Don't show collection in Collection Chooser
If you don't want to show your collection in the Collection Chooser, you can set the `scope` argument to an empty array or any other value that doesn't include the `block` value.
For example:
```tsx
__experimentalRegisterProductCollection({
name: "your-plugin-name/product-collection/my-custom-collection",
title: "My Custom Collection",
icon: "games",
description: "This is a custom collection.",
keywords: ["custom collection", "product collection"],
scope: [],
});
```
#### Show collection in the block inserter only
If you want to show your collection exclusively in the block inserter and not in the Collection Chooser, you can set the `scope` argument to `["inserter"]`. This allows users to add your custom collection directly from the block inserter while keeping it hidden from the Collection Chooser interface.
For example:
```tsx
__experimentalRegisterProductCollection({
name: "your-plugin-name/product-collection/my-custom-collection",
title: "My Custom Collection",
description: "This is a custom collection.",
keywords: ["custom collection", "product collection"],
scope: ["inserter"],
});
```
---
**Tip:** You can also take a look at how we are defining our core collections at [plugins/woocommerce/client/blocks/assets/js/blocks/product-collection/collections](https://github.com/woocommerce/woocommerce/blob/trunk/plugins/woocommerce/client/blocks/assets/js/blocks/product-collection/collections/) directory. Our core collections will also evolve over time.
---
## Using the Code Snippets Plugin
*Source: code-snippets/README.md*
# Using the Code Snippets Plugin
## What is a Code Snippet?
Customizing WooCommerce functionality often requires adding code snippets to modify behavior, enhance features, or integrate with third-party tools. Instead of editing theme files or the `functions.php` file directly, we recommend using the **Code Snippets** plugin from the WordPress.org repository. This approach ensures a safer, more manageable, and more organized way to add custom code to your WooCommerce store.
## Why Use the Code Snippets Plugin?
Editing your theme’s `functions.php` file or adding custom code directly to WooCommerce files can lead to several issues:
- **Loss of Custom Code on Theme Updates:** When you update your theme, modifications made in `functions.php` are lost.
- **Potential for Errors and Site Breakage:** A single syntax error can make your website inaccessible.
- **Difficult Debugging:** Managing multiple customizations in a single `functions.php` file can become unorganized.
The **Code Snippets** plugin addresses these issues by allowing you to:
- Add, activate, and deactivate snippets without modifying core files.
- Organize custom snippets with descriptions and tags.
- Avoid losing changes when updating your theme or WooCommerce.
- Debug and test code safely before deploying to a live site.
## How to Install the Code Snippets Plugin
1. Log in to your WordPress admin dashboard.
2. Navigate to **Plugins > Add New**.
3. Search for **"Code Snippets"** in the search bar.
4. Click **Install Now** on the "Code Snippets" plugin by **Code Snippets Pro**.
5. After installation, click **Activate**.
## Adding Custom WooCommerce Snippets
Once the plugin is installed and activated, follow these steps to add a WooCommerce customization:
1. Navigate to **Snippets** in your WordPress dashboard.
2. Click **Add New**.
3. Give your snippet a descriptive title.
4. Enter your WooCommerce-specific PHP code in the code editor.
5. Select **Only run in administration area** or **Run everywhere**, depending on your needs.
6. Click **Save Changes and Activate**.
## Example: Add a Custom Message to the WooCommerce Checkout Page
```php
add_action('woocommerce_before_checkout_form', function() {
echo 'Reminder: Ensure your shipping address is correct before placing your order.
';
});
```
## Managing and Troubleshooting Snippets
- **Deactivating Snippets:** If a snippet causes issues, simply deactivate it from the Code Snippets interface without affecting the rest of your site.
- **Error Handling:** The plugin detects fatal errors and automatically deactivates problematic snippets.
- **Backup and Export:** You can export your snippets for backup or transfer to another site.
## Next Steps
For more advanced customizations, refer to the [WooCommerce Developer Documentation](https://developer.woocommerce.com/) to build blocks, extensions, and more!
---
## Add a country
*Source: code-snippets/add-a-country.md*
# Add a country
Add a country using to your countries list using this code snippet:
```php
if ( ! function_exists( 'YOUR_PREFIX_add_country_to_countries_list' ) ) {
/**
* Add a country to countries list
*
* @param array $countries Existing country list.
* @return array $countries Modified country list.
*/
function YOUR_PREFIX_add_country_to_countries_list( $countries ) {
$new_countries = array(
'NIRE' => __( 'Northern Ireland', 'YOUR-TEXTDOMAIN' ),
);
return array_merge( $countries, $new_countries );
}
add_filter( 'woocommerce_countries', 'YOUR_PREFIX_add_country_to_countries_list' );
}
if ( ! function_exists( 'YOUR_PREFIX_add_country_to_continents_list' ) ) {
/**
* Add a country to continents list
*
* @param array $continents Existing continents list.
* @return array $continents Modified continents list.
*/
function YOUR_PREFIX_add_country_to_continents_list( $continents ) {
$continents['EU']['countries'][] = 'NIRE';
return $continents;
}
add_filter( 'woocommerce_continents', 'YOUR_PREFIX_add_country_to_continents_list' );
}
```
---
## Add currencies and symbols
*Source: code-snippets/add-a-currency-symbol.md*
# Add currencies and symbols
Add custom currencies to your currencies list:
```php
if ( ! function_exists( 'YOUR_PREFIX_add_currency_name' ) ) {
/**
* Add custom currency
*
* @param array $currencies Existing currencies.
* @return array $currencies Updated currencies.
*/
function YOUR_PREFIX_add_currency_name( $currencies ) {
$currencies['ABC'] = __( 'Currency name', 'YOUR-TEXTDOMAIN' );
return $currencies;
}
add_filter( 'woocommerce_currencies', 'YOUR_PREFIX_add_currency_name' );
}
if ( ! function_exists( 'YOUR_PREFIX_add_currency_symbol' ) ) {
/**
* Add custom currency symbol
*
* @param string $currency_symbol Existing currency symbols.
* @param string $currency Currency code.
* @return string $currency_symbol Updated currency symbol(s).
*/
function YOUR_PREFIX_add_currency_symbol( $currency_symbol, $currency ) {
switch( $currency ) {
case 'ABC': $currency_symbol = '$'; break;
}
return $currency_symbol;
}
add_filter('woocommerce_currency_symbol', 'YOUR_PREFIX_add_currency_symbol', 10, 2);
}
```
---
## Add or modify states
*Source: code-snippets/add-or-modify-states.md*
# Add or modify states
Add your own or modify shipping states in WooCommerce.
> Note: you **must** replace both instances of XX with your country code. This means each state id in the array must have your two letter country code before the number you assign to the state.
```php
if ( ! function_exists( 'YOUR_PREFIX_add_or_modify_states' ) ) {
/**
* Add or modify States
*
* @param array $states Existing country states.
* @return array $states Modified country states.
*/
function YOUR_PREFIX_add_or_modify_states( $states ) {
$states['XX'] = array(
'XX1' => __( 'State 1', 'YOUR-TEXTDOMAIN' ),
'XX2' => __( 'State 2', 'YOUR-TEXTDOMAIN' ),
);
return $states;
}
add_filter( 'woocommerce_states', 'YOUR_PREFIX_add_or_modify_states' );
}
```
---
## Adjust the quantity input values
*Source: code-snippets/adjust-quantity-input-values.md*
# Adjust the quantity input values
Set the starting value, maximum value, minimum value, and increment amount for quantity input fields on product pages.
```php
if ( ! function_exists( 'YOUR_PREFIX_woocommerce_quantity_input_args' ) ) {
/**
* Adjust the quantity input values for simple products
*/
function YOUR_PREFIX_woocommerce_quantity_input_args( $args, $product ) {
// Only affect the starting value on product pages, not the cart
if ( is_singular( 'product' ) ) {
$args['input_value'] = 4;
}
$args['max_value'] = 10; // Maximum value
$args['min_value'] = 2; // Minimum value
$args['step'] = 2; // Quantity steps
return $args;
}
add_filter( 'woocommerce_quantity_input_args', 'YOUR_PREFIX_woocommerce_quantity_input_args', 10, 2 );
}
if ( ! function_exists( 'YOUR_PREFIX_woocommerce_available_variation' ) ) {
/**
* Adjust the quantity input values for variations
*/
function YOUR_PREFIX_woocommerce_available_variation( $args ) {
$args['max_qty'] = 20; // Maximum value (variations)
$args['min_qty'] = 2; // Minimum value (variations)
// Note: the starting value and step for variations is controlled
// from the 'woocommerce_quantity_input_args' filter shown above for
// simple products
return $args;
}
add_filter( 'woocommerce_available_variation', 'YOUR_PREFIX_woocommerce_available_variation' );
}
```
If you are looking for a little more power, check out our [Min/Max Quantities](https://woocommerce.com/products/minmax-quantities) extension!
---
## Add a message above the login / register form
*Source: code-snippets/before-login--register-form.md*
# Add a message above the login / register form
This code will add a custom message above the login/register form on the user's my-account page.
```php
if ( ! function_exists( 'YOUR_PREFIX_login_message' ) ) {
/**
* Add a message above the login / register form on my-account page
*/
function YOUR_PREFIX_login_message() {
if ( get_option( 'woocommerce_enable_myaccount_registration' ) == 'yes' ) {
?>
supports`. You'll find the supported features:
```php
class WC_Gateway_Simplify_Commerce extends WC_Payment_Gateway {
/** * Constructor */
public function __construct() {
$this->id
= 'simplify_commerce';
$this->method_title
= __( 'Simplify Commerce', 'woocommerce' );
$this->method_description = __( 'Take payments via Simplify Commerce - uses simplify.js to create card tokens and the Simplify Commerce SDK. Requires SSL when sandbox is disabled.', 'woocommerce' );
$this->has_fields = true;
$this->supports = array(
'subscriptions',
'products',
'subscription_cancellation',
'subscription_reactivation',
'subscription_suspension',
'subscription_amount_changes',
'subscription_payment_method_change',
'subscription_date_changes',
'default_credit_card_form',
'refunds',
'pre-orders'
);
```
If you don't find `$this->supports` in the plugin files, that may mean that the payment method isn't correctly declaring support for refunds, subscripts or pre-orders.
---
## Code snippets for configuring special tax scenarios
*Source: code-snippets/configuring_special_tax_scenarios.md*
# Code snippets for configuring special tax scenarios
## Scenario A: Charge the same price regardless of location and taxes
If a store enters product prices including taxes, but levies various location-based tax rates, the prices will appear to change depending on which tax rate is applied. In reality, the base price remains the same, but the taxes influence the total. [Follow this link for a detailed explanation](https://woocommerce.com/document/how-taxes-work-in-woocommerce/#cross-border-taxes).
Some merchants prefer to dynamically change product base prices to account for the changes in taxes and so keep the total price consistent regardless of tax rate. Enable that functionality by adding the following snippet to your child theme's functions.php file or via a code snippet plugin.
```php
cart->subtotal <= 110 )
$tax_class = 'Zero Rate';
return $tax_class;
}
```
## Scenario C: Apply different tax rates based on the customer role
Some merchants may require different tax rates to be applied based on a customer role to accommodate for wholesale status or tax exemption.
To enable this functionality, add the following snippet to your child theme's functions.php file or via a code snippet plugin. In this snippet, users with "administrator" capabilities will be assigned the **Zero rate tax class**. Adjust it according to your requirements.
```php
checkout_fields['billing'] = $woocommerce->countries->get_address_fields( $this->get_value( 'billing_country' ), 'billing_' );
$this->checkout_fields['shipping'] = $woocommerce->countries->get_address_fields( $this->get_value( 'shipping_country' ), 'shipping_' );
$this->checkout_fields['account'] = array(
'account_username' => array(
'type' => 'text',
'label' => __( 'Account username', 'woocommerce' ),
'placeholder' => _x( 'Username', 'placeholder', 'woocommerce' ),
),
'account_password' => array(
'type' => 'password',
'label' => __( 'Account password', 'woocommerce' ),
'placeholder' => _x( 'Password', 'placeholder', 'woocommerce' ),
'class' => array( 'form-row-first' )
),
'account_password-2' => array(
'type' => 'password',
'label' => __( 'Account password', 'woocommerce' ),
'placeholder' => _x( 'Password', 'placeholder', 'woocommerce' ),
'class' => array( 'form-row-last' ),
'label_class' => array( 'hidden' )
),
);
$this->checkout_fields['order'] = array(
'order_comments' => array(
'type' => 'textarea',
'class' => array( 'notes' ),
'label' => __( 'Order Notes', 'woocommerce' ),
'placeholder' => _x( 'Notes about your order, e.g. special notes for delivery.', 'placeholder', 'woocommerce' )
)
);
```
This array is also passed through a filter:
```php
$this->checkout_fields = apply_filters( 'woocommerce_checkout_fields', $this->checkout_fields );
```
That means you have **full control** over checkout fields - you only need to know how to access them.
## Overriding Core Fields
Hooking into the **`woocommerce_checkout_fields`** filter lets you override any field. As an example, let's change the placeholder on the order_comments fields. Currently, it's set to:
```php
_x( 'Notes about your order, e.g. special notes for delivery.', 'placeholder', 'woocommerce' );
```
We can change this by adding a function to our theme functions.php file:
```php
// Hook in
add_filter( 'woocommerce_checkout_fields' , 'custom_override_checkout_fields' );
// Our hooked in function - $fields is passed via the filter!
function custom_override_checkout_fields( $fields ) {
$fields['order']['order_comments']['placeholder'] = 'My new placeholder';
return $fields;
}
```
You can override other parts, such as labels:
```php
// Hook in
add_filter( 'woocommerce_checkout_fields' , 'custom_override_checkout_fields' );
// Our hooked in function - $fields is passed via the filter!
function custom_override_checkout_fields( $fields ) {
$fields['order']['order_comments']['placeholder'] = 'My new placeholder';
$fields['order']['order_comments']['label'] = 'My new label';
return $fields;
}
```
Or remove fields:
```php
// Hook in
add_filter( 'woocommerce_checkout_fields' , 'custom_override_checkout_fields' );
// Our hooked in function - $fields is passed via the filter!
function custom_override_checkout_fields( $fields ) {
unset( $fields['order']['order_comments'] );
return $fields;
}
```
Here's a full list of fields in the array passed to `woocommerce_checkout_fields`:
- Billing
- `billing_first_name`
- `billing_last_name`
- `billing_company`
- `billing_address_1`
- `billing_address_2`
- `billing_city`
- `billing_postcode`
- `billing_country`
- `billing_state`
- `billing_email`
- `billing_phone`
- Shipping
- `shipping_first_name`
- `shipping_last_name`
- `shipping_company`
- `shipping_address_1`
- `shipping_address_2`
- `shipping_city`
- `shipping_postcode`
- `shipping_country`
- `shipping_state`
- Account
- `account_username`
- `account_password`
- `account_password-2`
- Order
- `order_comments`
Each field contains an array of properties:
- `type` - type of field (text, textarea, password, select)
- `label` - label for the input field
- `placeholder` - placeholder for the input
- `class` - class for the input
- `required` - true or false, whether or not the field is require
- `clear` - true or false, applies a clear fix to the field/label
- `label_class` - class for the label element
- `options` - for select boxes, array of options (key => value pairs)
In specific cases you need to use the **`woocommerce_default_address_fields`** filter. This filter is applied to all billing and shipping default fields:
- `country`
- `first_name`
- `last_name`
- `company`
- `address_1`
- `address_2`
- `city`
- `state`
- `postcode`
For example, to make the `address_1` field optional:
```php
// Hook in
add_filter( 'woocommerce_default_address_fields' , 'custom_override_default_address_fields' );
// Our hooked in function - $address_fields is passed via the filter!
function custom_override_default_address_fields( $address_fields ) {
$address_fields['address_1']['required'] = false;
return $address_fields;
}
```
### Defining select options
If you are adding a field with type 'select', as stated above you would define key/value pairs. For example:
```php
$fields['billing']['your_field']['options'] = array(
'option_1' => 'Option 1 text',
'option_2' => 'Option 2 text'
);
```
## Priority
Priority in regards to PHP code helps establish when a bit of code - called a function - runs in relation to a page load. It is set inside of each function and is useful when overriding existing code for custom display.
Code with a higher number set as the priority will run after code with a lower number, meaning code with a priority of 20 will run after code with 10 priority.
The priority argument is set during the [add_action](https://developer.wordpress.org/reference/functions/add_action/) function, after you establish which hook you're connecting to and what the name of your custom function will be.
In the example below, blue text is the name of the hook we're modifying, green text is the name of our custom function, and red is the priority we set.

## Examples
### Change Return to Shop button redirect URL
In this example, the code is set to redirect the "Return to Shop" button found in the cart to a category that lists products for sale at `http://example.url/category/specials/`.
```php
/**
* Changes the redirect URL for the Return To Shop button in the cart.
*/
function wc_empty_cart_redirect_url() {
return 'http://example.url/category/specials/';
}
add_filter( 'woocommerce_return_to_shop_redirect', 'wc_empty_cart_redirect_url', 10 );
```
There, we can see the priority is set to 10. This is the typical default for WooCommerce functions and scripts, so that may not be sufficient to override that button's functionality.
Instead, we can change the priority to any number greater than 10. While 11 would work, best practice dictates we use increments of ten, so 20, 30, and so on.
```php
/**
* Changes the redirect URL for the Return To Shop button in the cart.
*/
function wc_empty_cart_redirect_url() {
return 'http://example.com/category/specials/';
}
add_filter( 'woocommerce_return_to_shop_redirect', 'wc_empty_cart_redirect_url', 20 );
```
With priority, we can have two functions that are acting on the same hook. Normally this would cause a variety of problems, but since we've established one has a higher priority than the other, our site will only load the appropriate function, and we will be taken to the Specials page as intended with the code below.
```php
/**
* Changes the redirect URL for the Return To Shop button in the cart.
* BECAUSE THIS FUNCTION HAS THE PRIORITY OF 20, IT WILL RUN AFTER THE FUNCTION BELOW (HIGHER NUMBERS RUN LATER)
*/
function wc_empty_cart_redirect_url() {
return 'http://example.com/category/specials/';
}
add_filter( 'woocommerce_return_to_shop_redirect', 'wc_empty_cart_redirect_url', 20 );
/**
* Changes the redirect URL for the Return To Shop button in the cart.
* EVEN THOUGH THIS FUNCTION WOULD NORMALLY RUN LATER BECAUSE IT'S CODED AFTERWARDS, THE 10 PRIORITY IS LOWER THAN 20 ABOVE
*/
function wc_empty_cart_redirect_url() {
return 'http://example.com/shop/';
}
add_filter( 'woocommerce_return_to_shop_redirect', 'wc_empty_cart_redirect_url', 10 );
```
### Adding Custom Shipping And Billing Fields
Adding fields is done in a similar way to overriding fields. For example, let's add a new field to shipping fields - `shipping_phone`:
```php
// Hook in
add_filter( 'woocommerce_checkout_fields' , 'custom_override_checkout_fields' );
// Our hooked in function - $fields is passed via the filter!
function custom_override_checkout_fields( $fields ) {
$fields['shipping']['shipping_phone'] = array(
'label' => __( 'Phone', 'woocommerce' ),
'placeholder' => _x( 'Phone', 'placeholder', 'woocommerce' ),
'required' => false,
'class' => array( 'form-row-wide' ),
'clear' => true
);
return $fields;
}
/**
* Display field value on the order edit page
*/
add_action( 'woocommerce_admin_order_data_after_shipping_address', 'my_custom_checkout_field_display_admin_order_meta', 10, 1 );
function my_custom_checkout_field_display_admin_order_meta($order){
echo ''. esc_html__( 'Phone From Checkout Form' ) . ': ' . esc_html( $order->get_meta( '_shipping_phone', true ) ) . '
';
}
```
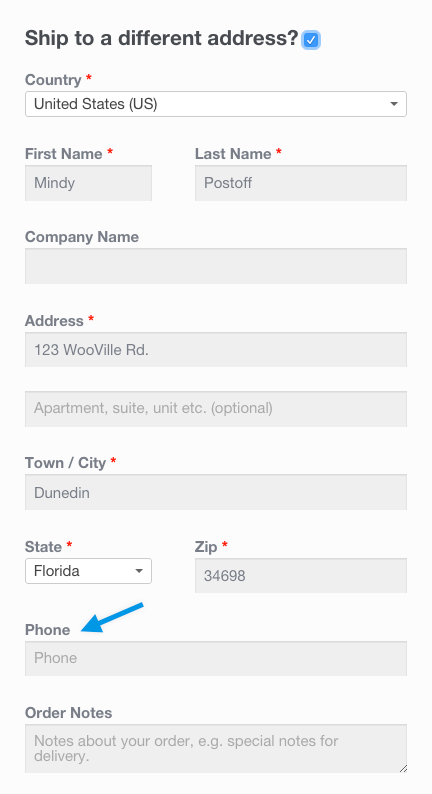
It's alive!
What do we do with the new field? Nothing. Because we defined the field in the `checkout_fields` array, the field is automatically processed and saved to the order post meta (in this case, `_shipping_phone`). If you want to add validation rules, see the checkout class where there are additional hooks you can use.
### Adding a Custom Special Field
To add a custom field is similar. Let's add a new field to checkout, after the order notes, by hooking into the following:
```php
/**
* Add the field to the checkout
*/
add_action( 'woocommerce_after_order_notes', 'my_custom_checkout_field' );
function my_custom_checkout_field( $checkout ) {
echo '' . esc_html__( 'My Field' ) . '
';
woocommerce_form_field(
'my_field_name',
array(
'type' => 'text',
'class' => array( 'my-field-class form-row-wide' ),
'label' => __( 'Fill in this field' ),
'placeholder' => __( 'Enter something' ),
),
$checkout->get_value( 'my_field_name' )
);
echo '';
}
```
This gives us:
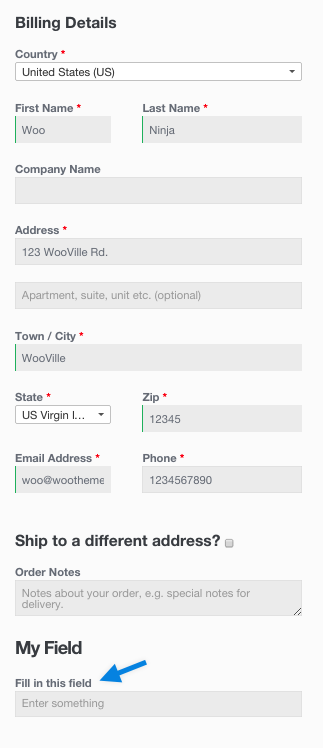
Next we need to validate the field when the checkout form is posted. For this example let's check that the field contains only letters:
```php
/**
* Process the checkout
*/
add_action( 'woocommerce_checkout_process', 'my_custom_checkout_field_process' );
function my_custom_checkout_field_process() {
// Check if this field contains just letters.
if ( ! preg_match( '/^[a-zA-Z]+$/', $_POST['my_field_name'] ) ) {
wc_add_notice( esc_html__( 'Please enter only letters into this new shiny field.' ), 'error' );
}
}
```
A checkout error is displayed if the field is blank:
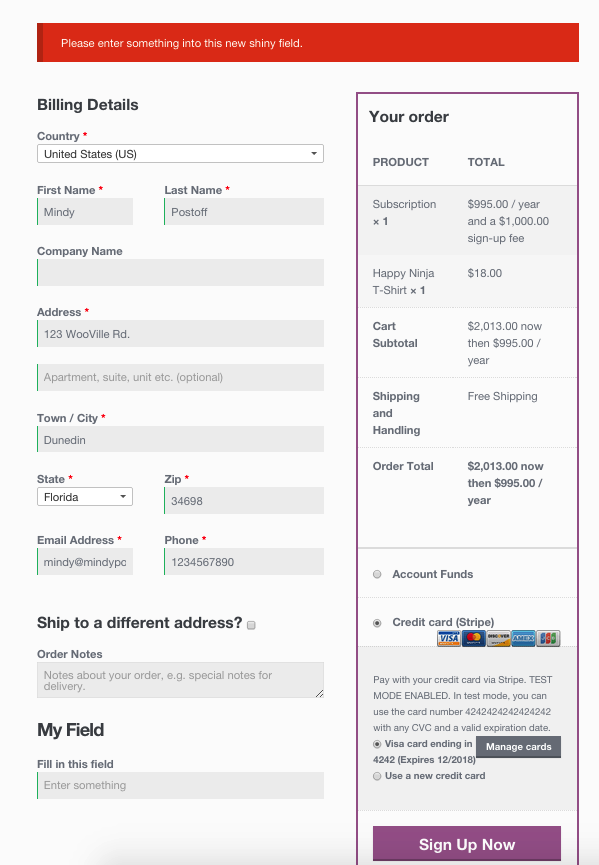
Finally, let's save the new field to order custom fields using the following code:
```php
/**
* Update the order meta with field value
*/
add_action( 'woocommerce_checkout_update_order_meta', 'my_custom_checkout_field_update_order_meta' );
function my_custom_checkout_field_update_order_meta( $order_id ) {
if ( ! empty( $_POST['my_field_name'] ) ) {
$order = wc_get_order( $order_id );
$order->update_meta_data( 'My Field', sanitize_text_field( $_POST['my_field_name'] ) );
$order->save_meta_data();
}
}
```
The field is now saved to the order.
If you wish to display the custom field value on the admin order edition page, you can add this code:
```php
/**
* Display field value on the order edit page
*/
add_action( 'woocommerce_admin_order_data_after_billing_address', 'my_custom_checkout_field_display_admin_order_meta', 10, 1 );
function my_custom_checkout_field_display_admin_order_meta( $order ){
echo '' . esc_html__( 'My Field' ) . ': ' . esc_html( $order->get_meta( 'My Field', true ) ) . '
';
}
```
This is the result:
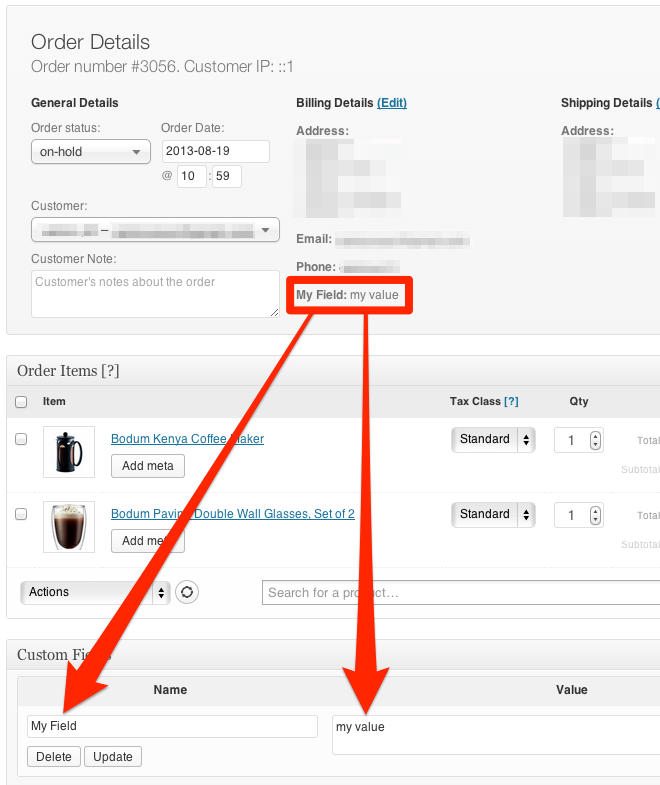
### Make phone number not required
```php
add_filter( 'woocommerce_billing_fields', 'wc_npr_filter_phone', 10, 1 );
function wc_npr_filter_phone( $address_fields ) {
$address_fields['billing_phone']['required'] = false;
return $address_fields;
}
```
---
## Disabling Marketplace Suggestions Programmatically
*Source: code-snippets/disabling_marketplace_suggestions_programmatically.md*
# Disabling Marketplace Suggestions Programmatically
For those who prefer to programmatically disable marketplace suggestions that are fetched from woocommerce.com, add the `woocommerce_allow_marketplace_suggestions` filter to your theme’s `functions.php` or a custom plugin.
For example:
```php
add_filter( 'woocommerce_allow_marketplace_suggestions', '__return_false' );
```
This filter will completely remove Marketplace Suggestions from your WooCommerce admin.
---
## Displaying custom fields in your theme or site
*Source: code-snippets/displaying_custom_fields_in_your_theme_or_site.md*
# Displaying custom fields in your theme or site
You can use the metadata from custom fields you add to your products to display the added information within your theme or site.
To display the custom fields for each product, you have to edit your theme’s files. Here’s an example of how you might display a custom field within the single product pages after the short description:

```php
get_id(), 'woo_custom_field', true );
if ( ! empty( $custom_field_value ) ) {
echo '' . esc_html( $custom_field_value ) . '
';
}
}
add_action( 'woocommerce_before_add_to_cart_form', 'woocommerce_custom_field_example', 10 );
```
---
## Free Shipping Customizations
*Source: code-snippets/free_shipping_customization.md*
# Free Shipping Customizations
## Free Shipping: Advanced Settings/Customization
### Overview
By default, WooCommerce shows all shipping methods that match the customer and the cart contents. This means Free Shipping also shows along with Flat Rate and other Shipping Methods.
The functionality to hide all other methods, and only show Free Shipping, requires either custom PHP code or a plugin/extension.
### Adding code
Before adding snippets, clear your WooCommerce cache. Go to WooCommerce > System Status > Tools > WooCommerce Transients > Clear transients.
## Code Snippets
### How do I only show Free Shipping?
The following snippet will hide all other shipping methods if Free Shipping is available for the customer.
```php
/**
* Hide other shipping rates when free shipping is available.
*
* @param array $rates Array of rates found for the package.
*
* @return array
*/
function fsc_hide_shipping_rates_when_free_is_available( $rates ) {
// Go through each rate found.
foreach ( $rates as $rate_id => $rate ) {
// If Free Shipping is found, define it as the only rate and break out of the foreach.
if ( 'free_shipping' === $rate->method_id ) {
$rates = [ $rate_id => $rate ];
break;
}
}
return $rates;
}
add_filter( 'woocommerce_package_rates', 'fsc_hide_shipping_rates_when_free_is_available', 10, 1 );
```
### How do I only show Local Pickup and Free Shipping?
The following snippet will hide all other shipping methods but Free Shipping and Local Pickup if they are available for the customer.
```php
/**
* If Free Shipping is available hide other rates, excluding Local Pickup.
*
* @param array $rates Array of rates found for the package.
*
* @return array
*/
function fsc_hide_shipping_rates_when_free_is_available_excluding_local( $rates ) {
// Define arrays to hold our Free Shipping and Local Pickup methods, if found.
$free_shipping = [];
$local_pickup = [];
// Go through each rate received.
foreach ( $rates as $rate_id => $rate ) {
// If either method is found, add them to their respective array.
if ( 'free_shipping' === $rate->method_id ) {
$free_shipping[ $rate_id ] = $rate;
continue;
}
if ( 'pickup_location' === $rate->method_id ) {
$local_pickup[ $rate_id ] = $rate;
}
}
// If the free_shipping array contains a method, then merge the local_pickup into it, and overwrite the rates array.
if ( ! empty( $free_shipping ) ) {
$rates = array_merge( $free_shipping, $local_pickup );
}
return $rates;
}
add_filter( 'woocommerce_package_rates', 'fsc_hide_shipping_rates_when_free_is_available_excluding_local', 10, 1 );
```
### Enabling or Disabling Free Shipping via Hooks
If you would like to know if Free Shipping is available programmatically, this is possible. WooCommerce applies a filter like the below:
```php
return apply_filters( 'woocommerce_shipping_' . $this->id . '_is_available', $is_available );
```
This means you can use `add_filter()` on `woocommerce_shipping_free_shipping_is_available` and receive `true` or `false` if Free Shipping is enabled. For example, this next snippet would log if Free Shipping is available or not:
```php
/**
* Log if Free Shipping is available or not.
*
* @param bool $is_available If Free Shipping is available, then `true`, `false` if not.
*
* @return bool
*/
function fsc_free_shipping_is_available( $is_available ) {
if ( $is_available ) {
error_log( 'Free shipping is available' );
} else {
error_log( 'Free shipping is NOT available' );
}
return $is_available;
}
add_filter( 'woocommerce_shipping_free_shipping_is_available', 'fsc_free_shipping_is_available', 10, 1 );
```
### Enable Shipping Methods on a per Class / Product Basis, split orders, or other scenarios?
Need more flexibility? Take a look at our [premium Shipping Method extensions](https://woocommerce.com/product-category/woocommerce-extensions/shipping-methods/).
---
## Advanced settings and customization for legacy Local Pickup
*Source: code-snippets/legacy_local_pickup_advacned_settings_and_customization.md*
# Advanced settings and customization for legacy Local Pickup
## Disable local taxes when using local pickup
Local Pickup calculates taxes based on your store's location (address) by default, and not the customer's address. Add this snippet at the end of your theme's `functions.php` to use your standard tax configuration instead:
```php
add_filter( 'woocommerce_apply_base_tax_for_local_pickup', '__return_false' );
```
Regular taxes is then used when local pickup is selected, instead of store-location-based taxes.
## Changing the location for local taxes
To charge local taxes based on the postcode and city of the local pickup location, you need to define the shop's base city and post code using this example code:
```php
add_filter( 'woocommerce_countries_base_postcode', create_function( '', 'return "80903";' ) );
add_filter( 'woocommerce_countries_base_city', create_function( '', 'return "COLORADO SPRINGS";' ) );
```
Update `80903` to reflect your preferred postcode/zip, and `COLORADO SPRINGS` with your preferred town or city.
## Custom emails for local pickup
_Shipping Address_ is not displayed on the admin order emails when Local Pickup is used as the shipping method.
Since all core shipping options use the standard order flow, customers receive the same order confirmation email whether they select local pickup or any other shipping option.
Use this guide to create custom emails for local pickup if you'd like to send a separate email for local pickup orders: [How to Add a Custom WooCommerce Email](https://www.skyverge.com/blog/how-to-add-a-custom-woocommerce-email/).
---
## Add link to logged data
*Source: code-snippets/link-to-logged-data.md*
# Add link to logged data
[Logging](/docs/best-practices/data-management/logging) is a crucial part of any WooCommerce extension. It helps you track errors and debug issues. A common pattern is to have a setting in your extension to enable logging when the user needs to troubleshoot an issue. The following code snippet shows an example of how to add this setting, as well as a link to the log viewer, in the context of the [Settings API](/docs/extensions/settings-and-config/settings-api).
```php
use Automattic\WooCommerce\Utilities\LoggingUtil;
// Define the label and description for the logging option
$label = __( 'Enable logging', 'your-textdomain-here' );
$description = __( 'Log events and errors to help with troubleshooting.', 'your-textdomain-here' );
// Check if WooCommerce's logging feature is enabled.
if ( LoggingUtil::logging_is_enabled() ) {
// The source value you use for your extension's log entries. Could be the same as your text domain.
$source = 'yourpluginslug';
$logs_url = add_query_arg(
'source',
$source,
LoggingUtil::get_logs_tab_url()
);
$label .= ' | ' . sprintf(
__( 'View logs', 'your-textdomain-here' ),
$logs_url
);
}
// Add the logging option to the form fields.
$form_fields['yourpluginslug_debug'] = array(
'title' => __( 'Debugging', 'your-textdomain-here' ),
'label' => $label,
'description' => $description,
'type' => 'checkbox',
'default' => 'no'
);
```
---
## Making your translation upgrade safe
*Source: code-snippets/making_translations_upgrade_safe.md*
# Making your translation upgrade safe
Like all other plugins, WooCommerce keeps translations in `wp-content/languages/plugins`.
However, if you want to include a custom translation, you can add them to `wp-content/languages/woocommerce`, or you can use a snippet to load a custom translation stored elsewhere:
```php
// Code to be placed in functions.php of your theme or a custom plugin file.
add_filter( 'load_textdomain_mofile', 'load_custom_plugin_translation_file', 10, 2 );
/*
* Replace 'textdomain' with your plugin's textdomain. e.g. 'woocommerce'.
* File to be named, for example, yourtranslationfile-en_GB.mo
* File to be placed, for example, wp-content/lanaguages/textdomain/yourtranslationfile-en_GB.mo
*/
function load_custom_plugin_translation_file( $mofile, $domain ) {
if ( 'textdomain' === $domain ) {
$mofile = WP_LANG_DIR . '/textdomain/yourtranslationfile-' . get_locale() . '.mo';
}
return $mofile;
}
```
---
## Change number of related products displayed
*Source: code-snippets/number-of-products-per-row.md*
# Change number of related products displayed
Add code to your child theme's functions.php file or via a plugin that allows custom functions to be added, such as the [Code snippets](https://wordpress.org/plugins/code-snippets/) plugin. Avoid adding custom code directly to your parent theme's `functions.php` file as this will be wiped entirely when you update the theme.
Please note that it does not work for all themes because of the way they're coded.
```php
if ( ! function_exists( 'YOUR_PREFIX_related_products_args' ) ) {
/**
* Change number of related products output.
*
* @param array $args The related products args.
* @return array The modified related products args.
*/
function YOUR_PREFIX_related_products_args( $args ) {
if ( ! is_array( $args ) ) {
$args = array();
}
$args['posts_per_page'] = 4; // 4 related products.
$args['columns'] = 2; // Arranged in 2 columns.
return $args;
}
}
add_filter( 'woocommerce_output_related_products_args', 'YOUR_PREFIX_related_products_args', 20 );
```
---
## Override loop template and show quantities next to add to cart buttons
*Source: code-snippets/override-loop-template-show-quantities-next-add-cart.md*
# Override loop template and show quantities next to add to cart buttons
Add this code to your child theme’s `functions.php` file or via a plugin that allows custom functions to be added, such as the [Code Snippets](https://wordpress.org/plugins/code-snippets/) plugin. Avoid adding custom code directly to your parent theme’s functions.php file, as this will be wiped entirely when you update the theme.
```php
if ( ! function_exists( 'YOUR_PREFIX_quantity_inputs_for_woocommerce_loop_add_to_cart_link' ) ) {
/**
* Override loop template and show quantities next to add to cart buttons
* @param string $html Default loop template.
* @param object $product Product data.
* @return string Modified loop template.
*/
function YOUR_PREFIX_quantity_inputs_for_woocommerce_loop_add_to_cart_link( $html, $product ) {
if ( $product && $product->is_type( 'simple' ) && $product->is_purchasable() && $product->is_in_stock() && ! $product->is_sold_individually() ) {
$html = '';
}
return $html;
}
add_filter( 'woocommerce_loop_add_to_cart_link', 'YOUR_PREFIX_quantity_inputs_for_woocommerce_loop_add_to_cart_link', 10, 2 );
}
```
---
## Rename a country
*Source: code-snippets/rename-a-country.md*
# Rename a country
Rename a country in your countries list:
```php
if ( ! function_exists( 'YOUR_PREFIX_rename_country' ) ) {
/**
* Rename a country
*
* @param array $countries Existing country names
* @return array $countries Updated country name(s)
*/
function YOUR_PREFIX_rename_country( $countries ) {
$countries['IE'] = __( 'Ireland (Changed)', 'YOUR-TEXTDOMAIN' );
return $countries;
}
add_filter( 'woocommerce_countries', 'YOUR_PREFIX_rename_country' );
}
```
---
## SSL and HTTPS and WooCommerce
*Source: code-snippets/ssl_and_https_and_woocommerce_websites_behind_load_balanacers_or_reverse_proxies.md*
# SSL and HTTPS and WooCommerce
## Websites behind load balancers or reverse proxies
WooCommerce uses the `is_ssl()` WordPress function to verify if your website using SSL or not.
`is_ssl()` checks if the connection is via HTTPS or on Port 443. However, this won't work for websites behind load balancers, especially websites hosted at Network Solutions. For details, read [WordPress is_ssl() function reference notes](https://codex.wordpress.org/Function_Reference/is_ssl#Notes).
Websites behind load balancers or reverse proxies that support `HTTP_X_FORWARDED_PROTO` can be fixed by adding the following code to the `wp-config.php` file, above the require_once call:
```php
if ( isset( $_SERVER['HTTP_X_FORWARDED_PROTO'] ) && 'https' == $_SERVER['HTTP_X_FORWARDED_PROTO'] ) {
$_SERVER['HTTPS'] = 'on';
}
```
**Note:** If you use CloudFlare, you need to configure it. Check their documentation.
---
## Unhook and remove WooCommerce emails
*Source: code-snippets/unhook--remove-woocommerce-emails.md*
# Unhook and remove WooCommerce emails
This code allows you to unhook and remove the default WooCommerce emails.
```php
if ( ! function_exists( 'YOUR_PREFIX_unhook_woocommerce_emails' ) ) {
/**
* Callback for woocommerce_email action hook
*
* @param WC_Email $email_class An Email class instance.
* @return void
*/
function YOUR_PREFIX_unhook_woocommerce_emails( $email_class ) {
/**
* Hooks for sending emails during store events.
*/
remove_action( 'woocommerce_low_stock_notification', array( $email_class, 'low_stock' ) );
remove_action( 'woocommerce_no_stock_notification', array( $email_class, 'no_stock' ) );
remove_action( 'woocommerce_product_on_backorder_notification', array( $email_class, 'backorder' ) );
// New order emails.
remove_action( 'woocommerce_order_status_pending_to_processing_notification', array( $email_class->emails['WC_Email_New_Order'], 'trigger' ) );
remove_action( 'woocommerce_order_status_pending_to_completed_notification', array( $email_class->emails['WC_Email_New_Order'], 'trigger' ) );
remove_action( 'woocommerce_order_status_pending_to_on-hold_notification', array( $email_class->emails['WC_Email_New_Order'], 'trigger' ) );
remove_action( 'woocommerce_order_status_failed_to_processing_notification', array( $email_class->emails['WC_Email_New_Order'], 'trigger' ) );
remove_action( 'woocommerce_order_status_failed_to_completed_notification', array( $email_class->emails['WC_Email_New_Order'], 'trigger' ) );
remove_action( 'woocommerce_order_status_failed_to_on-hold_notification', array( $email_class->emails['WC_Email_New_Order'], 'trigger' ) );
// Processing order emails.
remove_action( 'woocommerce_order_status_pending_to_processing_notification', array( $email_class->emails['WC_Email_Customer_Processing_Order'], 'trigger' ) );
remove_action( 'woocommerce_order_status_pending_to_on-hold_notification', array( $email_class->emails['WC_Email_Customer_On_Hold_Order'], 'trigger' ) );
// Completed order emails.
remove_action( 'woocommerce_order_status_completed_notification', array( $email_class->emails['WC_Email_Customer_Completed_Order'], 'trigger' ) );
// Note emails.
remove_action( 'woocommerce_new_customer_note_notification', array( $email_class->emails['WC_Email_Customer_Note'], 'trigger' ) );
}
}
add_action( 'woocommerce_email', 'YOUR_PREFIX_unhook_woocommerce_emails' );
```
---
## Uninstall and remove all WooCommerce Data
*Source: code-snippets/uninstall_remove_all_woocommerce_data.md*
# Uninstall and remove all WooCommerce Data
The WooCommerce plugin can be uninstalled like any other WordPress plugin. By default, the WooCommerce data is left in place though.
If you need to remove *all* WooCommerce data as well, including products, order data, coupons, etc., you need to to modify the site's `wp-config.php` *before* deactivating and deleting the WooCommerce plugin.
As this action is destructive and permanent, the information is provided as is. WooCommerce Support cannot help with this process or anything that happens as a result.
To fully remove all WooCommerce data from your WordPress site, open `wp-config.php`, scroll down to the bottom of the file, and add the following constant on its own line above `/* That's all, stop editing. */`.
```php
define( 'WC_REMOVE_ALL_DATA', true );
/* That's all, stop editing! Happy publishing. */
```
Then, once the changes are saved to the file, when you deactivate and delete WooCommerce, all of its data is removed from your WordPress site database.
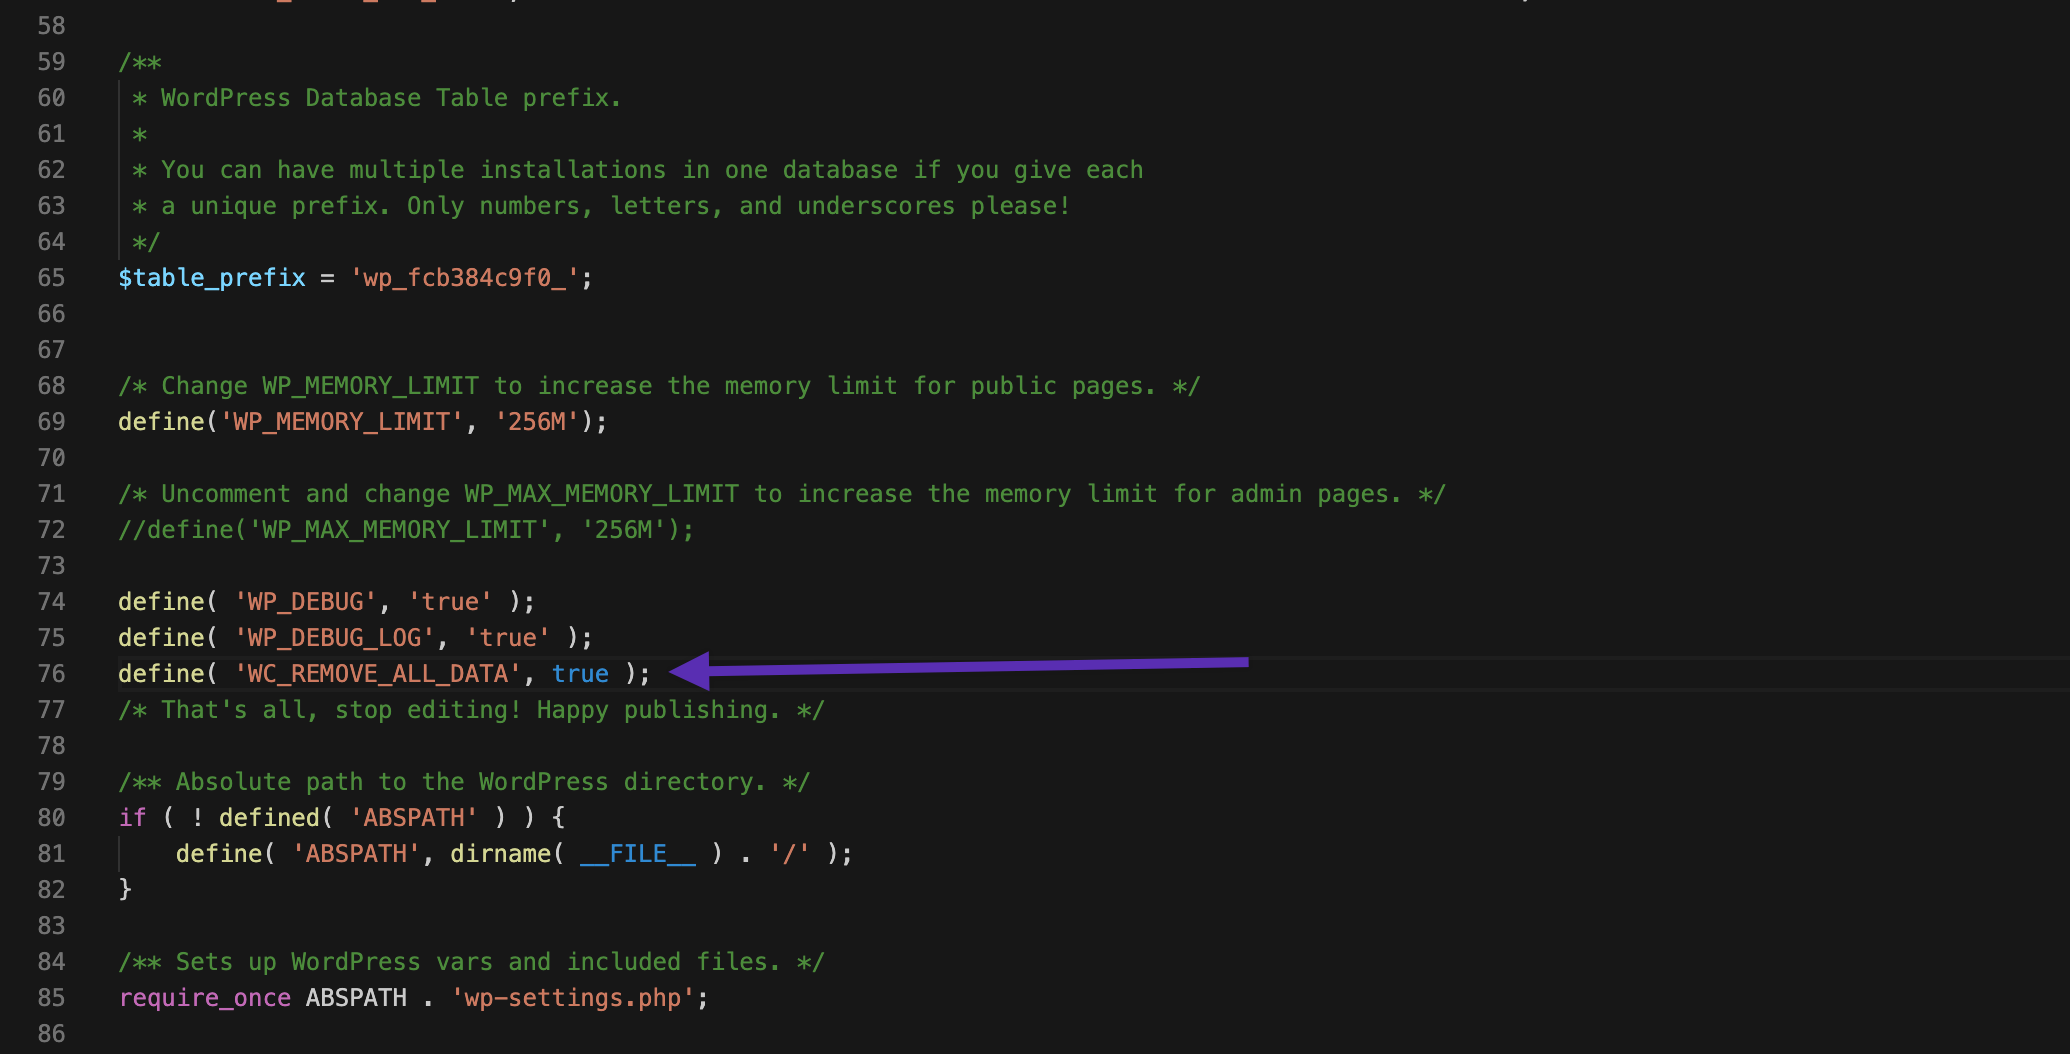
---
## Useful core functions
*Source: code-snippets/useful-functions.md*
# Useful core functions
WooCommerce core functions are available on both front-end and admin. They can be found in `includes/wc-core-functions.php` and can be used by themes in plugins.
## Conditional Functions
WooCommerce conditional functions help determine the current query/page.
### is_woocommerce
Returns true if on a page which uses WooCommerce templates (cart and checkout are standard pages with shortcodes and thus are not included).
```php
is_woocommerce()
```
### is_shop
Returns true when viewing the product type archive (shop).
```php
is_shop()
```
### is_product
Returns true when viewing a single product.
```php
is_product()
```
## Coupon Functions
### wc_get_coupon_code_by_id
Get coupon code by coupon ID.
```php
wc_get_coupon_code_by_id( $id )
```
The argument `$id` is the coupon ID.
### wc_get_coupon_id_by_code
Gets the coupon ID by code.
```php
wc_get_coupon_id_by_code( $code, $exclude = 0 )
```
`$code` is the coupon code and `$exclude` is to exclude an ID from the check if you're checking existence.
## User Functions
### wc_customer_bought_product
Checks if a customer has bought an item. The check can be done by email or user ID or both.
```php
wc_customer_bought_product( $customer_email, $user_id, $product_id )
```
### wc_get_customer_total_spent
Gets the total spent for a customer.
```php
wc_get_customer_total_spent( $user_id )
```
`$user_id` is the user ID of the customer.
### wc_get_customer_order_count
Gets the total orders for a customer.
```php
wc_get_customer_order_count( $user_id )
```
`$user_id` is the user ID of the customer.
## Formatting Functions
### wc_get_dimension
Takes a measurement `$dimension` measured in WooCommerce's dimension unit and converts it to the target unit `$to_unit`.
```php
wc_get_dimension( $dimension, $to_unit, $from_unit = '' )
```
Example usages:
```php
wc_get_dimension( 55, 'in' );
wc_get_dimension( 55, 'in', 'm' );
```
### wc_get_weight
Takes a weight `$weight` weighed in WooCommerce's weight unit and converts it to the target weight unit `$to_unit`.
```php
wc_get_weight( $weight, $to_unit, $from_unit = '' )
```
Example usages:
```php
wc_get_weight( 55, 'kg' );
wc_get_weight( 55, 'kg', 'lbs' );
```
### wc_clean
Clean variables using `sanitize_text_field`. Arrays are cleaned recursively. Non-scalar values are ignored.
```php
wc_clean( $var )
```
### wc_price
Formats a passed price with the correct number of decimals and currency symbol.
```php
wc_price( $price, $args = array() )
```
The ` $args` array has an option called ` ex_tax_label` - if true then an `excluding tax` message will be appended.
## Order Functions
### wc_get_orders
This function is the standard way of retrieving orders based on certain parameters. This function should be used for order retrieval so that when we move to custom tables, functions still work.
```php
wc_get_orders( $args )
```
[Arguments and usage](https://github.com/woocommerce/woocommerce/wiki/wc_get_orders-and-WC_Order_Query)
### wc_get_order
This is the main function for returning orders, uses the `WC_Order_Factory` class.
```php
wc_get_order( $the_order = false )
```
The `the_order` parameter can be a post object or post ID of the order.
### wc_orders_count
Returns the orders count of a specific order status.
```php
wc_orders_count( $status, string $type = '' )
```
### wc_order_search
Searches orders based on the given `$term`.
```php
wc_order_search( $term )
```
## Page Functions
### wc_get_page_id
Gets a WooCommerce page ID by name, e.g. thankyou
```php
wc_get_page_id( $page )
```
### wc_get_endpoint_url
Gets the URL for an `$endpoint`, which varies depending on permalink settings.
```php
wc_get_endpoint_url( $endpoint, $value = '', $permalink = '' )
```
## Product Functions
### wc_get_products
This function is the standard way of retrieving products based on certain parameters.
```php
wc_get_products( $args )
```
[Arguments and usage](https://github.com/woocommerce/woocommerce/wiki/wc_get_products-and-WC_Product_Query)
### wc_get_product
This is the main function for returning products. It uses the `WC_Product_Factory` class.
```php
wc_get_product( $the_product = false )
```
The argument `$the_product` can be a post object or post ID of the product.
### wc_get_product_ids_on_sale
Returns an array containing the IDs of the products that are on sale.
```php
wc_get_product_ids_on_sale()
```
### wc_get_featured_product_ids
Returns an array containing the IDs of the featured products.
```php
wc_get_featured_product_ids()
```
### wc_get_related_products
Gets the related products for product based on product category and tags.
```php
wc_get_related_products( $product_id, $limit = 5, $exclude_ids = array() )
```
## Account Functions
### wc_get_account_endpoint_url
Gets the account endpoint URL.
```php
wc_get_account_endpoint_url( $endpoint )
```
## Attribute Functions
### wc_get_attribute_taxonomies
Gets the taxonomies of product attributes.
```php
wc_get_attribute_taxonomies()
```
### wc_attribute_taxonomy_name
Gets the taxonomy name for a given product attribute.
```php
wc_attribute_taxonomy_name( $attribute_name )
```
### wc_attribute_taxonomy_id_by_name
Gets a product attribute ID by name.
```php
wc_attribute_taxonomy_id_by_name( $name )
```
## REST Functions
### wc_rest_prepare_date_response
Parses and formats a date for ISO8601/RFC3339.
```php
wc_rest_prepare_date_response( $date, $utc = true )
```
Pass `$utc` as `false` to get local/offset time.
### wc_rest_upload_image_from_url
Uploads an image from a given URL.
```php
wc_rest_upload_image_from_url( $image_url )
```
### wc_rest_urlencode_rfc3986
Encodes a `$value` according to RFC 3986.
```php
wc_rest_urlencode_rfc3986( $value )
```
### wc_rest_check_post_permissions
Checks permissions of posts on REST API.
```php
wc_rest_check_post_permissions( $post_type, $context = 'read', $object_id = 0 )
```
The available values for `$context` which is the request context are `read`, `create`, `edit`, `delete` and `batch`.
---
## Using NGINX server to protect your upload directory
*Source: code-snippets/using_nginx_server_to_protect_your_uploads_directory.md*
# Using NGINX server to protect your upload directory
If you using NGINX server for your site along with **X-Accel-Redirect/X-Sendfile** or **Force Downloads** download method, it is necessary that you add this configuration for better security:
```php
# Protect WooCommerce upload folder from being accessed directly.
# You may want to change this config if you are using "X-Accel-Redirect/X-Sendfile" or "Force Downloads" method for downloadable products.
# Place this config towards the end of "server" block in NGINX configuration.
location ~* /wp-content/uploads/woocommerce_uploads/ {
if ( $upstream_http_x_accel_redirect = "" ) {
return 403;
}
internal;
}
```
And this the configuration in case you are using **Redirect only** download method:
```php
# Protect WooCommerce upload folder from being accessed directly.
# You may want to change this config if you are using "Redirect Only" method for downloadable products.
# Place this config towards the end of "server" block in NGINX configuration.
location ~* /wp-content/uploads/woocommerce_uploads/ {
autoindex off;
}
```
If you do not know which web server you are using, please reach out to your host along with a link to this support page.
---
## CSS SASS coding guidelines and naming conventions
*Source: contribution/contributing/CSS-SASS-coding-guidelines-and-naming-conventions.md*
# CSS SASS coding guidelines and naming conventions
Our guidelines are based on those used in [Calypso](https://github.com/Automattic/wp-calypso) which itself follows the BEM methodology. Refer to [this doc](https://wpcalypso.wordpress.com/devdocs/docs/coding-guidelines/css.md?term=css) for full details. There are a few differences in WooCommerce however which are outlined below;
## Prefixing
As a WordPress plugin WooCommerce has to play nicely with WordPress core and other plugins / themes. To minimise conflict potential all classes should be prefixed with `.woocommerce-`.
## Class names
Calypso is built in React and uses component names to formulate CSS class names. WooCommerce Core has none of these components so uses a more traditional [BEM](http://getbem.com/) approach to [naming classes](http://cssguidelin.es/#bem-like-naming).
When adding classes just remember;
* **Block** - Standalone entity that is meaningful on its own.
* **Element** - Parts of a block and have no standalone meaning. They are semantically tied to its block.
* **Modifier** - Flags on blocks or elements. Use them to change appearance or behaviour.
### Example
* `.woocommerce-loop {}` (block).
* `.woocommerce-loop-product {}` (nested block).
* `.woocommerce-loop-product--sale {}` (modifier).
* `.woocommerce-loop-product__link {}` (element).
* `.woocommerce-loop-product__title {}` (element).
* `.woocommerce-loop-product__price {}` (element).
* `.woocommerce-loop-product__rating {}` (element).
* `.woocommerce-loop-product__button-add-to-cart {}` (element).
* `.woocommerce-loop-product__button-add-to-cart--added {}` (modifier).
**Note:** `.woocommerce-loop-product` is not the chosen classname _because_ the block is nested within `.woocommerce-loop`. It's to be specific so that we can have separate classes for single products, cart products etc. _Nested blocks do not need to inherit their parents full name_.
You can read more about BEM key concepts [in the BEM methodology documentation](https://en.bem.info/methodology/key-concepts/).
#### TL;DR
* Follow the [WP Coding standards for CSS](https://make.wordpress.org/core/handbook/best-practices/coding-standards/css/) unless it contradicts anything here.
* Follow [Calypso guidelines](https://wpcalypso.wordpress.com/devdocs/docs/coding-guidelines/css.md?term=css).
* Use BEM for [class names](https://en.bem.info/methodology/naming-convention/).
* Prefix all the things.
---
## Contribute to Woo
*Source: contribution/contributing/README.md*
# Contribute to Woo
Interested in joining the Woo contributor community? The links in this doc summarize and direct you to the order of operations you will need to make your first contribution. If you are a seasoned WooCommerce developer, feel free to skip ahead and utilize the template links, or the reference docs and guides below.
## Contributing to WooCommerce Core
The WooCommerce core plugin code can be found in our [monorepo](https://github.com/woocommerce/woocommerce). Here you can contribute to:
- [WooCommerce Core Plugin](https://github.com/woocommerce/woocommerce/tree/trunk/plugins/woocommerce)
- [WooCommerce Blocks](https://github.com/woocommerce/woocommerce/blob/trunk/plugins/woocommerce/client/blocks)
### Code of Conduct
Contributing to an open source project requires cooperation amongst individuals and organizations all working to make our project a stable and safe place to build and ask questions. Please thoroughly read our [Code of Conduct](https://github.com/woocommerce/woocommerce/blob/trunk/SECURITY.md) to get familiar with our standards and processes.
### Contributor Guidelines
Our [contributor guidelines](https://github.com/woocommerce/woocommerce/blob/trunk/.github/CONTRIBUTING.md) layout the first steps to contributing.
- [Prerequisites and developer tools to get started](https://github.com/woocommerce/woocommerce/blob/trunk/README.md#getting-started)
- [PNPM commands, plugin development environment packages, and troubleshooting](https://github.com/woocommerce/woocommerce/blob/trunk/DEVELOPMENT.md)
- [Coding standards, E2E testing links](https://github.com/woocommerce/woocommerce/blob/trunk/.github/CONTRIBUTING.md)
### Templates, Bug Reports, and Feature Requests
- [Pull Request template](https://github.com/woocommerce/woocommerce/blob/trunk/.github/PULL_REQUEST_TEMPLATE.md)
- [Core Issue template](https://github.com/woocommerce/woocommerce/blob/trunk/.github/ISSUE_TEMPLATE.md)
- [Bug Report template](https://github.com/woocommerce/woocommerce/blob/trunk/.github/ISSUE_TEMPLATE/1-bug-report.yml)
- [Enhancement template](https://github.com/woocommerce/woocommerce/blob/trunk/.github/ISSUE_TEMPLATE/2-enhancement.yml)
- [Feature requests](https://woocommerce.com/feature-requests/woocommerce/)
### Security
Security and safety for data management are incredibly important to us at Woo. Please check out the [Automattic security policy](https://automattic.com/security/) to learn about our foundational requirements.
Please report any vulnerabilities or security issues by reading through Woo's [security policy](https://github.com/woocommerce/woocommerce/blob/trunk/SECURITY.md).
---
## Critical flows within the WooCommerce Core API
*Source: contribution/contributing/api-critical-flows.md*
# Critical flows within the WooCommerce Core API
In our documentation, we've pinpointed the essential user flows within the WooCommerce Core API. These flows serve as
the compass for our testing initiatives, aiding us in concentrating our efforts where they matter most. They also
provide invaluable insights into assessing the ramifications of modifications and determining issue priorities.
It's important to note that these flows remain dynamic, evolving in lockstep with the platform. They regularly undergo
updates, additions, and re-prioritization to stay aligned with the evolving needs of our system.
## Products
| Route | Flow name | Endpoint | Test File |
|----------|----------------------------|--------------------------------|-------------------------------------------------------------|
| Products | Can view all products | `/wp-json/wc/v3/products` | `tests/api-core-tests/tests/products/product-list.test.js` |
| Products | Can search products | `/wp-json/wc/v3/products` | `tests/api-core-tests/tests/products/product-list.test.js` |
| Products | Can add a simple product | `/wp-json/wc/v3/products` | `tests/api-core-tests/tests/products/products-crud.test.js` |
| Products | Can add a variable product | `/wp-json/wc/v3/products` | `tests/api-core-tests/tests/products/products-crud.test.js` |
| Products | Can add a virtual product | `/wp-json/wc/v3/products` | `tests/api-core-tests/tests/products/products-crud.test.js` |
| Products | Can view a single product | `/wp-json/wc/v3/products/{id}` | `tests/api-core-tests/tests/products/products-crud.test.js` |
| Products | Can update a product | `/wp-json/wc/v3/products/{id}` | `tests/api-core-tests/tests/products/products-crud.test.js` |
| Products | Can delete a product | `/wp-json/wc/v3/products/{id}` | `tests/api-core-tests/tests/products/products-crud.test.js` |
## Orders
| Route | Flow name | Endpoints | Test File |
|--------|------------------------------------------------------------------|------------------------------|-----------------------------------------------------------|
| Orders | Can create an order | `/wp-json/wc/v3/orders` | `tests/api-core-tests/tests/orders/orders-crud.test.js` |
| Orders | Can view a single order | `/wp-json/wc/v3/orders/{id}` | `tests/api-core-tests/tests/orders/orders-crud.test.js` |
| Orders | Can update an order | `/wp-json/wc/v3/orders/{id}` | `tests/api-core-tests/tests/orders/orders-crud.test.js` |
| Orders | Can delete an order | `/wp-json/wc/v3/orders/{id}` | `tests/api-core-tests/tests/orders/orders-crud.test.js` |
| Orders | Can view all orders | `/wp-json/wc/v3/orders` | `tests/api-core-tests/tests/orders/orders.test.js` |
| Orders | Can search orders | `/wp-json/wc/v3/orders` | `tests/api-core-tests/tests/orders/order-search.test.js` |
| Orders | Can add new Order complex - multiple product types & tax classes | `/wp-json/wc/v3/orders` | `tests/api-core-tests/tests/orders/order-complex.test.js` |
## Refunds
| Route | Flow name | Endpoints | Test File |
|---------|---------------------|--------------------------------------|-----------------------------------------------------|
| Refunds | Can refund an order | `/wp-json/wc/v3/orders/{id}/refunds` | `tests/api-core-tests/tests/refunds/refund.test.js` |
## Coupons
| Route | Flow name | Endpoints | Test File |
|---------|---------------------------|--------------------------------------|------------------------------------------------------|
| Coupons | Can create a coupon | `/wp-json/wc/v3/coupons` | `tests/api-core-tests/tests/coupons/coupons.test.js` |
| Coupons | Can update a coupon | `/wp-json/wc/v3/coupons/{id}` | `tests/api-core-tests/tests/coupons/coupons.test.js` |
| Coupons | Can delete a coupon | `/wp-json/wc/v3/coupons/{id}` | `tests/api-core-tests/tests/coupons/coupons.test.js` |
| Coupons | Can add a coupon to order | `/wp-json/wc/v3/orders/{id}/coupons` | `tests/api-core-tests/tests/coupons/coupons.test.js` |
## Shipping
| Route | Flow name | Endpoints | Test File |
|------------------|-----------------------------------------------|----------------------------------------------|--------------------------------------------------------------|
| Shipping zones | Can create shipping zones | `/wp-json/wc/v3/shipping/zones` | `tests/api-core-tests/tests/shipping/shipping-zones.test.js` |
| Shipping methods | Can create shipping method to a shipping zone | `/wp-json/wc/v3/shipping/zones/{id}/methods` | n/a |
| Shipping classes | Can create a product shipping class | `/wp-json/wc/v3/products/shipping_classes` | `tests/api-core-tests/tests/products/products-crud.test.js` |
---
## Common issues
*Source: contribution/contributing/common-issues.md*
# Common issues
This page aims to document a comprehensive list of known issues, commonly encountered problems, and their solutions or workarounds. If you have encountered an issue that is not mentioned here and should be, please don't hesitate to add to the list.
## Composer error on `Automattic\Jetpack\Autoloader\AutoloadGenerator`
```bash
[ErrorException]
Declaration of Automattic\Jetpack\Autoloader\AutoloadGenerator::dump(Composer\Config $config, Composer\Repository\Inst
alledRepositoryInterface $localRepo, Composer\Package\PackageInterface $mainPackage, Composer\Installer\InstallationMa
nager $installationManager, $targetDir, $scanPsrPackages = false, $suffix = NULL) should be compatible with Composer\A
utoload\AutoloadGenerator::dump(Composer\Config $config, Composer\Repository\InstalledRepositoryInterface $localRepo,
Composer\Package\RootPackageInterface $rootPackage, Composer\Installer\InstallationManager $installationManager, $targ
etDir, $scanPsrPackages = false, $suffix = '')
```
A recent [change](https://github.com/composer/composer/commit/b574f10d9d68acfeb8e36cad0b0b25a090140a3b#diff-67d1dfefa9c7b1c7e0b04b07274628d812f82cd82fae635c0aeba643c02e8cd8) in composer 2.0.7 made our autoloader incompatible with the new `AutoloadGenerator` signature. Try to downgrading to composer 2.0.6 by using `composer self-update 2.0.6`.
## VVV: HostsUpdater vagrant plugin error
```bash
...vagrant-hostsupdater/HostsUpdater.rb:126:in ``digest': no implicit conversion of nil into String (TypeError)
```
You might be running an unsupported version of Vagrant. At the time of writing, VVV works with Vagrant 2.2.7. Please check VVV's [requirements](https://github.com/Varying-Vagrant-Vagrants/VVV#minimum-system-requirements).
## VVV: `install-wp-tests.sh` error
```bash
mysqladmin: CREATE DATABASE failed; error: 'Access denied for user 'wp'@'localhost' to database 'wordpress-one-tests''
```
To fix:
- Open MySQL with `sudo mysql`.
- Run `GRANT ALL PRIVILEGES ON * . * TO 'wp'@'localhost';`. Exit by typing `exit;`.
- Run the `install-wp-tests.sh` script again.
## Timeout / 404 errors while running e2e tests
```bash
Store owner can complete onboarding wizard › can complete the product types section
TimeoutError: waiting for function failed: timeout 30000ms exceeded
1 | export const waitForElementCount = function ( page, domSelector, count ) {
> 2 | return page.waitForFunction(
| ^
3 | ( domSelector, count ) => {
4 | return document.querySelectorAll( domSelector ).length === count;
5 | },
```
Timeouts or 404 errors in the e2e tests signal that the existing build might be broken. Run `npm install && npm run clean && npm run build` to generate a fresh build. It should also be noted that some of our npm scripts also remove the current build, so it's a good practice to always run a build before running e2e tests.
## Docker container couldn't be built when attempting e2e test
```bash
Thu Dec 3 11:55:56 +08 2020 - Docker container is still being built
Thu Dec 3 11:56:06 +08 2020 - Docker container is still being built
Thu Dec 3 11:56:16 +08 2020 - Docker container is still being built
Thu Dec 3 11:56:26 +08 2020 - Docker container couldn't be built
npm ERR! code ELIFECYCLE
npm ERR! errno 1
npm ERR! @woocommerce/e2e-environment@0.1.6 test:e2e: `bash ./bin/wait-for-build.sh && ./bin/e2e-test-integration.js`
npm ERR! Exit status 1
```
Ensure that Docker is running. While the script says `Docker container is still being built`, it is not actually responsible for running Docker; it's just waiting for an existing docker instance to respond. Run `npm run docker:up` if it's not.
## Set up WooCommerce Payments dev mode
Add this to `wp-config.php`:
```php
define( 'WCPAY_DEV_MODE', true );
```
Also see [this document](https://woocommerce.com/document/woopayments/testing-and-troubleshooting/sandbox-mode/).
## WooCommerce Admin install timestamp
To get the install timestamp (used in `wc_admin_active_for()` in `NoteTraits` for example) try this SQL:
```sql
SELECT * FROM wp_options WHERE option_name = 'woocommerce_admin_install_timestamp'
```
## Reset the onboarding wizard
Delete the `woocommerce_onboarding_profile` option:
```sql
DELETE FROM wp_options WHERE option_name = 'woocommerce_onboarding_profile'
```
## Enable tracks debugging in the console
```javascript
localStorage.setItem( 'debug', 'wc-admin:tracks' );
```
and set Chrome's log level "verbose" to checked.
## Running PHP unit tests using Vagrant (VVV)
1. SSH into Vagrant box (`vagrant ssh`)
2. `cd /srv/www//public_html/wp-content/plugins/woocommerce-admin`
3. Set up: `bin/install-wp-tests.sh wc-admin-tests root root`
4. Fast tests: `./vendor/bin/phpunit --group fast`
5. All tests: `./vendor/bin/phpunit`
You might need to `composer install` if `phpunit` doesn't exist.
---
## How to assess the impact of a pull request
*Source: contribution/contributing/deciding-pr-high-impact.md*
# How to assess the impact of a pull request
Deciding if a Pull Request should be declared High-Impact is a complex task. To achieve it, we need to assess and estimate the impact that the changes introduced in the Pull Request have in WooCommerce, which is usually a subjective task and sometimes inaccurate, due to the huge knowledge it demands of the WooCommerce product details, technical details and even customers issues history.
On this page, we will share some guidelines to help you assess the impact degree of a Pull Request.
## You should mark a Pull Request as High-Impact if
- It adds a **new feature** to WooCommerce, except if it's behind a feature flag.
- Modifies **critical functionality** (see the [critical flows list](https://github.com/woocommerce/woocommerce/wiki/Critical-Flows)).
- It fixes a **high-priority bug** (this includes Blocks fix releases core version bumps).
- It contains a **security fix**.
- Updates **SQL queries**.
- Touches any of the **$_REQUEST** family of variables.
- Any kind of **data migration/update**.
- Changes to **emails** sent from WooCommerce.
- Changes to WooCommerce **hooks/actions/filters**.
- Changes to **REST API endpoints**.
- It's a **big PR** (i.e. adds several changes in many files).
- It has **i18n changes** (for example, any file from `woocommerce/i18n` is modified).
## You should not mark a Pull Request as High-Impact if
- It only updates automated tests, things related to infrastructure not included in the WooCommerce release package, or other projects in the monorepo not included in the release package.
- It only contains readme or changelog changes.
- Fixes a low-priority bug such as a typo etc.
- Doesn't need to be verified in multiple environment types.
- Regular scheduled (not a fix release) core version bumps for the Blocks package (as testing will already be scheduled).
- It's part of a feature that hasn't been released as a whole yet (i.e. it's behind a feature flag currently in progress).
## My PR is High-Impact. What's next?
If your PR is High-Impact, be sure to label it with `impact: high` and the WooCommerce Core team will keep special considerations for testing it.
---
## Deprecation in core
*Source: contribution/contributing/deprecation-in-core.md*
# Deprecation in core
Deprecation is a method of discouraging usage of a feature or practice in favour of something else without breaking backwards compatibility or totally prohibiting its usage. To quote the Wikipedia article on Deprecation:
> While a deprecated software feature remains in the software, its use may raise warning messages recommending alternative practices; deprecated status may also indicate the feature will be removed in the future. Features are deprecated rather than immediately removed, to provide backward compatibility and give programmers time to bring affected code into compliance with the new standard.
There are various reasons why a function, method, or feature may be deprecated. To name a few:
- We may want to remove a function we do not use any longer.
- We may decide to change or improve how a function works, but due to breaking backwards compatibility we need to deprecate the old function instead.
- We may want to standardise naming conventions.
- We may find opportunities to merge similar functions to avoid reusing the same code in difference places.
Whilst deprecation notices are not ideal or attractive, they are just _warnings_ - not errors.
_*Store owners:* deprecation warnings do not mean your store is broken, it just serves as a reminder that code will need to be updated._
## How do we deprecate functions?
When we deprecate something in WooCommerce, we take a few actions to make it clear to developers and to maintain backwards compatibility.
1. We add a docblock to the function or method showing what version the function was deprecated in, e.g., `@deprecated 2.x.x`.
2. We add a warning notice using our own `wc_deprecated_function` function that shows what version, what function, and what replacement is available. More on that in a bit.
3. We remove usage of the deprecated function throughout the codebase.
The function or method itself is not removed from the codebase. This preserves backwards compatibility until removed - usually over a year or several major releases into the future.
We mentioned `wc_deprecated_function` above - this is our own wrapper for the `_deprecated_function` WordPress function. It works very similar except for that it forces a log entry instead of displaying it - regardless of the value of `WP_DEBUG` during AJAX events - so that AJAX requests are not broken by the notice.
## What happens when a deprecated function is called?
If an extension or theme uses a deprecated function, you may see a warning like the following example:
```bash
Notice: woocommerce_show_messages is deprecated since version 2.1! Use wc_print_notices instead. in /srv/www/wordpress-default/wp-includes/functions.php on line 3783
```
This tells you what is deprecated, since when, where, and what replacement is available.
Notices and warnings are usually shown inline, but there are some plugins you can use to collect and show them nicely in the footer of your site. Consider, for example, [Query Monitor](https://wordpress.org/plugins/query-monitor/).
### Warnings in production (store owners - read this!)
Showing PHP notices and warnings (or any error for that matter) is highly discouraged on your production stores. They can reveal information about your setup that a malicious user could exploit to gain access to your store. Make sure they are hidden from public view and optionally logged instead.
In WordPress you can do this by adding or modifying some constants in `wp-config.php`:
```php
define( 'WP_DEBUG', false );
```
On some hosts, errors may still be visible due to the hosts configuration. To force them to not display you might need to add this to `wp-config.php` as well:
```php
@ini_set( 'display_errors', 0 );
```
To log notices instead of displaying them, use:
```php
define( 'WP_DEBUG', true );
define( 'WP_DEBUG_LOG', true );
define( 'WP_DEBUG_DISPLAY', false );
```
The default location of the WordPress error log is `wp-content/debug.log`.
Note that this log can be publicly accessible, which could also pose a security risk. To keep it private, you can use a plugin or define a custom path in `wp-config.php`.
```php
1 string use numbered args. e.g. `Test %s string %s.` would be `Test %1$s string %2$s.`
3. Use sentence case. e.g. `Some Thing` should be `Some thing`.
4. Avoid HTML. If needed, insert the HTML using sprintf.
For more information, see WP core document [i18n for WordPress Developers](https://codex.wordpress.org/I18n_for_WordPress_Developers).
---
## WooCommerce Git flow
*Source: contribution/contributing/woocommerce-git-flow.md*
# WooCommerce Git flow
For core development, we use the following structure and flow.
**1.** Five weeks before the release we tag an alpha. We publish it for community testing, but this milestone doesn't imply a feature freeze. Issues found in the alpha are fixed with pull requests targetting `trunk` as usual.
**2.** Three weeks before the release we create a `release/x.y` branch off trunk and declare feature freeze: no additional pull requests will be accepted for the `x.y` release. We also tag a beta from the `release/x.y` branch.
**3.** If issues are found in the beta they are fixed with pull requests targeting the `release/x.y` branch.
**4.** At the end of every week during the beta cycle (at least, optionally more often) the release branch is merged back to `trunk` so that any fixed applied to the beta are present in future releases too:
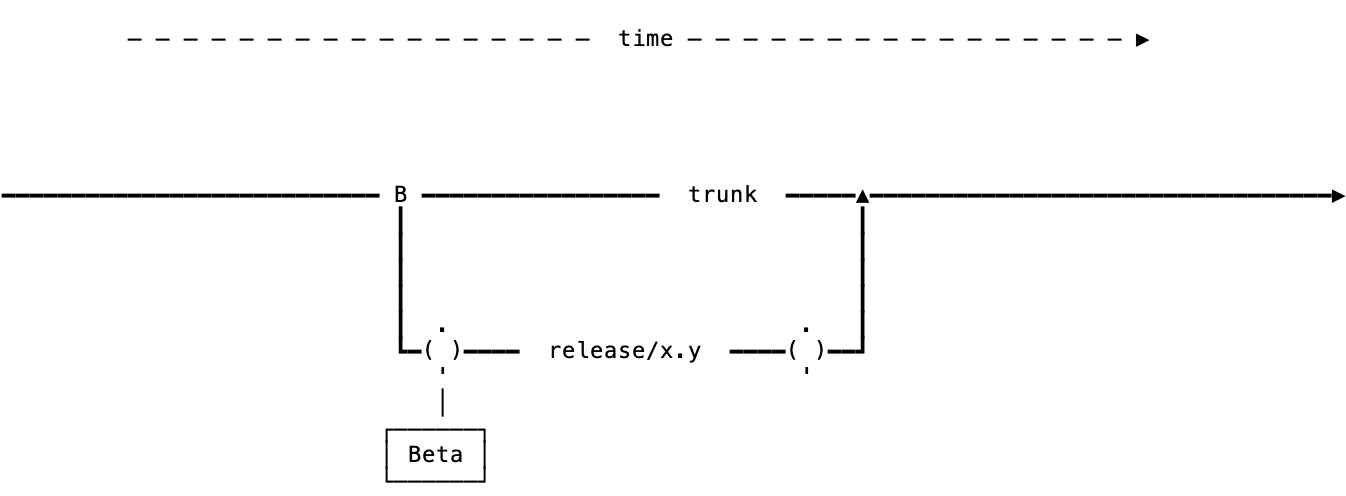
**5.** One week before the release we tag a Release Candidate. As with the beta, fixes for further issues discovered are handled with pull requests to the release branch.
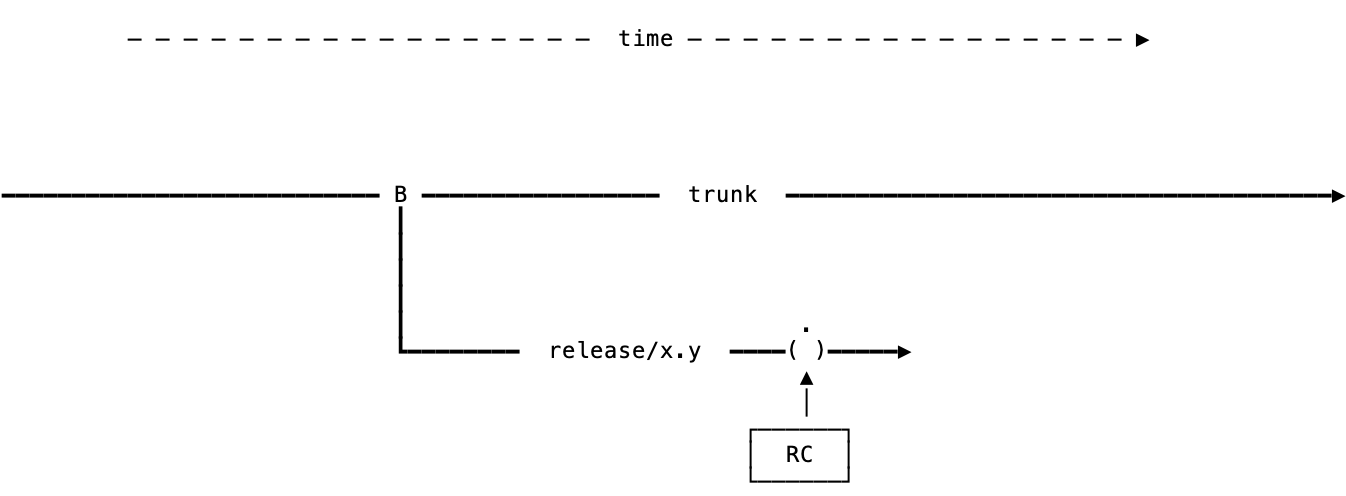
**6.** Finally, on the release day the release branch is merged one more time to `trunk`.
## Point releases
Point releases are those tagged `x.y.z` where `z` is not zero. These are handled similarly to the beta and release candidate of the main release:
* Pull requests are merged to the `release/x.y` branch (no dedicated branch is created).
* The release branch is merged back to `trunk` when the development for a point release is in progress, and also when the release happens.
## Branch naming
Prefixes determine the type of branch, and include:
* fix/
* feature/
* add/
* update/
* release/
When creating a **fix branch**, use the correct prefix and the issue number. Example:
```text
fix/12345
```
Alternatively you can summarise the change:
```text
fix/shipping-tax-rate-saving
```
---
## Contributing technical documentation
*Source: contribution/contributing-docs/contributing-docs.md*
# Contributing technical documentation
Thanks for helping improve WooCommerce's developer documentation. Our docs are powered by Docusaurus, and live inside the [`woocommerce/docs/`](https://github.com/woocommerce/woocommerce/tree/trunk/docs) folder of the monorepo.
This guide walks you through the structure, tooling, and process for contributing effectively.
## Getting started
> This guide presumes that you're familiar with basic Git and GitHub functionality, that you're signed into a GitHub account, and that you have Git setup locally. If you're new to GitHub, we recommend reading their [quickstart](https://docs.github.com/en/get-started/quickstart/hello-world) and [working with forks](https://docs.github.com/en/pull-requests/collaborating-with-pull-requests/working-with-forks/fork-a-repo) guides before getting started.
### Initial setup
1. Fork the [WooCommerce monorepo](https://github.com/woocommerce/woocommerce) on GitHub. If asked, you can safely check the `copy the trunk branch only` option.
2. [Clone the fork that you just created](https://docs.github.com/en/repositories/creating-and-managing-repositories/cloning-a-repository). This will allow you to edit it locally.
### Making changes
1. Prior to making any changes, ensure your `trunk` branch is up to date with the monorepo's `trunk` [by syncing it](https://docs.github.com/en/pull-requests/collaborating-with-pull-requests/working-with-forks/syncing-a-fork).
2. For each modification you'd like to make, create a new branch off `trunk` in your fork that starts with `docs/`. For example, if you're adding a doc about improving extension performance, you could call your branch `docs/improve-extension-performance`.
3. Create or edit markdown files inside the appropriate folder under `docs/`.
4. If needed, update the folder's `_category_.json` (for sidebar label/position).
5. Run a build to verify changes, confirm that the sitemaps and llms-txt files are updated, and detect markdown linting errors and broken links (link checking only happens on build):
```bash
npm run build
```
### Opening a pull request
1. Commit and push your changes to your fork.
2. [Open a pull request](https://docs.github.com/en/pull-requests/collaborating-with-pull-requests/proposing-changes-to-your-work-with-pull-requests/creating-a-pull-request) to woocommerce/woocommerce, targeting the trunk branch.
3. Use a descriptive title, and fill out the PR template. Include:
* Rationale for new files or categories
* A note about any sidebar or structure changes
4. The WooCommerce Developer Advocacy team will review and merge your changes.
## Docs folder anatomy
### Tooling and configuration
* **Supporting tooling and config** lives in:
* [`woocommerce/docs/_docu-tools/`](https://github.com/woocommerce/woocommerce/blob/trunk/docs/_docu-tools/)
* **Top-level sidebar and navbar** are configured in:
* [`sidebars.ts`](https://github.com/woocommerce/woocommerce/blob/trunk/docs/_docu-tools/sidebars.ts)
* [`docusaurus.config.ts`](https://github.com/woocommerce/woocommerce/blob/trunk/docs/_docu-tools/docusaurus.config.ts)
### Documentation files
* **Docs location**: All documentation lives inside of [`woocommerce/docs/`](https://github.com/woocommerce/woocommerce/blob/trunk/docs/)
* **Each folder is sidebar or top nav category**, for example: `getting-started`, `code-snippets`, etc.
* **Sidebar configuration** for each category is managed using a `_category_.json` file inside each category folder:
```json
{
"position": 7,
"label": "Code snippets"
}
```
## Adding images
All documentation images are stored in:
```bash
docs/_docu-tools/static/img/doc_images/
```
To include an image in a markdown file, reference it like this:
```markdown

```
## Creating New Categories
Before creating a new category, you should consider whether it is truly necessary to do so. Where possible, you should default to creating content in an existing category. If you do need to create a new category, follow these steps:
1. Inside the `/docs` folder, create a sub-folder with a descriptive name. For example, if you wanted to create a `Checkout design guidelines` section, you'd create a folder called `/docs/checkout-design-guidelines`.
2. Create a `_category_.json` file inside each category folder and give it a position it should have in the sidebar as well as a label:
```json
{
"position": 10,
"label": "Checkout design guidelines"
}
```
When creating new categories, please include rationale about why the category was created in your pull request's description.
## Writing guidelines and references
* Use short, URL-friendly file names (kebab-case, no spaces)
* Avoid pasting from rich text editors like Google Docs, which may introduce invalid characters
* Check our [docs style guide](style-guide) for detailed writing guidelines
* Reference the [Docusaurus documentation](https://docusaurus.io/docs) for additional guidance
---
## Technical Documentation Style Guide
*Source: contribution/contributing-docs/style-guide.md*
# Technical Documentation Style Guide
This style guide is intended to provide guidelines for creating effective and user-friendly tutorials and how-to guides for WooCommerce technical documentation that will live in repo and be editable and iterative by open source contributors and WooCommerce teams.
## Writing style
### Language style
- It's important to use clear and concise language that is easy to understand. Use active voice and avoid using jargon or technical terms that may be unfamiliar to the user. The tone should be friendly and approachable, and should encourage the user to take action.
- Articles are written in the 3rd-person voice.
Example: "Add an embed block to your page."
- Use American English for spelling and punctuation styles, or consider using a different word that doesn't have a different spelling in other English variants.
- Use sentence case (not title case) for docs titles and subheadings.
Example: "Introduction to the launch experience" rather than "Introduction to the Launch Experience."
- When referring to files or directories, the text formatting eliminates the need to include articles such as "the" and clarifying nouns such as "file" or "directory".
Example: "files stored in ~~the~~ `/wp-content/uploads/` ~~directory~~" or "edit ~~the~~ `/config/config.yml` ~~file~~ with"
### Writing tips
- Our target audience has a range of roles and abilities. When creating a tutorial or how-to guide, it's important to consider the intended audience. Are they beginners or advanced users? What is their technical background? Understanding the audience can help guide the level of detail and the choice of language used in the guide.
- Use language understable even by readers with little technical knowledge and readers whose first language might not be English.
- Consider that this might be the first WooCommerce documentation page the reader has seen. They may have arrived here via a Google search or another website. Give the reader enough context about the topic and link words and phrases to other relevant Docs articles as often as possible.
- Consider notes and sections that provide insights, tips, or cautionary information to expand on topics with context that would be relevant to the reader.
- When providing specific direction, best practices, or requirements, we recommend including a description of the potential consequences or impacts of not following the provided guidance. This can help seed additional search keywords into the document and provide better context when support links to the documentation.
- Always write a conceptual, high-level introduction to the topic first, above any H2 subheading.
### Tutorials
Tutorials are comprehensive and designed to teach a new skill or concept.
> You are the teacher, and you are responsible for what the student will do. Under your instruction, the student will execute a series of actions to achieve some end.
>
> [Divio Framework on Tutorial Writing](https://documentation.divio.com/tutorials/)
### How-to guides
How-to guides are focused and specific, providing instructions on how to accomplish a particular task or solve a particular problem.
> How-to guides are wholly distinct from tutorials and must not be confused with them:
>
> - A tutorial is what you decide a beginner needs to know.
> - A how-to guide is an answer to a question that only a user with some experience could even formulate.
>
> [Divio Framework on How-to-Guide Writing](https://documentation.divio.com/how-to-guides/)
## Custom Linting Rules
At WooCommerce, we're dedicated to maintaining a consistent and high-quality standard for our technical documentation. Our documents primarily adhere to the linting rules provided by `markdownlint`. To assist our contributors, we've detailed our custom configurations and exceptions below.
Note: While we've outlined specific rules above, all other default linting rules from `markdownlint` apply unless otherwise stated. We've only highlighted custom configurations or exceptions here. For a complete list of `markdownlint` rules, you can refer to [this link](https://github.com/DavidAnson/markdownlint/blob/3561fc3f38b05b3c55f44e371c2cd9bda194598a/doc/Rules.md).
1. **Headings Style**:
- Use the ATX-style (`#`) for headers.
```markdown
# This is an H1
## This is an H2
```
[Reference: MD003](https://github.com/DavidAnson/markdownlint/blob/3561fc3f38b05b3c55f44e371c2cd9bda194598a/doc/Rules.md#md003---heading-style)
2. **List Indentation**:
- Indent list items with 4 spaces.
```markdown
- Item 1
- Subitem 1.1
```
[Reference: MD007](https://github.com/DavidAnson/markdownlint/blob/3561fc3f38b05b3c55f44e371c2cd9bda194598a/doc/Rules.md#md007---unordered-list-indentation)
3. **Line Length**:
- No specific restriction on the line length, but keep paragraphs and sentences readable.
[Reference: MD013](https://github.com/DavidAnson/markdownlint/blob/main/doc/Rules.md#md013---line-length)
4. **Multiple Headings with the Same Content**:
- Multiple headings with the same content are permissible as long as they are not siblings.
[Reference: MD024](https://github.com/DavidAnson/markdownlint/blob/3561fc3f38b05b3c55f44e371c2cd9bda194598a/doc/Rules.md#md024---no-multiple-headings-with-the-same-content)
5. **Inline HTML**:
- Only the `video` element is allowed when using inline HTML.
```markdown
```
[Reference: MD033](https://github.com/DavidAnson/markdownlint/blob/3561fc3f38b05b3c55f44e371c2cd9bda194598a/doc/Rules.md#md033---inline-html)
6. **Tabs and Whitespace**:
- We're flexible with the use of hard tabs and trailing whitespace. However, for consistency, we recommend using spaces over tabs and avoiding trailing whitespaces.
[Reference: no-hard-tabs & whitespace](https://github.com/DavidAnson/markdownlint/blob/3561fc3f38b05b3c55f44e371c2cd9bda194598a/doc/Rules.md)
## Formatting
### Visual style
- Use the H2 style for main headings to be programmatically listed in the articles table of contents.
- File names and directory paths should be stylized as code per the [HTML spec](https://html.spec.whatwg.org/multipage/text-level-semantics.html#the-code-element).
Example: `/wp-content/uploads/`
- References to a single directory should have a trailing slash (eg. "/" appended) to the name.
Example: "uploads/"
- References to repositories should appear without forward slashes and not be formatted in any way. The first appearance of a repository in article content should link to the URL of the repository source whenever possible.
Example: "[woocommerce-blocks](https://github.com/woocommerce/woocommerce-blocks)" followed by "woocommerce-blocks"
- Inline references to functions and command line operations should be formatted as inline code.
Example: "Use `dig` to retrieve DNS information."
- Functions should be styled with "Inline code" formatting and retain upper and lower case formatting as established from their source.
Example: `WP_Query` (not WP_query)
### Visual aids
Visual aids such as screenshots, diagrams, code snippets and videos can be very helpful in a how-to guide. They provide a visual reference that can help the user understand the instructions more easily. When including visual aids, be sure to label them clearly and provide a caption or description that explains what is being shown.
### Acronyms
Phrases that are more familiarly known in their acronym form can be used. The first time an acronym appears on any page, the full phrase must be included, followed by its acronym in parentheticals.
Example: We've enhanced the querying functionality in WooCommerce with the introduction of High Performance Order Storage (HPOS).
After that, the acronym can be used for the remainder of the page.
When deciding if a term is common, consider the impact on translation and future internationalization (i18n) efforts.
## Patterning
### Article content
When creating a how-to guide, it's important to use a consistent and easy-to-follow format. Here is a suggested template for a software how-to guide:
**Introduction**: Provide an overview of the task or feature that the guide covers.
**Prerequisites**: List any prerequisites that are required to complete the task or use the feature.
**Step-by-step instructions**: Provide detailed, step-by-step instructions for completing the task or using the feature. Use numbered steps and include screenshots or other visual aids where appropriate.
**Troubleshooting**: Include a troubleshooting section that addresses common issues or errors that users may encounter.
**Conclusion**: Summarize the key points covered in the guide and provide any additional resources or references that may be helpful.
## Terminology
### Reference to components and features
- "**WordPress Admin dashboard**" should be presented in its complete form the first time it appears in an article, followed by its abbreviated form in parentheses ("WP Admin"). Thereafter the abbreviated form can be used for any reference to the WordPress Admin dashboard within the same article.
- When referring to the URL of the WordPress Admin dashboard, the shortened form `wp-admin` can be used.
## Testing
Before publishing a tutorial or guide, it's important to test it thoroughly to ensure that the instructions are accurate and easy to follow.
## Structure
### Atomizing the docs
Articles that cover too many topics in one place can make it difficult for users to find the information they are looking for. "Atomizing" the Docs refers to breaking down extensive articles into a group of smaller related articles. This group of articles often has a main "landing page" with a high-level overview of the group of articles, and the descriptive text provides links to the related articles that a user will find relevant. These groups of articles can be considered an information "molecule" formed by the smaller, atomized articles.
Breaking out smaller chunks of content into their own articles makes it easier to link to specific topics rather than relying on links to more extensive articles with anchor tags. This more specific linking approach is helpful to our Support team but is also useful for cross-linking articles throughout the Docs site.
---
## Releasing WooCommerce
*Source: contribution/releases/README.md*
# Releasing WooCommerce
The WooCommerce release process is managed by a rotating release lead. The documentation below outlines the process for managing releases.
## Process Overview
* [Backporting](/docs/contribution/releases/backporting)
* [Release Candidates](/docs/contribution/releases/rc)
* [Schedule](/docs/contribution/releases/schedule)
---
## Backporting in WooCommerce
*Source: contribution/releases/backporting.md*
# Backporting in WooCommerce
Backporting is the process of applying a change from `trunk` to an open release branch. When a release branch is created, it is copied from the `trunk` branch at the time of code freeze. Changes are applied to `trunk` and then backported to the release branch as needed.
## Requesting backports (Contributors)
### Cherry picking to a frozen release
If you have a pull request that should be backported to a frozen release, you should target `trunk` as your base branch. You can then request that the change is backported by adding the `cherry pick to frozen release` label to the pull request. Make sure to add the `Milestone` of the version you're targetting to the PR.
Note that adding this label does not guarantee that the change will be backported. The change must be qualified for backporting.
> If you're nearing the deadline for the final release, you may want to get in touch with the release lead directly to make them aware of the changes.
### Cherry picking to trunk
On occassion, more urgent changes may occur where we need to target the release branch directly as our base branch. When this happens, you should add the label `cherry pick to trunk` if this change is also meant to be included in `trunk`.
## Qualifying changes
Changes are qualified for backporting if they are:
- A bug fix.
- A change that impacts the performance of WooCommerce.
- A new feature that is time sensitive and impacts WooCommerce's business goals.
- A new feature that is contractually required by WooCommerce.
## Manually backporting pull requests (Release Lead)
### Cherry picking to a frozen release
Before cutting a new RC, you should manually backport any PRs with the respective labels.
1. Check out the release branch `git checkout release/x.y`.
2. Find all the [PRs labeled to be cherry picked](https://github.com/woocommerce/woocommerce/pulls?q=is%3Apr+label%3A%22cherry+pick+to+frozen+release%22) to the release branch. Filter by the current release milestone (`X.Y.0`) to limit to PRs relevant to this release.
3. Cherry-pick each PR (in chronological order) using `git cherry-pick [SHA]`.
4. After cherry-picking all PRs, push to the release branch using `git push`.
5. Remove the `cherry pick to frozen release` label and update the milestone to the current release for all cherry-picked PRs.
The SHA for a pull request can be found in the pull request activity once the PR has been merged.
---
## WooCommerce Release Candidates
*Source: contribution/releases/rc.md*
# WooCommerce Release Candidates
Release candidates are pre-release WooCommerce versions made available for testing by plugin authors and users.
They are versioned incrementally, starting with `-rc.1`, then `-rc.2`, and so on (released if any regressions have been
discovered or any crucial features need to make it into the final release).
The date of the very first release candidate is announced along with the final release date as part of the published release
checklist and [release schedule](https://developer.woocommerce.com/release-calendar/).
> Note on timeline: The expected timeframe between the RC1 and a final release is three weeks.
> Note on RC1: RC1 can be released without additional consideration, as it aligns with the code freeze timing.
> Note on RC2: RC2 can be released two weeks after RC1 (and one week before the final release).
On the technical side of the release process, we rely on release branches (named e.g., `release/9.9`) for code freeze and
stabilization. In those branches, we tag release candidates, fix regressions (via CFEs), and tag final releases in isolation
from ongoing development for greater release stability.
---
## WooCommerce Release Schedule
*Source: contribution/releases/schedule.md*
# WooCommerce Release Schedule
The schedule can be found on [this page](https://developer.woocommerce.com/release-calendar/), which also explains the types
of events in the calendar like `Releases`, `Release Candidates (RC)` and `Feature Freeze Dates`.
While the calendar reflects the events made public, there are specific steps in the release process that are internal,
and this page aims to provide necessary context about those events.
## Detailed release schedule
This section will use the publicly available release schedule as anchors and clarify where the internal events fit in.
### Feature Freeze (start of the release cycle)
This step is mostly automated and creates a dedicated release branch where the future release undergoes testing and stabilization.
At this point, the Developer Advocacy team publishes pre-release updates ([example](https://developer.woocommerce.com/2025/05/12/woocommerce-9-9-pre-release-updates/))
### RC1 (Feature Freeze + 1 week)
This step is where various testing processes are happening:
- internally: regression testing with Woo maintained extensions, regression testing in multiple environments, and exploration testing (including by the contributing teams).
- community: the Developer Advocacy team updates the pre-release announcement so the community can [begin testing](/docs/contribution/testing/beta-testing/) the release.
### RC2 (RC1 + 1 week)
This step is where we release regressions fixes discovered in RC1, as part of the release stabilization.
At this point, the Developer Advocacy team continues to update the pre-release announcement.
### Final Release (RC2 + 1 week)
This step is where the stable release version becomes available to everyone.
At this point, the Developer Advocacy team publishes release highlights that are prepared in-advance ([example](https://developer.woocommerce.com/2025/06/09/woocommerce-9-9-its-fast-period/)).
## Delays
Due to business needs, the release dates may be subject to change. Below we will describe some of the internal processes for how we wrangling this situation.
Once the need for changes in the release schedule is confirmed, the Woo team creates an internal Slack thread to communicate the necessary details. This thread provides an opportunity for teams to share additional context, which may help verify or challenge schedule changes.
Once the feedback and release schedule changes have been finalized, we procced to:
- ask the Developer Advocacy team to communicate the changes publicly ([example](https://developer.woocommerce.com/2025/06/02/woocommerce-9-9-release-is-delayed/))
- update [the calendar](https://developer.woocommerce.com/release-calendar/) with the new release dates
> Note: To reduce disruption for internal teams and contributors, we avoid changing the time between release candidates (RCs) and the final release. Instead, we adjust the overall release schedule. These intervals are based on several factors, including team capacity.
---
## Testing
*Source: contribution/testing/README.md*
# Testing
Properly setting up your test environment and writing tests when contributing to WooCommerce core are essential parts of our development pipeline. The links below are also included in our [Contributing Guidelines](https://github.com/woocommerce/woocommerce/blob/trunk/.github/CONTRIBUTING.md) on GitHub.
If you have any questions about testing please reach out to the developer community in our public channels([Developer Blog](https://developer.woocommerce.com/blog/), [GitHub Discussions](https://github.com/woocommerce/woocommerce/discussions), or [Community Slack](https://woocommerce.com/community-slack/)).
## Unit Testing
[End-to-end tests](https://github.com/woocommerce/woocommerce/tree/trunk/plugins/woocommerce/tests/e2e-pw) are powered by `Playwright`. The test site is spun up using `wp-env` ([recommended](https://developer.wordpress.org/block-editor/reference-guides/packages/packages-env/)).
## API Testing
[API tests](https://github.com/woocommerce/woocommerce/tree/trunk/plugins/woocommerce/tests/e2e-pw/tests/api-tests) are based on `Playwright` and `wp-env`.
## Calls for Testing
Keep tabs on calls for testing on our developer blog, and make sure to read our beta testing instructions to help us build new features and enhancements.
---
## Beta Testing
*Source: contribution/testing/beta-testing.md*
# Beta Testing
Beta testing is vital to ensuring our releases are as bug free as possible and to ensure we hear user feedback before putting changes live. Anyone can beta test; shop owners, plugin developers, theme developers, translators, any and all help is welcome.
We do understand however that the process of testing can be a little bit of a hassle since you need to download a tagged release and then upload it to your testing site manually. Sometimes this can also cause issues with plugin directory naming as well, because tagged releases will not have a directory named `woocommerce`. This can break extensions.
To make this process easier, we have released a beta testing plugin to help install the WooCommerce beta versions, and to ensure the directory names are kept correct.
Please ensure you test responsibly, it is not a good idea to run beta versions on a production site unless you have experience and can anticipate changes and failures.
## Installing the Beta Tester Plugin
To get started, go to Plugins > Add New > Upload plugin, and install the beta tester plugin which you can download from:
[WooCommerce Beta Tester](https://woocommerce.com/products/woocommerce-beta-tester/)
This plugin will give you access to all of the WooCommerce versions uploaded to [WordPress.org]. This includes beta releases and release candidates.
## Giving Feedback
During testing, if you come across a bug or want to propose or contribute an enhancement, [submit an issue on Github](https://github.com/woocommerce/woocommerce/issues/new?assignees=&labels=type%3A+enhancement%2Cstatus%3A+awaiting+triage&template=2-enhancement.yml&title=%5BEnhancement%5D%3A+). Ensure you read our guidelines on contributing and note which version you are using specifically. It is also possible to easily submit a new GitHub issue through the [beta tester plugin](https://woocommerce.com/products/woocommerce-beta-tester/).
Sometimes we may also ask for feedback via other means, such as the surveys and calls for testing on the [developer blog](https://developer.woocommerce.com/blog/). We appreciate immediate feedback, comments, and responses to surveys as it helps us judge how well received our releases and betas are and will help us shape future versions.
Thanks for testing WooCommerce!
---
## WooCommerce core critical flows
*Source: contribution/testing/core-critical-flows.md*
# WooCommerce core critical flows
We have identified what we consider to be our most critical user flows within WooCommerce Core. These flows will help us focus and prioritize our testing efforts. They will also help us consider the impact of changes and priority of issues.
These flows will continually evolve as the platform evolves with flows updated, added or re-prioritised.
## Shopper critical flow areas
- [Shopper > Shop](#shopper---shop)
- [Shopper > Product](#shopper---product)
- [Shopper > Cart](#shopper---cart)
- [Shopper > Checkout](#shopper---checkout)
- [Shopper > Email](#shopper---email)
- [Shopper > My Account](#shopper---my-account)
## Merchant critical flow areas
- [Merchant > Onboarding](#merchant---onboarding)
- [Merchant > Dashboard](#merchant---dashboard)
- [Merchant > Settings](#merchant---settings)
- [Merchant > Coupons](#merchant---coupons)
- [Merchant > Marketing](#merchant---marketing)
- [Merchant > Analytics](#merchant---analytics)
- [Merchant > Products](#merchant---products)
- [Merchant > Orders](#merchant---orders)
- [Merchant > Customers](#merchant---customers)
- [Merchant > Email](#merchant---email)
- [Merchant > Plugins](#merchant---plugins)
- [Merchant > My Subscriptions](#merchant---my-subscriptions)
- [Merchant > Pages](#merchant---pages)
- [Merchant > Posts](#merchant---posts)
### Shopper - Shop
| User Type | Flow Area | Flow Name | Test File |
| --------- | --------- | ------------------------------------------- | -------------------------------------------- |
| Shopper | Shop | Search Store | shopper/shop-search-browse-sort.spec.js |
| Shopper | Shop | Browse by categories | shopper/shop-search-browse-sort.spec.js |
| Shopper | Shop | Can sort items | shopper/shop-search-browse-sort.spec.js |
| Shopper | Shop | Add Simple Product to Cart (from shop page) | shopper/cart.spec.js |
| Shopper | Shop | Display shop catalog | shopper/shop-search-browse-sort.spec.js |
| Shopper | Shop | Products by tag | shopper/product-tags-attributes.spec.js |
| Shopper | Shop | Products by attribute | shopper/product-tags-attributes.spec.js |
| Shopper | Shop | Use product filters | shopper/shop-products-filer-by-price.spec.js |
### Shopper - Product
| User Type | Flow Area | Flow Name | Test File |
| --------- | --------- | ---------------------------------------------------- | ---------------------------------------- |
| Shopper | Product | Add Simple Product to Cart | shopper/product-simple.spec.js |
| Shopper | Product | Add Grouped Product to Cart | shopper/product-grouped.spec.js |
| Shopper | Product | Variable Product info updates depending on variation | shopper/product-variable.spec.js |
| Shopper | Product | Add Variable Product to Cart | shopper/product-variable.spec.js |
| Shopper | Product | Display up-sell product | products/product-linked-products.spec.js |
| Shopper | Product | Display related products | products/product-linked-products.spec.js |
| Shopper | Product | Display reviews | merchant/product-reviews.spec.js |
| Shopper | Product | Add review | merchant/product-reviews.spec.js |
| Shopper | Product | View product images | shopper/product-simple.spec.js |
| Shopper | Product | View product descriptions | shopper/product-simple.spec.js |
### Shopper - Cart
| User Type | Flow Area | Flow Name | Test File |
| --------- | --------- | ------------------------------------------ | ------------------------------------------- |
| Shopper | Cart | Add to cart redirects to cart when enabled | shopper/cart-redirection.spec.js |
| Shopper | Cart | View cart | shopper/cart.spec.js |
| Shopper | Cart | Update product quantity within limits | shopper/cart.spec.js |
| Shopper | Cart | Remove products from cart | shopper/cart.spec.js |
| Shopper | Cart | Apply all coupon types | shopper/cart-coupons.spec.js |
| Shopper | Cart | Display shipping options by address | shopper/calculate-shipping.spec.js |
| Shopper | Cart | View empty cart | shopper/cart.spec.js |
| Shopper | Cart | Display correct tax | shopper/cart-checkout-calculate-tax.spec.js |
| Shopper | Cart | Respect coupon usage constraints | shopper/cart-checkout-coupons.spec.js |
| Shopper | Cart | Display cross-sell products | products/product-linked-products.spec.js |
| Shopper | Cart | Proceed to checkout | shopper/checkout.spec.js |
### Shopper - Checkout
| User Type | Flow Area | Flow Name | Test File |
| --------- | --------- | ---------------------------------------- | ------------------------------------------- |
| Shopper | Checkout | Correct item in Order Review | shopper/checkout.spec.js |
| Shopper | Checkout | Can add shipping address | shopper/checkout.spec.js |
| Shopper | Checkout | Guest can place order | shopper/checkout.spec.js |
| Shopper | Checkout | Create an account | shopper/checkout-create-account.spec.js |
| Shopper | Checkout | Login to existing account | shopper/checkout-login.spec.js |
| Shopper | Checkout | Existing customer can place order | shopper/checkout.spec.js |
| Shopper | Checkout | Use all coupon types | shopper/checkout-coupons.spec.js |
| Shopper | Checkout | View checkout | shopper/checkout.spec.js |
| Shopper | Checkout | Receive warnings when form is incomplete | shopper/checkout.spec.js |
| Shopper | Checkout | Add billing address | shopper/checkout.spec.js |
| Shopper | Checkout | Respect coupon usage constraints | shopper/cart-checkout-coupons.spec.js |
| Shopper | Checkout | Display correct tax in checkout | shopper/cart-checkout-calculate-tax.spec.js |
| Shopper | Checkout | View order confirmation page | shopper/checkout.spec.js |
### Shopper - Email
| User Type | Flow Area | Flow Name | Test File |
| --------- | --------- | ------------------------------------- | --------------------------------------- |
| Shopper | Email | Customer Account Emails Received | shopper/account-email-receiving.spec.js |
| Shopper | Email | Customer Order Detail Emails Received | shopper/order-email-receiving.spec.js |
### Shopper - My Account
| User Type | Flow Area | Flow Name | Test File |
| --------- | ---------- | ------------------------- | ----------------------------------------- |
| Shopper | My Account | Create an account | shopper/my-account-create-account.spec.js |
| Shopper | My Account | Login to existing account | shopper/my-account.spec.js |
| Shopper | My Account | View Account Details | shopper/my-account.spec.js |
| Shopper | My Account | Update Addresses | shopper/my-account-addresses.spec.js |
| Shopper | My Account | View Orders | shopper/my-account-pay-order.spec.js |
| Shopper | My Account | Pay for Order | shopper/my-account-pay-order.spec.js |
| Shopper | My Account | View Downloads | shopper/my-account-downloads.spec.js |
### Merchant - Onboarding
| User Type | Flow Area | Flow Name | Test File |
| --------- | ------------- | -------------------------------------------------------------- | ---------------------------------------- |
| Merchant | Core Profiler | Introduction & opt-in | activate-and-setup/core-profiler.spec.js |
| Merchant | Core Profiler | User profile information | activate-and-setup/core-profiler.spec.js |
| Merchant | Core Profiler | Business information | activate-and-setup/core-profiler.spec.js |
| Merchant | Core Profiler | Extensions page | activate-and-setup/core-profiler.spec.js |
| Merchant | Core Profiler | WooPayments included in extensions for eligible criteria | activate-and-setup/core-profiler.spec.js |
| Merchant | Core Profiler | WooPayments not included in extensions for ineligible criteria | activate-and-setup/core-profiler.spec.js |
| Merchant | Core Profiler | Install all default extensions | activate-and-setup/core-profiler.spec.js |
| Merchant | Core Profiler | Complete site setup | activate-and-setup/core-profiler.spec.js |
| Merchant | Core Profiler | Skip introduction and confirm business location | activate-and-setup/core-profiler.spec.js |
### Merchant - Dashboard
| User Type | Flow Area | Flow Name | Test File |
| --------- | -------------- | ------------------------------------------------------ | --------- |
| Merchant | WC Home | Completing profiler redirects to home | |
| Merchant | WC Home | Complete all steps on task list | |
| Merchant | WC Home | Hide the task list | |
| Merchant | WC Home | Store management displayed after task list finished | |
| Merchant | WC Home | Direct access to analytics reports from stats overview | |
| Merchant | WC Home | Preserve task list completion status after upgrade | |
| Merchant | WC Home | Interact with extended task list | |
| Merchant | Activity Panel | Interact with activity button | |
| Merchant | Inbox | Interact with notes and perform CTAs | |
| Merchant | Inbox | Dismiss single note and all notes | |
### Merchant - Settings
| User Type | Flow Area | Flow Name | Test File |
| --------- | --------- |----------------------------------------|------------------------------------------|
| Merchant | Settings | Update General Settings | merchant/settings-general.spec.js |
| Merchant | Settings | Add Tax Rates | merchant/settings-tax.spec.js |
| Merchant | Settings | Add Shipping Zones | merchant/create-shipping-zones.spec.js |
| Merchant | Settings | Add Shipping Classes | merchant/create-shipping-classes.spec.js |
| Merchant | Settings | Enable local pickup for checkout block | merchant/settings-shipping.spec.js |
| Merchant | Settings | Update payment settings | admin-tasks/payment.spec.js |
| Merchant | Settings | Handle Product Brands | merchant/create-product-brand.spec.js |
### Merchant - Coupons
| User Type | Flow Area | Flow Name | Test File |
| --------- | --------- | --------------------- | ------------------------------------------ |
| Merchant | Coupons | Add all coupon types | merchant/create-coupon.spec.js |
| Merchant | Coupons | Add restricted coupon | merchant/create-restricted-coupons.spec.js |
### Merchant - Marketing
| User Type | Flow Area | Flow Name | Test File |
| --------- | --------- | -------------------------- | -------------------------------- |
| Merchant | Marketing | Display marketing overview | admin-marketing/overview.spec.js |
### Merchant - Analytics
| User Type | Flow Area | Flow Name | Test File |
| --------- | --------- | -------------------------------------------------- | ------------------------------------------ |
| Merchant | Analytics | View revenue report | admin-analytics/analytics.spec.js |
| Merchant | Analytics | View overview report | admin-analytics/analytics-overview.spec.js |
| Merchant | Analytics | Confirm correct summary numbers on overview report | admin-analytics/analytics-data.spec.js |
| Merchant | Analytics | Use date filter on overview page | admin-analytics/analytics-data.spec.js |
| Merchant | Analytics | Customize performance indicators on overview page | admin-analytics/analytics-overview.spec.js |
| Merchant | Analytics | Use date filter on revenue report | admin-analytics/analytics-data.spec.js |
| Merchant | Analytics | Download revenue report as CSV | admin-analytics/analytics-data.spec.js |
| Merchant | Analytics | Use advanced filters on orders report | admin-analytics/analytics-data.spec.js |
| Merchant | Analytics | Analytics settings | admin-analytics/analytics-data.spec.js |
| Merchant | Analytics | Set custom date range on revenue report | admin-analytics/analytics-data.spec.js |
### Merchant - Products
| User Type | Flow Area | Flow Name | Test File |
| --------- | -------------- | ------------------------------ | ------------------------------------------------------------------------- |
| Merchant | Products | View all products | merchant/product-search.spec.js |
| Merchant | Products | Search products | merchant/product-search.spec.js |
| Merchant | Products | Add simple product | merchant/product-create-simple.spec.js |
| Merchant | Products | Add variable product | merchant/products/add-variable-product/create-variable-product.spec.js |
| Merchant | Products | Edit product details | merchant/product-edit.spec.js |
| Merchant | Products | Add virtual product | merchant/product-create-simple.spec.js |
| Merchant | Products | Import products CSV | merchant/product-import-csv.spec.js |
| Merchant | Products | Add downloadable product | merchant/product-create-simple.spec.js |
| Merchant | Products | View product reviews list | merchant/product-reviews.spec.js |
| Merchant | Products | View all products reviews list | merchant/product-reviews.spec.js |
| Merchant | Products | Edit product review | merchant/product-reviews.spec.js |
| Merchant | Products | Trash product review | merchant/product-reviews.spec.js |
| Merchant | Products | Bulk edit products | merchant/product-edit.spec.js |
| Merchant | Products | Remove products | merchant/product-delete.spec.js |
| Merchant | Products | Manage product images | merchant/product-images.spec.js |
| Merchant | Products | Manage product inventory | merchant/product-create-simple.spec.js |
| Merchant | Products | Manage product attributes | merchant/product-create-simple.spec.js |
| Merchant | Products | Manage global attributes | |
| Merchant | Products | Add up-sell | products/product-linked-products.spec.js |
| Merchant | Products | Add cross-sell | products/product-linked-products.spec.js |
| Merchant | Products (New) | Disable new product experience | merchant/products/block-editor/disable-block-product-editor.spec.js |
| Merchant | Products (New) | Add simple product | merchant/products/block-editor/create-simple-product-block-editor.spec.js |
| Merchant | Products (New) | Edit simple product | merchant/products/block-editor/product-edit-block-editor.spec.js |
| Merchant | Products (New) | Manage product images | merchant/products/block-editor/product-images-block-editor.spec.js |
| Merchant | Products (New) | Manage product inventory | merchant/products/block-editor/product-inventory-block-editor.spec.js |
| Merchant | Products (New) | Manage product attributes | merchant/products/block-editor/product-attributes-block-editor.spec.js |
### Merchant - Orders
| User Type | Flow Area | Flow Name | Test File |
| --------- | --------- | ---------------------------------------------------------------- | -------------------------------------- |
| Merchant | Orders | View all orders | merchant/order-status-filter.spec.js |
| Merchant | Orders | Can add new order basic | merchant/order-edit.spec.js |
| Merchant | Orders | View single order | merchant/order-edit.spec.js |
| Merchant | Orders | Update order status to completed | merchant/order-edit.spec.js |
| Merchant | Orders | Update order status to cancelled | merchant/order-edit.spec.js |
| Merchant | Orders | Update order details | merchant/order-edit.spec.js |
| Merchant | Orders | Customer payment page | merchant/customer-payment-page.spec.js |
| Merchant | Orders | Refund order | merchant/order-refund.spec.js |
| Merchant | Orders | Apply coupon | merchant/order-coupon.spec.js |
| Merchant | Orders | Can add new order complex - multiple product types & tax classes | merchant/create-order.spec.js |
| Merchant | Orders | Search orders | merchant/order-search.spec.js |
| Merchant | Orders | Filter orders by order status | merchant/order-status-filter.spec.js |
| Merchant | Orders | Bulk change order status | merchant/order-bulk-edit.spec.js |
| Merchant | Orders | Add order notes | merchant/order-edit.spec.js |
### Merchant - Customers
| User Type | Flow Area | Flow Name | Test File |
| --------- | --------- | --------------------- | ------------------------------ |
| Merchant | Customers | Display customer list | merchant/customer-list.spec.js |
### Merchant - Email
| User Type | Flow Area | Flow Name | Test File |
| --------- | --------- | -------------------------------------------------- | ----------------------------- |
| Merchant | Email | Receive and check content of new order email | merchant/order-emails.spec.js |
| Merchant | Email | Receive and check content of cancelled order email | merchant/order-emails.spec.js |
| Merchant | Email | Receive and check content of failed order email | merchant/order-emails.spec.js |
| Merchant | Email | Resent new order email | merchant/order-emails.spec.js |
| Merchant | Email | Send invoice/order details to customer via Email | merchant/order-emails.spec.js |
### Merchant - Plugins
| User Type | Flow Area | Flow Name | Test File |
| --------- | --------- | ---------------------- | -------------------------------------- |
| Merchant | Plugins | Can update WooCommerce | smoke-tests/update-woocommerce.spec.js |
### Merchant - My Subscriptions
| User Type | Flow Area | Flow Name | Test File |
| --------- | ---------------- | --------------------------------------- | --------------------------------- |
| Merchant | My Subscriptions | Can initiate WooCommerce.com Connection | merchant/settings-woo-com.spec.js |
### Merchant - Pages
| User Type | Flow Area | Flow Name | Test File |
| --------- | --------- | --------------------- | ---------------------------- |
| Merchant | Pages | Can create a new page | merchant/create-page.spec.js |
### Merchant - Posts
| User Type | Flow Area | Flow Name | Test File |
| --------- | --------- | --------------------- | ---------------------------- |
| Merchant | Posts | Can create a new post | merchant/create-post.spec.js |
---
## Writing high quality testing instructions
*Source: contribution/testing/writing-high-quality-testing-instructions.md*
# Writing high quality testing instructions
## Introduction
Having clear testing Instructions on pull requests is the first level of quality engineering in WooCommerce, which is key for testing early and minimizing the impact of unexpected effects in the upcoming versions of WooCommerce.
This page contains the following sections:
- [What is a test?](#what-is-a-test)
- [What to cover with the testing instructions](#what-to-cover-with-the-testing-instructions)
- [Flow to write good testing instructions](#flow-to-write-good-testing-instructions)
- [Examples](#examples)
## What is a test?
A test is a method that we can use to check that something meets certain criteria. It is typically defined as a procedure which contains the steps required to put the system under test in a certain state before executing the action to be checked. Therefore, a test consists of the following stages:
- **Preconditions:** All the steps that need to be performed to put the system in the desired state before executing the action we want to check. A test could have many preconditions.
- **Action:** This is the exact step that causes the change we want to check in the system. It should be only one because each test should ideally cover one thing at a time.
- **Validation:** Relates to the steps to be performed in order to validate the result of performing the action in the system. A test could validate more than one thing.
For example, in the process of adding an item to the cart:
- The **preconditions** would be all the steps involved in:
- The product creation process.
- Logging as a shopper.
- Heading to the shop page where the products are listed.
- The **action** would be clicking the _"Add to cart"_ button in the desired product.
- The **validation** stage would include checking that the cart icon (if any) shows 1 more item and the product we selected is now included in the cart.
Specifying the preconditions, actions and validations can be quite beneficial when understanding the scope of a test, because:
- The **preconditions** describe what we have to do so that we can execute the test successfully.
- The **action** lets us know the purpose of the test, in other words, it is the key to understanding what we need to test.
- The **validation** stage lets us know what to expect when executing the test.
In this context, we will refer to testing instructions as the tests we need to execute in order to validate that the changes delivered in a pull request or release work as expected. This means the testing instructions could refer to a test or more, involving the happy path and potential edge cases.
## What to cover with the testing instructions
As stated in the previous section, a test (in our context, a testing instruction) is a method to check that a new change or set of changes meets certain criteria.
Therefore, a PR could have testing instructions for multiple scenarios, in fact, it is recommended to include testing instructions for as many scenarios as needed to cover the changes introduced in the PR. In other words, please **add as many testing instructions as needed to cover the acceptance criteria**, understanding acceptance criteria as _the conditions that a software product must satisfy to be accepted by a user, customer or other stakeholders_ or, in the context of a PR, the conditions that this PR must satisfy to be accepted by users, developers and the WooCommerce community as per requirements.
## Flow to write good testing instructions
1. **Outline the user flows** you want to cover.
2. **Define the environment** where the testing instructions should be executed (server, PHP version, WP version, required plugins, etc), and start writing the testing instructions as if you were starting from a fresh install.
3. Identify the **preconditions**, **action** and **validation** steps.
4. Write **as many preconditions as you need** to explain how to set up the state of WooCommerce so that you can execute the desired action to test every flow.
1. Try to be detailed when explaining the interactions the user needs to perform in WooCommerce.
2. If there are several preconditions for a user flow that is explained in a public guide, feel free to simply link the guide in the testing instructions instead of writing several steps. For example, _"Enable dev mode in WooCommerce Payments by following the steps mentioned [in the sandbox mode documentation](https://woocommerce.com/document/woocommerce-payments/testing-and-troubleshooting/sandbox-mode/)"_.
5. Write **the action step**, which should cover the specific action that we want to test as part of this user flow.
6. Write **as many validation steps** as needed in order to assess that the actual result meets expectations.
1. Bear in mind to check only the steps needed to validate that this change works.
### Considerations for writing high-quality testing instructions
- Define the testing instructions in a way that they can be **understood and followed by everybody**, even for people new to WooCommerce.
- Make sure to describe every detail and **avoid assuming knowledge**, the spectrum of readers might be wide and some people would not know the concepts behind what is being assumed. For example, instead of saying _"Enable the [x] experiment"_, say something like:
```text
- Install the WooCommerce Beta Tester plugin.
- Go to `Tools > WCA Test Helper > Experiments`.
- Toggle the [x] experiment.
```
- Always try to explain in detail **where the user should head to**, for example instead of saying "Go to the Orders page as admin", say "Go to [url]" or even "Go to WooCommerce > Orders".
- Try to use real test data. For example, instead of saying _"Enter a name for the product"_, say something like _"Enter 'Blue T-Shirt' as the product name"_. This will make it more self-explanatory and remove potential doubts related to assuming knowledge.
- Make sure you **keep your testing instructions updated** if they become obsolete as part of a new commit.
- If the testing instructions require to add custom code, please **provide the code snippet**.
- If the testing instructions require to install a plugin, please **provide a link to this plugin, or the zip file** to install it.
- If the testing instructions require to hit an API endpoint, please provide the **link to the endpoint documentation**.
- Ideally **provide screenshots and/or videos** that supported what the testing instructions are explaining. If you are using links to collaborative tools then also provide an equivalent screenshot/video for those who do not have access.
## Examples
### Good quality testing instructions
#### Example 1
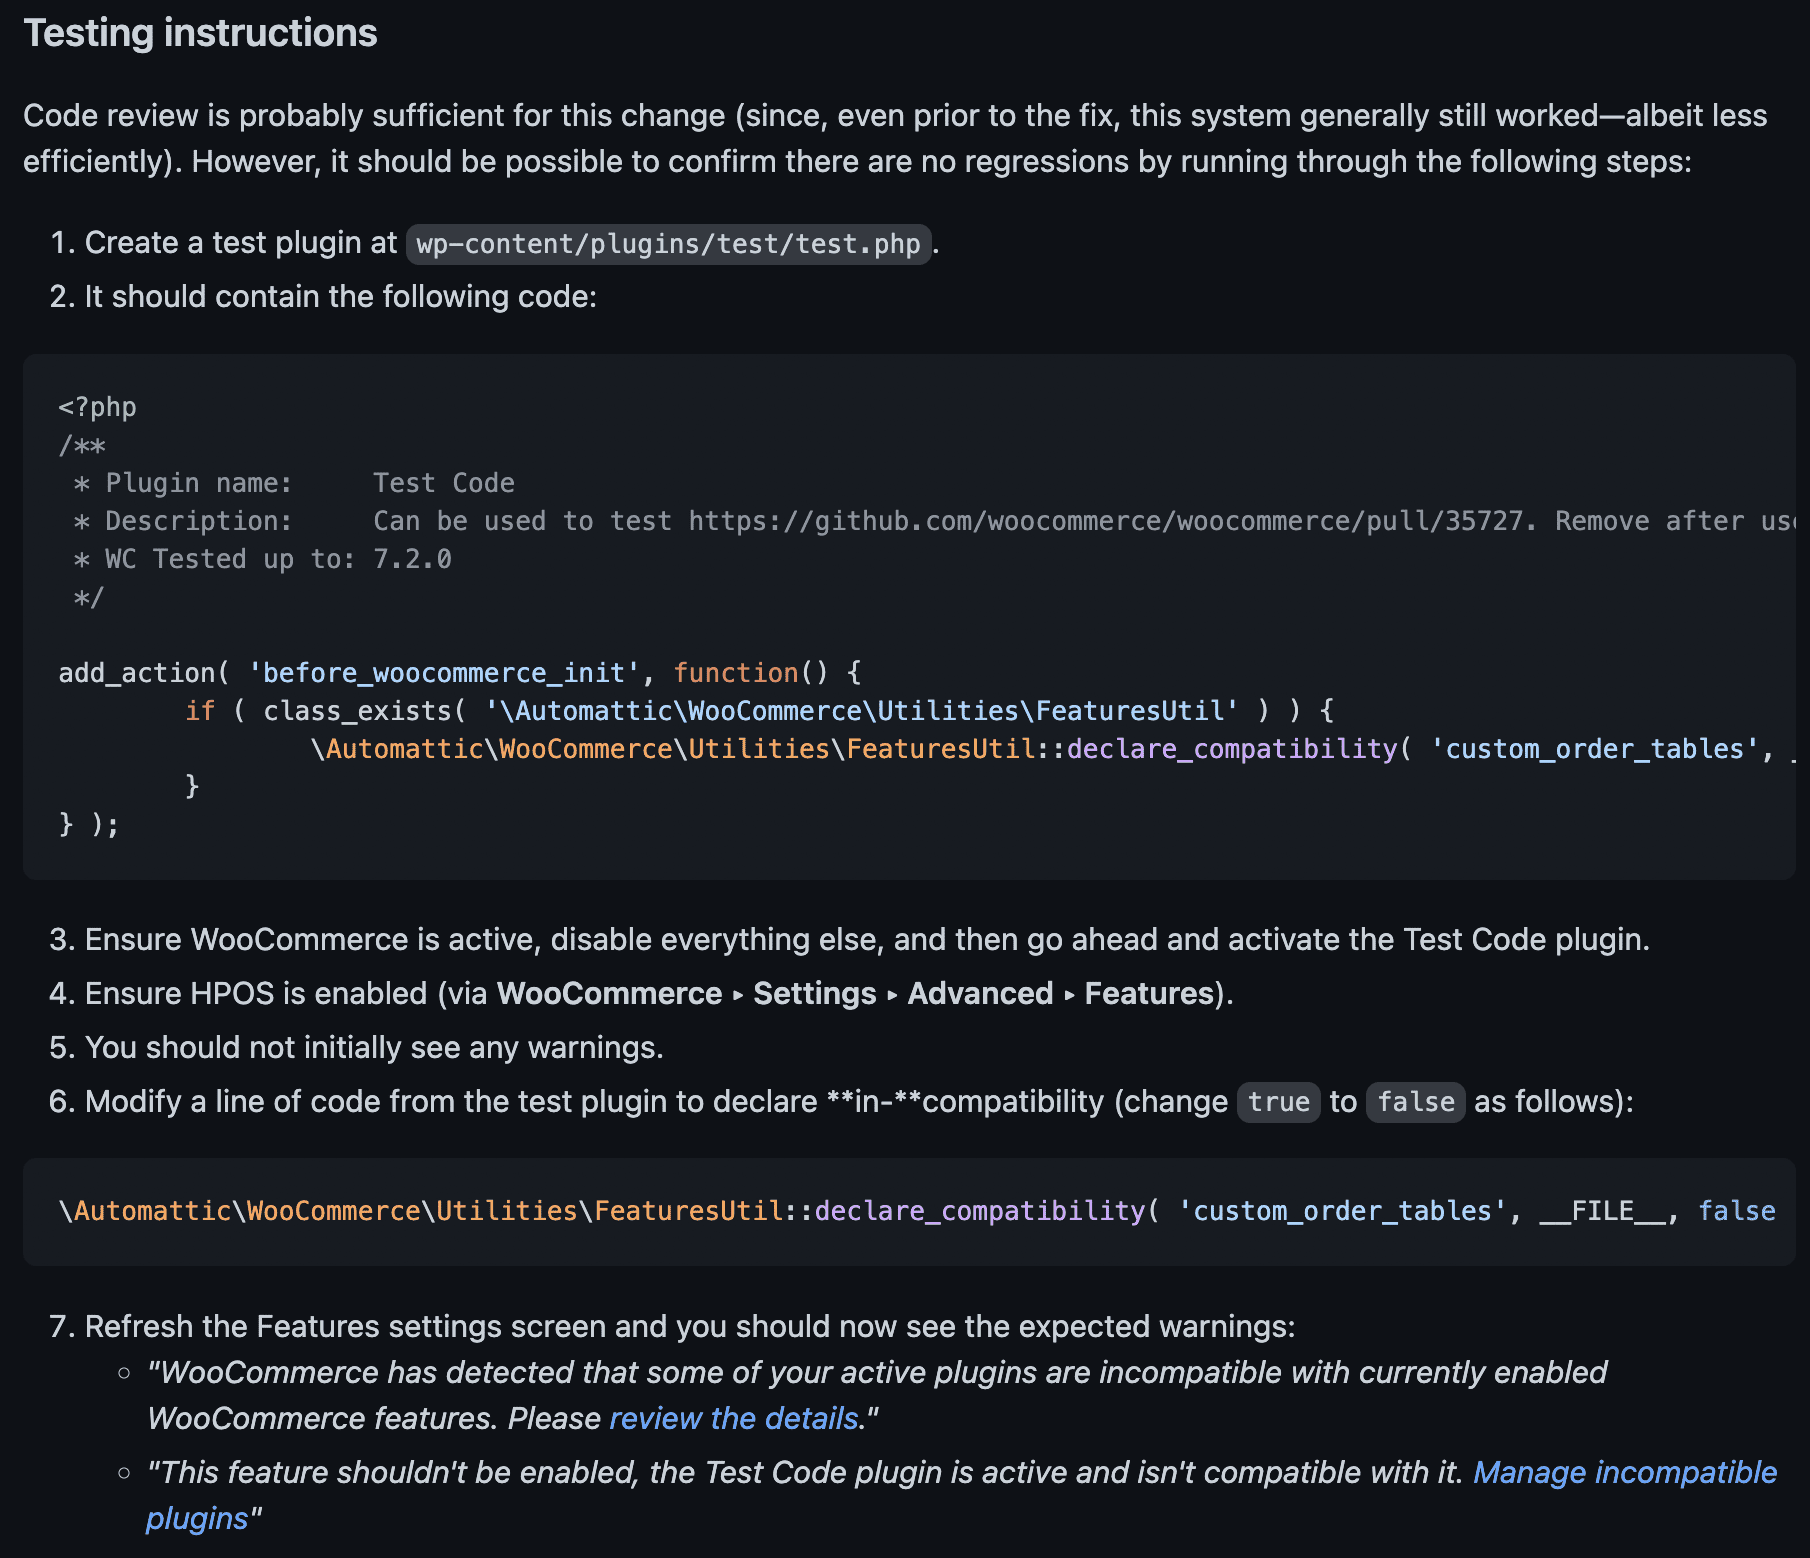
#### Example 2
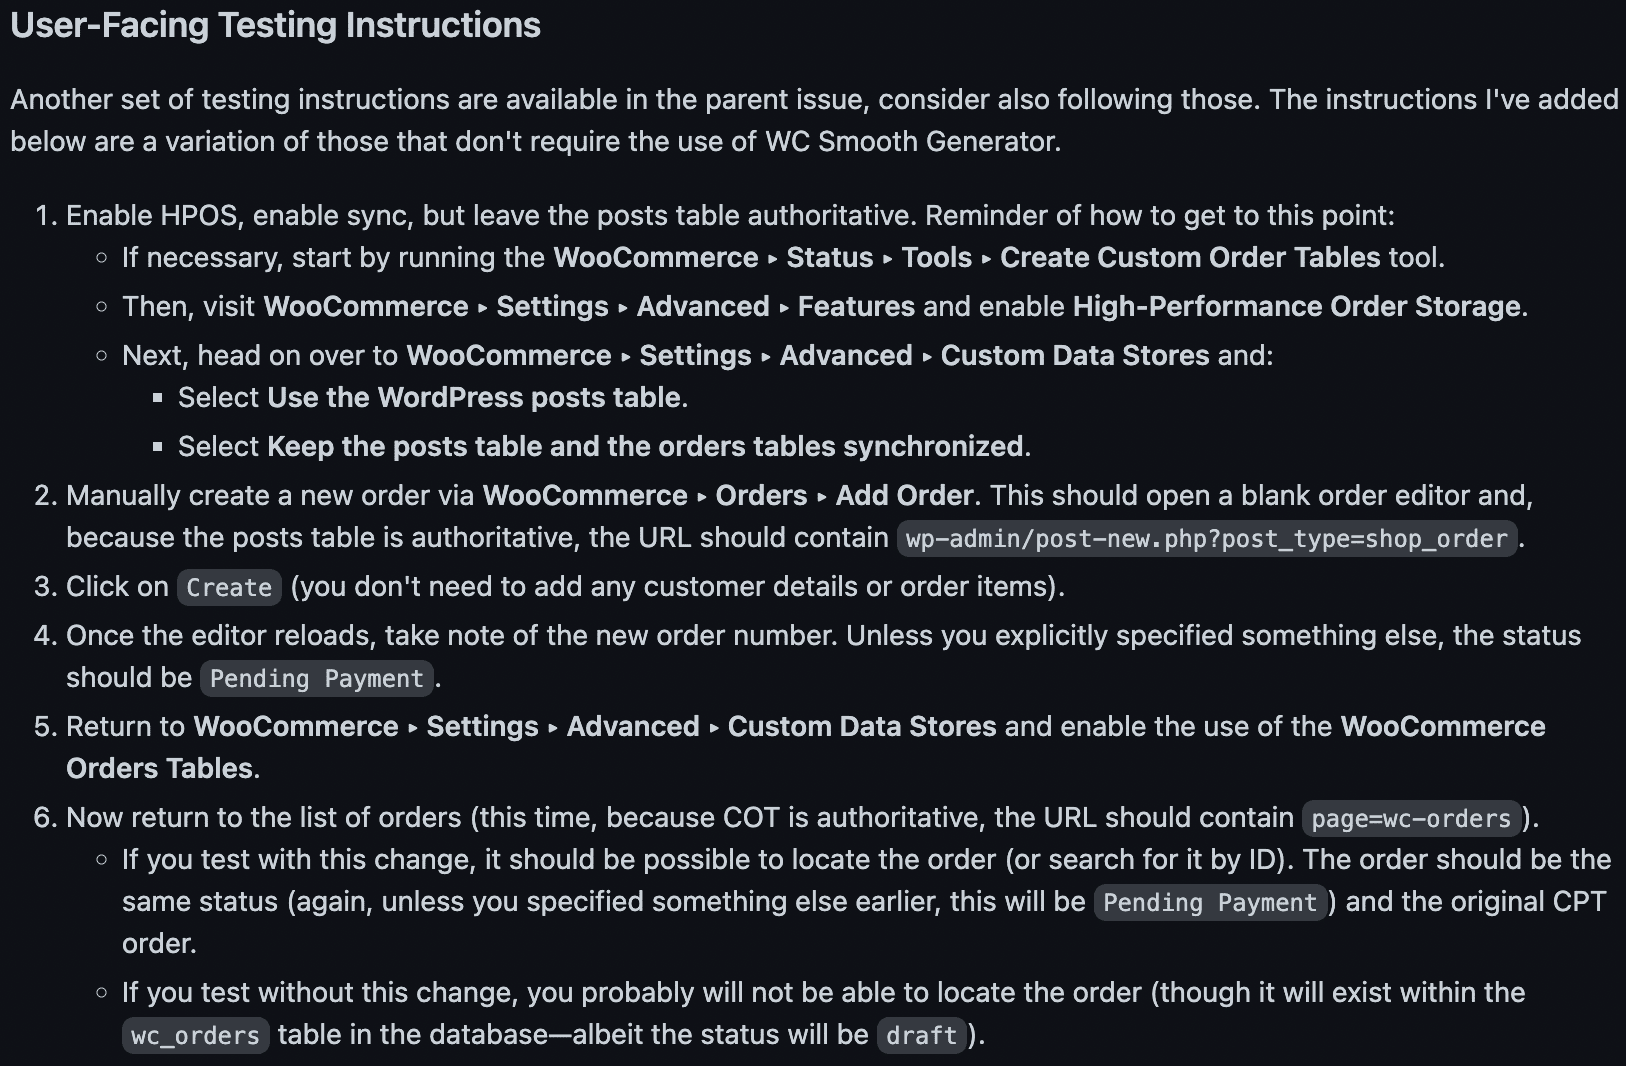
### Improving real testing instructions
In this section, you will see some real examples of testing instructions that have room for improvement (before) and how we can tweak them (after).
Before:
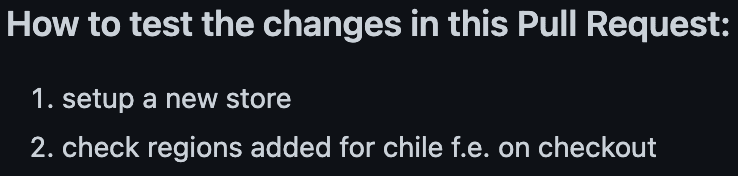
After:

Improvements:
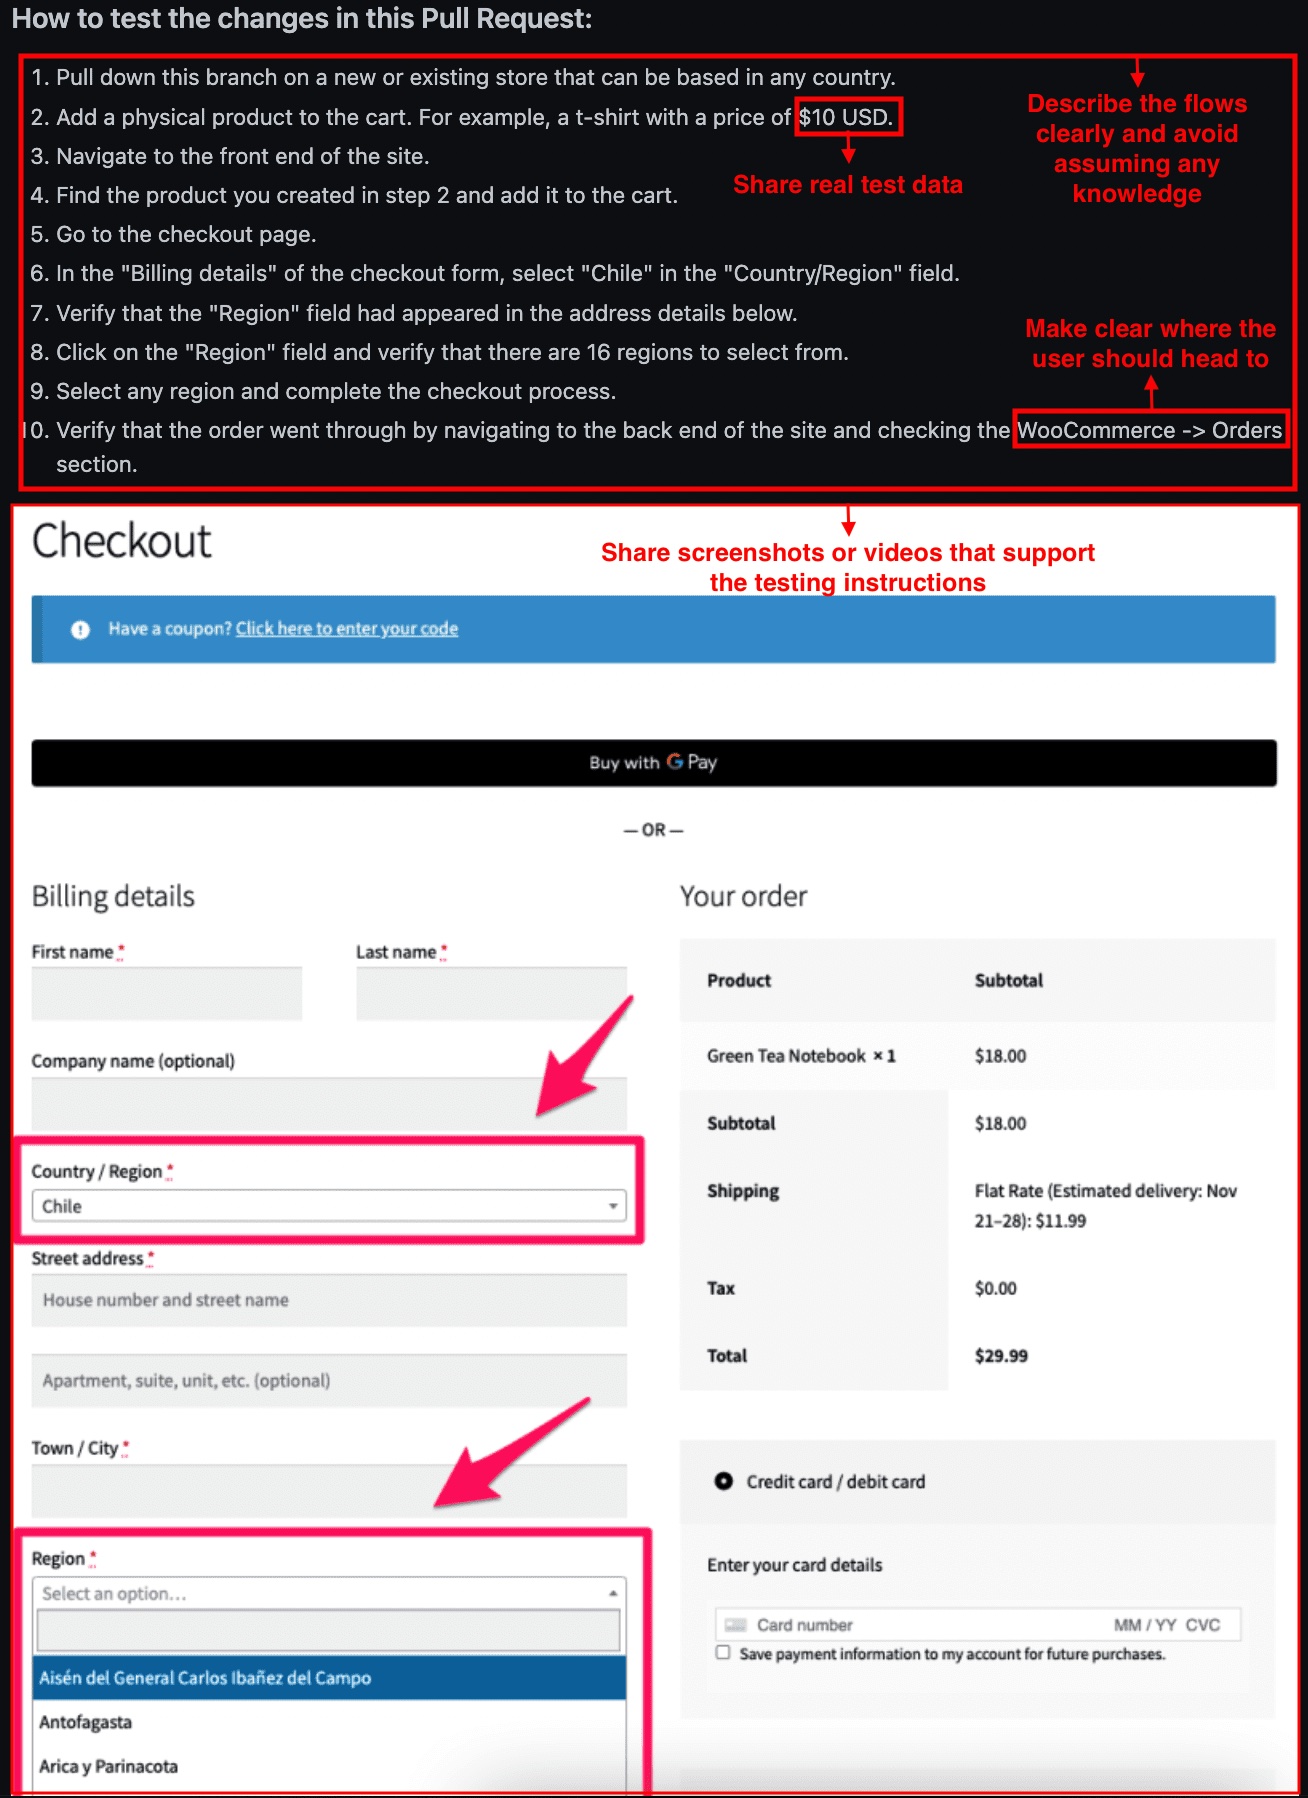
Before:
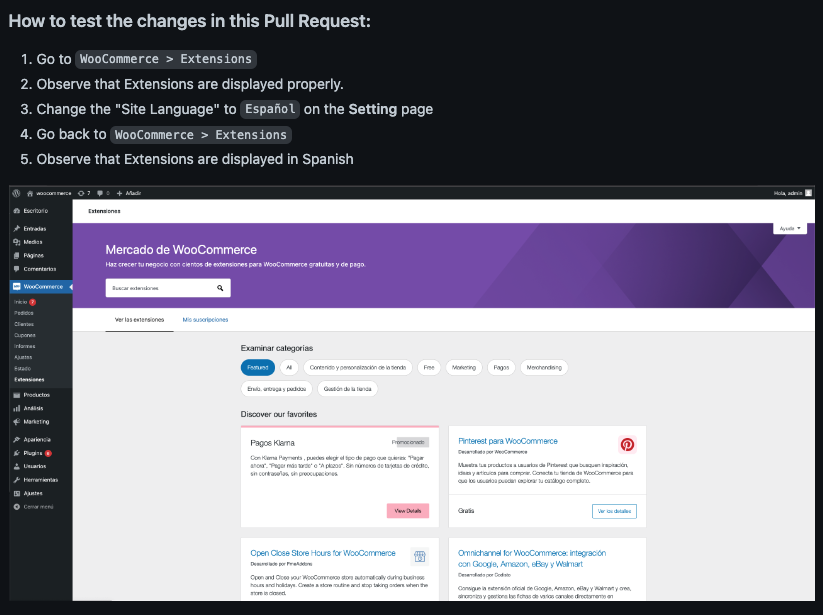
After:
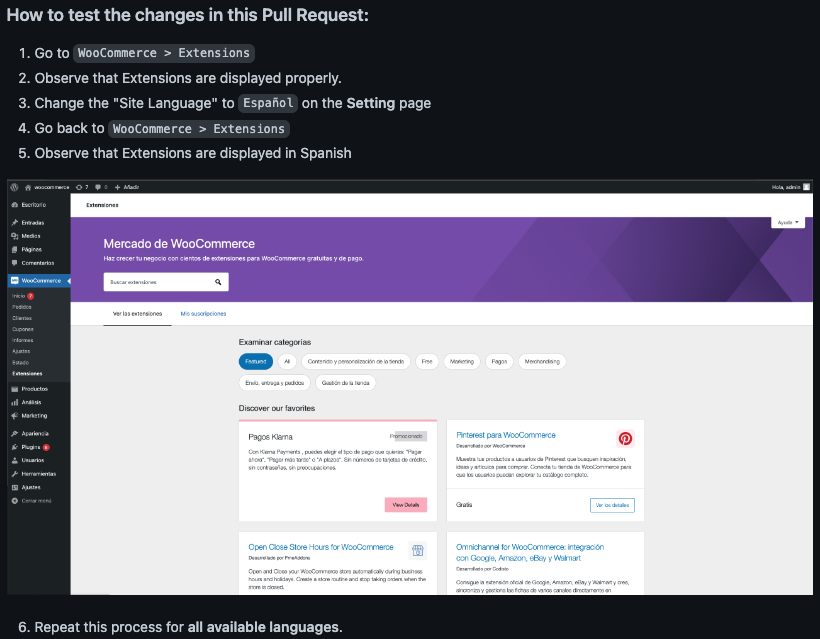
Improvements:
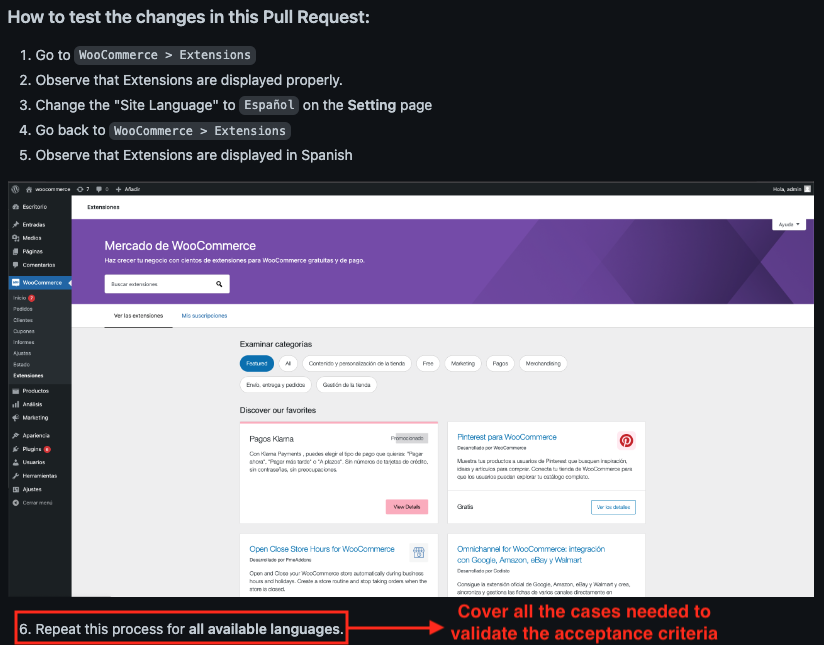
Before:
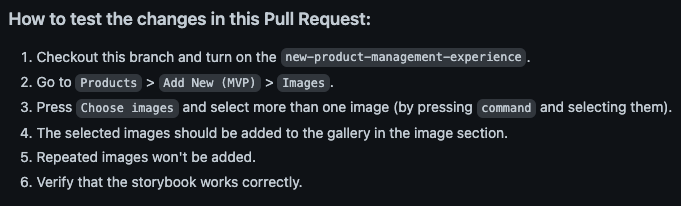
After:
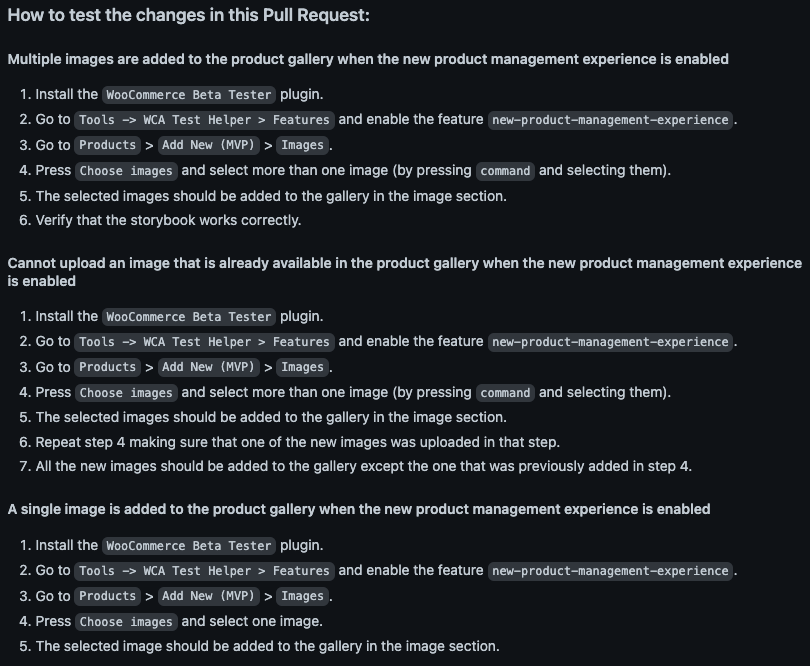
Improvements:
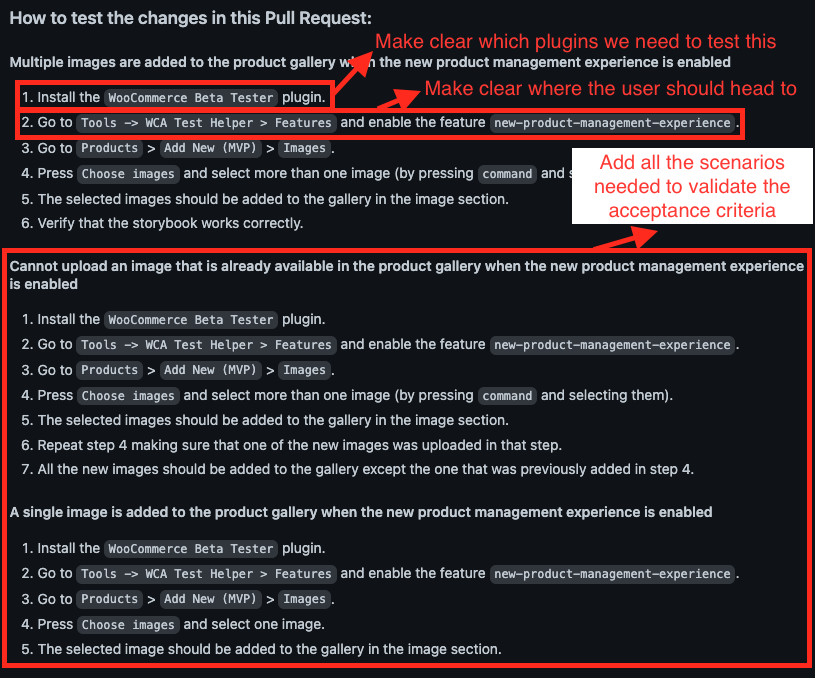
---
## Accessibility Best Practices
*Source: extensions/best-practices-extensions/accessibility.md*
# Accessibility Best Practices
In many places around the world, ecommerce stores are required to be accessible to people with disabilities. As a WooCommerce extension developer, your code directly impacts the accessibility of the shops that use it and can impact merchants’ compliance with accessibility laws.
This page is a resource for developers who want to ensure their extensions comply with accessibility standards and best practices. It is recommended that all WooCommerce extensions follow accessibility best practices to provide the best experience for merchants and their customers.
## Accessibility Laws
Two examples of laws that require ecommerce websites to be accessible include the [Americans with Disabilities Act (ADA)](https://ada.gov/) in the United States and the [European Accessibility Act (EAA)](https://employment-social-affairs.ec.europa.eu/policies-and-activities/social-protection-social-inclusion/persons-disabilities/union-equality-strategy-rights-persons-disabilities-2021-2030/european-accessibility-act_en), a directive that applies to all EU member countries. There are also laws requiring website accessibility in Australia, Canada, Israel, and many other countries. The W3C maintains a list of [web accessibility laws worldwide](https://www.w3.org/WAI/policies/) if you want to research laws in your country.
Most laws require websites to conform to Web Content Accessibility Guidelines (WCAG) as a measure of accessibility. To ensure that merchants can use your extension on their websites, it should also be WCAG conformant.
If your extension is not WCAG conformant, you may receive complaints about accessibility issues from merchants. You may also be included in lawsuits or legal cases about accessibility problems caused by your extension.
## Web Content Accessibility Guidelines (WCAG)
The [Web Content Accessibility Guidelines (WCAG)](https://www.w3.org/TR/WCAG22) are internationally recognized standards designed to make websites accessible to everyone, including people with disabilities. WCAG is made up of *success criteria* (specific, testable rules) that fall under four key principles:
### Four Key Principles
- **Perceivable**
Content should be available in ways users can perceive, even if they do not have all five senses. Information should be transformable from one form to another (e.g., text alternatives for images or captions for videos).
- **Operable**
Users should be able to interact with the site easily using alternative devices (such as a keyboard only or screen reader without a mouse), and there should be no time-sensitive actions.
- **Understandable**
Content and interfaces should be clear and consistent with simple language and predictable navigation.
- **Robust**
Websites should work well with assistive technologies and across different devices.
### Compliance Levels
WCAG has three levels of compliance:
- **Level A** – Basic
- **Level AA** – Mid-range (required by most laws)
- **Level AAA** – Highest
Most regulations require **Level AA**, meaning you need to meet all **A** and **AA** success criteria.
### Current Version
The current version of WCAG is **2.2**.
**Extension developers should aim for WCAG 2.2 Level AA compliance** as a best practice.
## Manual compatibility testing
It’s important to test your extension for [WCAG conformance](https://www.w3.org/TR/WCAG22) as you design and develop new features. Testing for accessibility is just as important as testing for security or WordPress coding standards. If you have not previously tested your extension for accessibility, start testing today and add accessibility bug fixes in future releases.
### Automated Testing
The easiest way to start accessibility testing is with an automated testing tool. Automated tools can quickly identify problems like empty buttons, ambiguous links, color contrast failures, missing alternative text, and more.
[Accessibility Checker](https://wordpress.org/plugins/accessibility-checker/) is a free WordPress plugin that you can use to test your extension. Simply install it in your test environment and add blocks or shortcodes created by your extension to a page. When you save the page, Accessibility Checker will scan the blocks or rendered shortcodes and provide a list of issues to address.
The [WAVE browser extension](https://wave.webaim.org/extension/) is another free automated testing tool. This browser extension can be used on any website and is helpful if you want to find accessibility problems on your extension’s admin pages.
### Keyboard Testing
After resolving issues from automated testing, the next step is to ensure that your extension can be used without a mouse and with a keyboard alone.
To test your extension for keyboard accessibility, go to the part of a test site controlled by your extension. Using the Tab key, move forward through the web page, ensuring that the following is true:
- All interactive components (buttons, links, inputs, etc.) can be reached by hitting the Tab key.
- Focus moves intuitively from left to right and top to bottom down the page.
- You can move backward through the components by hitting Shift + Tab.
- There are no keyboard traps. A keyboard trap is when focus lands on an element and then cannot go forward or backward.
- There is a visible focus outline on all interactive components. Also confirm that you have never set `:focus` in your stylesheet to `outline:none;` or `outline:0;`. It is never correct to remove focus outlines.
- If a button triggers a modal or dialog, focus should be moved into the dialog, and it should not be possible to tab out of the dialog without closing it.
- Buttons should be able to be triggered with both the Spacebar and the Return key.
- Links should be able to be triggered with the Return key.
Test all aspects of your extension on the front end and in the admin for full functionality without a mouse.
### Test When Zoomed
Ensure your extension can be used by low-vision users interacting with their browser zoomed in. Set your browser zoom to both 200% and 400% and ensure that no content overlaps or is lost and that the extension’s components can be used while the site is zoomed in.
### Screen Reader Testing
Familiarize yourself with screen readers, the assistive technology used by people who are blind or visually impaired, and use them to test your extension. There are two free screen readers that you can use for testing:
- **VoiceOver**: If you have a Mac, VoiceOver is built into your computer and is a great place to start, but it is not the preferred screen reader for blind desktop users.
- **NVDA**: NVDA is a free, open-source screen reader that you can download and use on your PC. This is the preferred screen reader for testing, as most blind people are Windows users.
To test your extension for screen reader accessibility, turn on the screen reader and use your keyboard to navigate the web page. Have the screen reader read the entire web page for you and listen for the following:
- All content and elements are read out – nothing meaningful is skipped.
- Images and graphics have accurate descriptions.
- Decorative images are skipped.
- Elements have the correct role: buttons should be announced as buttons, links as links, etc.
- Links and buttons have names that describe their purpose.
- Form fields are correctly labeled.
- States of components like tabs, accordions, and toggle buttons are announced as collapsed, selected, pressed, etc.
- Status changes are announced by the screen reader (e.g., success and error messages, changes in the number of visible products, opening of a modal or dialog, etc.).
- Hidden content is not read out.
### Test for Motion Sensitivity
Website animations and motion can be distracting or cause physical illness for some users. To ensure your extension passes WCAG success criteria for motion:
- Provide a pause button for any auto-playing content that lasts longer than 5 seconds (e.g., videos, background videos, sliders/carousels, or animated GIFs).
- Avoid flashing content that exceeds three flashes per second, as it can potentially trigger seizures.
- Ensure all animations are disabled if the user has enabled the “reduce motion” setting in their operating system.
You can test if your animations respect the “prefers reduced motion” setting by enabling it on your operating system. Here’s how to do this:
- **On Windows 11**: Go to *Settings > Accessibility > Visual Effects > Animation Effects*.
- **On macOS**: Navigate to *System Preferences > Accessibility > Display > Reduce motion*.
Learn more about coding [prefers-reduced-motion media queries](https://developer.mozilla.org/en-US/docs/Web/CSS/@media/prefers-reduced-motion).
### User Testing
Consider bringing in actual users with disabilities to test your extensions for accessibility. Seeing someone who relies on a screen reader or other assistive device use your products can be very enlightening. Ask your customer base to see if you already have people with disabilities in your audience available to test and provide feedback. Here’s a great resource on [how to run user testing sessions](https://www.w3.org/WAI/test-evaluate/involving-users/).
If you don’t want to run your own user testing sessions, there are [WooExperts](https://woocommerce.com/for-agencies/) who can help with this.
## Additional Considerations
### Make Your Website Accessible
In addition to testing your extension for accessibility best practices, you should be thinking about the accessibility of your own website and documentation. If your business meets certain revenue thresholds, the ecommerce store where people buy your products must be accessible and WCAG conformant.
### Include Captions for Your Videos
If your documentation includes videos, those videos must be captioned and include transcripts. This is important to ensure everyone can access your documentation and learn to use your extension.
### Guiding Your Customers
Even if your extension is perfectly accessible, merchants can introduce accessibility problems when configuring your extension or adding content. Whenever possible, define accessible defaults. For example, the default colors in your extension should always pass WCAG AA color contrast requirements. Merchants may change these colors to a combination that fails contrast, but you can say your extension is “accessibility-ready” if the default passes.
Consider adding functionality in the admin that alerts merchants when they make a choice that negatively impacts accessibility. For example, you can flag color combinations that fail contrast checks, similar to how it’s done in WordPress core. Other things you might warn merchants about include empty field labels, headings out of order, empty alt text, or choosing settings you must maintain for backward compatibility but know are not accessible.
### Create an Accessibility Conformance Report
Many organizations, especially in government and education, require an Accessibility Conformance Report (ACR) before purchasing software. An ACR can speed up the procurement process if your extension is sold to large businesses, government, or educational institutions.
An Accessibility Conformance Report is a document that outlines the accessibility compliance of a digital product, against recognized accessibility standards like WCAG, Section 508 (US), and Europe’s EN 301 549 accessibility standard.
ACRs are created using a Voluntary Product Accessibility Template (VPAT), a standardized format for assessing and reporting accessibility features. You can download this template for free and fill it in yourself, or hire an accessibility specialist to audit your extension and complete the VPAT for you.
### Get Help With Compliance
WCAG compliance doesn’t have to feel overwhelming! You can test and fix one issue at a time, incrementally improving your extension. However, accessibility goes faster if you don’t have to memorize WCAG or learn how to test first. Consider hiring an accessibility specialist to help with auditing or user testing your extension. The right company or consultant will help you find problems quickly, prioritize fixes, and train your team so fewer accessibility issues will be added in the future.
You can find accessibility-focused developers in our [WooExperts directory](https://woocommerce.com/for-agencies/).
## Learning More About Accessibility
We recommend these resources if you want to learn more about website accessibility:
- [WordPress Accessibility Meetup](https://www.meetup.com/wordpress-accessibility-meetup/)
- [WP Accessibility Day Conference](https://wpaccessibility.day/)
- [WordPress Accessibility Ready Requirements](https://make.wordpress.org/themes/handbook/review/accessibility/)
- [WordCamp Europe Accessibility Testing Workshop](https://europe.wordcamp.org/2023/accessibility-testing-workshop/)
- [Web Accessibility Specialist Certification from the International Association of Accessibility Professionals](https://www.accessibilityassociation.org/specialist)
---
## Compatibility and interoperability for WooCommerce extensions
*Source: extensions/best-practices-extensions/compatibility.md*
# Compatibility and interoperability for WooCommerce extensions
Ensuring your WooCommerce extension is compatible and interoperable with the core platform, various components, and other extensions is fundamental to providing a seamless experience for users. This document covers the importance of compatibility, the process for self-declared compatibility checks, manual testing for compatibility issues, and troubleshooting common problems.
## Compatibility importance
Compatibility ensures that your extension works as expected across different environments, including various versions of WordPress and WooCommerce, as well as with other plugins and themes. Ensuring compatibility is crucial for:
- **User experience**: Preventing conflicts that can lead to functionality issues or site downtime.
- **Adoption and retention**: Users are more likely to install and keep updates if they're assured of compatibility.
- **Security and performance**: Compatible extensions are less likely to introduce vulnerabilities or degrade site performance.
## Self-declared compatibility checks
Developers should declare their extension's compatibility with the latest versions of WordPress and WooCommerce, as well as with specific components like Cart & Checkout blocks, High Performance Order Storage (HPOS), Product Editor, and Site Editor. This process involves:
1. **Testing**: Before release, thoroughly test the extension with the latest versions of WordPress and WooCommerce, as well as the specified components.
2. **Declaration**: Update the extension's documentation and metadata to reflect its compatibility with these platforms and components.
3. **Communication**: Inform users of the compatible versions in the extension's change log, website, or repository.
## Manual compatibility testing
Manual testing is essential to identify and resolve potential compatibility issues. Follow these steps for effective manual compatibility testing:
1. **Set up a testing environment** that mirrors a typical user setup, including the latest versions of WordPress and WooCommerce.
2. **Test with core components**: Verify the extension's functionality with core components like Cart & Checkout blocks, HPOS, Product Editor, and Site Editor.
3. **Cross-plugin compatibility**: Activate your extension alongside other commonly used plugins to check for conflicts.
4. **Theme compatibility**: Test your extension with several popular themes to ensure it works correctly and maintains a consistent appearance.
## Troubleshooting and resolving compatibility issues
Despite thorough testing, compatibility issues may arise. Here are common problems and steps to resolve them:
### Conflicts with other extensions
- **Diagnosis**: Use tools like [Health Check & Troubleshooting plugin](https://wordpress.org/plugins/health-check/) to identify conflicting plugins.
- **Resolution**: Contact the other plugin's developer for collaboration, or implement conditional logic in your extension to avoid the conflict.
### Theme Compatibility Issues
- **Diagnosis**: Check for styling or layout issues when your extension is used with different themes.
- **Resolution**: Use more generic CSS selectors and provide configuration options for better theme integration.
### Updates breaking compatibility
- **Preventive measures**: Subscribe to the [WooCommerce developer blog](https://developer.woocommerce.com) to stay informed about upcoming changes.
- **Quick fixes**: Prepare patches or minor updates to address compatibility issues as soon as possible after a core update.
### No Errors with multiple extensions activated
- **Best practice**: Regularly test your extension in a multi-plugin environment to ensure it does not cause or suffer from conflicts.
## Conclusion
Maintaining compatibility and interoperability is a continuous effort that requires regular testing, updates, and communication with your users and the broader developer community. By following these guidelines, you can enhance the reliability, user satisfaction, and success of your WooCommerce extension.
---
## WooCommerce extension development best practices
*Source: extensions/best-practices-extensions/extension-development-best-practices.md*
# WooCommerce extension development best practices
Want to create a plugin to extend WooCommerce? You're in the right place.
WooCommerce extensions are the same as regular WordPress plugins. For more information, visit [Writing a plugin](https://developer.wordpress.org/plugins/).
Your WooCommerce extension should:
- Adhere to all WordPress plugin coding standards, as well as [best practice guidelines](https://developer.wordpress.org/plugins/plugin-basics/best-practices/) for harmonious existence within WordPress and alongside other WordPress plugins.
- Have a single core purpose and use WooCommerce features as much as possible.
- Not do anything malicious, illegal, or dishonest - for example, inserting spam links or executable code via third-party systems if not part of the service or explicitly permitted in the service's terms of use.
- Not subvert or override Marketplace connections in core — for example, extensions cannot create branded top-level menu items or introduce their own telemetry.
- Adhere to WooCommerce [compatibility and interoperability guidelines](https://woocommerce.com/document/marketplace-overview/#section-9).
Merchants make use of WooCommerce extensions daily, and should have a unified and pleasant experience while doing so without advertising invading their WP Admin or store.
## Best Practices
1. **Check if WooCommerce is active**. Most WooCommerce plugins do not need to run unless WooCommerce is already active. [Learn how to check if WooCommerce is active](/docs/extensions/core-concepts/check-if-woo-is-active).
2. **The main plugin file should adopt the name of the plugin**. For example: A plugin with the directory name `plugin-name` would have its main file named `plugin-name.php`.
3. **The text domain should match your plugin directory name**. For example: A plugin with a directory name of `plugin-name` would have the text domain `plugin-name`. Do not use underscores.
4. **Internationalization**: Follow guidelines for [Internationalization for WordPress Developers](https://codex.wordpress.org/I18n_for_WordPress_Developers)
5. **Localization**: All text strings within the plugin code should be in English. This is the WordPress default locale, and English should always be the first language. If your plugin is intended for a specific market (e.g., Spain or Italy), include appropriate translation files for those languages within your plugin package. Learn more at [Using Makepot to translate your plugin](https://codex.wordpress.org/I18n_for_WordPress_Developers#Translating_Plugins_and_Themes).
6. **Follow WordPress PHP Guidelines**. WordPress has a [set of guidelines](http://make.wordpress.org/core/handbook/coding-standards/php/) to keep all WordPress code consistent and easy to read. This includes quotes, indentation, brace style, shorthand php tags, yoda conditions, naming conventions, and more. Please review the guidelines.
7. **Avoid creating custom database tables**. Whenever possible, use WordPress [post types](http://codex.wordpress.org/Post_Types#Custom_Post_Types), [taxonomies](http://codex.wordpress.org/Taxonomies), and [options](http://codex.wordpress.org/Creating_Options_Pages). For more, check out our [primer on data storage](/docs/best-practices/data-management/data-storage).
8. **Prevent Data Leaks** by ensuring you aren't providing direct access to PHP files. [Find out how](/docs/best-practices/security/prevent-data-leaks).
9. **All plugins need a [standard WordPress README](http://wordpress.org/plugins/about/readme.txt)**. See an example in the [WordPress plugin README file standard](https://wordpress.org/plugins/readme.txt).
10. **All plugins need a changelog file.** See an example of a changelog file and different changelog entry types in the [changelog.txt documentation](/docs/extensions/core-concepts/changelog-txt).
11. **Follow our conventions for your Plugin header comment**. View our [example WordPress plugin header comment](/docs/extensions/core-concepts/example-header-plugin-comment) and follow the conventions listed, including: `Author:`, `Author URI:` , `Developer:`, `Developer URI`, `WC requires at least:`and `WC tested up to:`, and `Plugin URI:`.
12. **Make it extensible**: use WordPress actions and filters to allow for modification/customization, and if your plugin creates a front-end output, we recommend having a templating engine in place so users can create custom template files in their theme's WooCommerce folder to overwrite the plugin's template files.For more information, check out Pippin's post on [Writing Extensible Plugins with Actions and Filters](http://code.tutsplus.com/tutorials/writing-extensible-plugins-with-actions-and-filters--wp-26759).
13. **Avoid external libraries**. The use of entire external libraries is typically not suggested as this can open up the product to security vulnerabilities. If an external library is absolutely necessary, developers should be thoughtful about the code used and assume ownership as well as of responsibility for it. Try to only include the strictly necessary part of the library, or use a WordPress-friendly version or opt to build your own version. For example, if needing to use a text editor such as TinyMCE, we recommend using the WordPress-friendly version, TinyMCE Advanced.
14. **Avoid third-party systems**: Loading code from documented services is allowed, but communication must be secure. Executing outside code within a plugin is not allowed. Using third-party CDNs for non-service-related JavaScript and CSS is prohibited. Iframes should not be used to connect admin pages.
15. **Remove unused code**. With version control, there's no reason to leave commented-out code; it's annoying to scroll through and read. Remove it and add it back later if needed.
16. **Use Comments** to describe the functions of your code. If you have a function, what does the function do? There should be comments for most if not all functions in your code. Someone/You may want to modify the plugin, and comments are helpful for that. We recommend using [PHP Doc Blocks](http://en.wikipedia.org/wiki/PHPDoc) similar to [WooCommerce](https://github.com/woocommerce/woocommerce/).
17. **Avoid God Objects**. [God Objects](http://en.wikipedia.org/wiki/God_object) are objects that know or do too much. The point of object-oriented programming is to take a large problem and break it into smaller parts. When functions do too much, it's hard to follow their logic, making bugs harder to fix. Instead of having massive functions, break them down into smaller pieces.
18. **Separate Business Logic & Presentation Logic.** It's a good practice to separate business logic (i.e., how the plugin works) from [presentation logic](http://en.wikipedia.org/wiki/Presentation_logic) (i.e., how it looks). Two separate pieces of logic are more easily maintained and swapped if necessary. An example is to have two different classes - one for displaying the end results, and one for the admin settings page.
19. **Use Transients to Store Offsite Information**. If you provide a service via an API, it's best to store that information so future queries can be done faster and the load on your service is lessened. [WordPress transients](http://codex.wordpress.org/Transients_API) can be used to store data for a certain amount of time.
20. **Log data that can be useful for debugging purposes**, with two conditions: Allow any logging as an 'opt in', and Use the [WC_Logger](https://woocommerce.com/wc-apidocs/class-WC_Logger.html) class. A user can then view logs on their system status page. Learn [how to add a link to logged data](/docs/code-snippets/link-to-logged-data) in your extension.
21. **Test Your Code with [WP_DEBUG](http://codex.wordpress.org/Debugging_in_WordPress)** mode on, so you can see all PHP warnings sent to the screen. This will flag things like making sure a variable is set before checking the value.
22. **Integrate the [Quality Insights Toolkit (QIT)](https://qit.woo.com/docs/) into your development workflow**: The QIT allows the ability to test your extensions against new releases of PHP, WooCommerce, and WordPress, as well as other active extensions, at the same time. Additionally, the toolkit includes a [command-line interface (CLI) tool](https://qit.woo.com/docs/installation-setup/cli-installation) that allows you to run and view tests against development builds. This helps to catch errors before releasing a new version.
---
## GDPR compliance guidelines for WooCommerce extensions
*Source: extensions/best-practices-extensions/gdpr-compliance.md*
# GDPR compliance guidelines for WooCommerce extensions
## Introduction
The General Data Protection Regulation (GDPR) is in effect, granting EU residents increased rights over their personal data. Developers must ensure that WooCommerce extensions are compliant with these regulations.
## Data sharing and collection
### Third-party data sharing
- Assess and document any third-party data sharing.
- Obtain and manage user consent for data sharing.
- Link to third-party privacy policies in your plugin settings.
### Data collection
- List the personal data your plugin collects.
- Secure consent for data collection and manage user preferences.
- Safeguard data storage and restrict access to authorized personnel.
## Data access and storage
### Accessing personal data
- Specify what personal data your plugin accesses from WooCommerce orders.
- Justify the necessity for accessing each type of data.
- Control access to personal data based on user roles and permissions.
### Storing personal data
- Explain your data storage mechanisms and locations.
- Apply encryption to protect stored personal data.
- Perform regular security audits.
## Personal data handling
### Data Exporter and erasure hooks
- Integrate data exporter and erasure hooks to comply with user requests.
- Create a user-friendly interface for data management requests.
### Refusal of data erasure
- Define clear protocols for instances where data erasure is refused.
- Communicate these protocols transparently to users.
## Frontend and backend data exposure
### Data on the frontend
- Minimize personal data displayed on the site's frontend.
- Provide configurable settings for data visibility based on user status.
### Data in REST API rndpoints
- Ensure REST API endpoints are secure and disclose personal data only as necessary.
- Establish clear permissions for accessing personal data via the API.
## Privacy documentation and data management
### Privacy policy documentation
- Maintain an up-to-date privacy policy detailing your plugin's data handling.
- Include browser storage methods and third-party data sharing in your documentation.
### Data cleanup
- Implement data cleanup protocols for plugin uninstallation and deletion of orders/users.
- Automate personal data removal processes where appropriate.
## Conclusion
- Keep a record of GDPR compliance measures and make them accessible to users.
- Update your privacy policy regularly to align with any changes in data processing activities.
---
## Privacy Standards for WooCommerce extensions
*Source: extensions/best-practices-extensions/privacy-standards.md*
# Privacy Standards for WooCommerce extensions
Privacy and data protection are becoming increasingly important online, and WooCommerce extensions are no exception. This document outlines the key markers of quality regarding privacy for WooCommerce extensions, the current methods for testing compliance, and the standards developers should adhere to ensure user trust and legal compliance.
## Standards for privacy
To maintain high privacy standards, developers of WooCommerce extensions should adhere to the following:
### Presence of privacy policy page
- A privacy policy should be readily available and easy to understand. It must clearly describe the types of data collected by the extension, the purpose of data collection, how data is processed and stored, and the users' rights concerning their data.
### No unauthorized external requests
- All resources required by the extension should be hosted within the plugin folder/zip file unless there's a clear, justified reason for external requests, which should then be disclosed in the privacy policy.
- Unauthorized or undisclosed external requests, especially those that could expose user data to third-party services without consent, are strictly against privacy standards.
### GDPR compliance
For guidance on ensuring your WooCommerce extension complies with the General Data Protection Regulation (GDPR), please refer to our detailed documentation on [GDPR compliance](./gdpr-compliance.md).
## Conclusion
Adhering to privacy standards is essential for WooCommerce extension developers to build trust with users and ensure compliance with legal requirements. By establishing a clear privacy policy and avoiding unauthorized external requests, developers can demonstrate their commitment to privacy and data protection. Regular testing and compliance checks will help maintain these standards and protect user data effectively.
---
## Support and documentation for WooCommerce extensions
*Source: extensions/best-practices-extensions/support-and-documentation.md*
# Support and documentation for WooCommerce extensions
Effective support and comprehensive documentation are fundamental to the success of any WooCommerce extension. They not only enhance the user experience but also facilitate easier maintenance and development. This document outlines the best practices for creating documentation, providing support, and establishing feedback mechanisms.
## Creating effective documentation
Good documentation serves as a guide, helping users understand and utilize your extension to its full potential. It can significantly reduce the volume of support requests by answering common questions and troubleshooting typical issues.
### Importance of good documentation
- **User Autonomy**: Allows users to solve problems independently.
- **Reduced Support Load**: Comprehensive documentation can answer many user questions, reducing the need for direct support.
- **Improved User Satisfaction**: Users are more satisfied with the product when they can easily find information.
### How to create effective documentation
- **User-friendly language**: Write in clear, simple language accessible to users of all skill levels.
- **Comprehensive coverage**: Cover all features of your extension, including setup, configuration, troubleshooting, and FAQs.
- **Accessibility**: Ensure documentation is easy to navigate with a clear structure and search functionality.
- **Regular updates**: Keep the documentation up to date with the latest version of the extension.
### Standards for documentation
- **Presence of public documentation**: Ensure that users have access to basic documentation that covers essential information about the extension.
- **Quality of public documentation**: Documentation should be clear, concise, and free of technical jargon.
- **Developer-oriented documentation**: Provide detailed documentation aimed at developers who wish to extend or integrate with your extension.
- **Advanced internal documentation**: Maintain in-depth documentation for internal use, covering complex features and developer notes.
## Providing support
Offering timely and effective support is crucial for resolving user issues and maintaining a positive reputation.
### Best practices for offering support
- **Service level agreements (SLA)**: Establish clear SLAs for response times to manage user expectations.
- **Knowledgeable staff**: Ensure your team is well-trained and familiar with the extension and common issues.
- **Proactive support**: Monitor for common issues and reach out to users who might be affected.
### Standards for support
- **Support - SLA**: Define an SLA for how quickly support requests will be acknowledged and resolved.
- **Support quality**: Regularly review support interactions to ensure quality, accuracy, and helpfulness.
## Feedback mechanisms
Feedback is invaluable for continuous improvement of your extension and support services.
### How to establish and utilize feedback channels
- **Surveys and feedback forms**: Implement post-support surveys and feedback forms on your documentation pages.
- **Community forums**: Engage with users on community forums where they can share feedback, ask questions, and offer suggestions.
- **Social media and email**: Encourage feedback through social media channels and support emails.
### Utilizing feedback to improve
- **Act on feedback**: Regularly review feedback to identify areas for improvement in your extension and support services.
- **Update documentation**: Use feedback to fill gaps in your documentation and clarify existing content.
- **Train support staff**: Use common questions and feedback to train your support staff and improve their knowledge base.
## Conclusion
Support and documentation are critical components of the overall user experience for WooCommerce extensions. By investing in high-quality documentation, providing excellent support, and actively seeking and utilizing user feedback, developers can enhance user satisfaction, reduce support workload, and continuously improve their extensions.
---
## Core concepts
*Source: extensions/core-concepts/README.md*
# Core concepts
This section covers the fundamental principles, best practices, and essential knowledge you need to develop robust, maintainable WooCommerce extensions.
Learn about everything from basic setup and architecture to advanced development patterns. Whether you're building your first WooCommerce extension or maintaining existing ones, these guides will help you follow best practices and create high-quality code.
## Getting started
[Check if WooCommerce is active](./check-if-woo-is-active.md) to learn the proper way to ensure WooCommerce is installed and active before your code runs. This prevents errors and ensures your extension works reliably. You'll also want to understand the [core WooCommerce classes](./class-reference.md) and how to work with them, from the main `WooCommerce` class to `WC_Product`, `WC_Customer`, and `WC_Cart`.
## Development patterns
[Adding actions and filters](./adding-actions-and-filters.md) to master the art of extending WooCommerce through hooks. Learn when and how to add actions and filters, following WordPress and WooCommerce standards. For long-term success, discover strategies for [writing maintainable code](./maintainability.md) and establishing update processes that keep your extensions current and secure. You'll also need to [manage deactivation and uninstallation](./handling-deactivation-and-uninstallation.md) to ensure your extension cleans up properly when deactivated or uninstalled, including scheduled actions, admin notes, and tasks.
## Plugin structure and standards
See the [example header plugin comment](./example-header-plugin-comment.md) format for your extension's main plugin file header, including all required metadata. You'll also want to learn the standard [changelog format](./changelog-txt.md) for documenting changes in your extension's changelog file, and understand the [WooCommerce plugin API callback](./woocommerce-plugin-api-callback.md) for proper integration with WooCommerce's plugin API for seamless functionality.
---
## How to add actions and filters
*Source: extensions/core-concepts/adding-actions-and-filters.md*
# How to add actions and filters
Like many WordPress plugins, WooCommerce provides a range of actions and filters through which developers can extend and modify the platform.
Often, when writing new code or revising existing code, there is a desire to add new hooks-but this should always be done with thoughtfulness and care. This document aims to provide high-level guidance on the matter.
Practices we generally allow, support and encourage include:
* [Using existing hooks (or other alternatives) in preference to adding new hooks](#prefer-existing-hooks-or-other-alternatives)
* [Adding lifecycle hooks](#adding-lifecycle-hooks)
* [Optional escape hooks](#escape-hooks)
* [Modifying the inputs and outputs of global rendering functions](#modifying-function-input-and-output-global-rendering-functions)
* [Preferring the passing of objects over IDs](#prefer-passing-objects-over-ids)
On the flip side, there are several practices we discourage:
* [Tying lifecycle hooks to methods of execution](#tying-lifecycle-hooks-to-methods-of-execution)
* [Using filters as feature flags](#using-filters-as-feature-flags)
* [Placing filter hooks inside templates and data stores](#placement-of-filter-hooks)
* [Enumeration values within hook names](#enumeration-values-inside-hook-names)
Beyond those items, we generally otherwise adhere to WordPress coding standards. In regards to hooks, that specifically means following the:
* [Documentation standards for hooks](https://make.wordpress.org/core/handbook/best-practices/inline-documentation-standards/php/#4-hooks-actions-and-filters)
* [Guidance on Dynamic hook names](https://make.wordpress.org/core/handbook/best-practices/coding-standards/php/#interpolation-for-naming-dynamic-hooks)
Please note that we provide example code throughout this guide to help illustrate some of the principles. However, to keep things concise, we usually omit unnecessary detail, including doc blocks (in practice, though, hooks should always be accompanied by doc blocks!).
## Prefer existing hooks (or other alternatives)
Hooks come with a long-term obligation: the last thing we want is to add a new hook that developers come to depend on, only to strip it away again. However, this can lead to difficulties when the time comes to refactor a piece of code that contains hooks, sometimes delaying meaningful change or limiting how easily we can implement a change without compromising on backward compatibility commitments.
For those reasons, we always prefer that-wherever reasonable-an existing hook or alternative approach in preference to adding a new hook.
## Adding lifecycle hooks
Lifecycle hooks can be used to communicate that a lifecycle event is about to start, or that it has concluded. Examples of such events include:
* Main product loop
* Dispatching emails
* Rendering a template
* Product or order status changes
In general, lifecycle hooks:
* Come in pairs ('before' and 'after')
* Are always actions, never filters
* The 'before' hook will generally always provide callbacks with the arguments array, if there is one
* The 'after' hook will generally also provide callbacks with the function's return value, if there is one
Note that lifecycle hooks primarily exist to let other systems observe, rather than to modify the result. Of course, this does not stop the function author from additionally providing a filter hook that serves this function.
For example, noting that it is the process of fetching the promotions which we view as the "lifecycle event", and not the function itself:
```php
function woocommerce_get_current_promotions( ...$args ) {
/* Any initial prep, then first lifecycle hook... */
do_action( 'woocommerce_before_get_current_promotions', $args );
/* ...Do actual work, then final lifecycle hook... */
do_action( 'woocommerce_after_get_current_promotions', $result, $args );
/* ...Return the result, optionally via a filter... */
return apply_filters( 'woocommerce_get_current_promotions', $result, $args );
}
```
## Escape hooks
In some cases, it may be appropriate to support short-circuiting of functions or methods. This is what we call an escape hook, and can be useful as a means of overriding code when a better way of doing so is not available.
* Escape hooks are always filters
* They should always supply null as the initial filterable value
* If the value is changed to a non-null value, then the function should exit early by returning that new value
For type safety, care should be taken to ensure that, if a function is short-circuited, the return type matches the function signature and/or return type stated in the function doc block.
Example:
```php
function get_product_metrics( $args ): array {
$pre = apply_filters( 'pre_woocommerce_get_product_metrics', null, $args );
if ( $pre !== null ) {
return (array) $pre;
}
/* ...Default logic... */
return $metrics;
}
```
## Modifying function input and output (global rendering functions)
In the case of global rendering or formatting functions (so-called "template tags"), where it is not readily possible to implement better alternatives, it is permissible to add filters for both the function arguments and the function's return value.
This should be done sparingly, and only where necessary. Remember that while providing opportunities for other components to perform extensive customization, it can potentially derail other components which expect unmodified output.
Example:
```php
function woocommerce_format_sale_price( ...$args ): string {
/* Prep to fill in any missing $args values... */
$args = (array) apply_filters( 'woocommerce_format_sale_price_args', $args );
/* ...Actual work to determine the $price string... */
return (string) apply_filters( 'woocommerce_format_sale_price', $price, $args );
}
```
## Prefer passing objects over IDs
Some actions or filters provide an object ID (such as a product ID) as their primary value, while others will provide the actual object itself (such as a product object). For consistency, it is preferred that objects be passed.
Example:
```php
function get_featured_product_for_current_customer( ) {
/* ...Logic to find the featured product for this customer... */
return apply_filters(
'woocommerce_featured_product_for_current_customer',
$product, /* WC_Product */
$customer
);
}
```
## Tying lifecycle hooks to methods of execution
There can sometimes be multiple paths leading to the same action. For instance, an order can be updated via the REST API, through the admin environment, or on the front end. It may additionally happen via ajax, or via a regular request.
It is important however not to tie hooks for high-level processes to specific execution paths. For example, an action that fires when an order is created must not only be fired when this happens in the admin environment via an ajax request.
Instead, prefer a more generic hook that passes context about the method of execution to the callback.
Example of what we wish to avoid:
```php
/**
* Pretend this function is only called following an ajax request
* (perhaps it is itself hooked in using a `wp_ajax_*` action).
*/
function on_ajax_order_creation() {
/* Avoid this! */
do_action( 'woocommerce_on_order_creation' );
}
```
## Using filters as feature flags
It is sometimes tempting to use a filter as a sort of feature flag, that enables or disables a piece of functionality. This should be avoided! Prefer using an option:
* Options persist in the database.
* Options are already filterable (ideal for a temporary override).
Example of what we wish to avoid:
```php
/* Avoid this */
$super_products_enabled = (bool) apply_filters( 'woocommerce_super_products_are_enabled', true );
/* Prefer this */
$super_products_enabled = get_option( 'woocommerce_super_products_are_enabled', 'no' ) === 'yes';
```
## Placement of filter hooks
Filters should not be placed inside templates-only actions. If it is important that a value used within a template be filterable, then the relevant logic should be moved to whichever function or method decides to load the template-the result being passed in as a template variable.
It is also preferred that filter hooks not be placed inside data-store classes, as this can reduce the integrity of those components: since, by design, they are replaceable by custom implementations-the risk of accidentally breaking those custom stores is higher.
## Enumeration values inside hook names
Though there is a case for dynamic hook names (where part of the hook name is created using a variable), a good rule of thumb is to avoid this if the variable contains what might be considered an enumeration value.
This might for instance include a case where an error code forms part of the hook name.
Example (of what we wish to avoid):
```php
if ( is_wp_error( $result ) ) {
/* Avoid this */
$error_code = $result->get_error_code();
do_action( "woocommerce_foo_bar_{$error_code}_problem", $intermediate_result );
/* Prefer this */
do_action( 'woocommerce_foo_bar_problem', $result );
}
```
The primary reason for avoiding this is that the more values there are in the enumeration set, the more filters developers have to include in their code.
## Summary
This document is a high-level guide to the inclusion and placement of hooks, not an exhaustive list. There will occasionally be exceptions, and there may be good rules and methodologies we are missing: if you have suggestions or ideas for improvement, please reach out!
---
## Formatting for Changelog.txt
*Source: extensions/core-concepts/changelog-txt.md*
# Formatting for Changelog.txt
## The Changelog.txt file
WooCommerce extensions use a standard changelog format. Your `changelog.txt` file should look like this:
```php
*** WooCommerce Extension Name Changelog ***
YYYY-MM-DD - version 1.1.0
* Added - Useful new feature
* Fixed - Important bug fix
YYYY-MM-DD - version 1.0.1
* Fixed a bug
YYYY-MM-DD - version 1.0.0
* Initial release
```
## Changelog Entry Types
To showcase the different types of work done in a product update, use any of the following words to denote what type of change each line is:
- add
- added
- feature
- new
- developer
- dev
- tweak
- changed
- update
- delete
- remove
- fixed
- fix
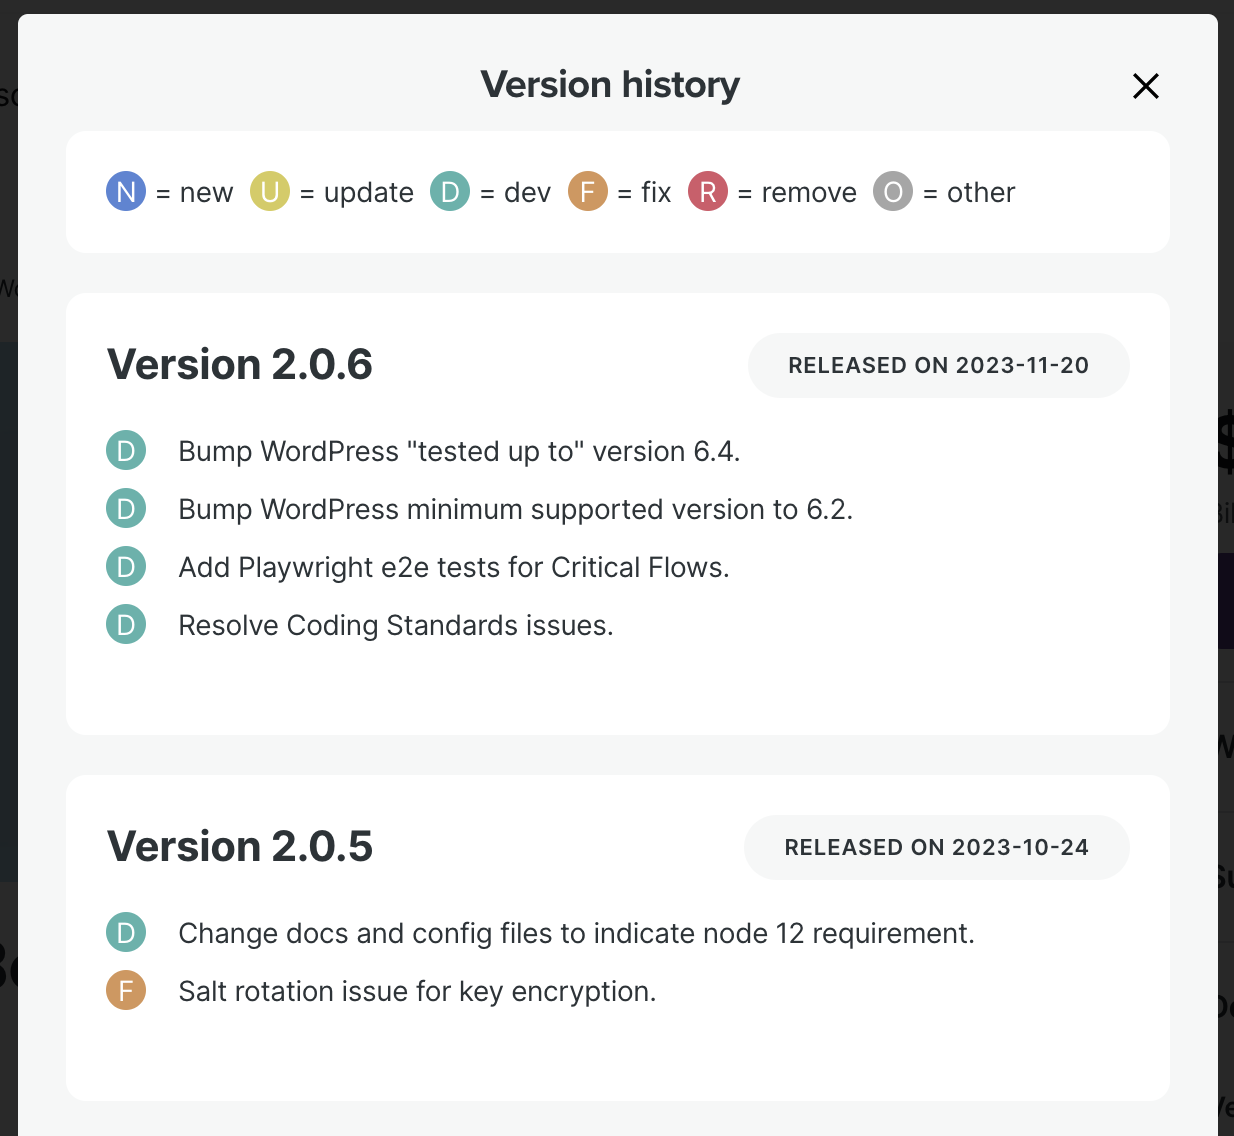
---
## How to check if WooCommerce is active
*Source: extensions/core-concepts/check-if-woo-is-active.md*
# How to check if WooCommerce is active
When developing for WooCommerce, ensuring that WooCommerce is installed and active before your code runs is crucial. This prevents errors related to missing WooCommerce functions or classes.
There are a few methods to achieve this. The first is to execute your code on the `woocommerce_loaded` action. This approach guarantees that WooCommerce and its functionalities are fully loaded and available for use. This is fired around the same time as the core `plugins_loaded` action.
```php
add_action( 'woocommerce_loaded', 'prefix_woocommerce_loaded' );
function prefix_woocommerce_loaded() {
// Custom code here. WooCommerce is active and all plugins have been loaded...
}
```
**Note**: At this stage, WordPress has not yet initialized the current user data.
Another method is to execute your code on the `woocommerce_init` action. This is executed right _after_ WooCommerce is active and initialized. This action (and the `before_woocommerce_init` action) fires in the context of the WordPress `init` action so at this point current user data has been initialized.
```php
add_action( 'woocommerce_init', 'prefix_woocommerce_init' );
function prefix_woocommerce_init() {
// Custom code here. WooCommerce is active and initialized...
}
```
**Note**: The `before_woocommerce_init` hook is also an option, running just _before_ WooCommerce's initialization
Using the above hooks grants access to WooCommerce functions, enabling further condition checks. For instance, you might want to verify WooCommerce's version to ensure compatibility with your code:
```php
add_action( 'woocommerce_init', 'prefix_woocommerce_init' );
function prefix_woocommerce_init() {
// Only continue if we have access to version 8.7.0 or higher.
if ( version_compare( wc()->version, '8.7.0', '<' ) ) {
return;
}
// Custom code here. WooCommerce is active and initialized...
}
```
Choosing the right hook based on your development needs ensures your WooCommerce extensions or customizations work seamlessly and efficiently.
---
## Classes in WooCommerce
*Source: extensions/core-concepts/class-reference.md*
# Classes in WooCommerce
## List of Classes in WooCommerce
For a list of Classes in WooCommerce, please see the [WooCommerce Code Reference](https://woocommerce.github.io/code-reference/packages/WooCommerce-Classes.html).
## Common Classes
### WooCommerce
The main class is `woocommerce` which is available globally via the `$woocommerce` variable. This handles the main functions of WooCommerce and init's other classes, stores site-wide variables, and handles error/success messages. The woocommerce class initializes the following classes when constructed:
- `WC_Query` - stored in `$woocommerce->query`
- `WC_Customer` - stored in `$woocommerce->customer`
- `WC_Shipping` - stored in `$woocommerce->shipping`
- `WC_Payment_Gateways` - stored in `$woocommerce->payment_gateways`
- `WC_Countries` - stored in `$woocommerce->countries`
Other classes are auto-loaded on demand.
View the [WooCommerce Class Code Reference](https://woocommerce.github.io/code-reference/classes/WooCommerce.html) for a full list of methods contained in this class.
### WC_Product
WooCommerce has several product classes responsible for loading and outputting product data. This can be loaded through PHP using:
`$product = wc_get_product( $post->ID );`
In the loop this is not always necessary since calling `the_post()` will automatically populate the global `$product` variable if the post is a product.
View the [WC_Product Code Reference](https://woocommerce.github.io/code-reference/classes/WC-Product.html) for a full list of methods contained in this class.
### WC_Customer
The customer class allows you to get data about the current customer, for example:
```php
global $woocommerce;
$customer_country = $woocommerce->customer->get_country();
```
View the [WC_Customer Code Reference](https://woocommerce.github.io/code-reference/classes/WC-Customer.html) for a full list of methods contained in this class.
### WC_Cart
The cart class loads and stores the users cart data in a session. For example, to get the cart subtotal you could use:
```php
global $woocommerce;
$cart_subtotal = $woocommerce->cart->get_cart_subtotal();
```
View the [WC_Cart Code Reference](https://woocommerce.github.io/code-reference/classes/WC-Cart.html) for a full list of methods contained in this class.
---
## Example WordPress plugin header comment for WooCommerce extensions
*Source: extensions/core-concepts/example-header-plugin-comment.md*
# Example WordPress plugin header comment for WooCommerce extensions
This is a WordPress plugin header comment. It's used to provide WordPress with metadata about a plugin.
```php
/**
* Plugin Name: WooCommerce Extension
* Plugin URI: https://woocommerce.com/products/woocommerce-extension/
* Description: Your extension's description text.
* Version: 1.0.0
* Author: Your Name
* Author URI: http://yourdomain.com/
* Developer: Your Name
* Developer URI: http://yourdomain.com/
* Text Domain: woocommerce-extension
* Domain Path: /languages
*
* WC requires at least: 8.0
* WC tested up to: 8.3
*
* License: GNU General Public License v3.0
* License URI: http://www.gnu.org/licenses/gpl-3.0.html
* Woo: 12345:342928dfsfhsf8429842374wdf4234sfd
*/
```
Here's what each line should contain:
* Plugin Name: The name of your plugin.
* Plugin URI: The home page of the plugin or the product page on WooCommerce.com.
* Description: A short description of the plugin.
* Version: The current version number of the plugin.
* Author: The name of the plugin author.
* Author URI: The author's website or profile page.
* Developer: The name of the developer if different from the author.
* Developer URI: The developer's website or profile page.
* Text Domain: The text domain is used for internationalization.
* Domain Path: The domain path is used to show where the MO files are located.
* WC requires at least: The minimum version of WooCommerce required for the plugin to work.
* WC tested up to: The latest version of WooCommerce that the plugin has been tested with.
* License: The license of the plugin.
* License URI: The URL where the license is explained in detail.
* Woo: A unique identifier for a plugin sold on WooCommerce.com. When submitting your extension or adding a new version, **we will automatically add this to the header of your main file**. You are not required to add it manually, but you can opt to include it before uploading.
This header comment is placed at the top of the main plugin file, so WordPress can read it.
---
## Managing extension deactivation and uninstallation
*Source: extensions/core-concepts/handling-deactivation-and-uninstallation.md*
# Managing extension deactivation and uninstallation
## Introduction
There are a number of cleanup tasks you'll need to handle when a merchant deactivates or uninstalls your extension. This guide provides a brief overview of WooCommerce-specific items you'll want to make sure you account for when defining your extension's deactivation and uninstallation logic.
## Removing Scheduled Actions
If your extension uses Action Scheduler to queue any background jobs, it's important to unschedule those actions when your extension is uninstalled or deactivated.
`as_unschedule_all_actions( $hook, $args, $group );`
You can read more about using Action Scheduler for managing background processing in the [Action Scheduler API Reference](https://actionscheduler.org/api/).
## Removing Admin Notes
If you have created any Notes for merchants, you should delete those notes when your extension is deactivated or, at the very least, when it is uninstalled.
```php
function my_great_extension_deactivate() {
ExampleNote::possibly_delete_note();
}
register_deactivation_hook( __FILE__, 'my_great_extension_deactivate' );
```
The example above assumes that you have followed the pattern this guide recommends for creating Notes as dedicated classes that include the `NoteTraits` trait included with WooCommerce Admin. This approach provides your Note with some baked in functionality that streamlines note operations such as creation and deletion.
## Removing Admin Tasks
When your extension is deactivated or uninstalled, you should take care to unregister any tasks that your extension created for merchants.
```php
// Unregister task.
function my_extension_deactivate_task() {
remove_filter( 'woocommerce_get_registered_extended_tasks', 'my_extension_register_the_task', 10, 1 );
}
register_deactivation_hook( __FILE__, 'my_extension_deactivate_task' );
```
Keep in mind that merchant tasks are managed via a hybrid approach that involves both PHP and JavaScript, so the client-side registration only happens when your extension's JavaScript runs.
## Unregistering navigation
When your extension deactivates and uninstalls, any registration you've done with the WooCommerce Navigation will be handled automatically.
## WordPress cleanup tasks
There are additional measures you may need to consider when your extension is deactivated or uninstalled, depending on the types of modifications it makes to the underlying WordPress environment when it activates and runs. You can read more about handling deactivation and uninstallation in the [WordPress Plugin Developer Handbook](https://developer.wordpress.org/plugins/intro/).
---
## Maintaining and updating WooCommerce extensions
*Source: extensions/core-concepts/maintainability.md*
# Maintaining and updating WooCommerce extensions
Maintaining and updating WooCommerce extensions is crucial for ensuring they remain compatible, secure, and functional within the ever-evolving WordPress ecosystem. This document outlines best practices for ensuring easy maintainability, adhering to update frequency and process, and conducting manual update checks.
## Ensuring easy maintainability
Maintainable code is essential for the long-term success of any WooCommerce extension. It ensures that your extension can be easily updated, debugged, and extended, both by you and others in the future.
### Importance of writing maintainable code
- **Future-proofing**: Maintainable code helps in adapting to future WooCommerce and WordPress updates.
- **Collaboration**: Makes it easier for teams to work together on the extension.
- **Cost-effective**: Reduces the time and resources required for adding new features or fixing issues.
### Strategies to achieve maintainability
- **Modular code**: Break down your extension into smaller, focused modules or components.
- **Coding standards**: Follow the [WordPress Coding Standards](https://developer.wordpress.org/coding-standards/) to ensure consistency.
- **Documentation**: Document your code extensively to explain "why" behind the code, not just "how" to use it.
- **Refactoring**: Regularly refactor your code to improve its structure without altering the external behavior.
## Update frequency and process
Keeping your extension up-to-date is vital for security, compatibility, and performance. Regular updates also signal to users that the extension is actively maintained.
### Best practices for regular updates
- **Scheduled updates**: Plan regular updates (e.g., monthly) to incorporate bug fixes, security patches, and new features.
- **Version control**: Use version control systems like Git to manage changes and collaborate efficiently.
- **Compatibility checks**: Before releasing an update, thoroughly test your extension with the latest versions of WordPress and WooCommerce to ensure compatibility.
- **Changelogs**: Maintain clear changelogs for each update to inform users about new features, fixes, and changes.
### Recommended update frequency
- We recommend that extensions receive an update **at least once every 30 days**. This frequency ensures that extensions can quickly adapt to changes in WooCommerce, WordPress, or PHP, and address any security vulnerabilities or bugs.
## Manual update checks
While automated update systems like the WordPress Plugin Repository offer a way to distribute updates, developers should also have a process for manually tracking and managing updates.
### How developers can manually track and manage updates
- **User feedback**: Monitor forums, support tickets, and user feedback for issues that may require updates.
- **Security monitoring**: Stay informed about the latest security vulnerabilities and ensure your extension is not affected.
- **Performance testing**: Regularly test your extension for performance and optimize it in updates.
- **Compatibility testing**: Manually test your extension with beta releases of WordPress and WooCommerce to anticipate compatibility issues before they arise.
## Conclusion
Maintainability and regular updates are key to the success and longevity of WooCommerce extensions. By writing maintainable code, adhering to a consistent update process, and actively monitoring the extension's performance and compatibility, developers can ensure their products remain valuable and functional for users over time.
---
## WooCommerce Plugin API callbacks
*Source: extensions/core-concepts/woocommerce-plugin-api-callback.md*
# WooCommerce Plugin API callbacks
## Overview
This document provides a guide on how to use the WooCommerce Plugin API to initiate callbacks for plugin actions, especially for gateways and classes not initialized by default.
## Callback URL Structure
Before WooCommerce 2.0, use:
`https://example.com/?wc-api=CALLBACK`
In WooCommerce 2.0 or later, use the endpoint:
`https://example.com/wc-api/CALLBACK/`
## Behavior
When the callback URL is accessed, WooCommerce will:
- Initialize the `CALLBACK` class, if available
- Trigger the `woocommerce_api_callback` action
- Exit WordPress
## Hooking into the API Callback
To hook into the callback, add an action in your plugin:
```php
add_action( 'woocommerce_api_callback', 'your_callback_handler_function' );
```
## Redirecting After Callback
It's possible to redirect users after the action has been executed using your custom handler function.
---
## How to add custom product types to Add Products onboarding list
*Source: extensions/extension-onboarding/adding-custom-products-to-add-products-onboarding-list.md*
# How to add custom product types to Add Products onboarding list
## Introduction
WooCommerce allows developers to extend the product type onboarding list, offering a more customizable and engaging experience during the Add Products onboarding task. This tutorial will guide you through adding custom product types to your WooCommerce store using the `experimental_woocommerce_tasklist_product_types` JavaScript filter.
## Prerequisites
- A basic understanding of JavaScript and PHP.
- WooCommerce 8.8 or later installed on your WordPress site.
## Step 1: Adding a JavaScript Filter
To add a new product type to the onboarding list, we'll utilize the `@wordpress/hooks` package, specifically the addFilter function. If you're not already familiar, `@wordpress/hooks` allows you to modify or extend features within the WordPress and WooCommerce ecosystem without altering the core code.
First, ensure you have the `@wordpress/hooks` package installed. If not, you can add it to your project using `npm` or `yarn`:
`npm install @wordpress/hooks`
or:
`yarn add @wordpress/hooks`
Next, add the following JavaScript code to your project. This code snippet demonstrates how to add a "custom product" type to the onboarding list:
```javascript
/**
* External dependencies
*/
import { addFilter } from '@wordpress/hooks';
import { Icon, chevronRight } from '@wordpress/icons';
import { __ } from '@wordpress/i18n';
import FolderMultipleIcon from 'gridicons/dist/folder-multiple';
addFilter(
'experimental_woocommerce_tasklist_product_types',
'custom-product',
(productTypes) => [
...productTypes,
{
key: 'custom-product',
title: __('Custom product', 'custom-product'),
content: __('Create an awesome custom product.', 'custom-product'),
before: ,
after: ,
onClick: () => {
}
},
]
);
```
This filter adds a new product type called "Custom Product" with a brief description and icons before and after the title for a visually appealing presentation.
## Step 2: Optional - Customizing the onClick Handler
By default, if no onClick handler is supplied, the onboarding task will utilize the default CSV template handler. To customize this behavior, you can specify your own onClick handler within the product type object.
## Step 3: Modifying the CSV Template Path (Optional)
If you wish to use a different CSV template for your custom product type, you can modify the template path using the woocommerce_product_template_csv_file_path filter in PHP. Here's an example of how to change the template path:
```php
add_filter('woocommerce_product_template_csv_file_path', function($path) {
// Specify your custom template path here
return $newPath;
});
```
## Conclusion
With WooCommerce, extending the product type onboarding list is straightforward and offers significant flexibility for customizing the onboarding experience. By following the steps outlined in this tutorial, you can enhance your WooCommerce store and make the Add Products task more relevant and helpful to your specific needs.
---
## How to create custom product tours
*Source: extensions/extension-onboarding/creating-custom-product-tours.md*
# How to create custom product tours
## Introduction
WooCommerce allows developers to extend or replace the product tour, offering a more customizable and engaging experience during product creation. This tutorial will guide you through adding a custom product tour to your WooCommerce store using the `experimental_woocommerce_admin_product_tour_steps` JavaScript filter.
This works in conjunction with the ability to customize the product type onboarding list.
## Prerequisites
- A basic understanding of JavaScript and PHP.
- WooCommerce 8.8 or later installed on your WordPress site.
## Adding a JavaScript Filter
To alter or create a product tour, we'll utilize the `@wordpress/hooks` package, specifically the `addFilter` function. If you're not already familiar, `@wordpress/hooks` allows you to modify or extend features within the WordPress and WooCommerce ecosystem without altering the core code.
First, ensure you have the `@wordpress/hooks` package installed. If not, you can add it to your project using `npm` or `yarn`:
`npm install @wordpress/hooks`
or:
`yarn add @wordpress/hooks`
Next, add the following JavaScript code to your project. This code snippet demonstrates how to replace the product tour with an entire custom one:
```javascript
/**
* External dependencies
*/
import { addFilter } from '@wordpress/hooks';
import { __ } from '@wordpress/i18n';
addFilter(
experimental_woocommerce_admin_product_tour_steps,
'custom-product',
(tourSteps, tourType) => {
if ('custom-product' !== tourType) {
return tourSteps;
}
return [
{
referenceElements: {
desktop: '#title',// The element to highlight
},
focusElement: {
desktop: '#title',// A form element to be focused
},
meta: {
name: 'product-name', // Step name
heading: __( 'Product name', 'custom-product' ),
descriptions: {
desktop: __(
'Start typing your new product name here. This will be what your customers will see in your store.',
'custom-product'
),
},
},
},
];
}
);
```
This filter replaces the entire product tour for a `custom-product` product type. Using built-in JavaScript array manipulation functions, you can also customize the default tour (by altering, adding, or removing steps).
The `tourType` is set by the `tutorial_type` GET parameter.
## Conclusion
With WooCommerce, extending and customizing the product tour is straightforward and offers significant flexibility for customizing the onboarding experience. By following the steps outlined in this tutorial, you can enhance your WooCommerce store and make the Add Products tour more relevant and helpful to your specific needs.
---
## How to implement merchant onboarding
*Source: extensions/extension-onboarding/handling-merchant-onboarding.md*
# How to implement merchant onboarding
## Introduction
Onboarding is a critical part of the merchant's user experience. It helps set them up for success and ensures they're not only using your extension correctly but also getting the most out of it. There are a few especially useful features that you can take advantage of as a developer to help onboard merchants who are using your extension:
- Setup tasks
- Store management links
- Admin notes
---
## Using setup tasks
Setup tasks appear on the WooCommerce Admin home screen and prompt a merchant to complete certain steps in order to set up your extension. Adding tasks is a two-step process that requires:
- Registering the task (and its JavaScript) using PHP
- Using JavaScript to build the task, set its configuration, and add it to the task list
### Registering the task with PHP
To register your task as an extended task list item, you'll need to start by creating a new PHP class that extends the Task class. This class will define the properties and behavior of your custom task.
```php
{
// Implement your task UI/feature here.
return ;
};
registerPlugin( 'add-task-content', {
render: () => (
{ ( { onComplete, query, task } ) => (
) }
),
} );
registerPlugin( 'add-task-list-item', {
scope: 'woocommerce-tasks',
render: () => (
{ ( { defaultTaskItem: DefaultTaskItem } ) => (
// Add a custom wrapper around the default task item.
) }
),
} );
```
In the example above, the extension does a few different things. Let's break it down:
#### Handle imports
First, import any functions, components, or other utilities from external dependencies.
```js
import { createElement } from '@wordpress/element';
import {
WooOnboardingTask,
WooOnboardingTaskListItem,
} from '@woocommerce/onboarding';
import { registerPlugin } from '@wordpress/plugins';
```
#### Construct the component
Next, we create a [functional component](https://reactjs.org/docs/components-and-props.html) that returns our task card. The intermixed JavaScript/HTML syntax we're using here is called JSX. If you're unfamiliar with it, you can [read more about it in the React docs](https://reactjs.org/docs/introducing-jsx.html).
```js
import { onboardingStore } from '@woocommerce/data';
import { useDispatch } from '@wordpress/data';
const Task = ( { onComplete, task } ) => {
const { actionTask } = useDispatch( onboardingStore );
const { isActioned } = task;
return (
{ __(
"This task's completion status is dependent on being actioned. The action button below will action this task, while the complete button will optimistically complete the task in the task list and redirect back to the task list. Note that in this example, the task must be actioned for completion to persist.",
'plugin-domain'
) }{ ' ' }
{ __( 'Task actioned status: ', 'plugin-domain' ) }{ ' ' }
{ isActioned ? 'actioned' : 'not actioned' }
);
};
```
In the example above, we're using the `Card` and `CardBody` components to construct our task's component. The `div` inside the `CardBody` uses a [JavaScript expression](https://developer.mozilla.org/en-US/docs/Web/JavaScript/Guide/Expressions_and_Operators#Expressions) (`{}`) to embed a ternary operator that uses the component's state to determine whether to display the task as complete or incomplete.
#### Register the Plugin for Task Content
Next, we register the Task component as a plugin named "add-task-content" using [SlotFills](https://developer.wordpress.org/block-editor/reference-guides/slotfills/). This plugin nests the Task component within a WooOnboardingTask component and passes the necessary properties. We also specify the scope of the plugin as "woocommerce-tasks" to make it effective only within WooCommerce's task list.
```js
registerPlugin( 'add-task-content', {
render: () => (
{ ( {
onComplete,
// eslint-disable-next-line @typescript-eslint/no-unused-vars
query,
task,
} ) => }
),
scope: 'woocommerce-tasks',
} );
```
#### Register the Plugin for Task List Item Customization
Finally, we register another plugin named "my-task-list-item-plugin." This plugin is used to customize the appearance of task list items. It also targets WooCommerce's task list and wraps the DefaultTaskItem component within a custom wrapper with additional styling.
```js
registerPlugin( 'my-task-list-item-plugin', {
scope: 'woocommerce-tasks',
render: () => (
{ ( { defaultTaskItem: DefaultTaskItem } ) => (
// Add a custom wrapper around the default task item.
) }
),
} );
```
In summary, the JavaScript file for a simple task extends and customizes the functionality of WooCommerce's task list, allowing users to better manage tasks and personalize the appearance of task list items.
### Registering the task with JavaScript
In addition to registering the task in php, you'll also need to register and enqueue the transpiled JavaScript file containing your task component and its configuration. A common way to do this is to create a dedicated registration function that hooks into the `admin_enqueue_scripts` action in WordPress. Below is an annotated example of how this registration might look:
```php
/**
* Register the scripts to fill the task content on the frontend.
*/
function add_task_register_script() {
if (
! class_exists( 'Automattic\WooCommerce\Internal\Admin\Loader' ) ||
! \Automattic\WooCommerce\Admin\PageController::is_admin_or_embed_page()
) {
return;
}
$asset_file = require __DIR__ . '/dist/index.asset.php';
wp_register_script(
'add-task',
plugins_url( '/dist/index.js', __FILE__ ), // task registration JS
$asset_file['dependencies'],
$asset_file['version'],
true
);
wp_enqueue_script( 'add-task' );
}
add_action( 'admin_enqueue_scripts', 'add_task_register_script' );
```
By following these steps, your custom task should appear in the WooCommerce onboarding tasklist.
For a complete example of adding a custom task as a WordPress plugin, you can check out the [add-task examples directory](https://github.com/woocommerce/woocommerce/tree/trunk/plugins/woocommerce/client/admin/docs/examples/extensions/add-task).
To learn more about the tasklist, you can refer to the [tasklist documentation](https://github.com/woocommerce/woocommerce/blob/trunk/plugins/woocommerce/client/admin/docs/features/onboarding-tasks.md).
---
## Using Store Management Links
When a merchant completes all of the items on the onboarding task list, WooCommerce replaces it with a section containing a list of handy store management links. Discoverability can be a challenge for extensions, so this section is a great way to bring more attention to key features of your extension and help merchants navigate to them.
The store management section has a relatively narrow purpose, so this section does not currently support external links. Instead, it is meant for navigating quickly within WooCommerce.
Adding your own store management links is a simple process that involves:
- Installing dependencies for icon support
- Enqueuing an admin script in your PHP
- Hooking in via a JavaScript filter to provide your link object
### Installing the Icons package
Store management links use the `@wordpress/icons` package. If your extension isn't already using it, you'll need to add it to your extension's list of dependencies.
`npm` `install` ` @wordpress``/icons ` `--save`
### Enqueuing the JavaScript
The logic that adds your custom link to the store management section will live in a JavaScript file. We'll register and enqueue that file with WordPress in our PHP file:
```js
function custom_store_management_link() {
wp_enqueue_script(
'add-my-custom-link',
plugins_url( '/dist/add-my-custom-link.js', __FILE__ ),
array( 'wp-hooks' ),
10
);
}
add_action( 'admin_enqueue_scripts', 'custom_store_management_link' );
```
The first argument of this call is a handle, the name by which WordPress will refer to the script we're enqueuing. The second argument is the URL where the script is located.
The third argument is an array of script dependencies. By supplying the `wp-hooks` handle in that array, we're ensuring that our script will have access to the `addFilter` function we'll be using to add our link to WooCommerce's list.
The fourth argument is a priority, which determines the order in which JavaScripts are loaded in WordPress. We're setting a priority of 10 in our example. It's important that your script runs before the store management section is rendered. With that in mind, make sure your priority value is lower than 15 to ensure your link is rendered properly.
### Supply your link via JavaScript
Finally, in the JavaScript file you enqueued above, hook in to the `woocommerce_admin_homescreen_quicklinks` filter and supply your task as a simple JavaScript object.
```js
import { megaphone } from '@wordpress/icons';
import { addFilter } from '@wordpress/hooks';
addFilter(
'woocommerce_admin_homescreen_quicklinks',
'my-extension',
( quickLinks ) => {
return [
...quickLinks,
{
title: 'My link',
href: 'link/to/something',
icon: megaphone,
},
];
}
);
```
---
## Using Admin Notes
Admin Notes are meant for displaying insightful information about your WooCommerce store, extensions, activity, and achievements. They're also useful for displaying information that can help with the day-to-day tasks of managing and optimizing a store. A good general rule is to use Admin Notes for information that is:
1. Timely
2. Relevant
3. Useful
With that in mind, you might consider using Admin Notes to celebrate a particular milestone that a merchant has passed, or to provide additional guidance about using a specific feature or flow. Conversely, you shouldn't use Admin Notes to send repeated messages about the same topic or target all users with a note that is only relevant to a subset of merchants. It's okay to use Admin Notes for specific promotions, but you shouldn't abuse the system. Use your best judgement and remember the home screen is meant to highlight a store's most important actionable tasks.
Despite being a part of the new React-powered admin experience in WooCommerce, Admin Notes are available to developers via a standard PHP interface.
The recommended approach for using Admin Notes is to encapsulate your note within its own class that uses the [NoteTraits](https://github.com/woocommerce/woocommerce/blob/trunk/plugins/woocommerce/src/Admin/Notes/NoteTraits.php) trait included with WooCommerce Admin. Below is a simple example of what this might look like:
```php
set_title( 'Getting Started' );
// Set our note's content.
$note->set_content(
sprintf(
'Extension activated on %s.', $activated_time_formatted
)
);
// In addition to content, notes also support structured content.
// You can use this property to re-localize notes on the fly, but
// that is just one use. You can store other data here too. This
// is backed by a longtext column in the database.
$note->set_content_data( (object) array(
'getting_started' => true,
'activated' => $activated_time,
'activated_formatted' => $activated_time_formatted
) );
// Set the type of the note. Note types are defined as enum-style
// constants in the Note class. Available note types are:
// error, warning, update, info, marketing.
$note->set_type( Note::E_WC_ADMIN_NOTE_INFORMATIONAL );
// Set the type of layout the note uses. Supported layout types are:
// 'plain', 'thumbnail'
$note->set_layout( 'plain' );
// Set the image for the note. This property renders as the src
// attribute for an img tag, so use a string here.
$note->set_image( '' );
// Set the note name and source. You should store your extension's
// name (slug) in the source property of the note. You can use
// the name property of the note to support multiple sub-types of
// notes. This also gives you a handy way of namespacing your notes.
$note->set_source( 'inbox-note-example');
$note->set_name( self::NOTE_NAME );
// Add action buttons to the note. A note can support 0, 1, or 2 actions.
// The first parameter is the action name, which can be used for event handling.
// The second parameter renders as the label for the button.
// The third parameter is an optional URL for actions that require navigation.
$note->add_action(
'settings', 'Open Settings', '?page=wc-settings&tab=general'
);
$note->add_action(
'learn_more', 'Learn More', 'https://example.com'
);
return $note;
}
}
function my_great_extension_activate() {
// This uses the functionality from the NoteTraits trait to conditionally add your note if it passes all of the appropriate checks.
ExampleNote::possibly_add_note();
}
register_activation_hook( __FILE__, 'my_great_extension_activate' );
function my_great_extension_deactivate() {
// This uses the functionality from the NoteTraits trait to conditionally remove your note if it passes all of the appropriate checks.
ExampleNote::possibly_delete_note();
}
register_deactivation_hook( __FILE__, 'my_great_extension_deactivate' );
```
### Breaking it down
Let's break down the example above to examine what each section does.
#### Namespacing and feature availability checks
First, we're doing some basic namespacing and feature availability checks, along with a safeguard to make sure this file only executes within the WordPress application space.
```php
namespace My\Wonderfully\Namespaced\Extension\Area;
defined ( 'ABSPATH' ) || exit;
if ( ! class_exists( 'Automattic\WooCommerce\Admin\Notes\Notes') ||
! class_exists( 'Automattic\WooCommerce\Admin\Notes\NoteTraits') ) {
return;
}
if ( ! class_exists( 'WC_Data_Store' ) ) {
return;
}
```
#### Using Note and NoteTraits objects
Next, we define a simple class that will serve as a note provider for our note. To create and manage note objects, we'll import the `Note` and `NotesTraits` classes from WooCommerce Admin.
```php
class ExampleNote {
use Automatic\WooCommerce\Admin\Notes\Note;
use Automatic\WooCommerce\Admin\Notes\NoteTraits;
}
```
#### Provide a unique note name
Before proceeding, create a constant called `NOTE_NAME` and assign a unique note name to it. The `NoteTraits` class uses this constant for queries and note operations.
`const NOTE_NAME = 'my-prefix-example-note';`
#### Configure the note's details
Once you've set your note's name, you can define and configure your note. The `NoteTraits` class will call `self::get_note()` when performing operations, so you should encapsulate your note's instantiation and configuration in a static function called `get_note()` that returns a `Note` object.
```php
public static function get_note() {
// We'll fill this in with logic that instantiates a Note object
// and sets its properties.
}
```
Inside our `get_note()` function, we'll handle any logic for collecting data our Note may need to display. Our example note will include information about when the extension was activated, so this bit of code is just for demonstration. You might include other logic here depending on what data your note should contain.
```php
$activated_time = current_time( 'timestamp', 0);
$activated_time_formatted = date( 'F jS', $activated_time );
```
Next, we'll instantiate a new `Note` object.
`$note = new Note();`
Once we have an instance of the Note class, we can work with its API to set its properties, starting with its title.
`$note->set_title( 'Getting Started' );`
Then we'll use some of the timestamp data we collected above to set the note's content.
```php
$note->set_content(
sprintf(
'Extension activated on %s.', $activated_time_formatted
)
);
```
In addition to regular content, notes also support structured content using the `content_data` property. You can use this property to re-localize notes on the fly, but that is just one use case. You can store other data here too. This is backed by a `longtext` column in the database.
```php
$note->set_content_data( (object) array(
'getting_started' => true,
'activated' => $activated_time,
'activated_formatted' => $activated_time_formatted
) );
```
Next, we'll set the note's `type` property. Note types are defined as enum-style class constants in the `Note` class. Available note types are _error_, _warning_, _update_, _info_, and _marketing_. When selecting a note type, be aware that the _error_ and _update_ result in the note being shown as a Store Alert, not in the Inbox. It's best to avoid using these types of notes unless you absolutely need to.
`$note->set_type( Note::E_WC_ADMIN_NOTE_INFORMATIONAL );`
Admin Notes also support a few different layouts. You can specify `banner`, `plain`, or `thumbnail` as the layout. If you're interested in seeing the different layouts in action, take a look at [this simple plugin](https://gist.github.com/octaedro/864315edaf9c6a2a6de71d297be1ed88) that you can install to experiment with them.
We'll choose `plain` as our layout, but it's also the default, so we could leave this property alone and the effect would be the same.
`$note->set_layout( 'plain' );`
If you have an image that you want to add to your Admin Note, you can specify it using the `set_image` function. This property ultimately renders as the `src` attribute on an `img` tag, so use a string here.
`$note->set_image( '' );`
Next, we'll set the values for our Admin Note's `name` and `source` properties. As a best practice, you should store your extension's name (i.e. its slug) in the `source` property of the note. You can use the `name` property to support multiple sub-types of notes. This gives you a handy way of namespacing your notes and managing them at both a high and low level.
```php
$note->set_source( 'inbox-note-example');
$note->set_name( self::NOTE_NAME );
```
Admin Notes can support 0, 1, or 2 actions (buttons). You can use these actions to capture events that trigger asynchronous processes or help the merchant navigate to a particular view to complete a step, or even simply to provide an external link for further information. The `add_action()` function takes up to three arguments. The first is the action name, which can be used for event handling, the second renders as a label for the action's button, and the third is an optional URL for actions that require navigation.
```php
$note->add_action(
'settings', 'Open Settings', '?page=wc-settings&tab=general'
);
$note->add_action(
'learn_more', 'Learn More', 'https://example.com'
);
```
Finally, remember to have the `get_note()` function return the configured Note object.
`return $note;`
#### Adding and deleting notes
To add and delete notes, you can use the helper functions that are part of the `NoteTraits` class: `possibly_add_note()` and its counterpart `possibly_delete_note()`. These functions will handle some of the repetitive logic related to note management and will also run checks to help you avoid creating duplicate notes.
Our example extension ties these calls to activation and deactivation hooks for the sake of simplicity. While there are many events for which you may want to add Notes to a merchant's inbox, deleting notes upon deactivation and uninstallation is an important part of managing your extension's lifecycle.
```php
function my_great_extension_activate() {
ExampleNote::possibly_add_note();
}
register_activation_hook( __FILE__, 'my_great_extension_activate' );
function my_great_extension_deactivate() {
ExampleNote::possibly_delete_note();
}
register_deactivation_hook( __FILE__, 'my_great_extension_deactivate' );
```
---
## Integrating with coming soon mode
*Source: extensions/extension-onboarding/integrating-coming-soon-mode.md*
# Integrating with coming soon mode
This guide provides examples for third-party developers and hosting providers on how to integrate their systems with WooCommerce's coming soon mode. For more details, please read the [developer blog post](https://developer.woocommerce.com/2024/06/18/introducing-coming-soon-mode/). For site visibility settings, please refer to the [admin documentation](https://woocommerce.com/document/configuring-woocommerce-settings/coming-soon-mode/).
## Introduction
WooCommerce's coming soon mode allows you to temporarily make your site invisible to the public while you work on it. This guide will show you how to integrate this feature with your system, clear server cache when site visibility settings change, and sync coming soon mode with other plugins.
## Prerequisites
- Familiarity with PHP and WordPress development.
## Step-by-step instructions
### Clear server cache on site visibility settings change
When the site's visibility settings change, it may be necessary to clear a server cache to apply the changes and re-cache customer-facing pages. The [`update_option`](https://developer.wordpress.org/reference/hooks/update_option/) hook can be used to achieve this.
```php
add_action( 'update_option_woocommerce_coming_soon', 'clear_server_cache', 10, 3 );
add_action( 'update_option_woocommerce_store_pages_only', 'clear_server_cache', 10, 3 );
function clear_server_cache( $old_value, $new_value, $option ) {
// Implement your logic to clear the server cache.
if ( function_exists( 'your_cache_clear_function' ) ) {
your_cache_clear_function();
}
}
```
### Clear server cache on template changes
By default, Coming-soon pages are set with `Cache-Control: max-age=60` header. This setting enables CDNs and other caching mechanisms to cache the page for 60 seconds, balancing the need for efficient performance with reasonable update times.
When the user changes the coming soon template, it's recommended that any cache be purged so the changes take effect immediately when the client-side cache expires.
You can use the `save_post_wp_template`, `save_post_wp_template_part`, and `save_post_wp_global_styles` hooks to detect when a template is updated and trigger the cache purge.
```php
add_action( 'save_post_wp_template', 'purge_cache_on_template_change', 10, 3 );
add_action( 'save_post_wp_template_part', 'purge_cache_on_template_change', 10, 3 );
add_action( 'save_post_wp_global_styles', 'purge_cache_on_template_change', 10, 3 );
function purge_cache_on_template_change( $post_id, $post, $update ) {
// Check if the template is associated with the coming soon mode.
if ( 'coming-soon' === $post->post_name ) {
// Implement your logic to clear the server cache.
if ( function_exists( 'your_cache_clear_function' ) ) {
your_cache_clear_function();
}
}
}
```
### Syncing coming soon mode with other plugins
The coming soon mode can be programmatically synced from a plugin or application. Here are some example use cases:
- Integrating with a maintenance mode plugin.
- Integrating with a hosting provider's coming soon mode.
#### Trigger from WooCommerce
You can use the following example to run a code such as setting your plugin's status when coming soon mode option is updated:
```php
add_action( 'update_option_woocommerce_coming_soon', 'sync_coming_soon_to_other_plugins', 10, 3 );
function sync_coming_soon_to_other_plugins( $old_value, $new_value, $option ) {
$is_enabled = $new_value === 'yes';
// Implement your logic to sync coming soon status.
if ( function_exists( 'your_plugin_set_coming_soon' ) ) {
your_plugin_set_coming_soon( $is_enabled );
}
}
```
#### Trigger from other plugins
You can use the following example to enable or disable WooCommerce coming soon mode from another plugin by directly updating `woocommerce_coming_soon` option:
```php
function sync_coming_soon_from_other_plugins( $is_enabled ) {
// Check user capability.
if ( ! current_user_can( 'manage_options' ) ) {
wp_die( 'You do not have sufficient permissions to access this page.' );
}
// Set coming soon mode.
if ( isset( $is_enabled ) ) {
update_option( 'woocommerce_coming_soon', $is_enabled ? 'yes' : 'no' );
}
}
```
#### 2-way sync with plugins
If 2-way sync is needed, use the following example where `update_option` will not recursively call `sync_coming_soon_from_other_plugins`:
```php
add_action( 'update_option_woocommerce_coming_soon', 'sync_coming_soon_to_other_plugins', 10, 3 );
function sync_coming_soon_to_other_plugins( $old_value, $new_value, $option ) {
$is_enabled = $new_value === 'yes';
// Implement your logic to sync coming soon status.
if ( function_exists( 'your_plugin_set_coming_soon' ) ) {
your_plugin_set_coming_soon( $is_enabled );
}
}
function sync_coming_soon_from_other_plugins( $is_enabled ) {
// Check user capability.
if ( ! current_user_can( 'manage_options' ) ) {
wp_die( 'You do not have sufficient permissions to access this page.' );
}
if ( isset( $is_enabled ) ) {
// Temporarily remove the action to prevent a recursive call.
remove_action( 'update_option_woocommerce_coming_soon', 'sync_coming_soon_to_other_plugins', 10, 3 );
// Set coming soon mode.
update_option( 'woocommerce_coming_soon', $is_enabled ? 'yes' : 'no' );
// Re-add the action.
add_action( 'update_option_woocommerce_coming_soon', 'sync_coming_soon_to_other_plugins', 10, 3 );
}
}
```
#### One-way binding with option override
We could also programmatically bind the coming soon option from another plugin by overriding the `woocommerce_coming_soon` option. This is advantageous since it simplifies state management and prevents possible out-of-sync issues.
In the following example, we're binding the coming soon option from another plugin by overriding the `woocommerce_coming_soon` option.
```php
add_filter( 'pre_option_woocommerce_coming_soon', 'override_option_woocommerce_coming_soon' );
function override_option_woocommerce_coming_soon( $current_value ) {
// Implement your logic to sync coming soon status.
if ( function_exists( 'your_plugin_is_coming_soon' ) ) {
return your_plugin_is_coming_soon() ? 'yes' : 'no';
}
return $current_value;
}
add_filter( 'pre_update_option_woocommerce_coming_soon', 'override_update_woocommerce_coming_soon', 10, 2 );
function override_update_woocommerce_coming_soon( $new_value, $old_value ) {
// Check user capability.
if ( ! current_user_can( 'manage_options' ) ) {
wp_die( 'You do not have sufficient permissions to access this page.' );
}
// Implement your logic to sync coming soon status.
if ( function_exists( 'your_plugin_set_coming_soon' ) ) {
your_plugin_set_coming_soon( $new_value === 'yes' );
}
}
```
### Custom exclusions filter
It is possible for developers to add custom exclusions that bypass the coming soon protection. This is useful for exclusions like always bypassing the screen on a specific IP address, or making a specific landing page available.
#### Disabling coming soon in all pages
If there is another feature that behaves similarly to WooCommerce's coming soon mode, it can cause unintended conflicts. The coming soon mode can be disabled by excluding all customer-facing pages. The following is an example:
```php
add_filter( 'woocommerce_coming_soon_exclude', function() {
return true;
}, 10 );
```
#### Disabling coming soon except for a specific page
Use the following example to exclude a certain page based on the page's ID. Replace `` with your page identifier:
```php
add_filter( 'woocommerce_coming_soon_exclude', function( $is_excluded ) {
if ( get_the_ID() === ) {
return true;
}
return $is_excluded;
}, 10 );
```
#### Custom share links
The following example shows how to integrate with a custom share code. We recommend using cookies or other storage to persist the access when users navigate across the site:
```php
add_filter( 'woocommerce_coming_soon_exclude', function( $exclude ) {
// Implement your logic to get and validate share code.
if ( function_exists( 'your_plugin_get_share_code' ) && function_exists( 'your_plugin_is_valid_share_code' ) ) {
$share_code = your_plugin_get_share_code();
if ( your_plugin_is_valid_share_code( $share_code ) ) {
return true;
}
}
return $exclude;
} );
```
### Extend "Apply to store pages only" setting
When using the `Apply to store pages only` setting, you may want to add a custom page to the list of store pages which will be restricted by coming soon mode. You can use the following example to add a custom page:
```php
add_filter( 'woocommerce_store_pages', function( $pages ) {
$page = get_page_by_path( 'your-page-slug' );
if ( $page ) {
$pages[] = $page->ID;
}
return $pages;
} );
```
---
## Get started building extensions
*Source: extensions/getting-started-extensions/README.md*
# Get started building extensions
This section provides guides and resources for building, testing, and distributing WooCommerce extensions.
## Getting started
- [Design a simple extension](/extensions/getting-started-extensions/how-to-design-a-simple-extension) - Learn extension architecture and best practices
- [Build your first extension](/extensions/getting-started-extensions/building-your-first-extension) - Create your first WooCommerce extension
- [Core concepts](/extensions/core-concepts/) - Master fundamental concepts like plugin headers, lifecycle management, and security
## Submit to the WooCommerce Marketplace
Join the WooCommerce Marketplace and get your extension in front of 3.6M+ active stores worldwide.
Learn more about [why extension developers are choosing the WooCommerce Marketplace](https://woocommerce.com/partners/) and [submit your extension](https://woocommerce.com/document/submitting-your-product-to-the-woo-marketplace/)
### Quality Insights Toolkit (QIT)
#### Available to all developers with a WooCommerce.com vendor profile
QIT (Quality Insights Toolkit) is a testing platform developed by WooCommerce for plugins and themes. It allows developers to quickly run a variety of managed tests out-of-the-box, as well as integrate their own custom E2E tests to ensure their extensions are reliable, secure, and compatible.
#### Key features
- **Managed test suites:** Run pre-configured end-to-end tests, activation tests, security scans, PHPStan analysis, API tests, and more
- **Custom E2E testing:** Write and run your own Playwright-based E2E tests directly through QIT
- **Continuous quality checks:** Seamlessly integrate QIT into your development workflows via CLI, GitHub Actions, and more
- **Marketplace integration:** Currently in closed beta for extensions listed on the WooCommerce Marketplace
[Learn more about QIT](https://qit.woo.com/docs/)
## Development tools
- [Extension scaffolds](/getting-started/scaffolding/#extension-scaffolds) - Learn how to scaffold new extensions with our [create-woo-extension](https://www.npmjs.com/package/@woocommerce/create-woo-extension) package.
- [WooCommerce CLI](/wc-cli/cli-overview) - Command-line tools for WooCommerce development
---
## How to build your first extension
*Source: extensions/getting-started-extensions/building-your-first-extension.md*
# How to build your first extension
This guide will teach you how to use [create-woo-extension](https://www.npmjs.com/package/@woocommerce/create-woo-extension) to scaffold a WooCommerce extension. There are various benefits to using create-woo-extension over manually creating one from scratch, including:
There is less boilerplate code to write, and fewer dependencies to manually setup.
Modern features such as Blocks are automatically supported, and unit testing, linting, and Prettier IDE configuration are ready to use.
Once your extension is set up, we will show you how to instantly spin up a development environment using [wp-env](https://developer.wordpress.org/block-editor/reference-guides/packages/packages-env/).
## Requirements
Before getting started, you will need the following tools installed on your device:
- [Node.js](https://nodejs.org/en/learn/getting-started/how-to-install-nodejs) with NPM
- [Docker](https://docs.docker.com/engine/install/) (must be running to use wp-env)
- [Composer](https://getcomposer.org/doc/00-intro.md)
This guide also presumes that you are familiar with working with the command line.
## Bootstrapping Your Extension
Open your terminal and run
```sh
npx @wordpress/create-block -t @woocommerce/create-woo-extension my-extension-name
```
If you would like to set a custom extension name, you can replace `my-extension-name` with any slug. Please note that your slug must not have any spaces.
If you see a prompt similar to `Need to install the following packages`: `@wordpress/create-block@4.34.0. Ok to proceed?`, press `Y`.
Once the package finishes generating your extension, navigate into the extension folder using
```sh
cd my-extension-name
```
You should then install the extension dependencies using `npm install` and build it using `npm run build`.
Congratulations! You just spun up a WooCommerce extension! Your extension will have the following file structure:
- `my-extension-name`
- `block.json` - contains metadata used to register your custom blocks with WordPress. Learn more.
- `build` - the built version of your extension which is generated using npm run build. You shouldn't directly modify any of the files in this folder.
- `composer.json` - contains a list of your PHP dependencies which is referenced by Composer.
- `composer.lock` - this file allows you to control when and how to update these dependencies
- `includes` - The primary purpose of an "includes" folder in PHP development is to store reusable code or files that need to be included or required in multiple parts of a project. This is a PHP developer convention.
- `languages` - contains POT files that are used to localize your plugin.
- `my-extension-name.php` - your plugin entry point that registers your plugin with WordPress.
- `node-modules` - help you form the building blocks of your application and write more structured code
- `package.json` - is considered the heart of a Node project. It records metadata, and installs functional dependencies, runs scripts, and defines the entry point of your application.
- `README.md` - An introduction and instructional overview of your application. Any special instructions, updates from the author, and details about the application can be written in text here.
- `src` - keeps the root directory clean and provides a clear separation between the source code and other assets
- `tests` - can hold unit tests for your application, keeps them separate from source files
- `vendor` - holds project dependencies, and 3rd party code that you did not write
- `webpack.config.js` - webpack is a module bundler. Its main purpose is to bundle JavaScript files for usage in a browser
## Setting Up a Developer Environment
We recommend using `wp-env` to spin up local development environments. You can [learn more about wp-env here](https://make.wordpress.org/core/2020/03/03/wp-env-simple-local-environments-for-wordpress/). If you do not already have wp-env installed locally, you can install it using
`npm -g i @wordpress/env`.
Once you have installed `wp-env`, and while still inside your `my-extension-name` folder, run `wp-env` start. After a few seconds, a test WordPress site with your WooCommerce and your extension installed will be running on `localhost:8888`.
If you did not set a custom name for your extension, you can visit `wp-admin/admin.php?page=wc-admin&path=%2Fmy-extension-name` to see the settings page generated by /src/index.js. The default username/password combination for `wp-env` is `admin` / `password`.
## Next Steps
Now that you’ve bootstrapped your extension, you can finally add some features! Here are some simple ones you could include:
[How to add a custom field to simple and variable products](https://developer.woocommerce.com/docs/how-to-add-a-custom-field-to-simple-and-variable-products/)
## Reference
[Visit @woocommerce/create-woo-extension on NPM for package reference](https://www.npmjs.com/package/@woocommerce/create-woo-extension)
[Check out wp-env's command reference to learn more about advanced functionality](https://developer.wordpress.org/block-editor/reference-guides/packages/packages-env/#command-reference)
---
## How to design a simple extension
*Source: extensions/getting-started-extensions/how-to-design-a-simple-extension.md*
# How to design a simple extension
## Introduction
Building a WooCommerce extension that provides a first-class experience for merchants and shoppers requires a hybrid development approach combining PHP and modern JavaScript. The PHP handles the lifecycle and server-side operations of your extension, while the modern JavaScript lets you shape the appearance and behavior of its user interface.
## The main plugin file
Your extension's main PHP file is a bootstrapping file. It contains important metadata about your extension that WordPress and WooCommerce use for a number of ecosystem integration processes, and it serves as the primary entry point for your extension's functionality. While there is not a particular rule enforced around naming this file, using a hyphenated version of the plugin name is a common best practice. (i.e. my-extension.php)
## Declaring extension metadata
Your extension's main plugin file should have a header comment that includes a number of important pieces of metadata about your extension. WordPress has a list of header requirements to which all plugins must adhere, but there are additional considerations for WooCommerce extensions:
- The `Author` and `Developer` fields are required and should be set to
either your name or your company name.
- The `Developer URI` field should be your official webpage URL.
- The `Plugin URI` field should contain the URL of the extension's product page in the WooCommerce Marketplace or the extension's official landing page on your website.
- For extensions listed in the WooCommerce Marketplace, to help facilitate the update process, add a `Woo` field and an appropriate value. WooCommerce Marketplace vendors can find this snippet by logging in to the Vendors Dashboard and navigating to `Extensions > All Extensions`. Then, select the product and click Edit product page. This snippet will be in the upper-right-hand corner of the screen.
Below is an example of what the header content might look like for an extension listed in the WooCommerce Marketplace.
```php
/**
* Plugin Name: My Great WooCommerce Extension
* Plugin URI: https://woocommerce.com/products/woocommerce-extension/
* Description: Your extension's description text.
* Version: 1.0.0
* Author: Your Name
* Author URI: http://yourdomain.com/
* Developer: Your Name
* Developer URI: http://yourdomain.com/
* Text Domain: my-extension
* Domain Path: /languages
*
* Woo: 12345:342928dfsfhsf8429842374wdf4234sfd
*
* License: GNU General Public License v3.0
* License URI: http://www.gnu.org/licenses/gpl-3.0.html
*/
```
## Preventing data leaks
As a best practice, your extension's PHP files should contain a conditional statement at the top that checks for WordPress' ABSPATH constant. If this constant is not defined, the script should exit.
`defined( 'ABSPATH' ) || exit;`
This check prevents your PHP files from being executed via direct browser access and instead only allows them to be executed from within the WordPress application environment.
## Managing extension lifecycle
Because your main PHP file is the primary point of coupling between your extension and WordPress, you should use it as a hub for managing your extension's lifecycle. At a very basic level, this means handling:
- Activation
- Execution
- Deactivation
Starting with these three broad lifecycle areas, you can begin to break your extension's functionality down further to help maintain a good separation of concerns.
## Handling activation and deactivation
A common pattern in WooCommerce extensions is to create dedicated functions in your main PHP file to serve as activation and deactivation hooks. You then register these hooks with WordPress using the applicable registration function. This tells WordPress to call the function when the plugin is activated or deactivated. Consider the following examples:
```php
function my_extension_activate() {
// Your activation logic goes here.
}
register_activation_hook( __FILE__, 'my_extension_activate' );
```
```php
function my_extension_deactivate() {
// Your deactivation logic goes here.
}
register_deactivation_hook( __FILE__, 'my_extension_deactivate' );
```
## Maintaining a separation of concerns
There are numerous ways to organize the code in your extension. You can find a good overview of best practices in the WordPress Plugin Developer Handbook. Regardless of the approach you use for organizing your code, the nature of WordPress' shared application space makes it imperative that you build with an eye toward interoperability. There are a few common principles that will help you optimize your extension and ensure it is a good neighbor to others:
- Use namespacing and prefixing to avoid conflicts with other extensions.
- Use classes to encapsulate your extension's functionality.
- Check for existing declarations, assignments, and implementations.
## The core extension class
As mentioned above, encapsulating different parts of your extension's functionality using classes is an important measure that not only helps with interoperability, but which also makes your code easier to maintain and debug. Your extension may have many different classes, each shouldering some piece of functionality. At a minimum, your extension should define a central class which can handle the setup, initialization and management of a single instance of itself.
## Implementing a singleton pattern
Unless you have a specific reason to create multiple instances of your main class when your extension runs, you should ensure that only one instance exists in the global scope at any time. A common way of doing this is to use a Singleton pattern. There are several ways to go about setting up a singleton in a PHP class. Below is a basic example of a singleton that also implements some of the best practices mentioned above about namespacing and pre-declaration checks:
```php
if ( ! class_exists( 'My_Extension' ) ) :
/**
* My Extension core class
*/
class My_Extension {
/**
* The single instance of the class.
*/
protected static $_instance = null;
/**
* Constructor.
*/
protected function __construct() {
// Instantiation logic will go here.
}
/**
* Main Extension Instance.
* Ensures only one instance of the extension is loaded or can be loaded.
*/
public static function instance() {
if ( is_null( self::$_instance ) ) {
self::$_instance = new self();
}
return self::$_instance;
}
/**
* Cloning is forbidden.
*/
public function __clone() {
// Override this PHP function to prevent unwanted copies of your instance.
// Implement your own error or use `wc_doing_it_wrong()`
}
/**
* Unserializing instances of this class is forbidden.
*/
public function __wakeup() {
// Override this PHP function to prevent unwanted copies of your instance.
// Implement your own error or use `wc_doing_it_wrong()`
}
}
endif;
```
Notice that the example class above is designed to be instantiated by calling the static class method `instance()`, which will either return an existing instance of the class or create one and return it. In order to fully protect against unwanted instantiation, it's also necessary to override the built-in magic methods `__clone()` and `__wakeup()`. You can implement your own error logging here or use something like `_doing_it_wrong()` which handles error logging for you. You can also use WooCommerce's wrapper function `wc_doing_it_wrong()` here. Just be sure your code checks that the function exists first.
## Constructor
The example above includes an empty constructor for demonstration. In a real-world WooCommerce extension, however, this constructor should handle a few important tasks:
- Check for an active installation of WooCommerce & other sibling dependencies.
- Call a setup method that loads other files that your class depends on.
- Call an initialization method that gets your class and its dependencies ready to go.
If we build upon our example above, it might look something like this:
```php
protected function __construct() {
$this->includes();
$this->init();
// You might also include post-setup steps such as showing activation notices here.
}
```
## Loading dependencies
The includes() function above is where you'll load other class dependencies, typically via an include or require constructs. A common way of managing and loading external dependencies is to use Composer's autoload feature, but you can also load specific files individually. You can read more about how to autoload external dependencies in the Composer documentation. A basic example of a setup method that uses both Composer and internal inclusion is below.
```php
public function includes() {
$loader = include_once dirname( __FILE__ ) . '/' . 'vendor/autoload.php';
if ( ! $loader ) {
throw new Exception( 'vendor/autoload.php missing please run `composer install`' );
}
require_once dirname( __FILE__ ) . '/' . 'includes/my-extension-functions.php';
}
```
## Initialization
The `init()` function above is where you should handle any setup for the classes you loaded in the includes() method. This step is where you'll often perform any initial registration with relevant actions or filters. It's also where you can register and enqueue your extension's JavaScripts and stylesheets.
Here's an example of what your initialization method might look like:
```php
private function init() {
// Set up cache management.
new My_Extension_Cache();
// Initialize REST API.
new My_Extension_REST_API();
// Set up email management.
new My_Extension_Email_Manager();
// Register with some-action hook
add_action( 'some-action', 'my-extension-function' );
}
```
There are many different ways that your core class' initialization method might look, depending on the way that you choose to architect your extension. The important concept here is that this function serves as a central point for handling any initial registration and setup that your extension requires in order to respond to web requests going forward.
## Delaying initialization
The WordPress activation hook we set up above with register_activation_hook() may seem like a great place to instantiate our extension's main class, and in some cases it will work. By virtue of being a plugin for a plugin, however, WooCommerce extensions typically require WooCommerce to be loaded in order to function properly, so it's often best to delay instantiation and initialization until after WordPress has loaded other plugins.
To do that, instead of hooking your instantiation to your extension's activation hook, use the plugins_loaded action in WordPress to instantiate your extension's core class and add its singleton to the $GLOBALS array.
```php
function my_extension_initialize() {
// This is also a great place to check for the existence of the WooCommerce class
if ( ! class_exists( 'WooCommerce' ) ) {
// You can handle this situation in a variety of ways,
// but adding a WordPress admin notice is often a good tactic.
return;
}
$GLOBALS['my_extension'] = My_Extension::instance();
}
add_action( 'plugins_loaded', 'my_extension_initialize', 10 );
```
In the example above, WordPress will wait until after all plugins have been loaded before trying to instantiate your core class. The third argument in add_action() represents the priority of the function, which ultimately determines the order of execution for functions that hook into the plugins_loaded action. Using a value of 10 here ensures that other WooCommerce-related functionality will run before our extension is instantiated.
## Handling execution
Once your extension is active and initialized, the possibilities are wide open. This is where the proverbial magic happens in an extension, and it's largely up to you to define. While implementing specific functionality is outside the scope of this guide, there are some best practices to keep in mind as you think about how to build out your extension's functionality.
- Keep an event-driven mindset. Merchants and shoppers who use your extension will be interacting with WooCommerce using web requests, so it can be helpful to anchor your extension to some of the critical flows that users follow in WooCommerce.
- Keep business logic and presentation logic separate. This could be as simple as maintaining separate classes for handling back-end processing and front-end rendering.
- Where possible, break functionality into smaller parts and delegate responsibility to dedicated classes instead of building bloated classes and lengthy functions.
You can find detailed documentation of classes and hooks in the WooCommerce Core Code Reference and additional documentation of the REST API endpoints in the WooCommerce REST API Documentation.
## Handling deactivation
The WordPress deactivation hook we set up earlier in our main PHP file with register_deactivation_hook() is a great place to aggregate functionality for any cleanup that you need to handle when a merchant deactivates your extension. In addition to any WordPress-related deactivation tasks your extension needs to do, you should also account for WooCommerce-related cleanup, including:
- Removing Scheduled Actions
- Removing Notes in the Admin Inbox
- Removing Admin Tasks
## Uninstallation
While it's certainly possible to completely reverse everything your extension has created when a merchant deactivates it, it's not advisable nor practical in most cases. Instead, it's best to reserve that behavior for uninstallation.
For handling uninstallation, it's best to follow the guidelines in the WordPress Plugin Handbook.
## Putting it all together
Below is an example of what a main plugin file might look like for a very simple extension:
```php
/**
* Plugin Name: My Great WooCommerce Extension
* Plugin URI: https://woocommerce.com/products/woocommerce-extension/
* Description: Your extension's description text.
* Version: 1.0.0
* Author: Your Name
* Author URI: http://yourdomain.com/
* Developer: Your Name
* Developer URI: http://yourdomain.com/
* Text Domain: my-extension
* Domain Path: /languages
*
* Woo: 12345:342928dfsfhsf8429842374wdf4234sfd
*
* License: GNU General Public License v3.0
* License URI: http://www.gnu.org/licenses/gpl-3.0.html
*/
defined( 'ABSPATH' ) || exit;
/**
* Activation and deactivation hooks for WordPress
*/
function myPrefix_extension_activate() {
// Your activation logic goes here.
}
register_activation_hook( __FILE__, 'myPrefix_extension_activate' );
function myPrefix_extension_deactivate() {
// Your deactivation logic goes here.
// Don't forget to:
// Remove Scheduled Actions
// Remove Notes in the Admin Inbox
// Remove Admin Tasks
}
register_deactivation_hook( __FILE__, 'myPrefix_extension_deactivate' );
if ( ! class_exists( 'My_Extension' ) ) :
/**
* My Extension core class
*/
class My_Extension {
/**
* The single instance of the class.
*/
protected static $_instance = null;
/**
* Constructor.
*/
protected function __construct() {
$this->includes();
$this->init();
}
/**
* Main Extension Instance.
*/
public static function instance() {
if ( is_null( self::$_instance ) ) {
self::$_instance = new self();
}
return self::$_instance;
}
/**
* Cloning is forbidden.
*/
public function __clone() {
// Override this PHP function to prevent unwanted copies of your instance.
// Implement your own error or use `wc_doing_it_wrong()`
}
/**
* Unserializing instances of this class is forbidden.
*/
public function __wakeup() {
// Override this PHP function to prevent unwanted copies of your instance.
// Implement your own error or use `wc_doing_it_wrong()`
}
/**
* Function for loading dependencies.
*/
private function includes() {
$loader = include_once dirname( __FILE__ ) . '/' . 'vendor/autoload.php';
if ( ! $loader ) {
throw new Exception( 'vendor/autoload.php missing please run `composer install`' );
}
require_once dirname( __FILE__ ) . '/' . 'includes/my-extension-functions.php';
}
/**
* Function for getting everything set up and ready to run.
*/
private function init() {
// Examples include:
// Set up cache management.
// new My_Extension_Cache();
// Initialize REST API.
// new My_Extension_REST_API();
// Set up email management.
// new My_Extension_Email_Manager();
// Register with some-action hook
// add_action('some-action', 'my-extension-function');
}
}
endif;
/**
* Function for delaying initialization of the extension until after WooCommerce is loaded.
*/
function my_extension_initialize() {
// This is also a great place to check for the existence of the WooCommerce class
if ( ! class_exists( 'WooCommerce' ) ) {
// You can handle this situation in a variety of ways,
// but adding a WordPress admin notice is often a good tactic.
return;
}
$GLOBALS['my_extension'] = My_Extension::instance();
}
```
---
## How to add a section to a settings tab
*Source: extensions/settings-and-config/adding-a-section-to-a-settings-tab.md*
# How to add a section to a settings tab
When you're building an extension for WooCommerce that requires settings of some kind, it's important to ask yourself: **Where do they belong?** If your extension just has a couple of simple settings, do you really need to create a new tab specifically for it? Most likely the answer is no.
## When to Create a Section
Let's say we had an extension that adds a slider to a single product page. This extension only has a few options:
- Auto-insert into single product page (checkbox)
- Slider Title (text field)
That's only two options, specifically related to **Products**. We could quite easily just append them onto the core WooCommerce Products Settings (**WooCommerce > Settings > Products**), but that wouldn't be very user friendly. Users wouldn't know where to look initially so they'd have to scan all of the Products options and it would be difficult / impossible to link the options directly. Fortunately, as of WooCommerce 2.2.2, there is a new filter in place that allows you add a new **section**, beneath one of the core settings' tabs.
## How to Create a Section
We'll go over doing this through individual functions, but you should probably create a Class that stores all of your settings methods.
The first thing you need to is add the section, which can be done like this by hooking into the `woocommerce_get_sections_products` filter:
```php
/**
* Create the section beneath the products tab
**/
add_filter( 'woocommerce_get_sections_products', 'wcslider_add_section' );
function wcslider_add_section( $sections ) {
$sections['wcslider'] = __( 'WC Slider', 'text-domain' );
return $sections;
}
```
_[wc-create-section-beneath-products.php](https://gist.github.com/woogists/2964ec01c8bea50fcce62adf2f5c1232/raw/da5348343cf3664c0bc8b6b132d8105bfcf9ca51/wc-create-section-beneath-products.php)_
Make sure you change the **wcslider** parts to suit your extension's name / text-domain. The important thing about the `woocommerce_get_sections_products` filter, is that the last part **products**, is the tab you'd like to add a section to. So if you want to add a new tab to accounts section, you would hook into the `woocommerce_get_sections_accounts` filter.
## How to Add Settings to a Section
Now that you've got the tab, you need to filter the output of `woocommerce_get_sections_products` (or similar). You would add the settings like usual using the [**WooCommerce Settings API**](./settings-api.md), but check for the current section before adding the settings to the tab's settings array. For example, let's add the sample settings we discussed above to the new **wcslider** section we just created:
```php
/**
* Add settings to the specific section we created before
*/
add_filter( 'woocommerce_get_settings_products', 'wcslider_all_settings', 10, 2 );
function wcslider_all_settings( $settings, $current_section ) {
/**
* Check the current section is what we want
**/
if ( $current_section == 'wcslider' ) {
$settings_slider = array();
// Add Title to the Settings
$settings_slider[] = array( 'name' => __( 'WC Slider Settings', 'text-domain' ), 'type' => 'title', 'desc' => __( 'The following options are used to configure WC Slider', 'text-domain' ), 'id' => 'wcslider' );
// Add first checkbox option
$settings_slider[] = array(
'name' => __( 'Auto-insert into single product page', 'text-domain' ),
'desc_tip' => __( 'This will automatically insert your slider into the single product page', 'text-domain' ),
'id' => 'wcslider_auto_insert',
'type' => 'checkbox',
'css' => 'min-width:300px;',
'desc' => __( 'Enable Auto-Insert', 'text-domain' ),
);
// Add second text field option
$settings_slider[] = array(
'name' => __( 'Slider Title', 'text-domain' ),
'desc_tip' => __( 'This will add a title to your slider', 'text-domain' ),
'id' => 'wcslider_title',
'type' => 'text',
'desc' => __( 'Any title you want can be added to your slider with this option!', 'text-domain' ),
);
$settings_slider[] = array( 'type' => 'sectionend', 'id' => 'wcslider' );
return $settings_slider;
/**
* If not, return the standard settings
**/
} else {
return $settings;
}
}
```
_[wc-add-settings-section.php](https://gist.github.com/woogists/4038b83900508806c57a193a2534b845#file-wc-add-settings-section-php)_
We're hooking into the same `woocommerce_get_sections_products` filter, but this time doing a check that the `$current_section` matches our earlier defined custom section (wcslider), before adding in our new settings.
## Using the New Settings
You would now just use your newly created settings like you would any other WordPress / WooCommerce setting, through the [**get_option**](http://codex.wordpress.org/Function_Reference/get_option) function and the defined ID of the setting. For example, to use the previously created **wcslider_auto_insert** option, simply use the following code: `get_option( 'wcslider_auto_insert' )`
## Conclusion
When creating an extension for WooCommerce, think about where your settings belong before you create them. The key to building a useful product is making it easy to use for the end user, so appropriate setting placement is crucially important. For more specific information on adding settings to WooCommerce, check out the [**Settings API documentation**](https://github.com/woocommerce/woocommerce/blob/trunk/docs/extension-development/settings-api.md).
---
## How to add store management links
*Source: extensions/settings-and-config/how-to-add-your-own-store-management-links.md*
# How to add store management links
## Introduction
In the new and improved WooCommerce home screen, there are two points of extensibility for plugin developers that have recently had some attention. The first is the setup task list, allowing you to remind the user of tasks they need to complete and keeping track of their progress for them.
The second is the store management links section. Once the user has completed the setup tasks this will display for them. This section consolidates a list of handy navigation links that merchants can use to quickly find features in WooCommerce.
Discoverability can be hard for users so this can be a great place to bring attention to the features of your plugin and allow users to easily find their way to the key functionality your plugin provides.
Adding your own store management links is a simple process.
## Add your own store management link
Before we start, let's outline a couple of restrictions on this feature.
Right now these links are designed to keep the user within WooCommerce, so it does not support external links.
All the links you add will fall under a special category in the list called "Extensions". There is not currently any support for custom categories.
With those things in mind, let's start.
## Step 1 - Enqueue JavaScript
Adding a store management link will all be done in JavaScript, so the first step is enqueuing your script that will add the store management link. The most important thing here is ensuring that your script runs before the store management link section is rendered.
To ensure that your script runs before ours you'll need to enqueue it with a priority higher than 15. You'll also need to depend on `wp-hooks` to get access to `addFilter`.
Example:
```php
function enqueue_management_link_script() {
wp_enqueue_script( $script_name, $script_url, array( 'wp-hooks' ), 10 );
}
add_action( 'admin_enqueue_scripts', 'enqueue_management_link_script' );
```
## Step 2 - Install @wordpress/icons
To provide an icon of your choice for your store management link, you'll need to install `@wordpress/icons` in your JavaScript project:
```sh
npm install @wordpress/icons --save
```
## Step 3 - Add your filter
Your script will need to use `addFilter` to provide your custom link to the store management link section. And you'll need to import your icon of choice from `@wordpress/icons`. Here's an example:
```js
import { megaphone } from "@wordpress/icons";
import { addFilter } from "@wordpress/hooks";
addFilter(
"woocommerce_admin_homescreen_quicklinks",
"my-extension",
(quickLinks) => {
return [
...quickLinks,
{
title: "My link",
href: "link/to/something",
icon: megaphone,
},
];
}
);
```
Here's a screen shot using our new custom store management link:
---
## Creating custom settings for WooCommerce extensions
*Source: extensions/settings-and-config/implementing-settings.md*
# Creating custom settings for WooCommerce extensions
If you're customizing WooCommerce or adding your own functionality to it you'll probably need a settings page of some sort. One of the easiest ways to create a settings page is by taking advantage of the [`WC_Integration` class](https://woocommerce.github.io/code-reference/classes/WC-Integration.html 'WC_Integration Class'). Using the Integration class will automatically create a new settings page under **WooCommerce > Settings > Integrations** and it will automatically save, and sanitize your data for you. We've created this tutorial so you can see how to create a new integration.
## Setting up the Integration
You'll need at least two files to create an integration so you'll need to create a directory.
### Creating the Main Plugin File
Create your main plugin file to [hook](https://developer.wordpress.org/reference/functions/add_action/ 'WordPress add_action()') into the `plugins_loaded` hook and check if the `WC_Integration` [class exists](https://www.php.net/manual/en/language.oop5.basic.php#language.oop5.basic.extends 'PHP Class Exists'). If it doesn't then the user most likely doesn't have WooCommerce activated. After you do that you need to register the integration. Load the integration file (we'll get to this file in a minute). Use the `woocommerce_integrations` filter to add a new integration to the [array](http://php.net/manual/en/language.types.array.php 'PHP Array').
### Creating the Integration Class
Now that we have the framework setup let's actually implement this Integration class. There already is a `WC_Integration` class so we want to make a [child class](https://www.php.net/manual/en/language.oop5.inheritance.php). This way it inherits all of the existing methods and data. You'll need to set an id, a description, and a title for your integration. These will show up on the integration page. You'll also need to load the settings by calling: `$this->init_form_fields();` & `$this->init_settings();` You'll also need to save your options by calling the `woocommerce_update_options_integration_{your method id}` hook. Lastly you have to input some settings to save! We've included two dummy fields below but we'll go more into fields in the next section.
> Added to a file named `class-wc-integration-demo-integration.php`
```php
id = 'integration-demo';
$this->method_title = __( 'Integration Demo', 'woocommerce-integration-demo' );
$this->method_description = __( 'An integration demo to show you how easy it is to extend WooCommerce.', 'woocommerce-integration-demo' );
// Load the settings.
$this->init_form_fields();
$this->init_settings();
// Define user set variables.
$this->api_key = $this->get_option( 'api_key' );
$this->debug = $this->get_option( 'debug' );
// Actions.
add_action( 'woocommerce_update_options_integration_' . $this->id, array( $this, 'process_admin_options' ) );
}
/**
* Initialize integration settings form fields.
*/
public function init_form_fields() {
$this->form_fields = array(
'api_key' => array(
'title' => __( 'API Key', 'woocommerce-integration-demo' ),
'type' => 'text',
'description' => __( 'Enter with your API Key. You can find this in "User Profile" drop-down (top right corner) > API Keys.', 'woocommerce-integration-demo' ),
'desc_tip' => true,
'default' => '',
),
'debug' => array(
'title' => __( 'Debug Log', 'woocommerce-integration-demo' ),
'type' => 'checkbox',
'label' => __( 'Enable logging', 'woocommerce-integration-demo' ),
'default' => 'no',
'description' => __( 'Log events such as API requests', 'woocommerce-integration-demo' ),
),
);
}
}
endif;
```
> Added to a file named `wc-integration-demo.php`
```php
.
*
*/
if ( ! class_exists( 'WC_Integration_Demo' ) ) :
/**
* Integration demo class.
*/
class WC_Integration_Demo {
/**
* Construct the plugin.
*/
public function __construct() {
add_action( 'plugins_loaded', array( $this, 'init' ) );
}
/**
* Initialize the plugin.
*/
public function init() {
// Checks if WooCommerce is installed.
if ( class_exists( 'WC_Integration' ) ) {
// Include our integration class.
include_once 'class-wc-integration-demo-integration.php';
// Register the integration.
add_filter( 'woocommerce_integrations', array( $this, 'add_integration' ) );
} else {
// throw an admin error if you like
}
}
/**
* Add a new integration to WooCommerce.
*
* @param array Array of integrations.
*/
public function add_integration( $integrations ) {
$integrations[] = 'WC_Integration_Demo_Integration';
return $integrations;
}
}
endif;
$WC_Integration_Demo = new WC_Integration_Demo( __FILE__ );
```
## Creating Settings
If you took a look through the last section you'll see that we added two dummy settings using the `init_form_fields()` method.
### Types of Settings
WooCommerce includes support for 8 types of settings.
- text
- price
- decimal
- password
- textarea
- checkbox
- select
- multiselect
And these settings have attributes which you can use. These affect the way the setting looks and behaves on the settings page. It doesn't affect the setting itself. The attributes will manifest slightly differently depending on the setting type. A placeholder for example doesn't work with checkboxes. To see exactly how they work you should look through the [source code](https://github.com/woocommerce/woocommerce/blob/trunk/plugins/woocommerce/includes/abstracts/abstract-wc-settings-api.php 'WC Settings API on GitHub'). Ex.
- title
- class
- css
- placeholder
- description
- default
- desc_tip
### Creating Your Own Settings
The built-in settings are great but you may need extra controls to create your settings page. That's why we included some methods to do this for you. First, define a setting by adding it to the `$this->form_fields` array, entering the kind of form control you want under `type`. You can override the default HTML for your form inputs by creating a method with a name of the format `generate_{ type }_html` which outputs HTML markup. To specify how buttons are rendered, you'd add a method called `generate_button_html`. For textareas, you'd add a `generate_textarea_html` method, and so on. (Check out the `generate_settings_html` method of the `WC_Settings_API` class in the WooCommerce source code to see how WooCommerce uses this.) The below example creates a button that goes to WooCommerce.com.
```php
/**
* Initialize integration settings form fields.
*
* @return void
*/
public function init_form_fields() {
$this->form_fields = array(
// don't forget to put your other settings here
'customize_button' => array(
'title' => __( 'Customize!', 'woocommerce-integration-demo' ),
'type' => 'button',
'custom_attributes' => array(
'onclick' => "location.href='https://woocommerce.com'",
),
'description' => __( 'Customize your settings by going to the integration site directly.', 'woocommerce-integration-demo' ),
'desc_tip' => true,
)
);
}
/**
* Generate Button HTML.
*
* @access public
* @param mixed $key
* @param mixed $data
* @since 1.0.0
* @return string
*/
public function generate_button_html( $key, $data ) {
$field = $this->plugin_id . $this->id . '_' . $key;
$defaults = array(
'class' => 'button-secondary',
'css' => '',
'custom_attributes' => array(),
'desc_tip' => false,
'description' => '',
'title' => '',
);
$data = wp_parse_args( $data, $defaults );
ob_start();
?>
|
get_tooltip_html( $data ); ?>
|
get_description_html( $data ); ?>
|
id, array( $this, 'sanitize_settings' ) );
}
/**
* Sanitize our settings
*/
public function sanitize_settings( $settings ) {
// We're just going to make the api key all upper case characters since that's how our imaginary API works
if ( isset( $settings ) &&
isset( $settings['api_key'] ) ) {
$settings['api_key'] = strtoupper( $settings['api_key'] );
}
return $settings;
}
```
### Validation
Validation isn't always necessary but it's nice to do. If your API keys are always 10 characters long and someone enters one that's not 10 then you can print out an error message and prevent the user a lot of headache when they assumed they put it in correctly. First set up a `validate_{setting key}_field` method for each field you want to validate. For example, with the `api_key` field you need a `validate_api_key_field()` method.
```php
public function validate_api_key_field( $key, $value ) {
if ( isset( $value ) && 20 < strlen( $value ) ) {
WC_Admin_Settings::add_error( esc_html__( 'Looks like you made a mistake with the API Key field. Make sure it isn't longer than 20 characters', 'woocommerce-integration-demo' ) );
}
return $value;
}
```
## A complete example
If you've been following along you should have a complete integration example. If you have any problems see our [full integration demo](https://github.com/woogists/woocommerce-integration-demo 'Integration Demo').
---
## Settings API
*Source: extensions/settings-and-config/settings-api.md*
# Settings API
The WooCommerce Settings API is used by extensions to display, save, and load settings. The best way to make use of the API in your extension is to create a class that extends the `WC_Settings_API` class:
```php
class My_Extension_Settings extends WC_Settings_API {
//
}
```
## Defining form fields
You can define your fields using a method called `init_form_fields` in your class constructor:
```php
$this->init_form_fields();
```
You must have your settings defined before you can load them. Setting definitions go in the `form_fields` array:
```php
/**
* Initialise gateway settings form fields.
*/
function init_form_fields() {
$this->form_fields = array(
'title' => array(
'title' => __( 'Title', 'your-text-domain' ),
'type' => 'text',
'description' => __( 'This controls the title which the user sees during checkout.', 'your-text-domain' ),
'default' => __( 'PayPal', 'your-text-domain' )
),
'description' => array(
'title' => __( 'Description', 'your-text-domain' ),
'type' => 'textarea',
'description' => __( 'This controls the description which the user sees during checkout.', 'your-text-domain' ),
'default' => __( "Pay via PayPal; you can pay with your credit card if you don't have a PayPal account", 'your-text-domain' )
)
);
} // End init_form_fields()
```
(Make sure your class initializes the `form_fields` property so that the "Creation of dynamic property" error is not thrown in PHP 8.2+)
In the above example we define two settings, Title and Description. Title is a text box, whereas Description is a textarea. Notice how you can define a default value and a description for the setting itself.
Setting definitions use the following format:
```php
'setting_name' => array(
'title' => 'Title for your setting shown on the settings page',
'description' => 'Description for your setting shown on the settings page',
'type' => 'text|password|textarea|checkbox|select|multiselect',
'default' => 'Default value for the setting',
'class' => 'Class for the input element',
'css' => 'CSS rules added inline on the input element',
'label' => 'Label', // For checkbox inputs only.
'options' => array( // Array of options for select/multiselect inputs only.
'key' => 'value'
),
)
```
## Displaying your settings
Create a method called `admin_options` containing the following:
```php
function admin_options() {
?>
init_settings();
```
After that you can load your settings from the settings API. The `init_settings` method above populates the settings variable for you:
```php
// Define user set variables
$this->title = $this->settings['title'];
$this->description = $this->settings['description'];
```
---
## Managing custom attributes in WooCommerce menus and taxonomy archives
*Source: extensions/settings-and-config/using-custom-attributes-in-menus.md*
# Managing custom attributes in WooCommerce menus and taxonomy archives
Attributes that can be used for the layered nav are a custom taxonomy, which means you can display them in menus, or display products by attributes. This requires some work on your part, and archives must be enabled.
## Register the taxonomy for menus
When registering taxonomies for your custom attributes, WooCommerce calls the following hook:
```php
$show_in_nav_menus = apply_filters('woocommerce_attribute_show_in_nav_menus', false, $name);
```
So, for example, if your attribute slug was `size` you would do the following to register it for menus:
```php
add_filter('woocommerce_attribute_show_in_nav_menus', 'wc_reg_for_menus', 1, 2);
function wc_reg_for_menus( $register, $name = '' ) {
if ( $name == 'pa_size' ) $register = true;
return $register;
}
```
Custom attribute slugs are prefixed with `pa_`, so an attribute called `size` would be `pa_size`
Now use your attribute in **Appearance > Menus**. You will notice, however, that it has default blog styling when you click on a link to your taxonomy term.
## Create a template
You need to theme your attribute to make it display products as you want. To do this:
1. Copy `woocommerce/templates/taxonomy-product_cat.php` into your theme folder
2. Rename the template to reflect your attribute - in our example we'd use `taxonomy-pa_size.php`
You should now see this template when viewing taxonomy terms for your custom attribute.
---
## Integrating admin pages into WooCommerce extensions
*Source: extensions/settings-and-config/working-with-woocommerce-admin-pages.md*
# Integrating admin pages into WooCommerce extensions
## Introduction
There are a number of ways to manage admin-area pages for your WooCommerce extension. You can use existing PHP pages or create new React-powered pages. Regardless of the approach you choose, you'll need to register your page with the [`PageController`](https://woocommerce.github.io/code-reference/classes/Automattic-WooCommerce-Admin-PageController.html) in order to display the WooCommerce Admin header and activity panel on your page.
## Connecting a PHP-powered page to WooCommerce Admin
To register an existing PHP-powered admin page with the [`PageController`](https://woocommerce.github.io/code-reference/classes/Automattic-WooCommerce-Admin-PageController.html), use the [`wc_admin_connect_page()`](https://woocommerce.github.io/code-reference/namespaces/default.html#function_wc_admin_connect_page) function. For example:
```php
wc_admin_connect_page(
array(
'id' => 'woocommerce-settings',
'screen_id' => 'woocommerce_page_wc-settings-general',
'title' => array( 'Settings', 'General' ),
'path' => add_query_arg( 'page', 'wc-settings', 'admin.php' ),
)
);
```
The [`wc_admin_connect_page()`](https://woocommerce.github.io/code-reference/namespaces/default.html#function_wc_admin_connect_page) function accepts an array of arguments, two of which are optional:
- `id` (**required**) - This identifies the page with the controller.
- `parent` (_optional_) - This value denotes the page as a child of a parent (using the parent's ID) and is used for generating breadcrumbs.
- `screen_id` (**required**) - This corresponds to [`PageController::get_current_screen_id()`](https://woocommerce.github.io/code-reference/classes/Automattic-WooCommerce-Admin-PageController.html#method_get_current_screen_id). It is used to determine the current page. (see note below)
- `title` (**required**) - This corresponds to the page's title and is used to build breadcrumbs. You can supply a string or an array of breadcrumb pieces here.
- `path` (_optional_) - This is the page's relative path. Used for linking breadcrumb pieces when this page is a parent.
In the example above, you can see how to use an array to construct breadcrumbs for your extension. WooCommerce will attach a link leading to the `path` value to the first piece in the title array. All subsequent pieces are rendered as text and not linked.
### A note about determining the screen ID
WooCommerce Admin uses its own version of [`get_current_screen()`](https://developer.wordpress.org/reference/functions/get_current_screen/) to allow for more precise identification of admin pages, which may have various tabs and subsections.
The format of this ID may vary depending on the structural elements present on the page. Some formats that the function will generate are:
- `{$current_screen->action}-{$current_screen->action}-tab-section`
- `{$current_screen->action}-{$current_screen->action}-tab`
- `{$current_screen->action}-{$current_screen->action}` if no tab is present
- `{$current_screen->action}` if no action or tab is present
If your extension adds new pages with tabs or subsections, be sure to use the `wc_admin_pages_with_tabs` and `wc_admin_page_tab_sections` filters to have WooCommerce generate accurate screen IDs for them.
You can also use the `wc_admin_current_screen_id` filter to make any changes necessary to the screen ID generation behavior.
## Registering a React-powered page
To register a React-powered page, use the [`wc_admin_register_page()`](https://woocommerce.github.io/code-reference/namespaces/default.html#function_wc_admin_register_page) function. It accepts an array of arguments:
- `id` (**required**) - This identifies the page with the controller.
- `parent` (_optional_) - This denotes the page as a child of `parent` (using the parent's ID) and is used for generating breadcrumbs.
- `title` (**required**) - This corresponds to the page's title and is used to build breadcrumbs. You can supply a String or an Array of breadcrumb pieces here.
- `path` (**required**) - This is the page's path (relative to `#wc-admin`). It is used for identifying this page and for linking breadcrumb pieces when this page is a parent.
- `capability` (_optional_) - User capability needed to access this page. The default value is `manage_options`.
- `icon` (_optional_) - Use this to apply a Dashicons helper class or base64-encoded SVG. Include the entire dashicon class name, ie `dashicons-*`. Note that this won't be included in WooCommerce Admin Navigation.
- `position` (_optional_) - Menu item position for parent pages. See: [`add_menu_page()`](https://developer.wordpress.org/reference/functions/add_menu_page/).
Registering a React-powered page is similar to connecting a PHP page, but with some key differences. Registering pages will automatically create WordPress menu items for them, with the appropriate hierarchy based on the value of `parent`.
### Example: Adding a new WooCommerce Admin page
```php
if ( ! function_exists( 'YOUR_PREFIX_add_extension_register_page' ) ) {
function YOUR_PREFIX_add_extension_register_page() {
if ( ! function_exists( 'wc_admin_register_page' ) ) {
return;
}
wc_admin_register_page( array(
'id' => 'my-example-page',
'title' => __( 'My Example Page', 'YOUR-TEXTDOMAIN' ),
'parent' => 'woocommerce',
'path' => '/example',
) );
}
}
add_action( 'admin_menu', 'YOUR_PREFIX_add_extension_register_page' );
```
In the example above, we encapsulated our call to [`wc_admin_register_page()`](https://woocommerce.github.io/code-reference/namespaces/default.html#function_wc_admin_register_page) in a function that we have hooked to the [`admin_menu`](https://developer.wordpress.org/reference/hooks/admin_menu/) action. Once you have registered a page with the controller, you can supply a React component on the client side.
```js
import { addFilter } from '@wordpress/hooks';
import { __ } from '@wordpress/i18n';
const MyExamplePage = () => My Example Extension
;
addFilter( 'woocommerce_admin_pages_list', 'my-namespace', ( pages ) => {
pages.push( {
container: MyExamplePage,
path: '/example',
breadcrumbs: [ __( 'My Example Page', 'YOUR-TEXTDOMAIN' ) ],
} );
return pages;
} );
```
Above, we're creating a simple [functional React component](https://reactjs.org/docs/components-and-props.html#function-and-class-components) for the sake of demonstration, but a real-world extension would likely have a more complex nesting of components.
## Further reading
You can learn more about how page registration works by checking out the [`PageController`](https://woocommerce.github.io/code-reference/classes/Automattic-WooCommerce-Admin-PageController.html) class in the WooCommerce Core Code Reference.
You can see real-world examples of the two page registration methods in WooCommerce Core by taking a look at:
- [How WooCommerce Admin registers existing core pages](https://github.com/woocommerce/woocommerce/blob/trunk/plugins/woocommerce/includes/react-admin/connect-existing-pages.php) - registering PHP-powered pages
- [How WooCommerce registers React-powered Analytics report pages](https://github.com/woocommerce/woocommerce/blob/trunk/plugins/woocommerce/src/Internal/Admin/Analytics.php) - registering React-powered pages
---
## Extension Guidelines
*Source: extensions/ux-guidelines-extensions/README.md*
# Extension Guidelines
This section covers general guidelines, and best practices to follow in order to ensure your product experience aligns with WooCommerce for ease of use, seamless integration, and strong adoption.
We strongly recommend you review the current [WooCommerce setup experience](https://woocommerce.com/documentation/plugins/woocommerce/getting-started/) to get familiar with the user experience and taxonomy.
We also recommend you review the [WordPress core guidelines](https://developer.wordpress.org/plugins/wordpress-org/detailed-plugin-guidelines/) to ensure your product isn't breaking any rules, and review [this helpful resource](https://woocommerce.com/document/grammar-punctuation-style-guide/) on content style.
## General
Use existing WordPress/WooCommerce UI, built in components (text fields, checkboxes, etc) and existing menu structures.
Plugins which draw on WordPress' core design aesthetic will benefit from future updates to this design as WordPress continues to evolve. If you need to make an exception for your product, be prepared to provide a valid use case.
- [WordPress Components library](https://wordpress.github.io/gutenberg/?path=/story/docs-introduction--page)
- [Figma for WordPress](https://make.wordpress.org/design/2018/11/19/figma-for-wordpress/) | ([WordPress Design Library Figma](https://www.figma.com/file/e4tLacmlPuZV47l7901FEs/WordPress-Design-Library))
- [WooCommerce Component Library](https://woocommerce.github.io/woocommerce/)
## Component Library - Storybook
> Storybook is an open source tool for developing UI components in isolation for React, React Native and more. It makes building stunning UIs organized and efficient.
The WooCommerce repository also includes [Storybook](https://storybook.js.org/) integration that allows testing and developing in a WooCommerce-agnostic context. This is very helpful for developing reusable components and trying generic JavaScript modules without any backend dependency.
You can launch Storybook by running `pnpm --filter=@woocommerce/storybook watch:build` locally. It will open in your browser automatically.
You can also test Storybook for the current `trunk` branch on GitHub Pages: [https://woocommerce.github.io/woocommerce](https://woocommerce.github.io/woocommerce)
---
## Accessibility
*Source: extensions/ux-guidelines-extensions/accessibility.md*
# Accessibility
Your extensions must meet the [WordPress Accessibility Coding Standards](https://developer.wordpress.org/coding-standards/wordpress-coding-standards/accessibility/)
For more information on accessibility, check out the [WordPress accessibility quick start guide](https://make.wordpress.org/accessibility/handbook/best-practices/quick-start-guide/).
---
## Best Practices
*Source: extensions/ux-guidelines-extensions/best-practices.md*
# Best Practices
- **Plugin name should simply state the feature of the plugin and not use an existing core feature or extension in its' title**. The plugin name should appear at all times in the UI as a functional and original name. e.g "Appointments" instead of "VendorXYZ Bookings Plugin for WooCommerce."
- **Avoid creating new UI**. Before considering a new UI, review the WordPress interface to see if a component can be repurposed. Follow existing UI navigation patterns so merchants have context on where they are when navigating to a new experience.
- **Be considerate of mobile for the merchant (and shopper-facing if applicable) experience**. Stores operate 24/7. Merchants shouldn't be limited to checking their store on a desktop. Extensions need to be built responsively so they work on all device sizes.
- **It's all about the merchant**. Don't distract with unrelated content. Keep the product experience front and center to help the user achieve the tasks they purchased your product for.
- **Present a review request at the right time**. Presenting users with a request for review is a great way to get feedback on your extension. Think about best placement and timing to show these prompts.
- Avoid showing the user a review request upon first launching the extension. Once the user has had a chance to set up, connect, and use the plugin they'll have a better idea of how to rate it.
- Try to present the review request at a time that's least disruptive, such as after successful completion of a task or event.
- **Don't alter the core interface**. Don't express your brand by changing the shape of containers in the Woo admin.
- **Focus on the experience**. After the customer installs your product, the experience should be the primary focus. Keep things simple and guide the user to successful setup. Do not convolute the experience or distract the user with branding, self promotion, large banners, or anything obtrusive.
- **Keep copy short and simple**. Limit instructions within the interface to 120-140 characters. Anything longer should be placed in the product documentation.
- **Maintain a consistent tone when communicating with a user**. Maintain the same communication style and terminology across an extension, and avoid abbreviations and acronyms.
- In extensions:
- Use sentences for descriptions, feedback, and headlines. Avoid all-caps text.
- Use standard punctuation and avoid excessive exclamation marks.
- Use American English.
- For more, read our [Grammar, Punctuation, and Capitalization guide](https://woocommerce.com/document/grammar-punctuation-style-guide/).
---
## Colors
*Source: extensions/ux-guidelines-extensions/colors.md*
# Colors
When creating extensions for the WordPress wp-admin, use the core colors, respect the user's WordPress admin color scheme selection, and ensure your designs pass AA level guidelines.
When using components with text, such as buttons, cards, or navigation, the background-to-text contrast ratio should be at least 4.5:1 to be [WCAG AA compliant](https://www.w3.org/WAI/WCAG21/Understanding/contrast-minimum.html). Be sure to [test your color contrast ratios](https://webaim.org/resources/contrastchecker/) to abide by WCAG standards.
- [Accessibility handbook on uses of color and contrast](https://make.wordpress.org/accessibility/handbook/current-projects/use-of-color/)
- [Color contrast ratio checker](http://webaim.org/resources/contrastchecker/)
- [More resources regarding accessibility and color testing](http://webaim.org/resources/contrastchecker/)
For WooCommerce-specific color use, review our [Style Guide](https://woocommerce.com/brand-and-logo-guidelines/).
---
## Navigation
*Source: extensions/ux-guidelines-extensions/navigation.md*
# Navigation
**Menu Structure.** Place your product navigation elements within the existing WooCommerce taxonomy.
Examples:
- If your extension is extending a component within WooCommerce, it should live directly within that category's section.

- If your plugin adds a settings screen to set up the plugin, settings should be under an appropriate tab on the WooCommerce > Settings screen. Only if necessary, create a top-level settings tab if your plugin has settings that don't fit under existing tabs and creating a sub-tab isn't appropriate.
**No iframes, only APIs.** To create a cohesive experience, application data should be loaded via API instead of an iFrame.
**One line navigation label.** Keep all navigation labels on one line. Do not introduce a second line in any of the preexisting menu items.
**Keep menu structure simple.** Use existing WooCommerce menu structures as much as possible to reduce redundancies. If your plugin must introduce multiple pages or areas, consider grouping them in tabs using existing components to remain consistent with WooCommerce structure.
**No top level navigation.** If your product is extending WooCommerce, then there's a 99.9% chance your product navigation, and settings should live within the WooCommerce nav structure-see above menu structure examples.
---
## Notices
*Source: extensions/ux-guidelines-extensions/notices.md*
# Notices
Use notices primarily to provide user feedback in response to an action. Avoid using notices to communicate offers or announcements. Don't apply brand colors, fonts, or illustrations to your notices.
If a post-activation notice is required, keep it within the WordPress plugin area-do not display it on the dashboard, or any other parts of the platform.
Use the standard WordPress notice format and WooCommerce admin notices API.
## Language
Providing timely feedback like success and error messages is essential for ensuring that the user understands whether changes have been made.
Use short but meaningful messages that communicate what is happening. Ensure that the message provides instructions on what the user needs to do to continue. Proper punctuation should be used if the message contains multiple sentences. Avoid abbreviations.
## Design
The placement of feedback is vital so the user notices it. For example, when validation messages are needed to prompt the user to enter data, get the user's attention by displaying a message close to the inputs where data needs to be revised.
**Success** message: When the user performs an action that is executed successfully.
**Error Message**: When the user performs an action that could not be completed. (This can include validation messages.) When requiring the user to input data, make sure you verify whether each field meets the requirements, such as format, ranges, and if the field is required. Provide validation messages that are adjacent to each field so that the user can act on each in context. Avoid technical jargon.
**Warning Message**: When the user performs an action that may have completed successfully, but the user should review it and proceed with caution.
**Informational Message**: When it's necessary to provide information before the user executes any action on the screen. Examples can be limitations within a time period or when a global setting limits actions on the current screen.
### Examples
---
## Onboarding
*Source: extensions/ux-guidelines-extensions/onboarding.md*
# Onboarding
The first experience your users have with your extension is crucial. A user activating your extension for the first time provides an opportunity to onboard new and reorient returning users the right way. Is it clear to the user how to get started? Keep in mind that the more difficult the setup, the more likely a user will abandon the product altogether so keep it simple and direct.
**Use primary buttons as calls to action and keep secondary information deprioritized for clarity**. Guide merchants towards successful setup with a clear next step and/or step-by-step process with progress indicator if the extension isn't configured or if setup is not complete.
**If necessary, provide a dismissible notification in the plugin area**. Add a notification to communicate next steps if setup or connection is required to successfully enable the plugin.
- Use the standard WordPress notice format and WooCommerce admin notices API.
- Notices should be dismissible. Users should always have a clear way to close the notice.
- Keep the post-activation notice with the WordPress plugin area in context of the plugin listing-do not display it on the dashboard, or any other parts of the platform.
- Don't display more than one notice.
- Try to keep the notice copy between 125 to 200 characters.
If no action is required for setup it's best to rely on other onboarding aids such as the Task List (link to component) and Inbox (link to component) to help users discover features and use your plugin.
**Get to the point and keep it instructional**. This is not a time to promote your brand or pitch the product. The user has bought your product and is ready to use it. Keep the information instructional and precise and avoid the use of branded colors, fonts, and illustrations in empty states and other onboarding aids. Help users with context on next steps.
**Show helpful empty states**. Rely on the existing plugin UI, if any, to guide users towards successful setup and use of the plugin. Avoid onboarding emails, push notifications, and welcome tours.
**Plugins should not redirect on activation from WordPress plugins area**. This can break bulk activation of plugins. Following the [dotorg plugin guideline 11](https://developer.wordpress.org/plugins/wordpress-org/detailed-plugin-guidelines/#11-plugins-should-not-hijack-the-admin-dashboard), the extension shouldn't hijack the dashboard or hide functionality of core or other extensions.
**Avoid dead end links and pages**. There should always be a way forward or back.
**Error Handling and Messaging**. If users encounter an error during setup, provide a clear and useful notification with clear and easily understood information on what went wrong and how to fix it.
---
## Settings
*Source: extensions/ux-guidelines-extensions/settings.md*
# Settings
**Make extension settings easy to understand.** Only include settings options that are crucial to the overall functionality of the product.
**Use smart defaults wherever possible**, rather than asking the merchant to configure.
**Group your settings intuitively.** Prioritize frequently-used settings at the top of each section, and place destructive or infrequently-used settings at the bottom.
**Group relevant settings together**, either by frequency of use (eg. Quick Settings), or by description (eg. Account Settings). Use section titles and sub-section titles to create clear hierarchy.
**Avoid long, tedious lists of many different types of settings.** This overwhelms the user with so many options that the product feels unusable to them. Consider using separate pages or sections for different types of settings, or progressive disclosure that surfaces the most used settings and hides everything else.
**Use impersonal titles and text**, eg. "Reports" instead of "My reports." Exception: If referring to the user is necessary for understanding the setting, use the second person ("you") rather than the first person ("I").
**Include helper text** for settings or sections that are not easily understandable.
**Use clear and consistent language.** Avoid technical jargon.
---
## Task List and Inbox
*Source: extensions/ux-guidelines-extensions/task-list-and-inbox.md*
# Task List and Inbox
Plugins should choose between implementing a Task or Inbox note based on the following guidelines. Avoid implementing both Task and Inbox note for the same message, which adds clutter and reduces the impact of the message.
Use the Task List and Inbox sparingly. Messages should be clear, concise, and maintain a consistent tone. Follow the [Grammar, Punctuation, and Capitalization guide](https://woocommerce.com/document/grammar-punctuation-style-guide/).
## Task List

Anything that **requires** action should go in the task list.
- *What appears in the Things to Do Task List:*
- Tasks that will enable, connect, or configure an extension.
- Tasks that are critical to the business, such as capturing payment or responding to disputes.
- *What doesn't appear in the Things to do Task List:*
- Any critical update that would impact or prevent the functioning of the store should appear as a top level notice using the standard WordPress component.
- Informational notices such as feature announcements or tips for using the plugin should appear in the Inbox as they are not critical and do not require action.
- Notifications from user activity should result in regular feedback notices (success, info, error, warning).
Examples:
## Inbox
The Inbox provides informational, useful, and supplemental content to the user, while important notices and setup tasks have their separate and relevant locations.

- *What appears in the Inbox*:
- Informational notices such as non-critical reminders.
- Requests for plugin reviews and feedback.
- Tips for using the plugin and introducing features.
- Insights such as inspirational messages or milestones.
- *What doesn't appear in the Inbox*:
- Notices that require action, extension setup tasks, or regular feedback notices.
Examples:
---
## Testing
*Source: extensions/ux-guidelines-extensions/testing.md*
# Testing
Users must be able to perform all actions of the functionality provided. This can be achieved by running user tests.
To run an effective user test, list as many scenarios your extension supports. An example of a scenario: "I am a store owner who wants to create a customizable product that includes letting customers add custom text and select from 5 different color options for the custom text." Give this scenario to testers, and watch them attempt/perform the task with your extension.
Different ways to do quick user testing:
- Recruit potential customers to test your product.
- Use online services that allow you to expose your extension to new users such as UserTesting.com.
- Ask enthusiasts in the [WooCommerce Community Slack](https://woocommerce.com/community-slack/) for feedback.
---
## How to add columns to analytics reports and CSV downloads
*Source: features/analytics/adding-columns-to-analytics-reports-and-csv-downloads.md*
# How to add columns to analytics reports and CSV downloads
Adding columns to analytics reports are a really interesting way to add functionality to WooCommerce. New data can be consumed in the table view of the user interface and in your user's favourite spreadsheet or third party application by generating a CSV.
These instructions assume that you have a test plugin for WooCommerce installed and activated. You can follow the ["Getting started" instructions](extending-woocommerce-admin-reports.md) to get a test plugin set up. That post also includes instructions to further modify the query that is executed to get the data in an advanced fashion - it isn't required to just add a simple column.
In WooCommerce, analytics CSVs are generated in two different ways: in the web browser using data already downloaded, or on the server using a new query. It uses the size of the data set to determine the method - if there is more than one page worth of results it generates the data on the server and emails a link to the user, but if the results fit on one page the data is generated and downloaded straight away in the browser.
We'll look at the on-server method for adding a column first, because this is also where the data sent to the browser is generated.
This example extends the Downloads analytics report. To get some data in your system for this report, create a downloadable product with a download expiry value, create an order purchasing the product, then download the product several times. In testing I created 26 downloads, which is enough that the report is spread over two pages when showing 25 items per page, and on a single page when showing 50 items per page. This let me test CSVs generated both on the server and in browser.
In the PHP for your plugin, add three filter handlers:
```php
// This adds the SELECT fragment to the report SQL
function add_access_expires_select( $report_columns, $context, $table_name ) {
if ( $context !== 'downloads' ) {
return $report_columns;
}
$report_columns['access_expires'] =
'product_permissions.access_expires AS access_expires';
return $report_columns;
}
add_filter( 'woocommerce_admin_report_columns', 'add_access_expires_select', 10, 3 );
// This adds the column header to the CSV
function add_column_header( $export_columns ) {
$export_columns['access_expires'] = 'Access expires';
return $export_columns;
}
add_filter( 'woocommerce_filter_downloads_export_columns', 'add_column_header' );
// This maps the queried item to the export item
function map_access_expires( $export_item, $item ) {
$export_item['access_expires'] = $item['access_expires'];
return $export_item;
}
add_filter( 'woocommerce_report_downloads_prepare_export_item', 'map_access_expires', 10, 2 );
```
This adds the access expiry timestamp to the Downloads table/CSV (when the CSV is generated on the server).
These three filters together add the new column to the database query, adds the new header to the CSV, and maps the data returned from the database to the CSV. The first filter `woocommerce_admin_report_columns` adds a SQL fragment to the `SELECT` statement generated for the data query. The second filter `woocommerce_filter_downloads_export_columns` adds the column header to the CSV generated on the server. The third filter `woocommerce_report_downloads_prepare_export_item` maps the value in the data returned from the database query `$item` to the export item for the CSV.
To finish this off by adding support for columns generated in browser, another filter needs to be added to your plugin's JavaScript:
```js
import { addFilter } from "@wordpress/hooks";
function addAccessExpiresToDownloadsReport(reportTableData) {
const { endpoint, items } = reportTableData;
if ("downloads" !== endpoint) {
return reportTableData;
}
reportTableData.headers = [
...reportTableData.headers,
{
label: "Access expires",
key: "access_expires",
},
];
reportTableData.rows = reportTableData.rows.map((row, index) => {
const item = items.data[index];
const newRow = [
...row,
{
display: item.access_expires,
value: item.access_expires,
},
];
return newRow;
});
return reportTableData;
}
addFilter(
"woocommerce_admin_report_table",
"dev-blog-example",
addAccessExpiresToDownloadsReport
);
```
This filter first adds the header to the CSV, then maps the data.
With the plugin you've created, you should now be able to add data to the analytics table, the CSV generated on the server, and the CSV generated on the browser.
---
## How to extend WooCommerce analytics reports
*Source: features/analytics/extending-woocommerce-admin-reports.md*
# How to extend WooCommerce analytics reports
## Introduction
This document serves as a guide to extending WC-Admin Reports with a basic UI dropdown, added query parameters, and modification of SQL queries and resulting report data. This example will create a currency selector for viewing the Orders Report based on a specific currency.
Code from this guide can be viewed in the [woocommerce code repository](https://github.com/woocommerce/woocommerce/tree/trunk/plugins/woocommerce/client/admin/docs/examples/extensions/sql-modification).
## Getting started
We'll be using a local installation of WordPress with WooCommerce and the development version of WC-Admin to take advantage of `create-wc-extension` as a way to easily scaffold a modern WordPress JavaScript environment for plugins.
In your local install, clone and start WC-Admin if you haven't already.
```sh
cd wp-content/plugins
git clone git@github.com:woocommerce/woocommerce.git
cd plugins/woocommerce/client/admin
npm run build
```
Once that's working, we can setup the extension folder ready for JavaScript development.
```sh
npm run create-wc-extension
```
After choosing a name, move into that folder and start webpack to watch and build files.
```sh
cd ../
npm install
npm start
```
Don't forget to head over to `/wp-admin/plugins.php` and activate your plugin.
## Populating test data
Next, set up some orders to have sample data. Using WooCommerce > Settings > Currency, I added three test orders in Mexican Peso, US Dollar, and New Zealand Dollar.
After doing so, check out WC-Admin to make sure the orders are showing up by going to `/wp-admin/admin.php?page=wc-admin&period=today&path=%2Fanalytics%2Forders&compare=previous_year`. Note that without any modification currency figures show according to what I have currently in WooCommerce settings, which is New Zealand Dollar in this case.
We can confirm each order's currency by running the following query on the `wp_posts` table and joining `wp_postmeta` to gather currency meta values. Results show an order in NZD, USD, and MXN. This query is similar to the one we'll implement later in the guide to gather and display currency values.
```sql
SELECT
ID,
post_name,
post_type,
currency_postmeta.meta_value AS currency
FROM `wp_posts`
JOIN wp_postmeta currency_postmeta ON wp_posts.ID = currency_postmeta.post_id
WHERE currency_postmeta.meta_key = '_order_currency'
ORDER BY wp_posts.post_date DESC
LIMIT 3
```
## Add a UI dropdown
In order to view reports in differing currencies, a filter or dropdown will be needed. We can add a basic filter to reports by adding a configuration object similar to [this one from the Orders Report](https://github.com/woocommerce/woocommerce/blob/trunk/plugins/woocommerce/client/admin/client/analytics/report/orders/config.js#L50-L62).
First, we need to populate the client with data to render the dropdown. The best way to do this is to add data to the `wcSettings` global. This global can be useful for transferring static configuration data from PHP to the client. In the main PHP file, add currency settings to the Data Registry to populate `window.wcSettings.multiCurrency`.
```php
function add_currency_settings() {
$currencies = array(
array(
'label' => __( 'United States Dollar', 'dev-blog-example' ),
'value' => 'USD',
),
array(
'label' => __( 'New Zealand Dollar', 'dev-blog-example' ),
'value' => 'NZD',
),
array(
'label' => __( 'Mexican Peso', 'dev-blog-example' ),
'value' => 'MXN',
),
);
$data_registry = Automattic\WooCommerce\Blocks\Package::container()->get(
Automattic\WooCommerce\Blocks\Assets\AssetDataRegistry::class
);
$data_registry->add( 'multiCurrency', $currencies );
}
add_action( 'init', 'add_currency_settings' );
```
In the console, you can confirm the data has safely made its way to the client.
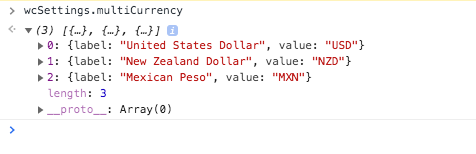
In `index.js` create the custom currency filter and add it the Orders Report.
```js
import { addFilter } from "@wordpress/hooks";
import { __ } from "@wordpress/i18n";
const addCurrencyFilters = (filters) => {
return [
{
label: __("Currency", "dev-blog-example"),
staticParams: [],
param: "currency",
showFilters: () => true,
defaultValue: "USD",
filters: [...(wcSettings.multiCurrency || [])],
},
...filters,
];
};
addFilter(
"woocommerce_admin_orders_report_filters",
"dev-blog-example",
addCurrencyFilters
);
```
If we check out the Orders Report, we can see our new dropdown. Play around with it and you'll notice the currency query parameter gets added to the url. If you check out the Network tab, you'll also see this value included in requests for data used to populate the report. For example, see the requests to orders stats endpoint, `/wp-json/wc-analytics/reports/orders/stats`. Next we'll use that query parameter to adjust report results.
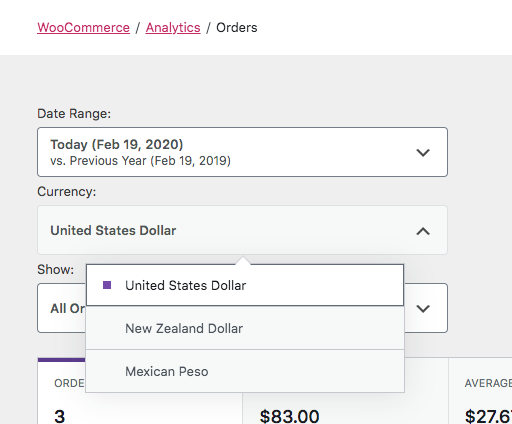
## Handle currency parameters on the server
Now that our dropdown adds a `currency` query parameter to requests for data, the first thing we'll need to do is add the parameter as a query argument to the Orders Data Store and Orders Stats Data Store. Those data stores use query arguments for caching purposes, so by adding our parameter we can be sure a new database query will be performed when the parameter changes. Add the query argument in your main PHP file.
```php
function apply_currency_arg( $args ) {
$currency = 'USD';
if ( isset( $_GET['currency'] ) ) {
$currency = sanitize_text_field( wp_unslash( $_GET['currency'] ) );
}
$args['currency'] = $currency;
return $args;
}
add_filter( 'woocommerce_analytics_orders_query_args', 'apply_currency_arg' );
add_filter( 'woocommerce_analytics_orders_stats_query_args', 'apply_currency_arg' );
```
Now that we're sure a new database query is performed on mutations of the `currency` query parameter, we can start adding SQL statements to the queries that gather data.
Lets start by adding a JOIN for the orders table, orders stats, and orders chart.
```php
function add_join_subquery( $clauses ) {
global $wpdb;
$clauses[] = "JOIN {$wpdb->postmeta} currency_postmeta ON {$wpdb->prefix}wc_order_stats.order_id = currency_postmeta.post_id";
return $clauses;
}
add_filter( 'woocommerce_analytics_clauses_join_orders_subquery', 'add_join_subquery' );
add_filter( 'woocommerce_analytics_clauses_join_orders_stats_total', 'add_join_subquery' );
add_filter( 'woocommerce_analytics_clauses_join_orders_stats_interval', 'add_join_subquery' );
```
Next, add a WHERE clause
```php
function add_where_subquery( $clauses ) {
$currency = 'USD';
if ( isset( $_GET['currency'] ) ) {
$currency = sanitize_text_field( wp_unslash( $_GET['currency'] ) );
}
$clauses[] = "AND currency_postmeta.meta_key = '_order_currency' AND currency_postmeta.meta_value = '{$currency}'";
return $clauses;
}
add_filter( 'woocommerce_analytics_clauses_where_orders_subquery', 'add_where_subquery' );
add_filter( 'woocommerce_analytics_clauses_where_orders_stats_total', 'add_where_subquery' );
add_filter( 'woocommerce_analytics_clauses_where_orders_stats_interval', 'add_where_subquery' );
```
And finally, a SELECT clause.
```php
function add_select_subquery( $clauses ) {
$clauses[] = ', currency_postmeta.meta_value AS currency';
return $clauses;
}
add_filter( 'woocommerce_analytics_clauses_select_orders_subquery', 'add_select_subquery' );
add_filter( 'woocommerce_analytics_clauses_select_orders_stats_total', 'add_select_subquery' );
add_filter( 'woocommerce_analytics_clauses_select_orders_stats_interval', 'add_select_subquery' );
```
Lets head back to the Orders Report and see if it works. You can manipulate the dropdown and see the relevant order reflected in the table.
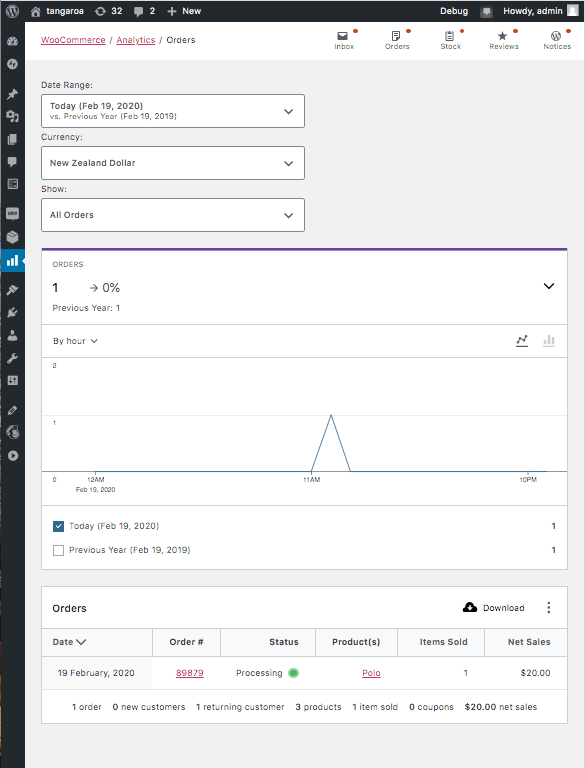
## Finishing touches
The orders table could use some customisation to reflect the selected currency. We can add a column to display the currency in `index.js`. The `reportTableData` argument is an object of headers, rows, and items, which are arrays of data. We'll need to add a new header and append the currency to each row's data array.
```js
const addTableColumn = (reportTableData) => {
if ("orders" !== reportTableData.endpoint) {
return reportTableData;
}
const newHeaders = [
{
label: "Currency",
key: "currency",
},
...reportTableData.headers,
];
const newRows = reportTableData.rows.map((row, index) => {
const item = reportTableData.items.data[index];
const newRow = [
{
display: item.currency,
value: item.currency,
},
...row,
];
return newRow;
});
reportTableData.headers = newHeaders;
reportTableData.rows = newRows;
return reportTableData;
};
addFilter("woocommerce_admin_report_table", "dev-blog-example", addTableColumn);
```
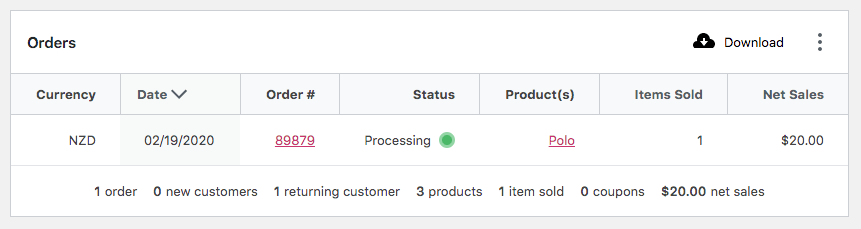
While adding a column is certainly helpful, currency figures in the table and chart only reflect the store currency.
In order to change a Report's currency and number formatting, we can make use of the `woocommerce_admin_report_currency` JS hook. You can see the store's default sent to the client in `wcSettings.currency`, but we'll need to change these depending on the currency being viewed and designated by the query parameter `?currency=NZD`.
First, lets create some configs in index.js.
```js
const currencies = {
MXN: {
code: "MXN",
symbol: "$MXN", // For the sake of the example.
symbolPosition: "left",
thousandSeparator: ",",
decimalSeparator: ".",
precision: 2,
},
NZD: {
code: "NZD",
symbol: "$NZ",
symbolPosition: "left",
thousandSeparator: ",",
decimalSeparator: ".",
precision: 2,
},
};
```
Finally, add our function to the hook which applies a config based on the currency query parameter.
```js
const updateReportCurrencies = (config, { currency }) => {
if (currency && currencies[currency]) {
return currencies[currency];
}
return config;
};
addFilter(
"woocommerce_admin_report_currency",
"dev-blog-example",
updateReportCurrencies
);
```
🎉 We can now view our Orders Report and see the currency reflected in monetary values throughout the report.
## Conclusion
In this guide, we added a UI element to manipulate query parameters sent to the server and used those values to modify SQL statements which gather report data. In doing so, we established a way to highly customise WC-Admin reports. Hopefully this example illustrates how the platform can be tailored by extensions to bring a powerful experience to users.
---
## Email HTML - Best Practices
*Source: features/email/email-html-best-practices.md*
# Email HTML - Best Practices
## Overview
Email design and development require a different approach than traditional web development. This guide outlines best practices for ensuring your HTML emails render correctly across all major email clients.
### Key principles
- **Width**: Keep your email width between 600-640px - This ensures your email displays properly across all devices without horizontal scrolling on smaller screens.
- **File size**: Keep total email size under 100KB - Large emails may be clipped by Gmail and other providers, and take longer to load on mobile devices.
- **Tables**: Use tables for layout (despite being deprecated for the web) - Email clients have inconsistent CSS support but reliable table rendering.
- **Testing**: Test across multiple email clients and devices - Email clients render HTML differently, and testing helps identify and fix rendering issues.
## HTML
### Use older, simpler HTML standards
- Use HTML 4.01 or XHTML 1.0 - Many email clients use outdated rendering engines and don't support modern HTML5 features.
- Avoid HTML5 elements in the main structure - Elements like ``, ``, and `