While looking into a Store API related GitHub issue, I decided to create a brief tutorial on how to place an order using the Store API when using WooCommerce Blocks.
This tutorial uses a REST client for the examples. The screenshots are from Insomnia, but you can also use other REST clients like Postman if you want.
The Store API allows placing an order using RESTful requests.
💡 RESTful requests are a standardized way for applications to communicate with servers over the internet. These requests use different methods to perform specific actions:
• GET: Fetch information from the server.
• POST: Creates information to the server.
• PUT: Updates existing information on the server.
• DELETE: Deleting information from the server.
In this tutorial, we will walk through the following steps in order to achieve placing an order with the Store API using RESTful requests:
- Get a nonce token
- Fetch all available products
- Add a product to the cart
- Fetch the billing address and payment method
- Place the order
Let’s get started
Get a nonce token
First, we need to fetch a valid Nonce Token. To get the nonce, we make the following request:
GET https://store.test/wp-json/wc/store/v1/cart
In the headers of the response, we can see the nonce, which in my case is 25222b6f2b:
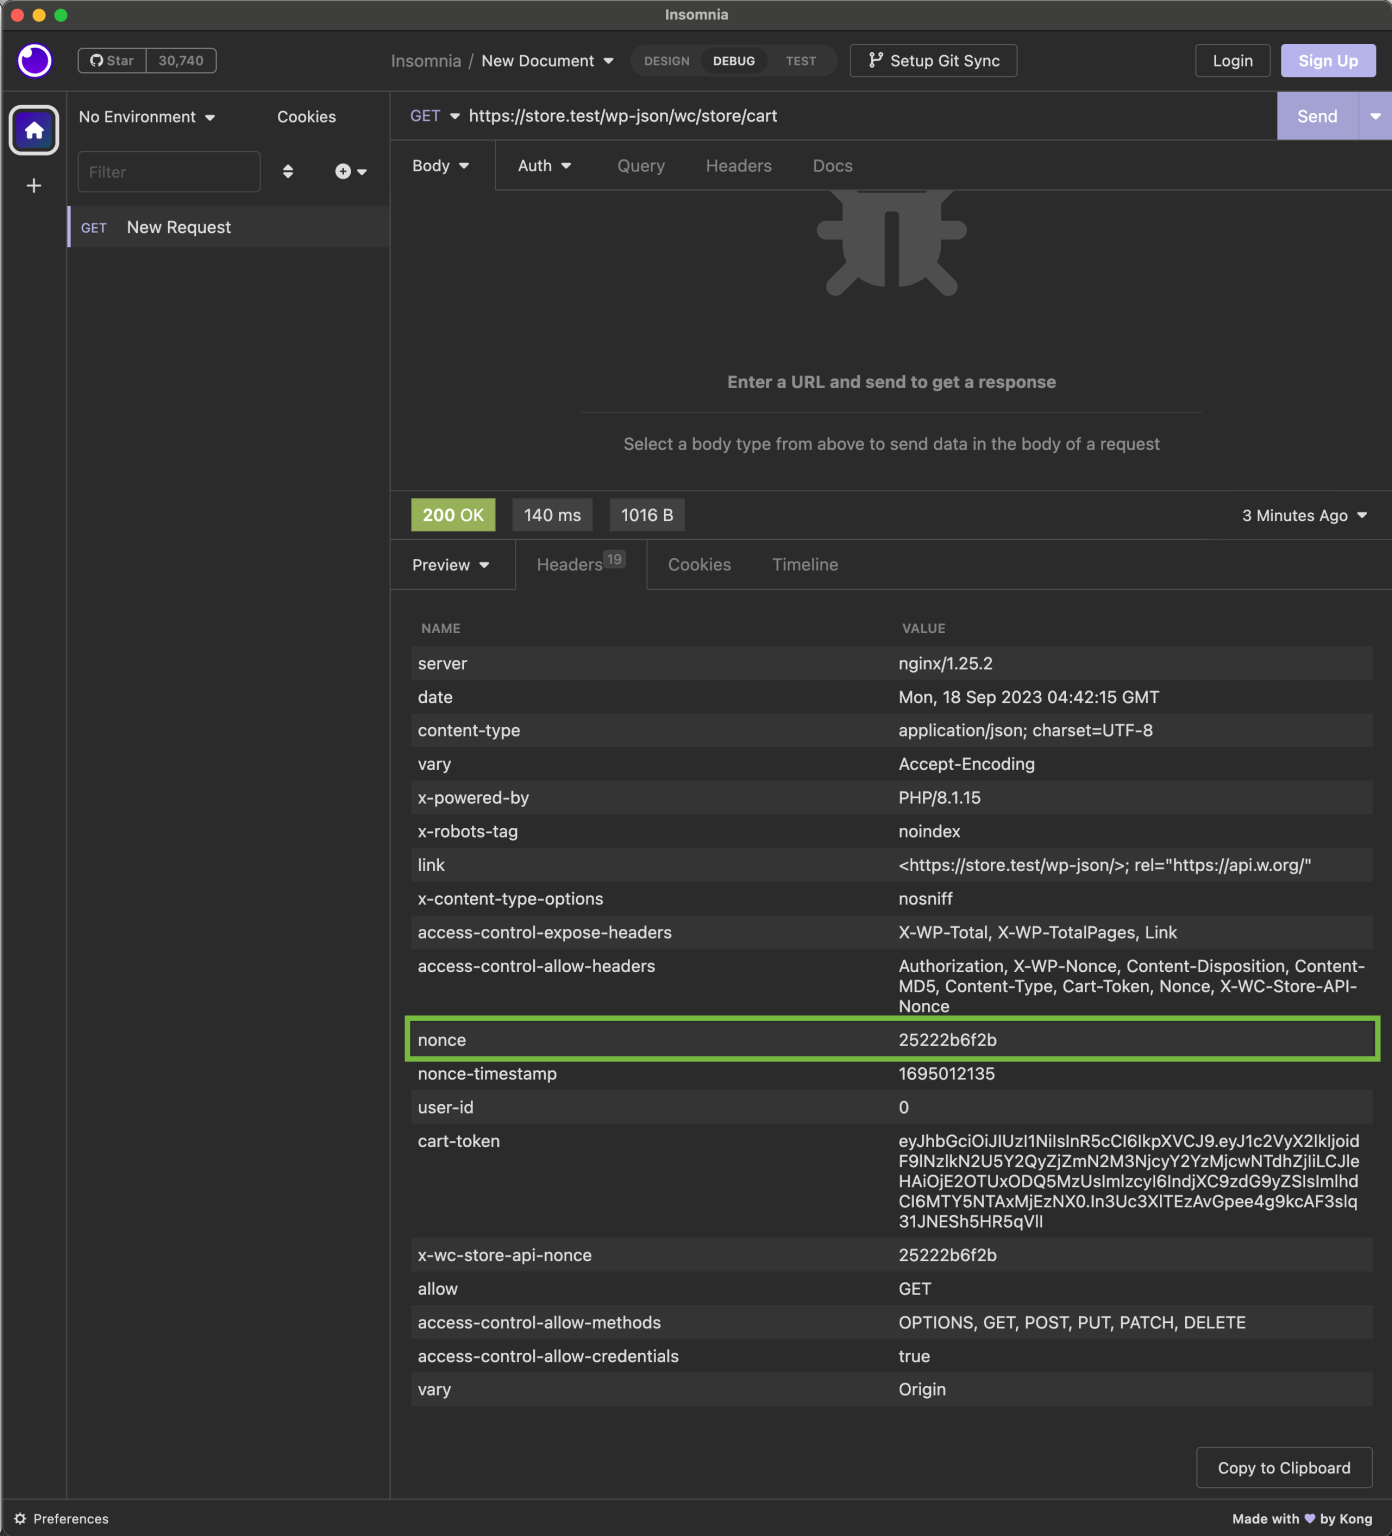
💡 A nonce is a one-time unique or random number used in computing to enhance security. It helps ensure that a request or action is legitimate and hasn’t been tampered with.
We copy that nonce and add it as a headers argument in our REST client:

Fetch all available products
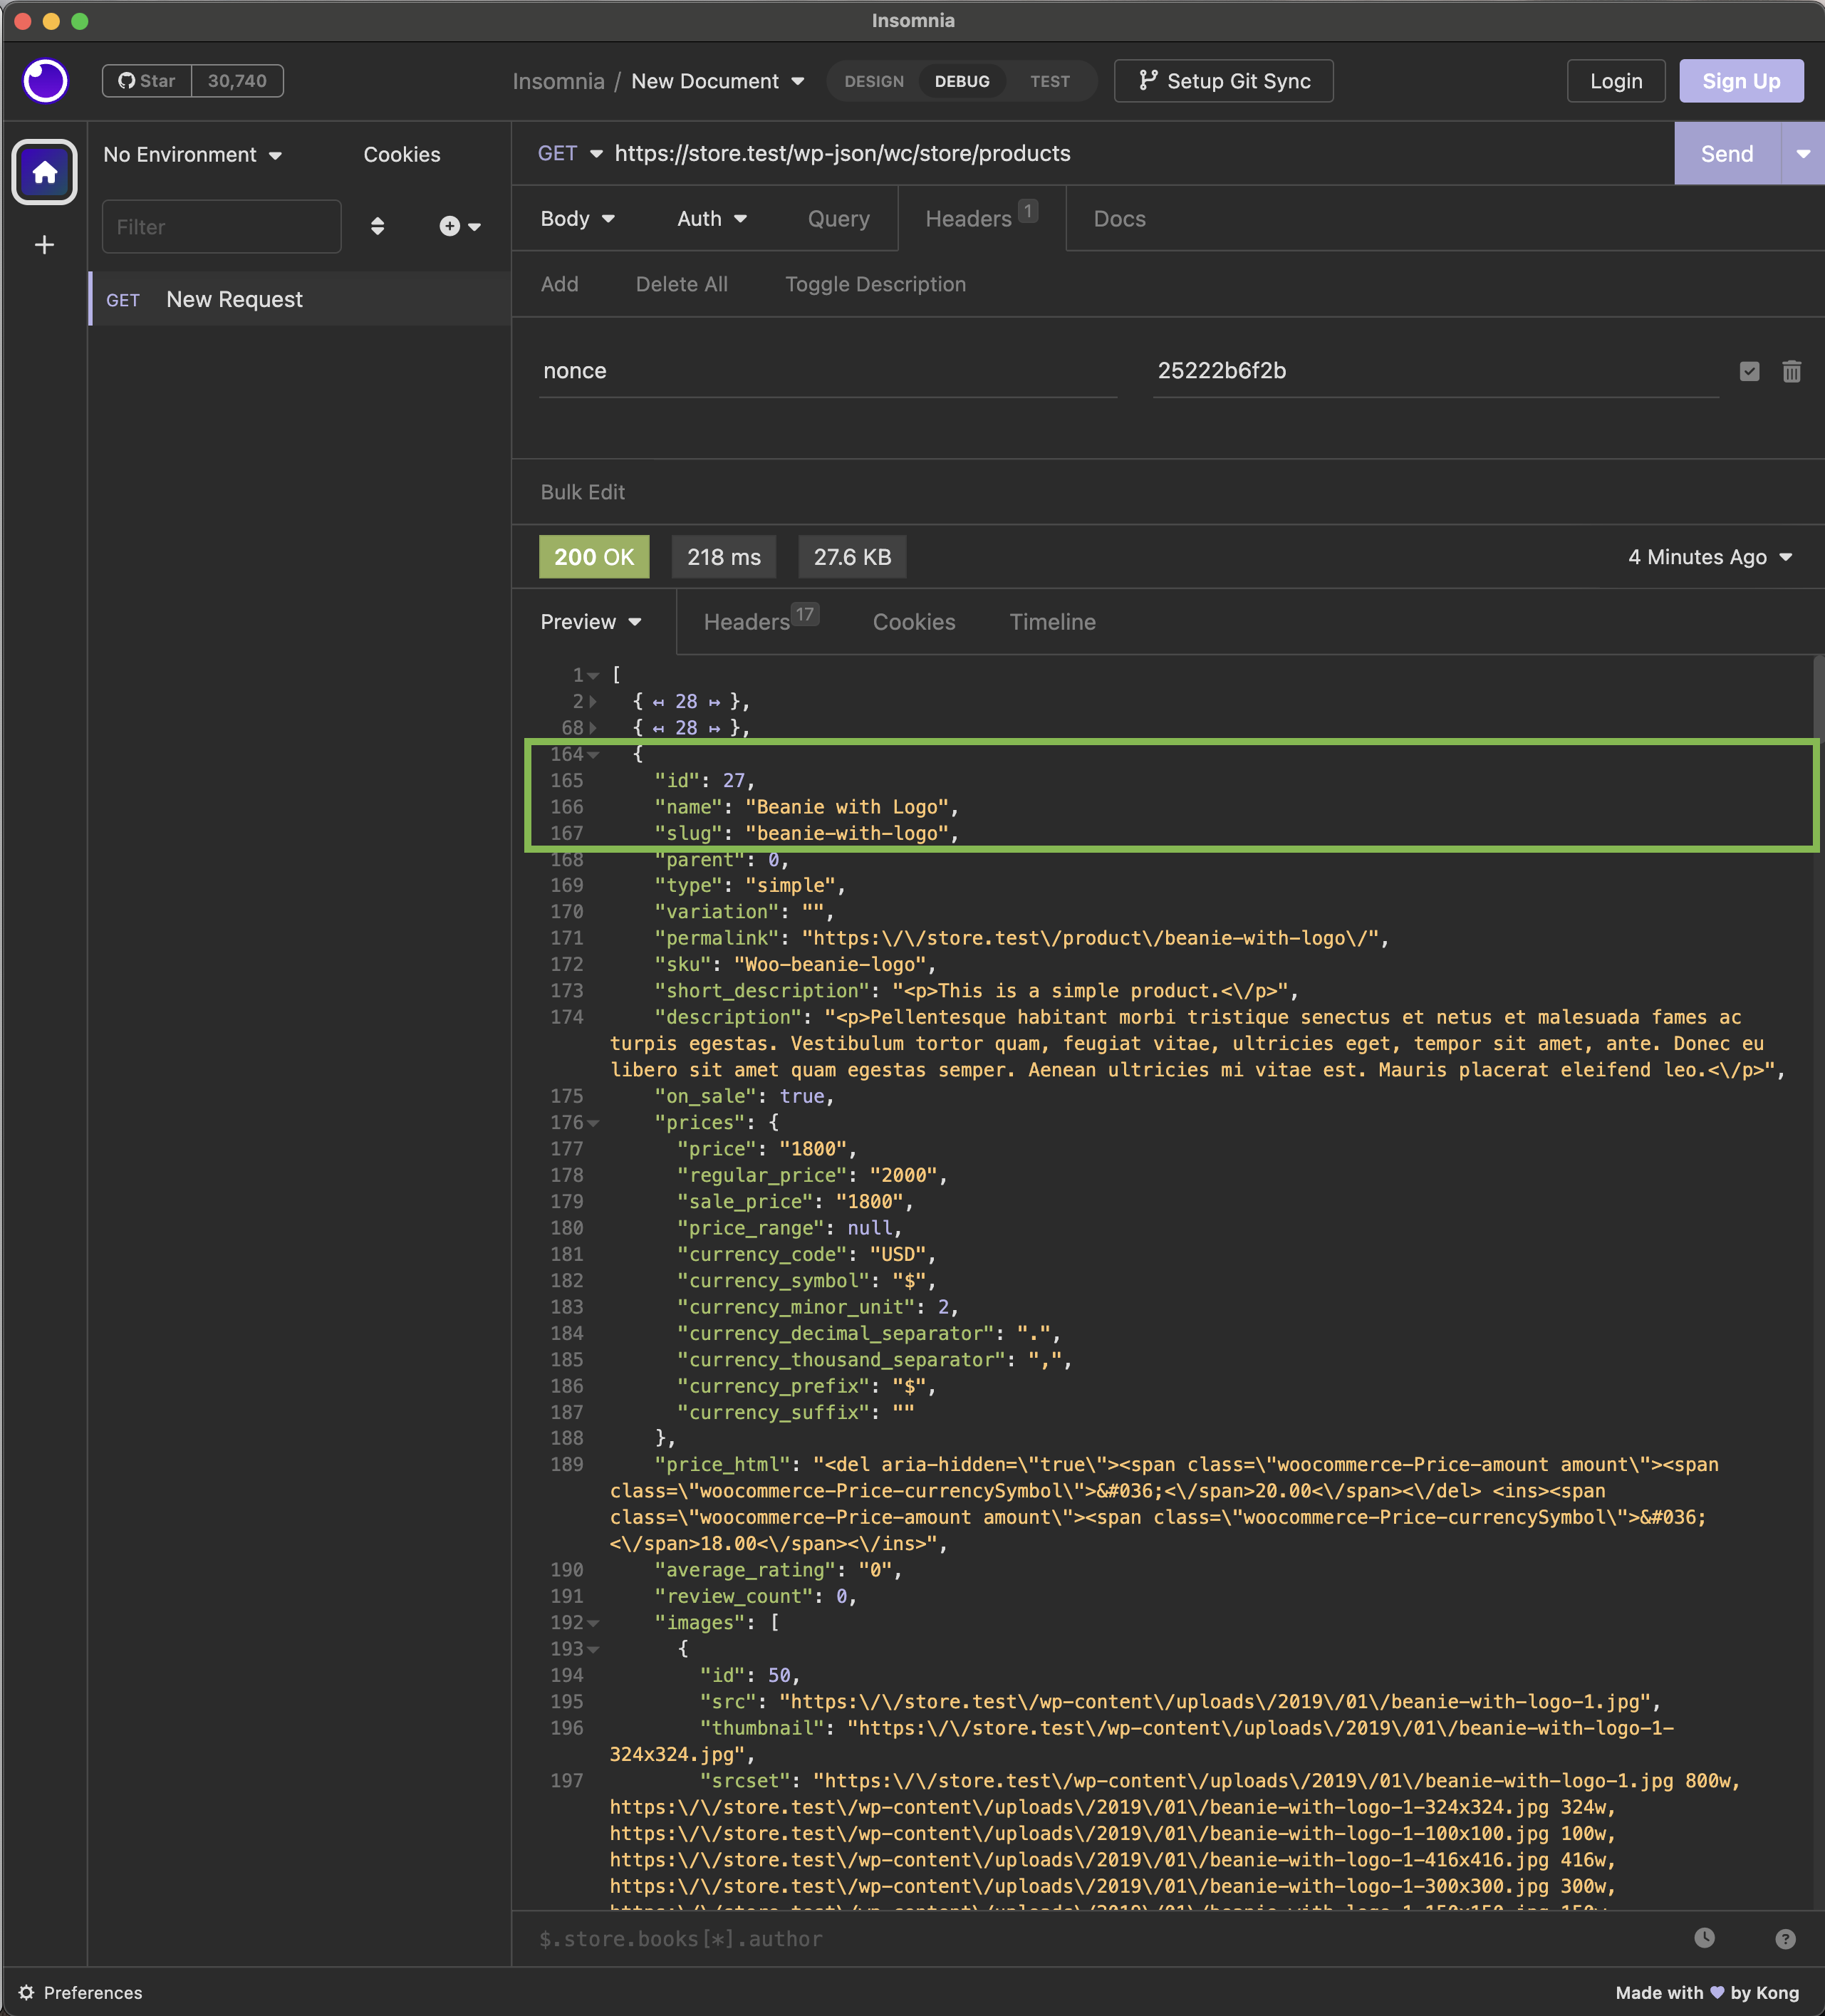
Next, we need to know the ID of the product we want to order. For this example, I decided to go with the product named Beanie with Logo, one of the sample products in WooCommerce core. To list all available products, we make the following request:
GET https://store.test/wp-json/wc/store/v1/productsWe then get a list with all products, which also includes the product, Beanie with Logo:
Add a product to the cart
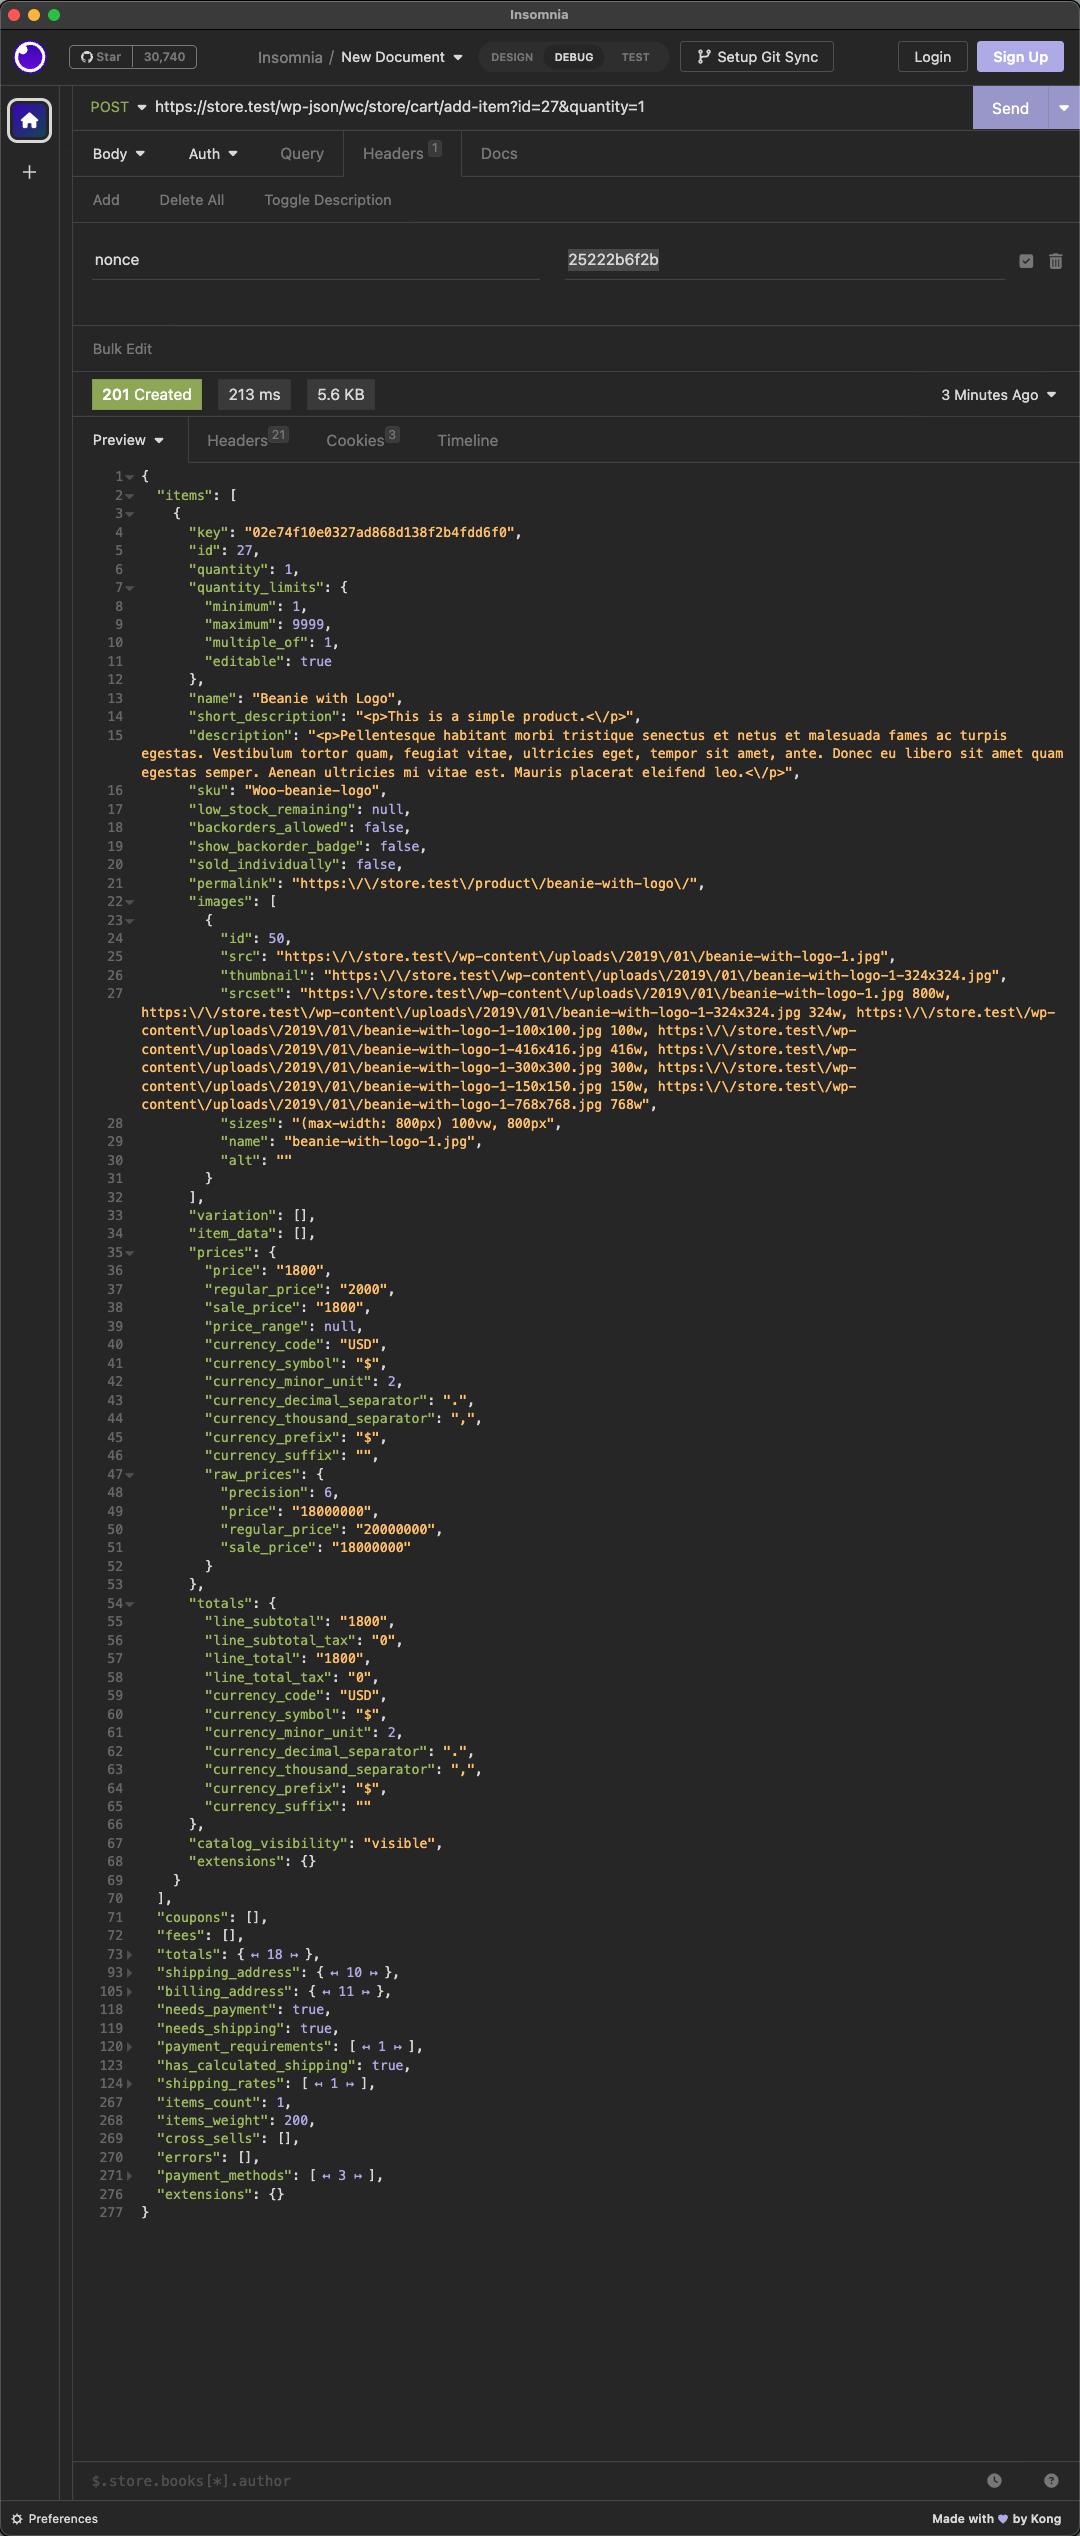
The ID of this product is 27. We copy this ID and make the following request, to add it to the cart:
POST https://store.test/wp-json/wc/store/v1/cart/add-item?id=27&quantity=1💡 In comparison to the previous GET requests, adding a product to the cart requires a POST request.
After making the request, we can see that the desired product had been added to the cart:
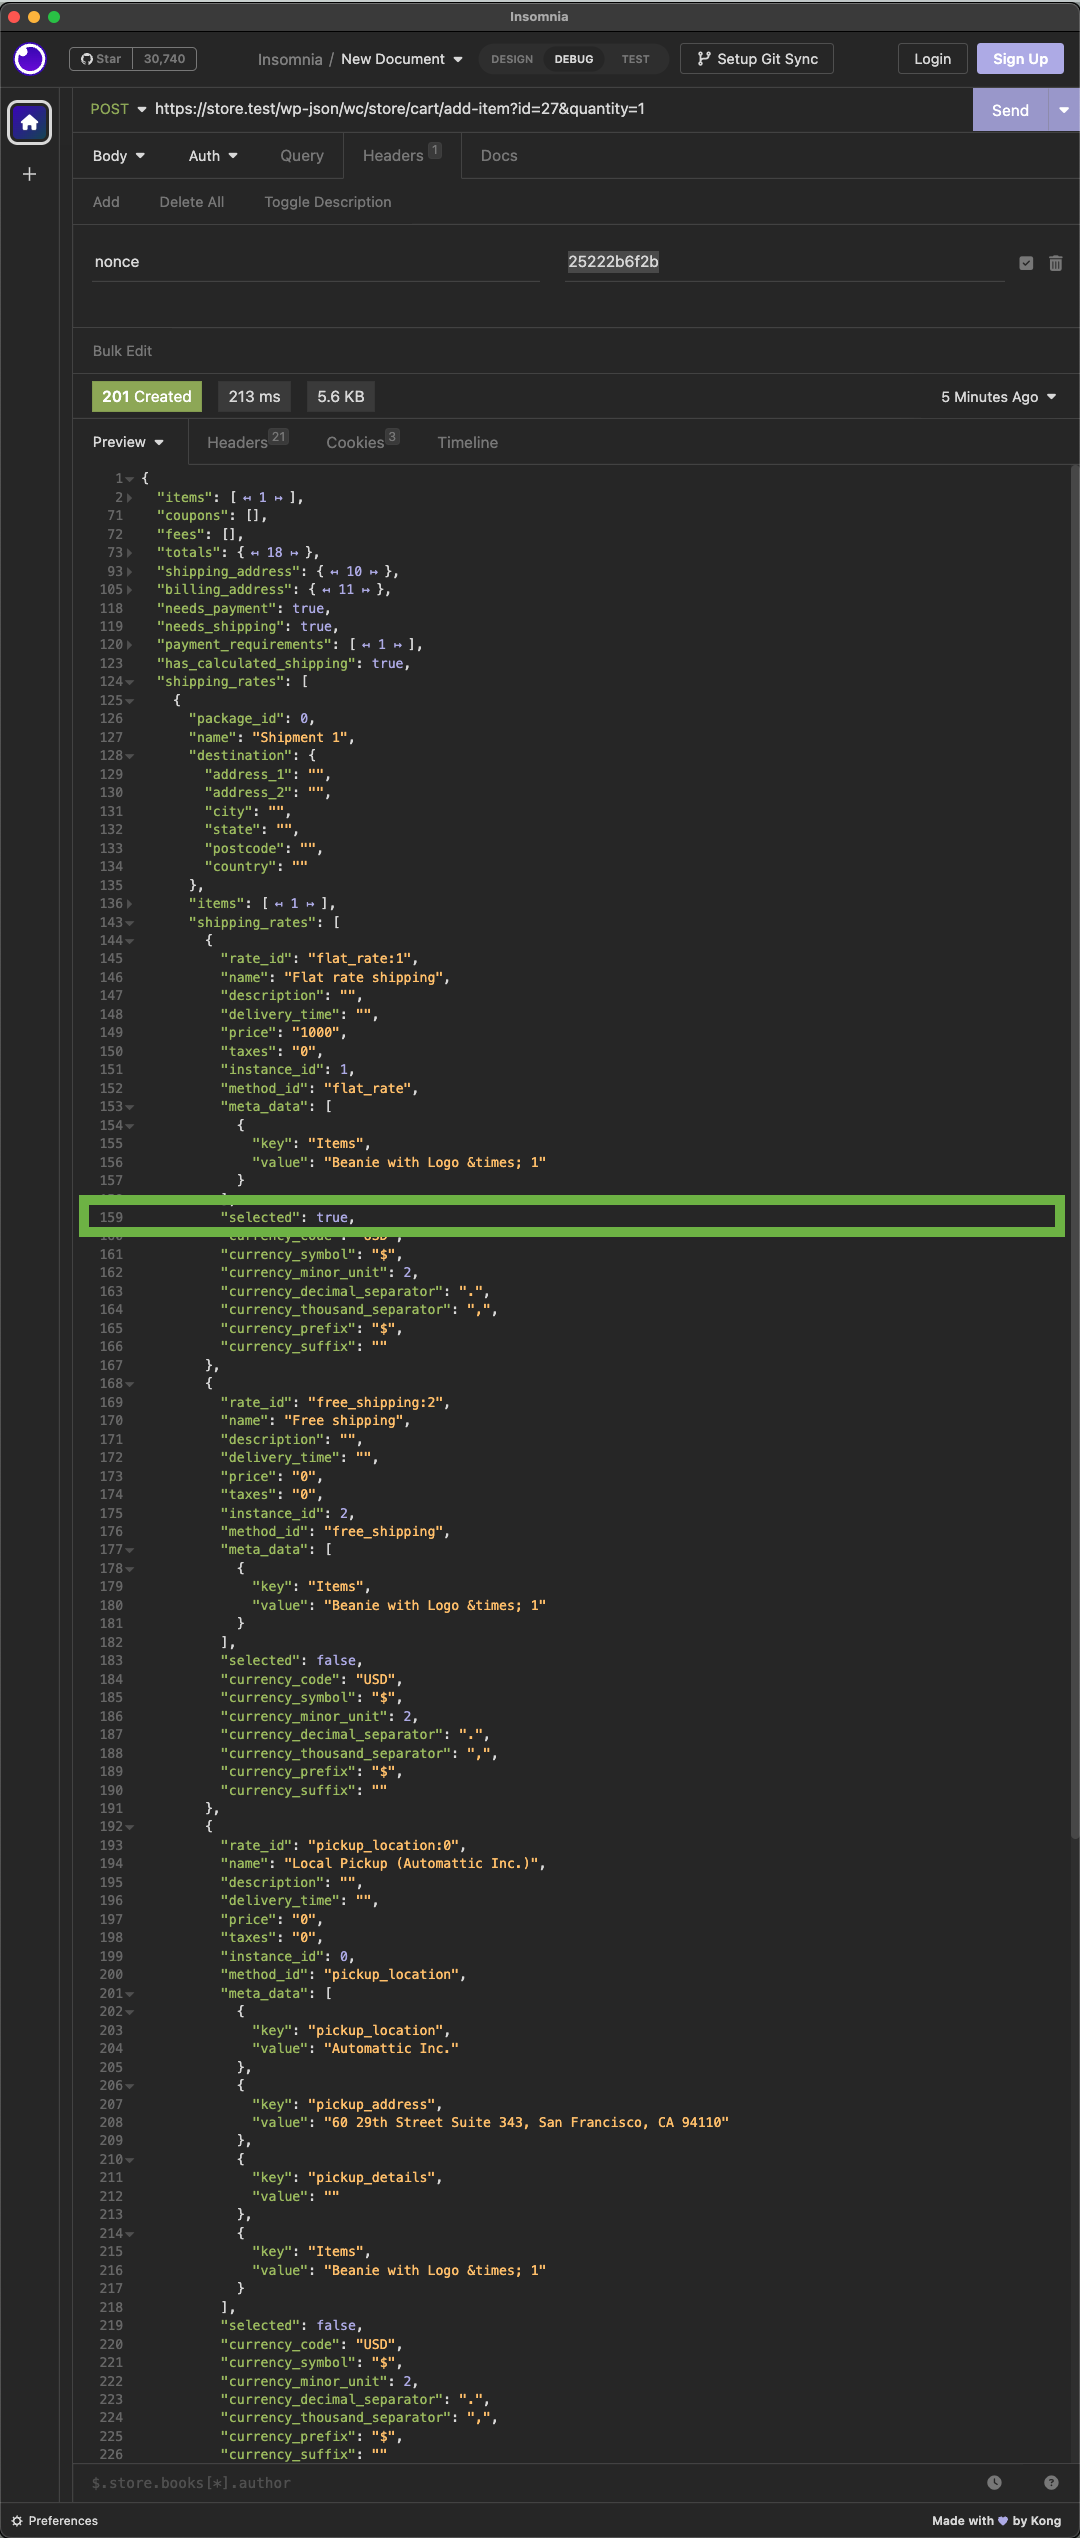
We can also see that the first shipping rate is selected by default (see also GitHub Issue: [StoreApi] Support default shipping rates #10963):
💡Of course, it’s possible placing multiple products as well as one product multiple times to the cart.
To add multiple products to the cart, simply call the /wp-json/wc/store/v1/cart/add-item endpoint with various products.
To add one product multiple times to the cart, simply adjust the parameter quantity of the /wp-json/wc/store/v1/cart/add-item endpoint.
Further information can be found in the Store API docs.
Fetch the billing address and payment method
Before placing the order, we need at least a billing address and a payment method. We can take the following example request from the Checkout API docs:
{
	"billing_address": {
		"first_name": "Peter",
		"last_name": "Venkman",
		"company": "",
		"address_1": "550 Central Park West",
		"address_2": "Corner Penthouse Spook Central",
		"city": "New York",
		"state": "NY",
		"postcode": "10023",
		"country": "US",
		"email": "admin@example.com",
		"phone": "555-2368"
	},
	"shipping_address": {
		"first_name": "Peter",
		"last_name": "Venkman",
		"company": "",
		"address_1": "550 Central Park West",
		"address_2": "Corner Penthouse Spook Central",
		"city": "New York",
		"state": "NY",
		"postcode": "10023",
		"country": "US"
	},
	"customer_note": "Test notes on order.",
	"create_account": false,
	"payment_method": "cheque",
	"payment_data": [],
	"extensions": {
		"some-extension-name": {
			"some-data-key": "some data value"
		}
	}
}Apart from that, we can also use the following, minimalistic, example request:
{
	"billing_address": {
		"first_name": "Peter",
		"last_name": "Venkman",
		"company": "",
		"address_1": "550 Central Park West",
		"address_2": "Corner Penthouse Spook Central",
		"city": "New York",
		"state": "NY",
		"postcode": "10023",
		"country": "US",
		"email": "admin@example.com",
		"phone": "555-2368"
	},
  "payment_method": "cheque"
}Place the order
The following screenshot shows how to add the billing and payment data from the previous step to our POST request to place the order:
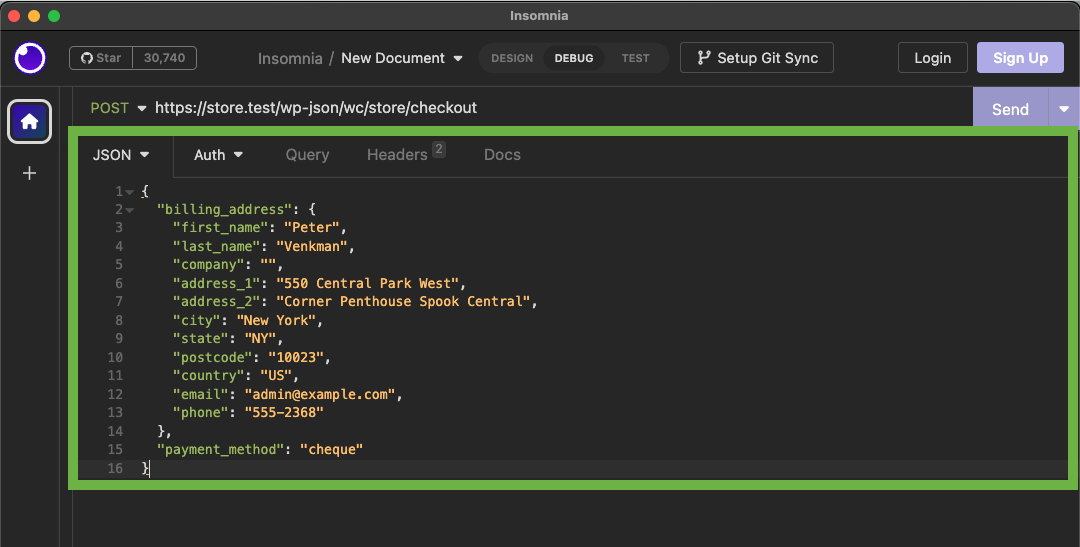
To place the order itself, we make the following request:
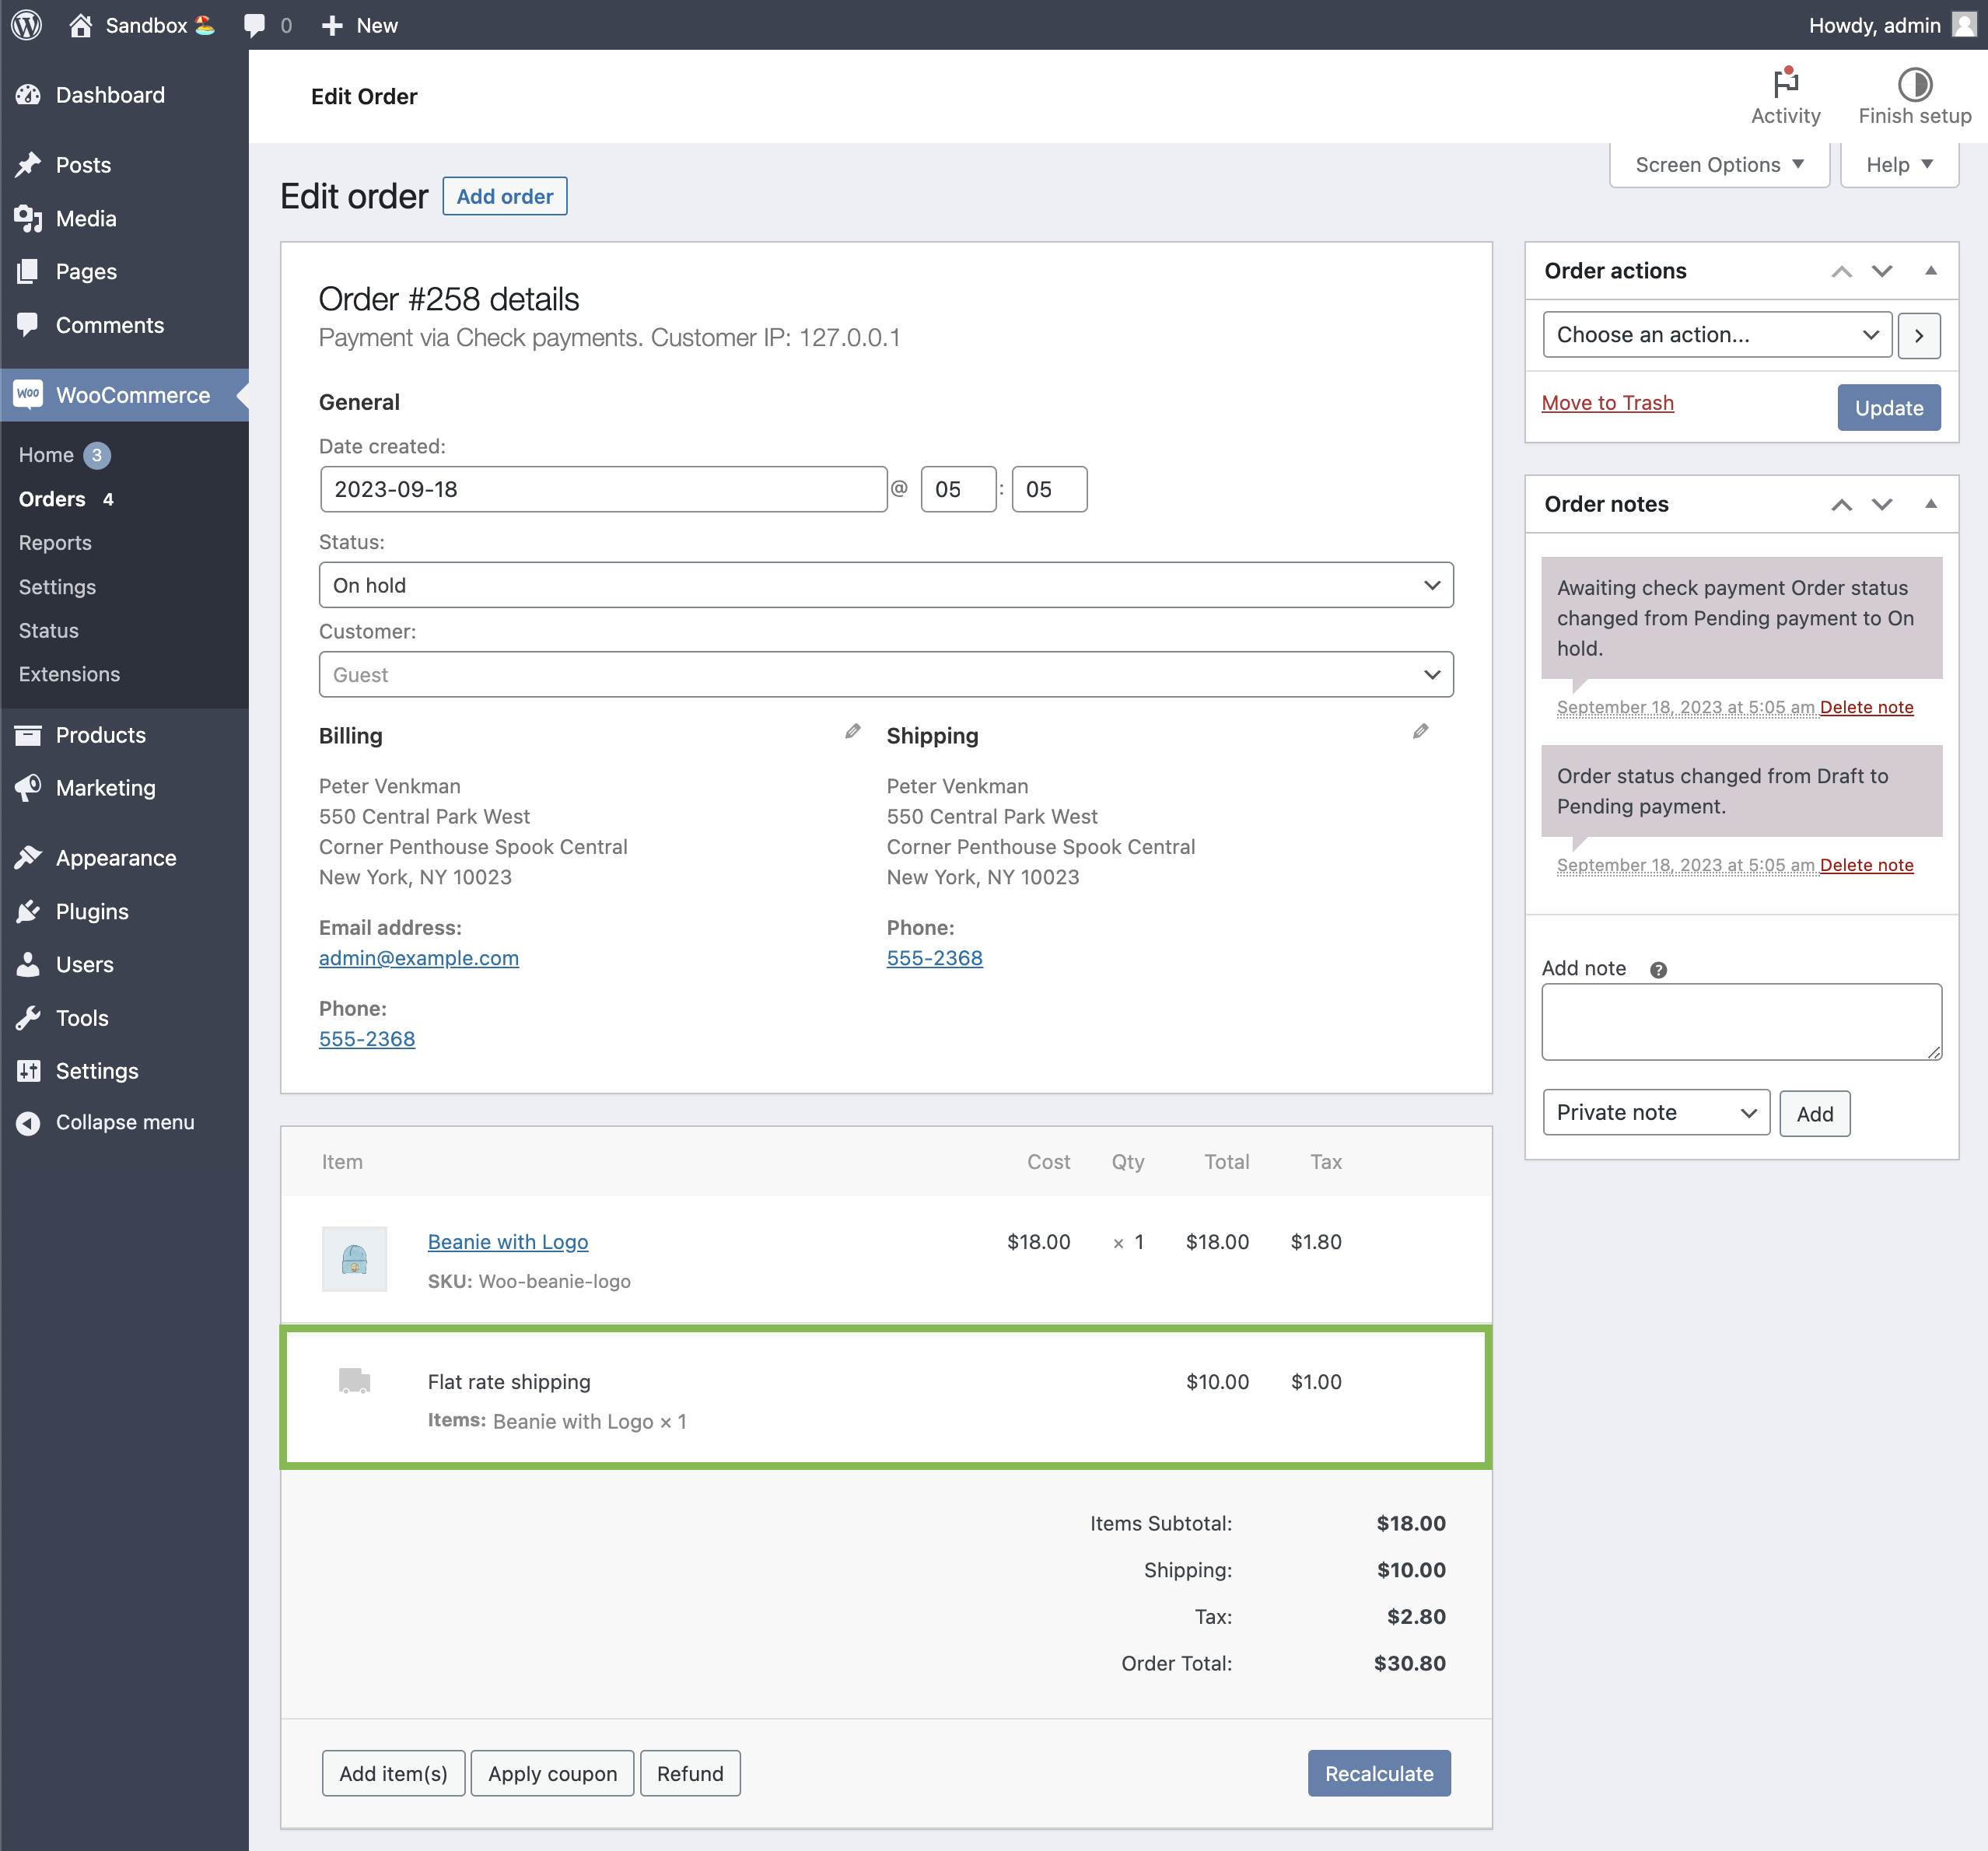
POST https://store.test/wp-json/wc/store/v1/checkoutAs a final step, we can look up the placed order within WP Admin, to verify that all provided information are correct. (We can also see that the default shipping address had been selected.)
Resources
- Get Cart Info (
/wc/store/v1/cart) - Add Item to Cart (
/wc/store/v1/cart/add-item) - List Products (
/wc/store/v1/products) - Checkout (
/wc/store/v1/checkout)
Thoughts & feedback
We hope you found this tutorial helpful! If you’ve got any questions or there’s another tutorial topic you’re keen to see, feel free to drop a comment or reach out in the WooCommerce Community Slack. Your feedback helps us create content that better serves you. Thanks for reading!
Leave a Reply