What’s new?
We’ve recently done some work to improve the express checkout area, both for shop managers and shoppers. This includes:
- A new feature where merchants can change the
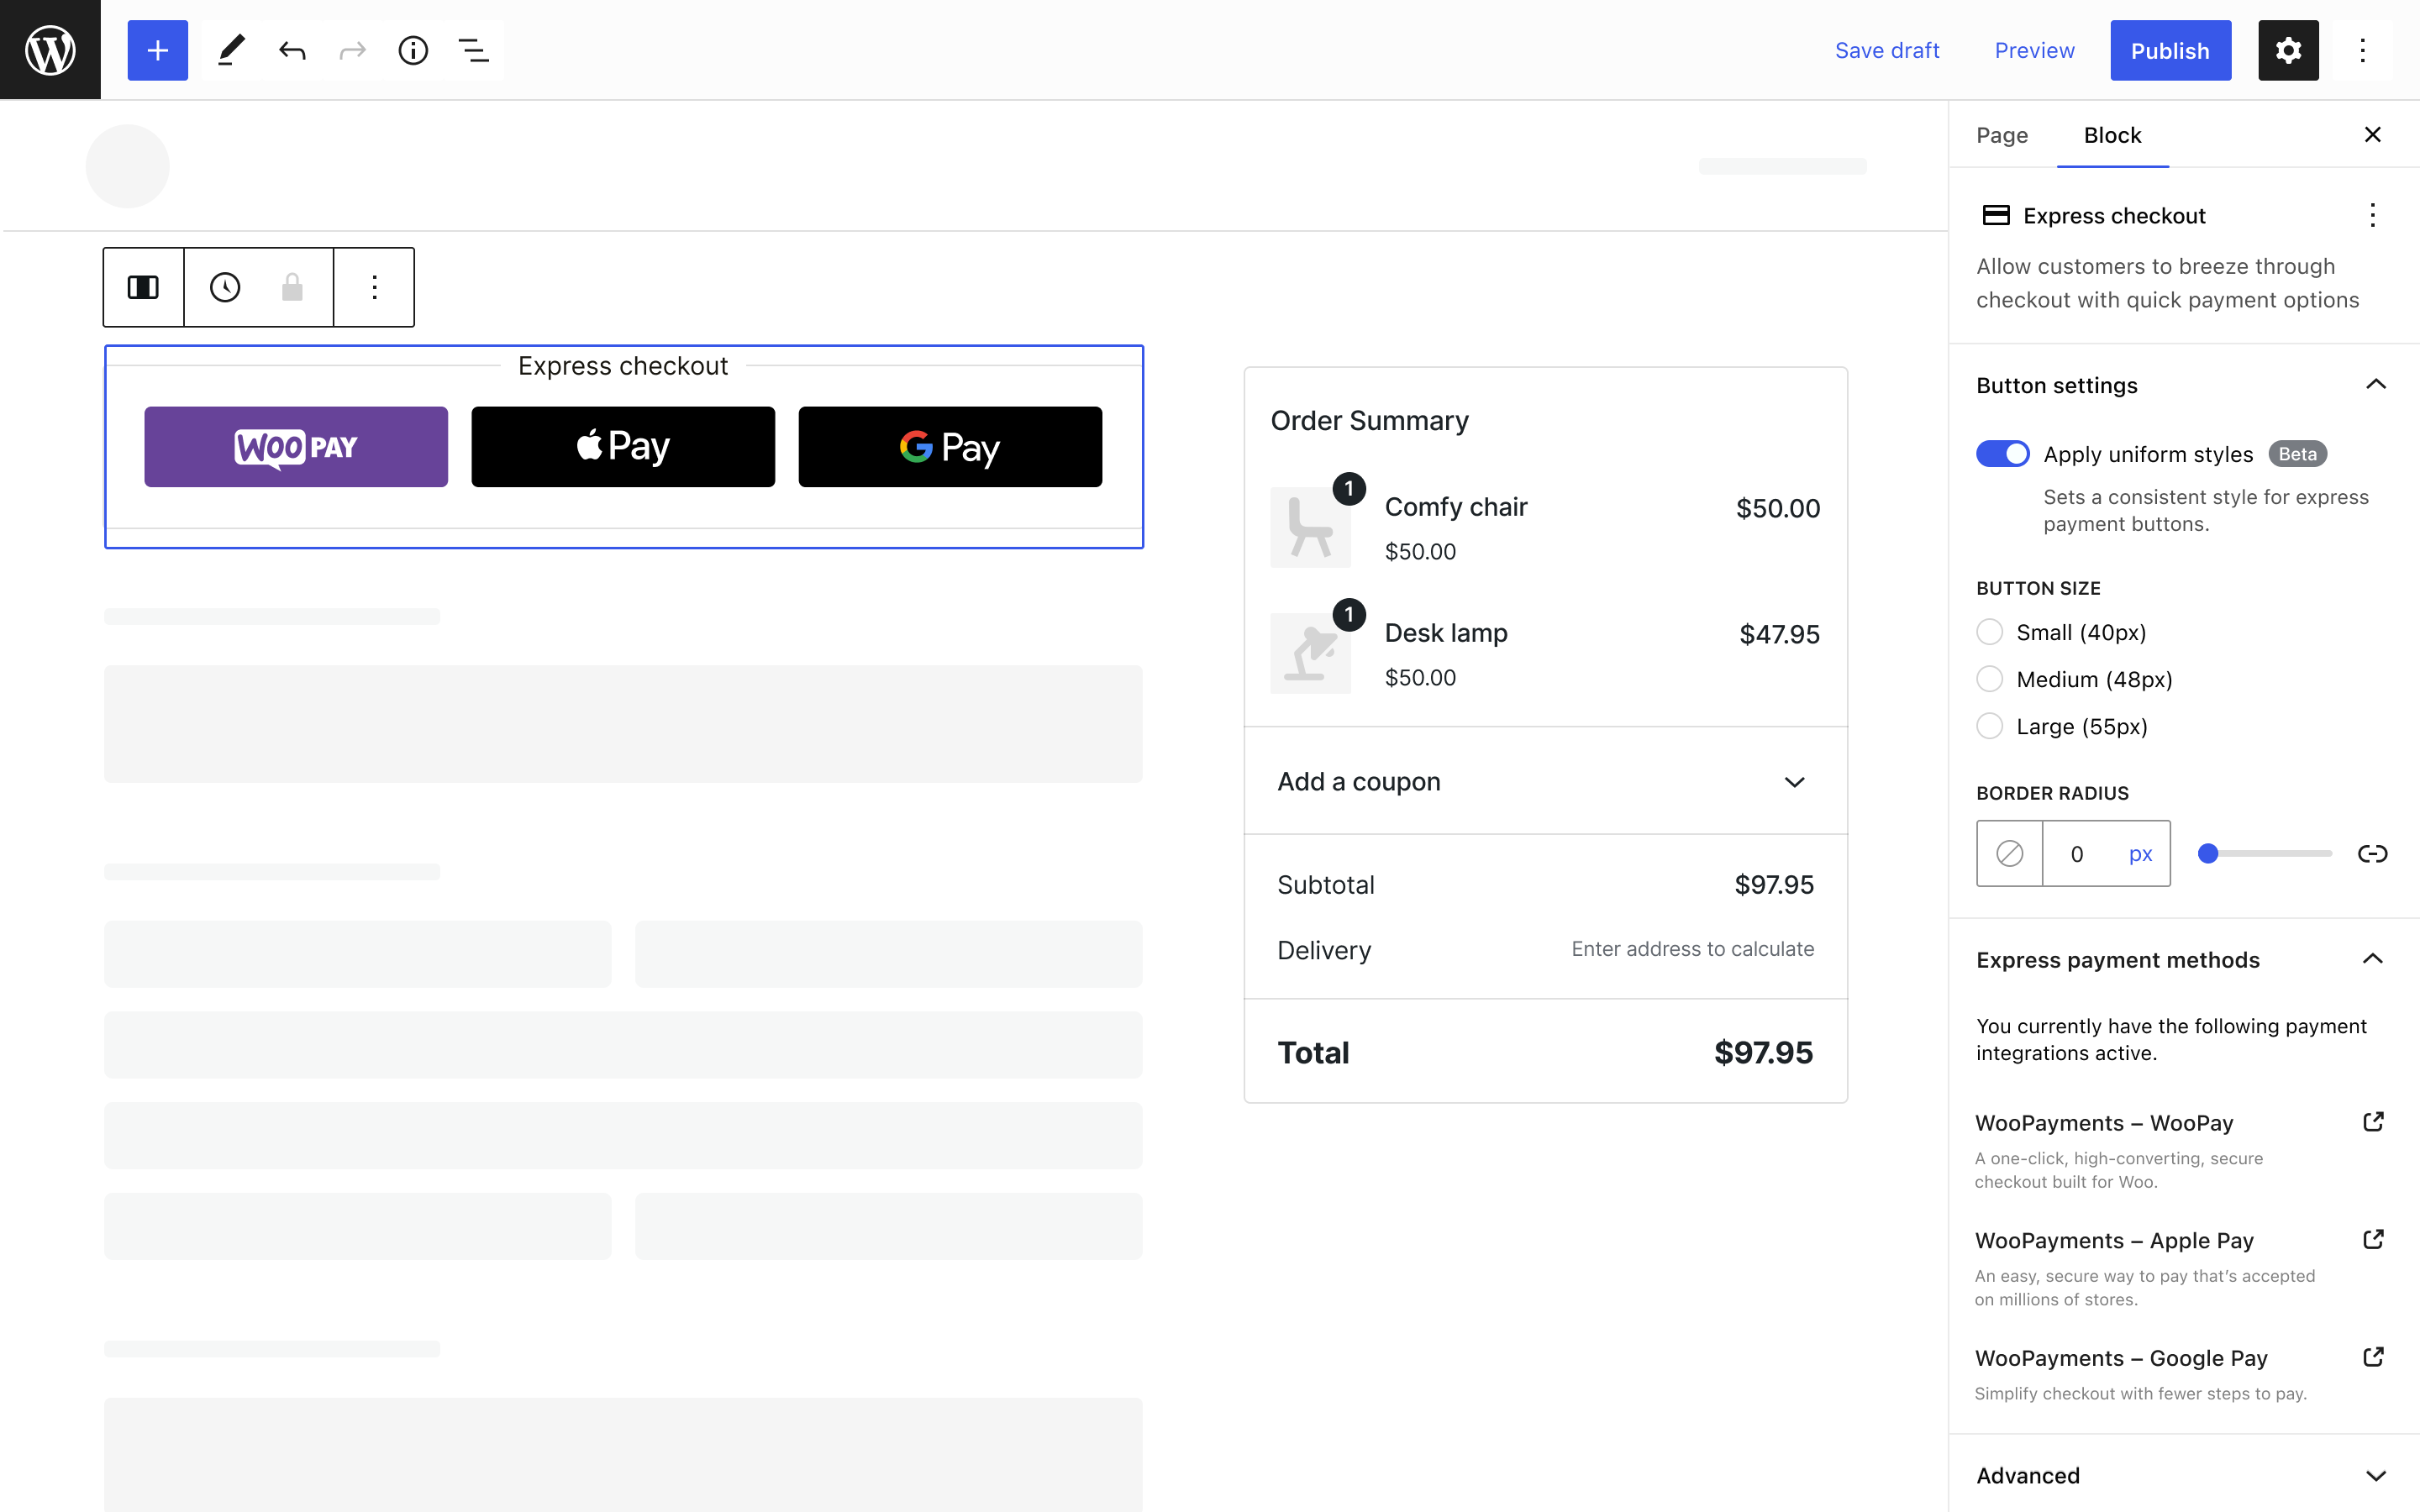
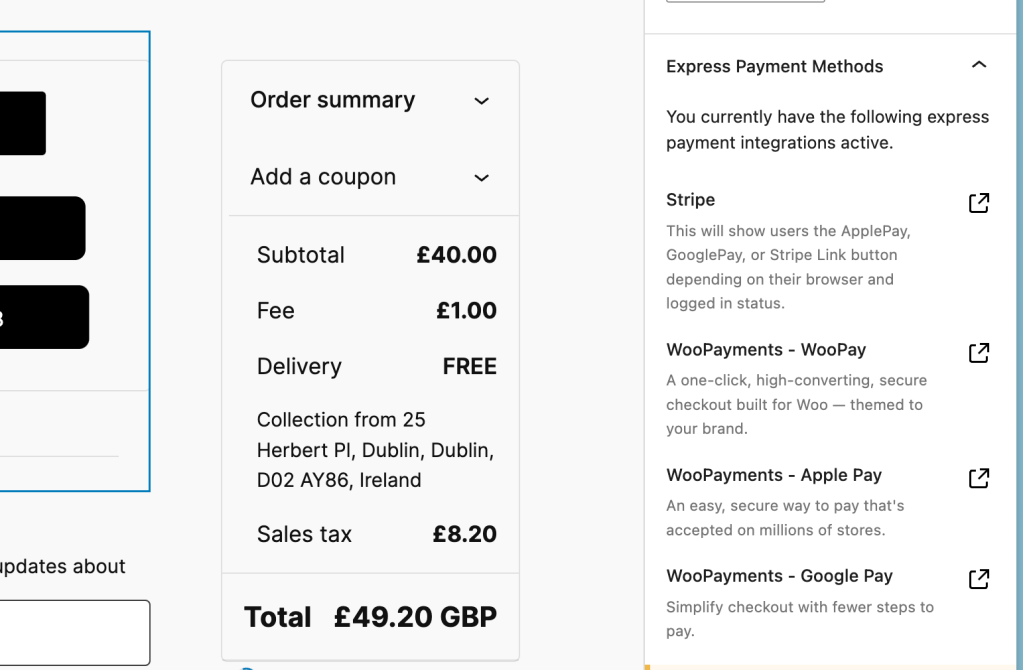
heightandborder radiusof all active express payment buttons in the editor, to allow for better coherence. - A list of active express payment methods is now displayed in the editor, when you click the Express Payment block.
- Fixed a few layout related bugs where express payment buttons were breaking out of their containers, not rendering properly at certain widths and not displaying properly in the editor.
These changes will be available as a part of the upcoming WooCommerce 9.4. We anticipate these changes will result in a smoother, more efficient express payment experience, offering greater customization options and ultimately driving higher conversion rates for merchants.
However, these improvements do require some changes from existing payment extensions. This feature is only useful when the payment methods support it, so we encourage payment method providers to update their code. This article aims to serve as a guide to make those changes.
What does this mean for you, as a payment extension developer?

Rendering buttons in the editor
First and foremost, we are asking all payment extensions to render the full express payment buttons in the editor instead of preview images. Up until now, image previews were encouraged in the editor instead of the actual buttons rendered on the front-end for shoppers. With these recent changes, the merchant UX will be greatly improved if all the payment extensions could render the full buttons in the editor.
Rendering the full buttons in the editor:
- gives the merchant a more accurate representation of what a shopper is likely to see on the frontend. Images rendered in the editor are not necessarily rendered the same size as the buttons are. Also, any changes to the third payment provider APIs (e.g. Stripe) that would have an impact on button behavior or appearance, would not be spotted by merchants beforehand.
- provides real time feedback to the merchant about how their buttons will look, when changing the style controls introduced in this update. For example, if the button
heightorborder radiusis changed, these are not applicable to images and the merchant would not see the impact of these changes unless visiting the cart or checkout pages on the front end.
What does this mean for your code?
- You must now load any SDKs or client side scripts used to render the buttons in the editor as well. Note: It’s important to only load any external scripts on pages that contain the checkout block to avoid clogging up the editor
- When calling
registerExpressPaymentMethod(options), theeditorprop should receive the same component as thecontentprop of the options object
Here’s an example of what the registerExpressPaymentMethod might look like:
registerExpressPaymentMethod({
	...
	content: <ExpressPaymentButton />,
	edit: <ExpressPaymentButton />,
	...
})Using buttonAttributes API
This is used to support merchant controls for styling the express payment buttons. At the moment, height and border radius are supported.
When registering an express payment method, we use the registerExpressPaymentMethod(options) function. As part of the options argument, you provide React nodes to render on the frontend (content prop) and in the editor (edit prop). These React components will receive certain properties that you can access in your button component. More details of how this works can be found in the official docs here.
A new property is now available to these React components called buttonAttributes. This contains the styles that should be respected by your express button component.
When the merchant toggles this feature off, buttonAttributes will be undefined.
When this feature is on, the buttonAttributes object will have the following shape:
{
	height: '48', // default value
	borderRadius: '4' // default value
}These styles should be respected above extension specific configuration. The idea is that the merchant can apply the same styles uniformly across all express payment buttons. If this is toggled off, then the styles should revert to extension specific styles defined in the extension settings.
This is an example of how this could be implemented:
const ExpressPaymentButton = ( props ) => {
	const { buttonAttributes } = props;
	// Get your extension specific settings and set defaults if not available
	let {
		borderRadius = '4',
		height = '48',
	} = getButtonSettingsFromConfig();

	// In a cart & checkout block context, we receive `buttonAttributes` as a prop which overwrite the extension specific settings
	if ( typeof buttonAttributes !== 'undefined' ) {
		height = buttonAttributes.height;
		borderRadius = buttonAttributes.borderRadius;
	}
	...

	return <button style={height: `${height}px`, borderRadius: `${borderRadius}px`} />
}Declaring title, description and gatewayId
Three new properties have been added to the registerExpressPaymentMethod argument that allows a list of express payment methods to be displayed to the merchant. These should be declared as follows:
registerExpressPaymentMethod({
  ...
  title: 'My Express Payment Method',
  description: 'A short description, capped to 130 characters, describing your payment method',
  gatewayId: 'my-gateway-id', // This should be the same as the gatewayId used to register the payment gateway with WooCommerce
  ...
});This is what it will look like in the editor. The gatewayId is used to link to the specific payment extension settings page that registered the express payment method.

Declaring style support
Once the buttons render in the editor and the buttonAttributes are respected, an extension can declare support for each of the attributes. This is done with the supports prop of the registerExpressPaymentMethod argument as follows:
registerExpressPaymentMethod({
  ...
  supports: {
    style: ['height', 'borderRadius']
  }
});Ideally, your buttons would support both height and borderRadius. However, if your button only supports height, you can simply declare the height support and omit borderRadius from the array. This will let WooCommerce know which controls to display in the editor.
Putting it all together
This is what the registerExpressPaymentMethod would look like with all of these changes above, for a payment method that supports both height and border radius controls for the button.
registerExpressPaymentMethod({
  name: 'my-payment-method',
  paymentMethodId: 'my-payment-method-id',
  title: 'My Express Payment Method',
  description: 'A short description, capped to 130 characters, describing your payment method',
  gatewayId: 'my-gateway-id', // This should be the same as the gatewayId used to register the payment gateway with WooCommerce
  content: <MyExpressPaymentButton />,
  edit: <MyExpressPaymentButton />,
  supports: {
    style: ['height', 'borderRadius']
  },
  canMakePayment: () => { ... },
});Need help with these changes?
In order for this feature to be successful, we rely on payment gateways to implement the work in the guide above to support it.
We are here to support you in these changes, so please reach out to us in comments or in the #woocommerce-blocks-and-block-themes inside our Woo Community Slack if you encounter any issues aligning your code with these changes.
Leave a Reply