String localization
WooCommerce is translation-ready out of the box. This page covers how to write localizable strings, contribute translations, create custom translations, and update locale-specific data such as countries and subdivisions.
Translating WooCommerce
WooCommerce is already translated into several languages and only needs a translation file for your language. In most cases, you can contribute translations on translate.wordpress.org.
To create custom translations, you can also use a tool such as Poedit.
Set up WordPress in your language
To set your WordPress site's language:
- Go to
WP Admin > Settings > Generaland adjust theSite Language. - Go to
WP Admin > Dashboard > Updatesand click theUpdate Translationsbutton.
Once this has been done, the shop displays in your locale if the language file exists. Otherwise, you need to create the language files.
Writing localizable strings
- Use the
woocommercetextdomain in all strings. - When using dynamic strings in
printf()orsprintf(), use numbered arguments if you are replacing more than one string. For example,Test %s string %s.should beTest %1$s string %2$s. - Use sentence case. For example,
Some Thingshould beSome thing. - Avoid HTML. If needed, insert the HTML using
sprintf().
For more information, see the WordPress core documentation for i18n for WordPress Developers.
Contribute translations to core
We encourage contributions to our translations. If you want to add translated strings or start a new translation, register at WordPress.org and submit your translations to translate.wordpress.org for approval.
Both stable and development versions of WooCommerce are available for translation. When you install or update WooCommerce, WordPress will automatically fetch a 100% complete translation for your language. If such a translation isn't available, you can download it manually or contribute to complete the translation, benefiting all users.
If you're new to translating, check out the Translators Handbook to get started.
Download translations manually
-
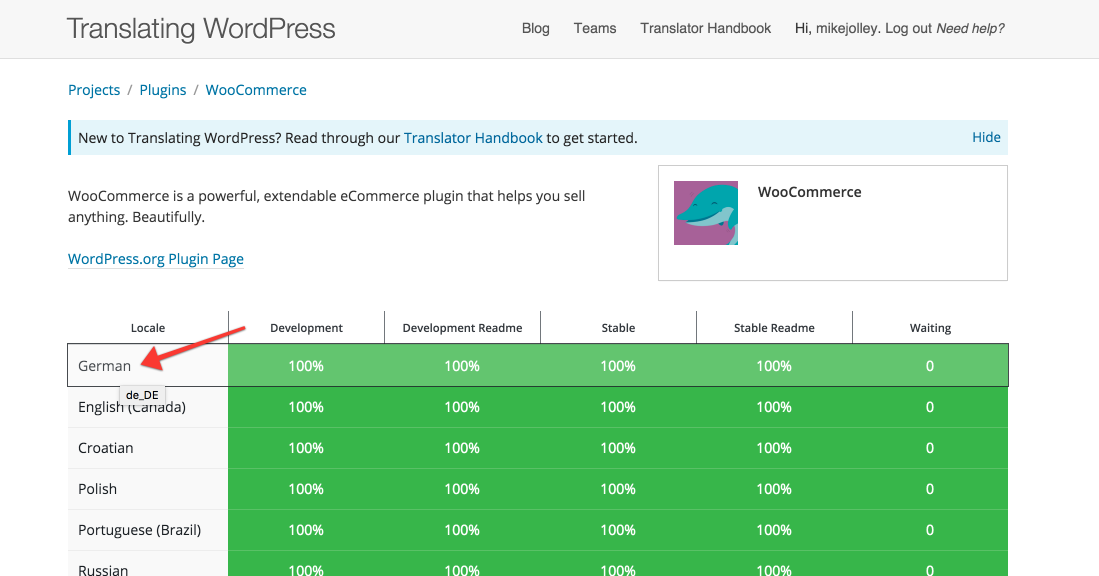
Go to translate.wordpress.org and look for your language in the list.
-
Click the title to be taken to the section for that language.
-
Click the heading under
Set/Sub Projectto view and download a Stable version.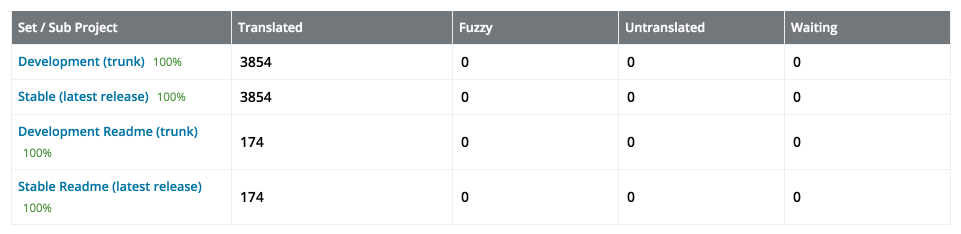
-
Scroll to the bottom for export options. Export a
.mofile for use on your site. -
Rename this file to
woocommerce-YOURLANG.mo. For example, Great Britain English should bewoocommerce-en_GB.mo. The corresponding language code can be found by opening the desired language on translate.wordpress.org. The language code is visible in the upper-right corner.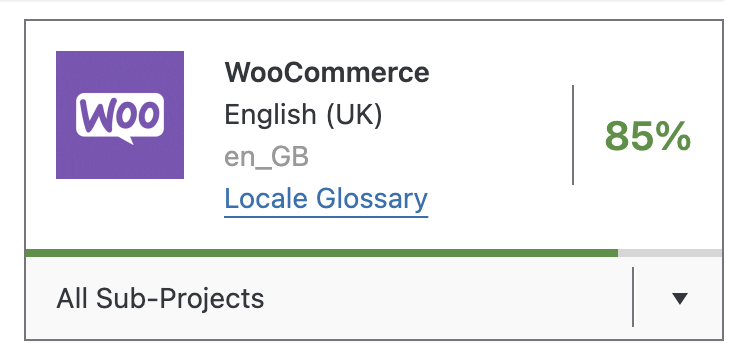
-
Upload the file to your site under
wp-content/languages/woocommerce/. Once uploaded, this translation file may be used.
Creating custom translations
WooCommerce includes a language file (.pot file) that contains all of the English text. You can find this language file inside the plugin folder in woocommerce/i18n/languages/.
Create custom translations with Poedit
WooCommerce comes with a .pot file that can be imported into Poedit to translate.
To get started:
-
Open Poedit and select
Create new translation from POT template. -
Choose
woocommerce.potand Poedit will show the catalog properties window.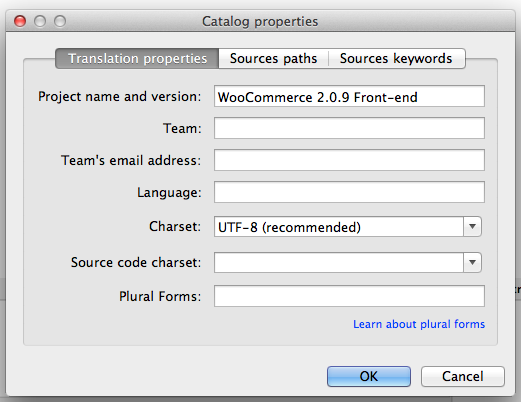
-
Enter your name and details, so other translators know who you are, and click
OK. -
Save your
.pofile. Name it based on what you are translating to, such aswoocommerce-en_GB.pofor a Great Britain English translation. Now the strings are listed.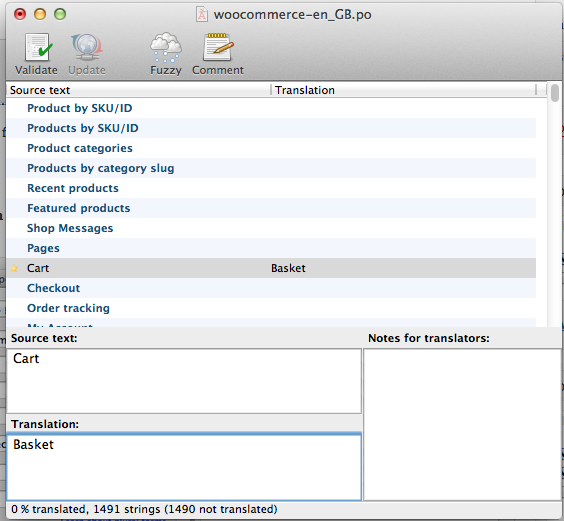
-
Save after translating strings. The
.mofile is generated automatically. -
Update your
.pofile by opening it and then going toCatalog > Update from POT file. -
Choose the file and it will be updated accordingly.
Make custom translations upgrade safe
WooCommerce keeps translations in wp-content/languages/plugins, like all other plugins. If you wish to include a custom translation, you can use the directory wp-content/languages/woocommerce, or you can use a snippet to load a custom translation stored elsewhere:
// Code to be placed in functions.php of your theme or a custom plugin file.
add_filter( 'load_textdomain_mofile', 'load_custom_plugin_translation_file', 10, 2 );

/**
 * Replace 'textdomain' with your plugin's textdomain. e.g. 'woocommerce'.
 * File to be named, for example, yourtranslationfile-en_GB.mo
 * File to be placed, for example, wp-content/languages/textdomain/yourtranslationfile-en_GB.mo
 */
function load_custom_plugin_translation_file( $mofile, $domain ) {
    if ( 'textdomain' === $domain ) {
        $mofile = WP_LANG_DIR . '/textdomain/yourtranslationfile-' . get_locale() . '.mo';
    }

    return $mofile;
}
Translation tools
Some third-party tools can help with translations:
- Loco Translate provides in-browser editing of WordPress translation files and integration with automatic translation services.
- Say what? allows you to translate or modify specific words without editing a WordPress theme's
.pofile. - String Locator enables quick searches within themes, plugins, or WordPress core, displaying a list of files with the matching text and its line number.
FAQ
Why are some Checkout page strings not being translated?
You may see that some Checkout page strings are not translated. For example, the Local pickup shipping method, Cash on delivery payment method, or a Privacy Policy message may remain in English while the rest of the form is translated:
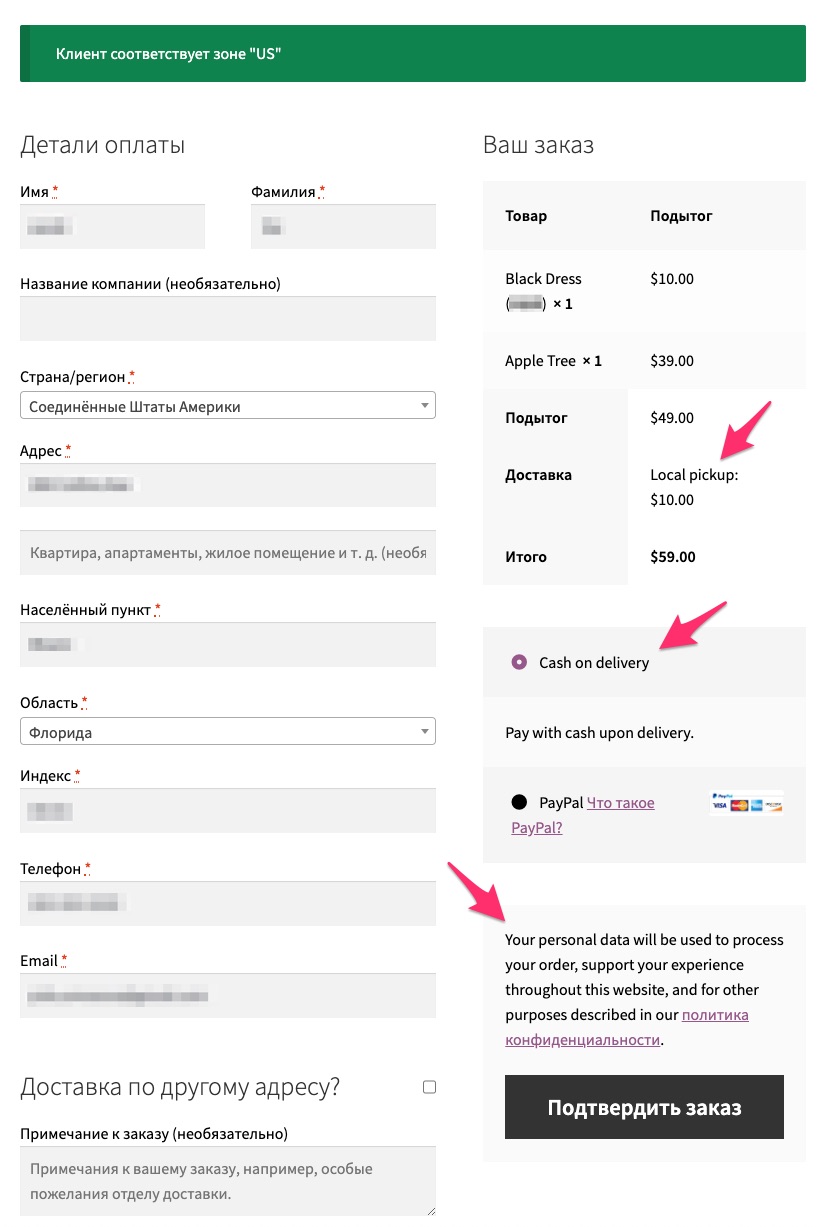
This usually happens when you first install WooCommerce with the default site language, English, and later change the site language to another one. In WooCommerce, the strings that have not been translated in the screenshot are stored in the database after the initial WooCommerce installation. Therefore, if the site language is changed to another one, there is no way for WooCommerce to detect a translatable string since these are database entries.
To fix it, navigate to the WooCommerce settings corresponding to the string you need to change and update the translation there directly.
For Local pickup:
- Go to
WooCommerce > Settings > Shipping > Shipping Zones. - Select the shipping zone where "Local pickup" is listed.
- Open "Local pickup" settings.
- Rename the method using your translation.
- Save the setting.
For Cash on delivery:
- Go to
WooCommerce > Settings > Payments. - Select the "Cash on delivery" payment method.
- Open its settings.
- Rename the method title, description, and instructions using your translation.
- Save the setting.
For the privacy policy message:
- Go to
WooCommerce > Settings > Accounts & Privacy. - Scroll to the "Privacy policy" section.
- Edit both the
Registration privacy policyandCheckout privacy policyfields with your translation. - Save the settings.
Navigate back to the Checkout page. Translations should be reflected there.
Why do some translated strings not show up on the front end?
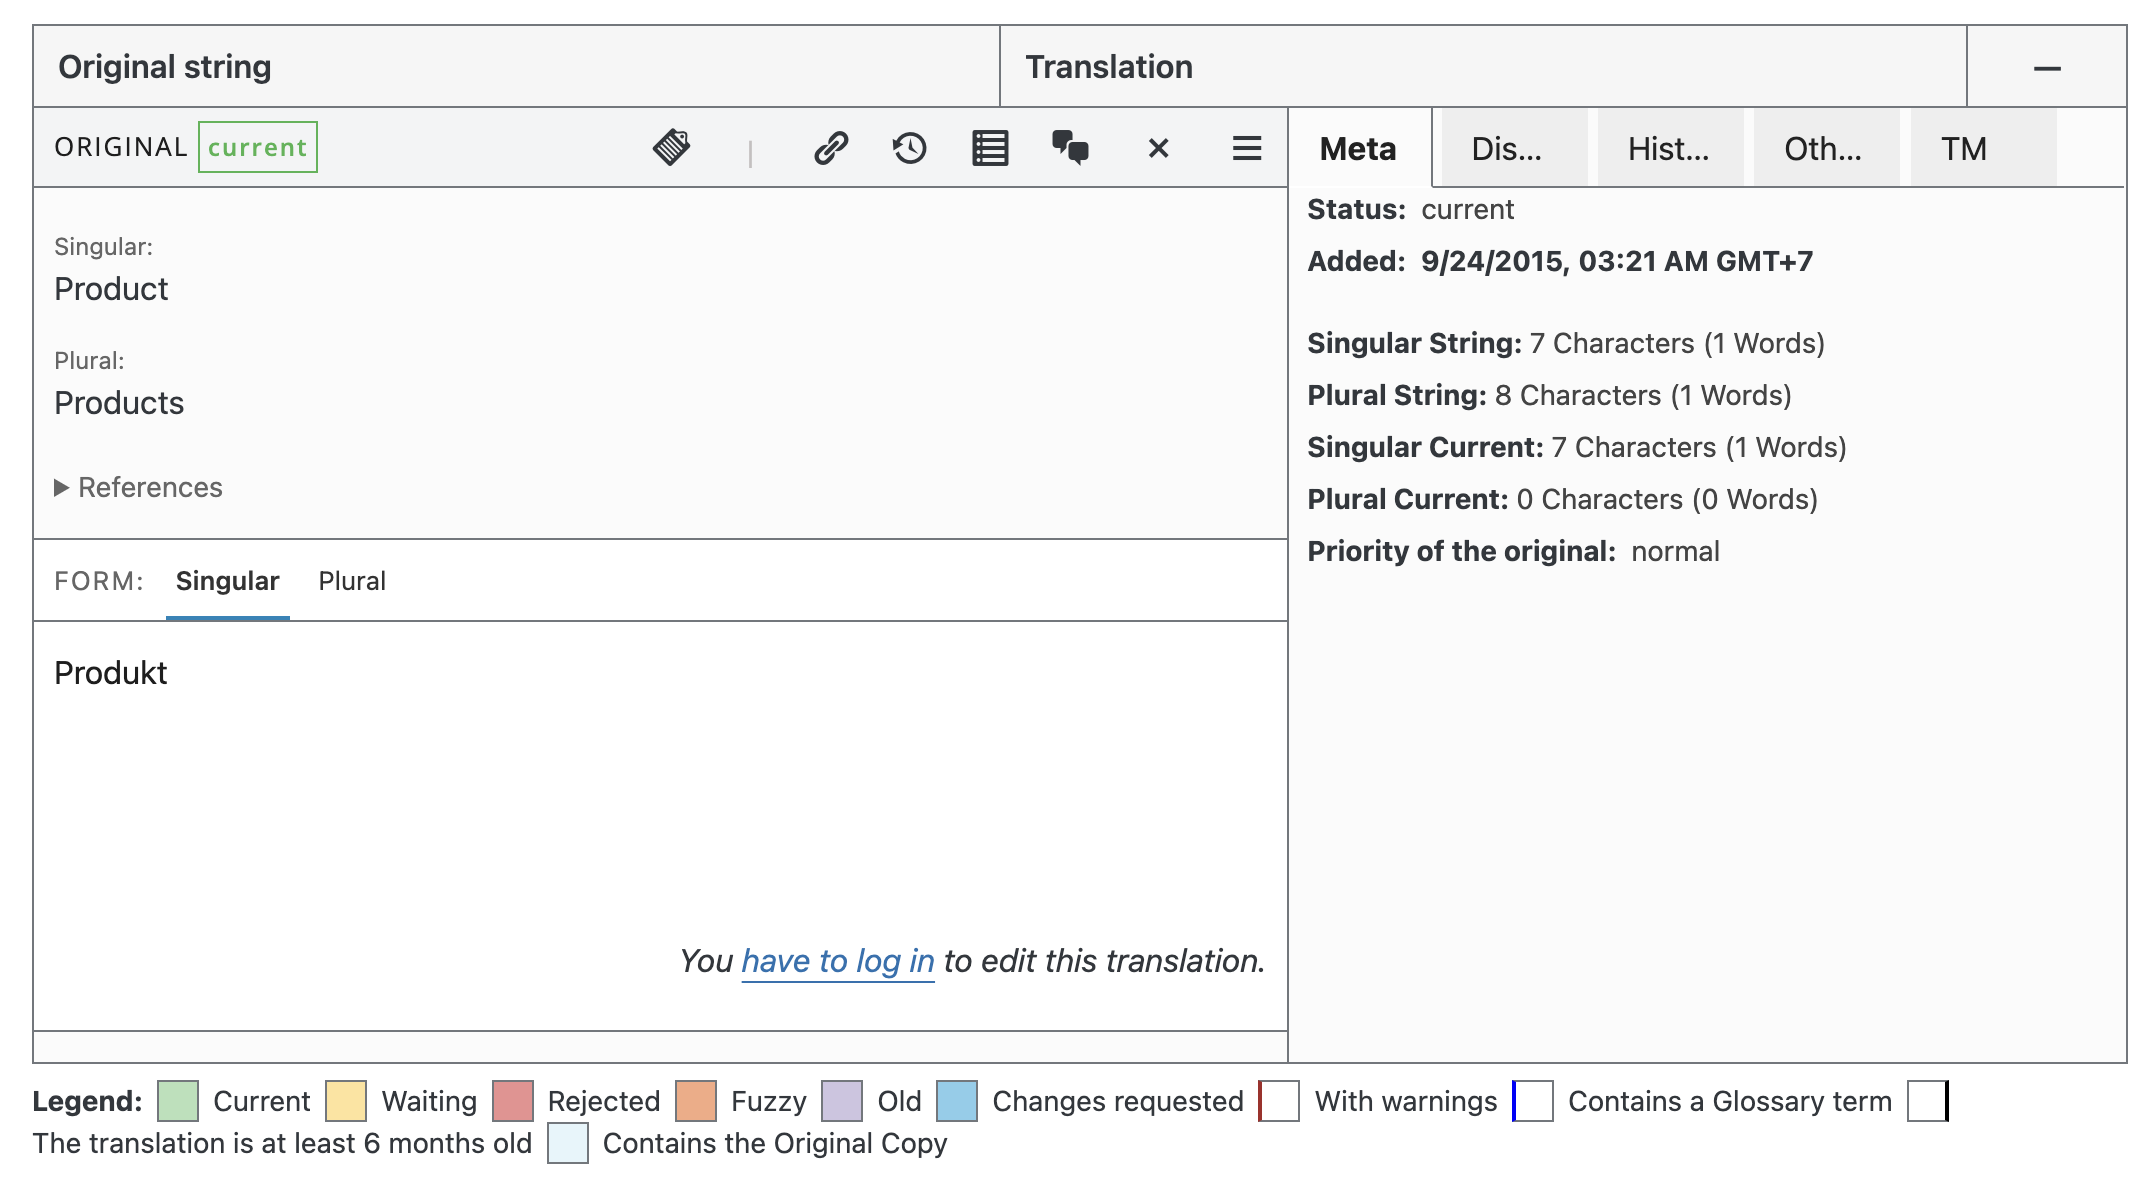
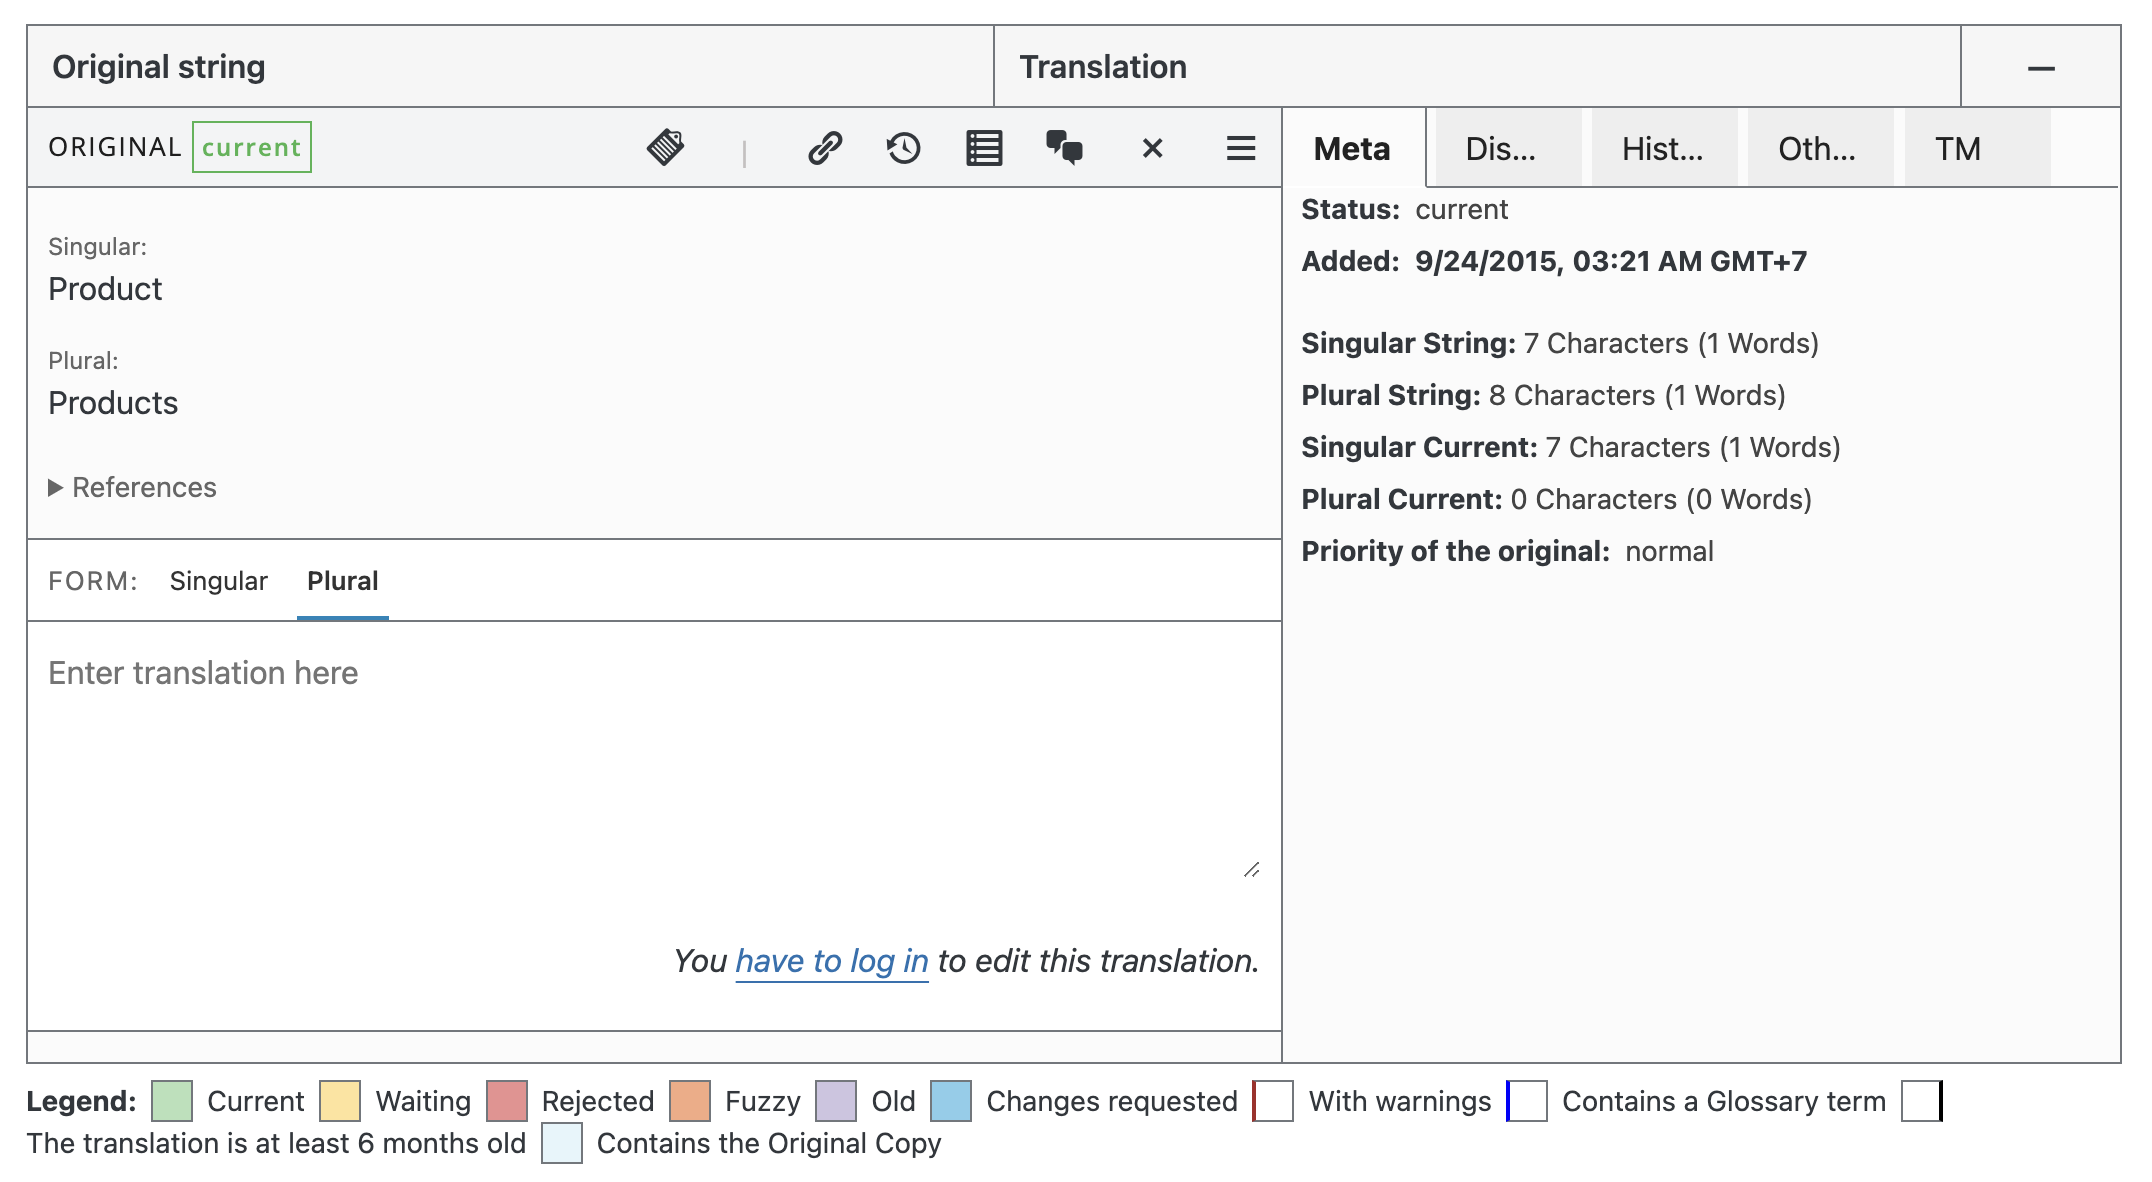
If some of your translated strings don't show up as expected on your WooCommerce site, first check if these strings have both a single and plural form in the Source text section. To do so, open the corresponding translation on translate.wordpress.org, such as the translation for Product and Products.
This screenshot shows that the singular translation is available:
This screenshot shows that the plural translation is not available:
Countries and subdivisions
WooCommerce comes complete with a comprehensive list of countries and subdivisions, such as provinces or states, that are used in various parts of the user interface.
Countries and their subdivisions periodically change. In these cases, you can file a bug report or submit a pull request. However, our policy is only to accept changes if they align with the current version of the CLDR project. It is generally best to review CLDR and, if necessary, propose a change there first before asking that it be adopted by WooCommerce.
This approach may not be suitable in all cases, because it can take time for CLDR to accept updates. In such cases, you can still modify the lists of countries and subdivisions by using custom snippets like the following:
Updating an existing country or subdivision code
Adding a new country or subdivision code is safe, and so is changing a display name, since names are just translatable strings. Renaming or removing an existing code is different: the old code may already be stored in customer orders, shipping zones, tax rates, and the store's default country setting, so it often needs a database migration too. For subdivision codes, use MigrationHelper::migrate_country_states() (Automattic\WooCommerce\Database\Migrations\MigrationHelper). There's an example in wc_update_721_adjust_new_zealand_states() (wc-update-functions.php). The helper only covers subdivision codes, so country or other changes might need a custom migration routine.