Building and Publishing a Release
While this guide can be used as reference, keep in mind that version-specific instructions are provided in the release tracking issues created ahead of the release cycle, and should be preferred.
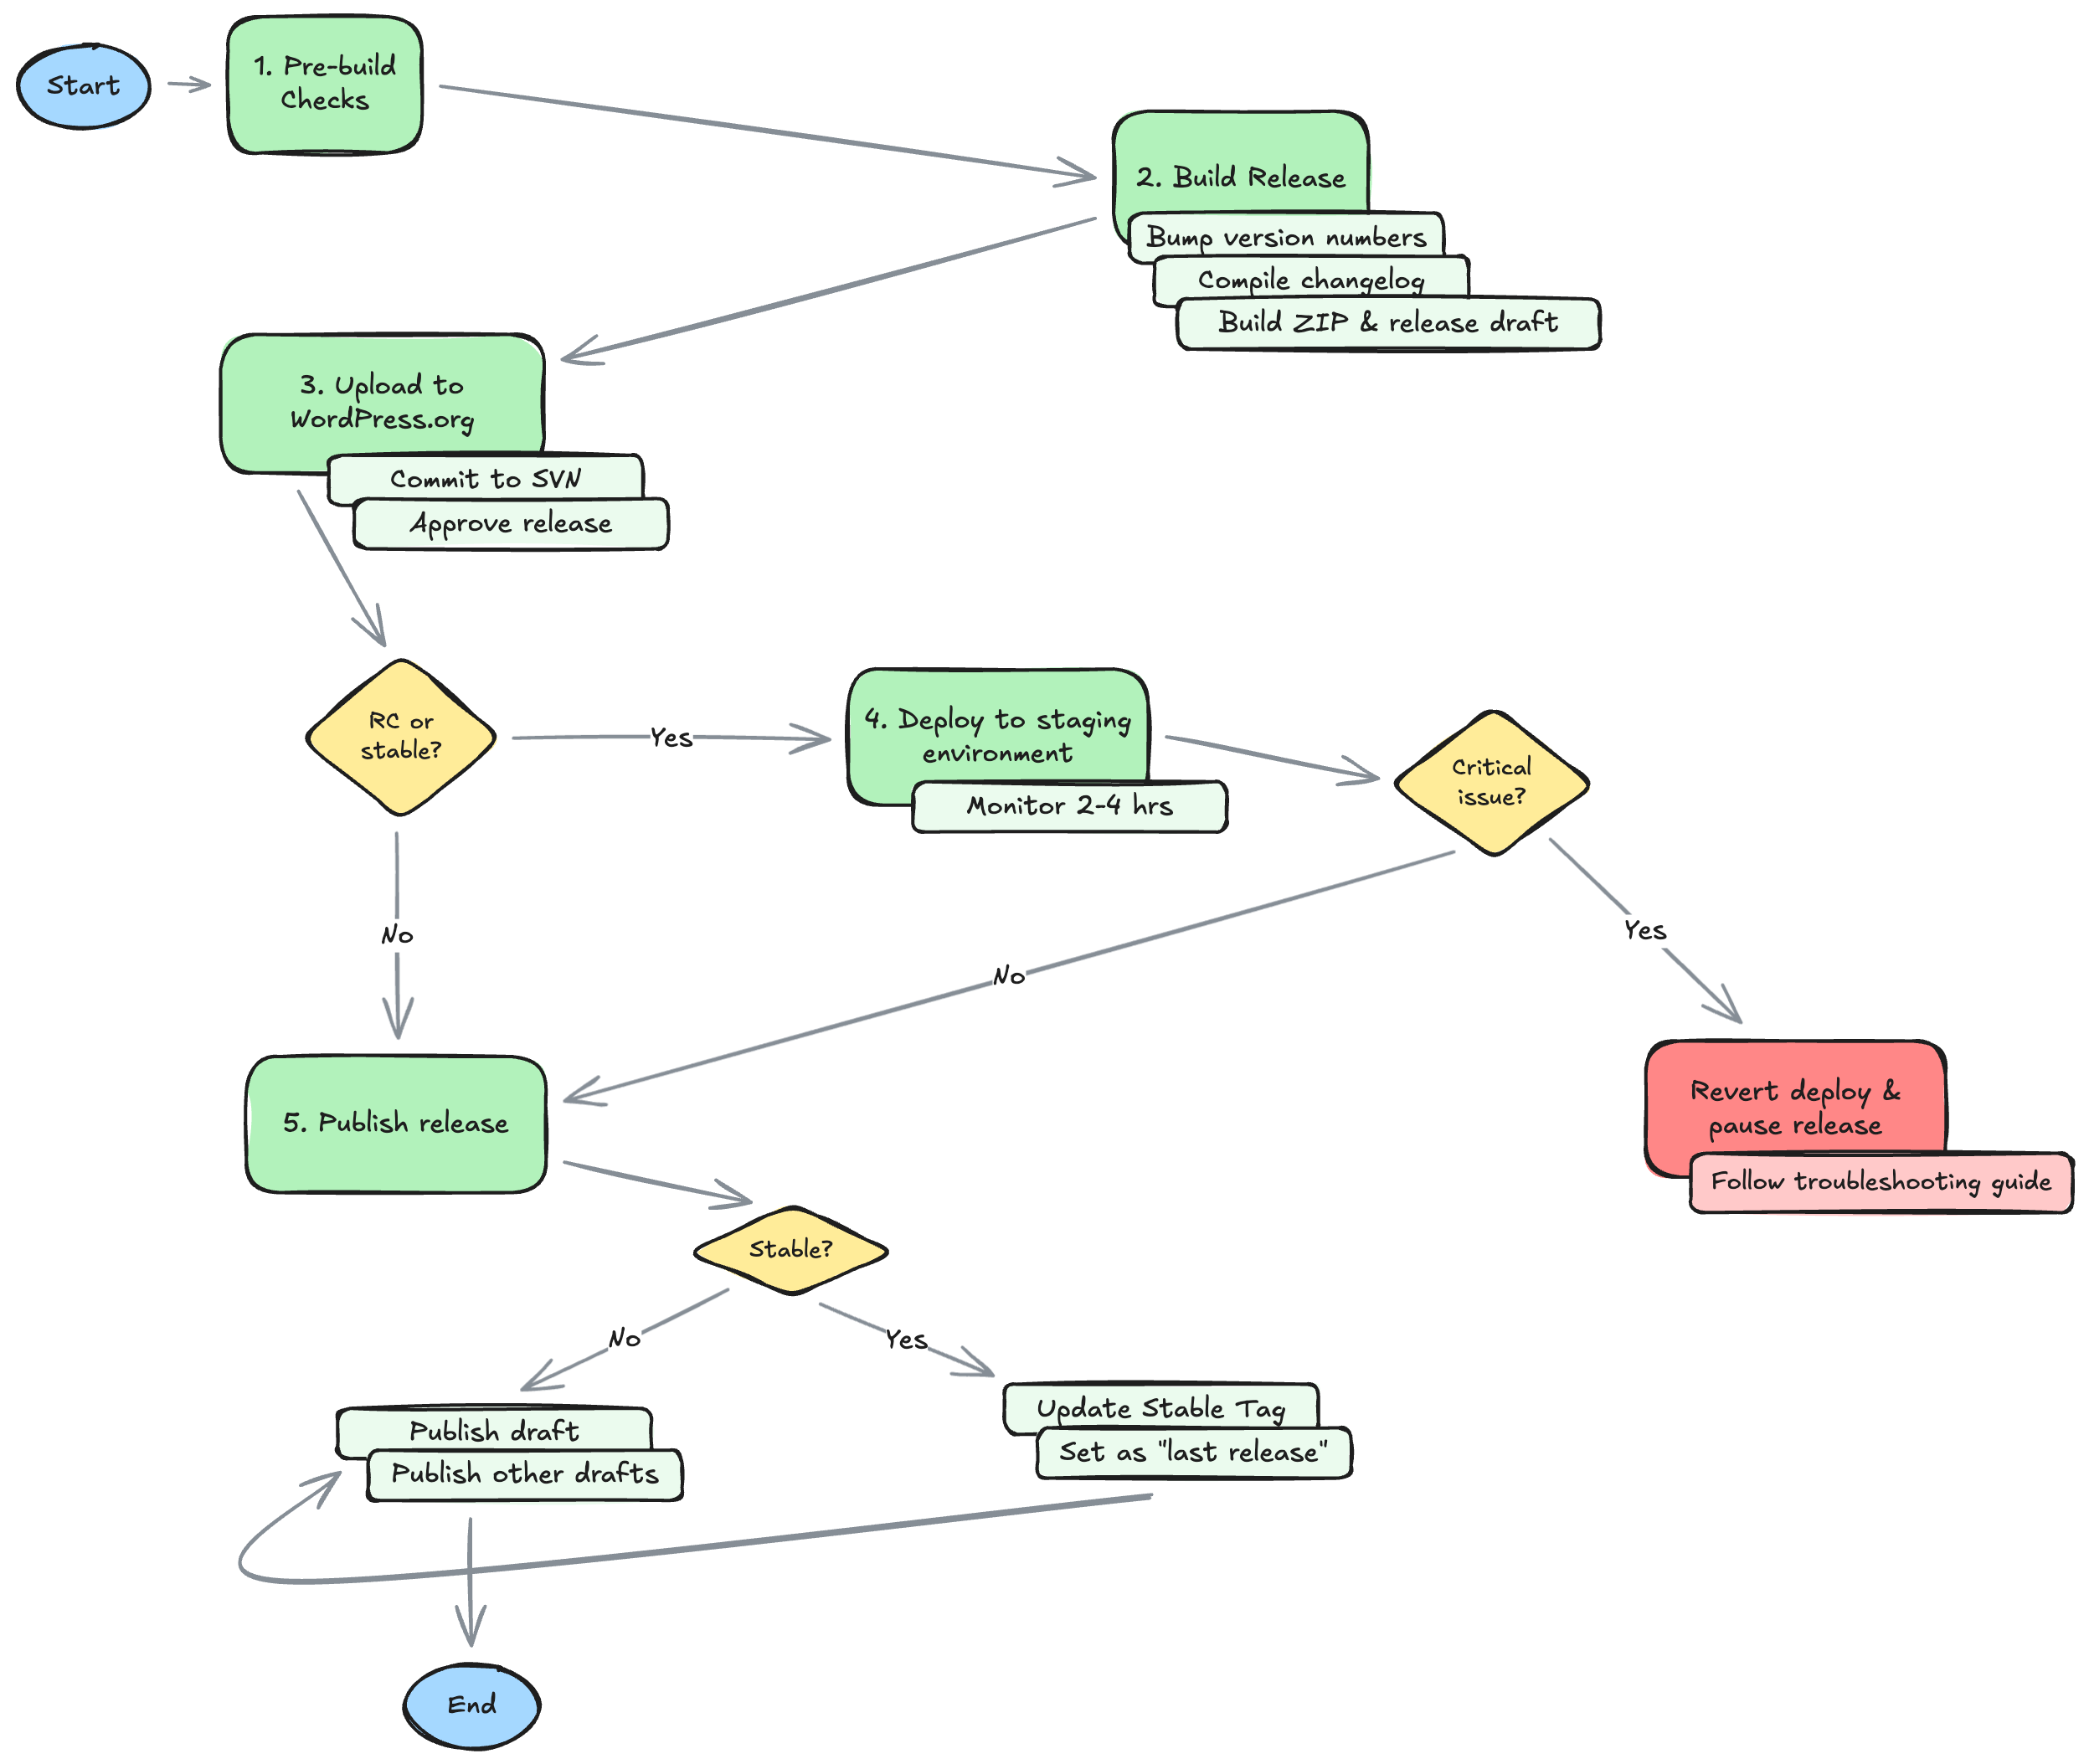
This page provides an overview of the steps required to build any WooCommerce release from the release branch. Review the flowchart to understand the overall process and the decision table. Step-by-step instructions are provided below.
Overview
Instructions
Perform all the steps below in order. When running any GitHub workflow, ensure you do it from the trunk branch (the default) and input the release version or branch as indicated.
Keep the Release Troubleshooting & Recovery guide handy, in case you encounter any issues.
Steps
1. Pre-build checks
- Confirm GitHub services are operational.
- Verify no open issues or pull requests exist against the release milestone. Ping authors as needed to merge or close.
- Ensure that there aren't any pull requests with label "cherry pick failed" that apply to this release that haven't been actioned.
- Confirm the
Stable tagvalue in the readme.txt on the release branch matches the one on WordPress.org'strunk.
2. Build the release package
- Run workflow Release: Bump version number: enter the release main version (
x.y) as Release branch and choose the release type from the dropdown. - Review and merge the PR that was generated against the release branch.
- Run workflow Release: Compile changelog: enter the release main version (
x.y) as Version and leave Release date empty, except when building the package ahead of schedule. - Review and merge the PRs that were generated: one against
trunkand another one against the release branch. Both should be under the release milestone. - Run workflow Release: Build ZIP file to build the asset and create the GitHub release: enter the release main version (
x.y) as Release branch and check Create GitHub release. - Confirm that a draft release was created in the repository with an attached
woocommerce.zipasset.
3. Upload the release to WordPress.org
- Run workflow Release: Upload release to WordPress.org: enter the release version (
x.y.z) as Release tag to upload and make sure to check off the confirmation box. - Confirm that SVN tag exists on WordPress.org SVN.
- Log into WordPress.org using the credentials from the
WordPress.org "WooCommerce" user accountsecret in the secret store and approve the release. - After a few minutes, confirm that the release package is available for download.
4. Deploy to the staging environment
This step only applies to rc or stable (x.y.0 onwards) releases.
- Follow the guide to deploy to the staging environment and monitor for 4 hours (RC) or 2 hours (stable) after deploy.
- Create a thread in the releases Slack channel for monitoring and discussion of this release.
If a critical issue was detected while monitoring
- Request a revert in the staging environment.
- Pause the release process and do not continue with any steps on this issue. Follow the procedure in the troubleshooting guide instead.
5. Publish the release
- (Only for stable releases) Run workflow Release: Update stable tag: enter the release version (
x.y.z) as Version and make sure to check off the confirmation box. - Publish the release draft that was previously created, as well as any other release drafts that might exist from previous attempts. Ensure that "Set as the latest release" is checked only for stable releases.
6. Post-release tasks
This step only applies to stable (x.y.0 onwards) releases.
- Wait at least 1 hour for all automations to complete and make sure to merge any follow-up PRs under the release milestone.
- Continue monitoring for bugs related to the release for at least 3 days. See the release monitoring guide for more details.